Materials Needed:
- Reference of your Prop
- Jumbo Roll of WonderFlex. I get mine from Cosplay Supplies
- Acrylic Spray Paint (White, Pink, Purple and Yellow)
- Painters Tape
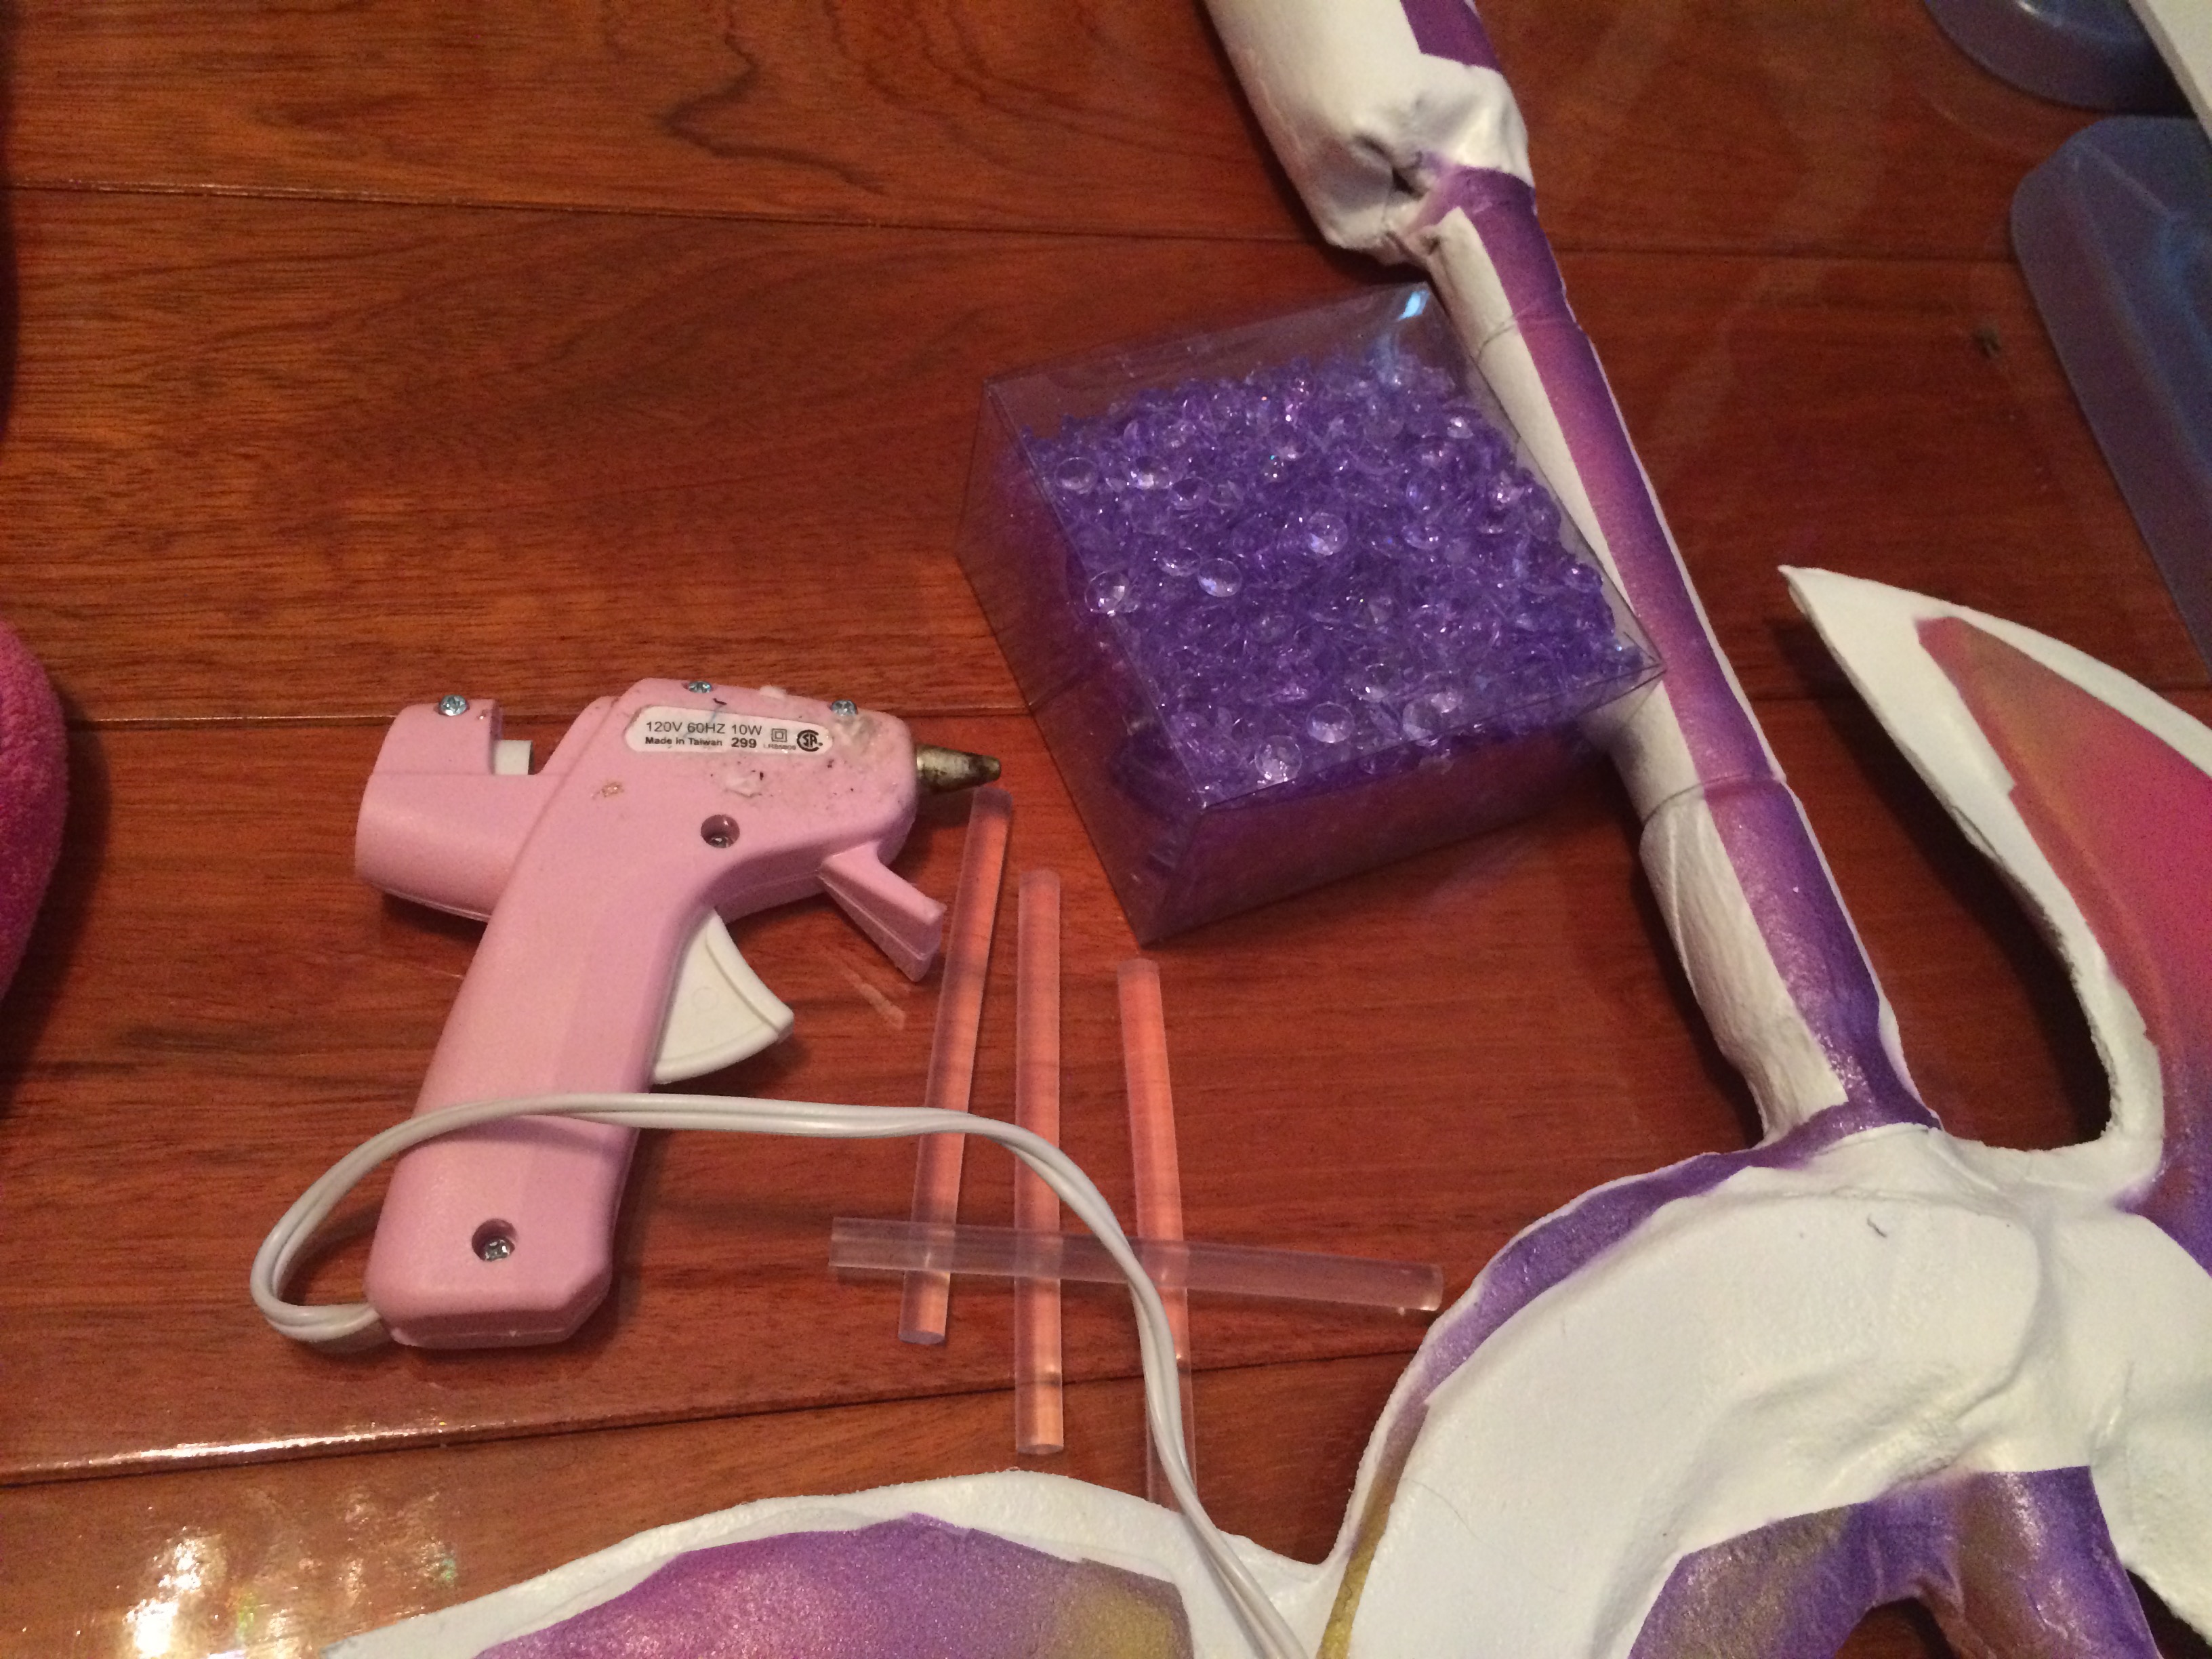
- Hot Glue
- Plastic/Acrylic Gems
- Heat Gun
- A Roll of Craft Foam and Poster Board (for support and raised details along the blade)
- Approx: 2ft PVC pipe (the handle and to help with support)
- 2 Micro LED Lights. I get mine from Amazon (they come in many different colors)
Instead of WonderFlex you can use Worbla if you want. Same thing I just find WonderFlex to be less expensive. I suggest buying the Jumbo Roll. This is more than enough to complete the project.
For those who do not know what WonderFlex is or how it is used I will give you a brief overview of it. WonderFlex and Worbla are thermoplastics that have become very popular in the cosplay community. It looks like a giant sheet of plastic but when heated it becomes soft and malleable. You can create virtually anything from this material from weapons to wearable armor. While hot I suggest that you wear heat resistant gloves as you shape the material. It can be very hot at times. Once it cools down it hardens retaining the shape that you molded. The material can be re-heated and reshaped as many times as you want so if you mess up you have nothing worry about! If enough pressure is applied you can add layer upon layer of the material. Wonderflex/Worbla holds paint very well and you can even glue fabric on top. To heat the WonderFlex you can use a heat gun (recommended), a microwave oven, or you can dip it in hot water (I have even seen people use a hairdryer). I can’t stress this enough. Save every little bit of WonderFlex. This stuff is pricey and you don’t want to waste it. If you have a sharp corner all you have to do is heat a little extra piece of the material and stick it on the area at fault.
Here is what a Jumbo roll of WonderFlex looks like:
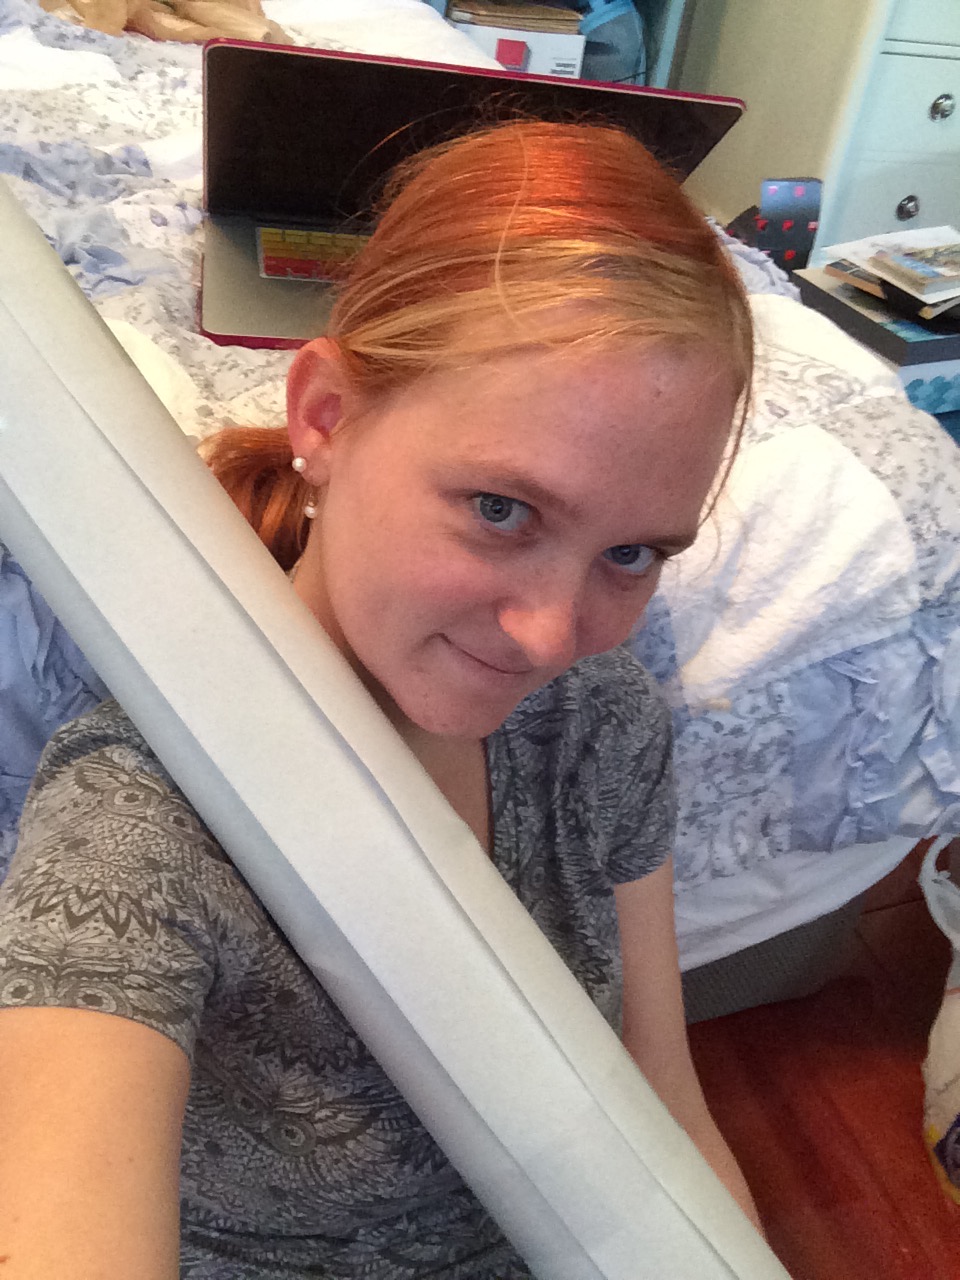
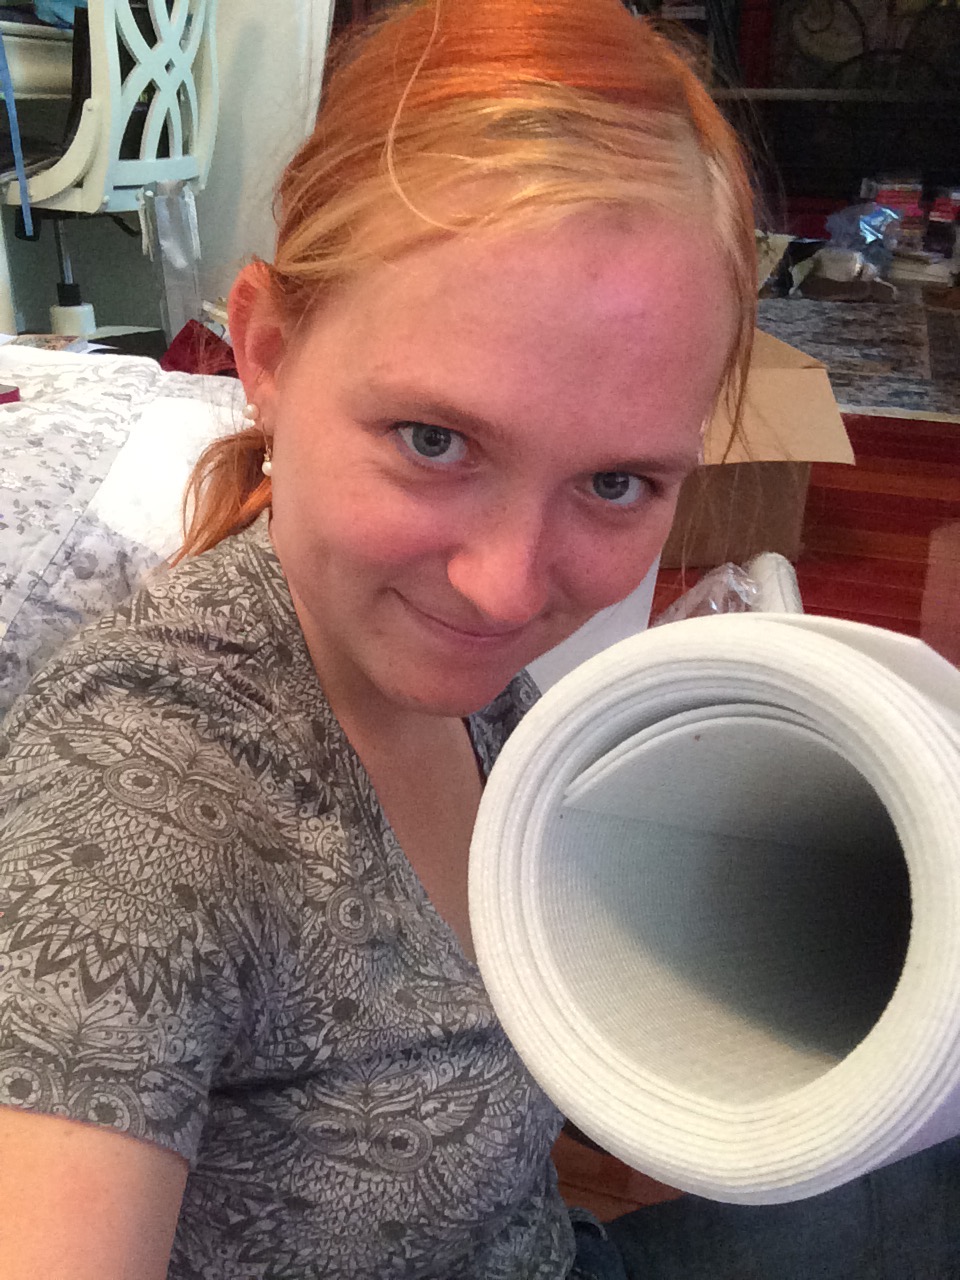
A long white tube with a rough and a smooth side (you can heat either side, your choice). It comes rolled up and this could get complicated especially when drawing and cutting out your pattern. I would suggest you roll out the sheet and hold it down with books and other heavy objects. This will also be the case after you cut out each individual piece of your pattern. It will try to fold in on itself. I obviously didn’t have any books around me so I used shoes and photo frames to keep everything flat (don’t be lazy like me, just use some books).

To begin let’s first take a look at our references… or reference in this case: (trying to locate this file, give me a few days….)
In any case I only had one very rough reference of this weapon. The frustrating thing about doing “Tales of” weapons is that it is very hard to find a lot of references for each weapon. You are lucky to come across one. A little secret: this weapon is not Milla’s weapon. In fact it is Rowen weapon and is only the length of a conductors stick. However, I loved this weapon and the way it looked. Plus I wanted to do some LED technology with the weapon, so I chose this weapon and elongated it to make it look like a sword for Milla. Plus it’s in the shape of a treble clef 
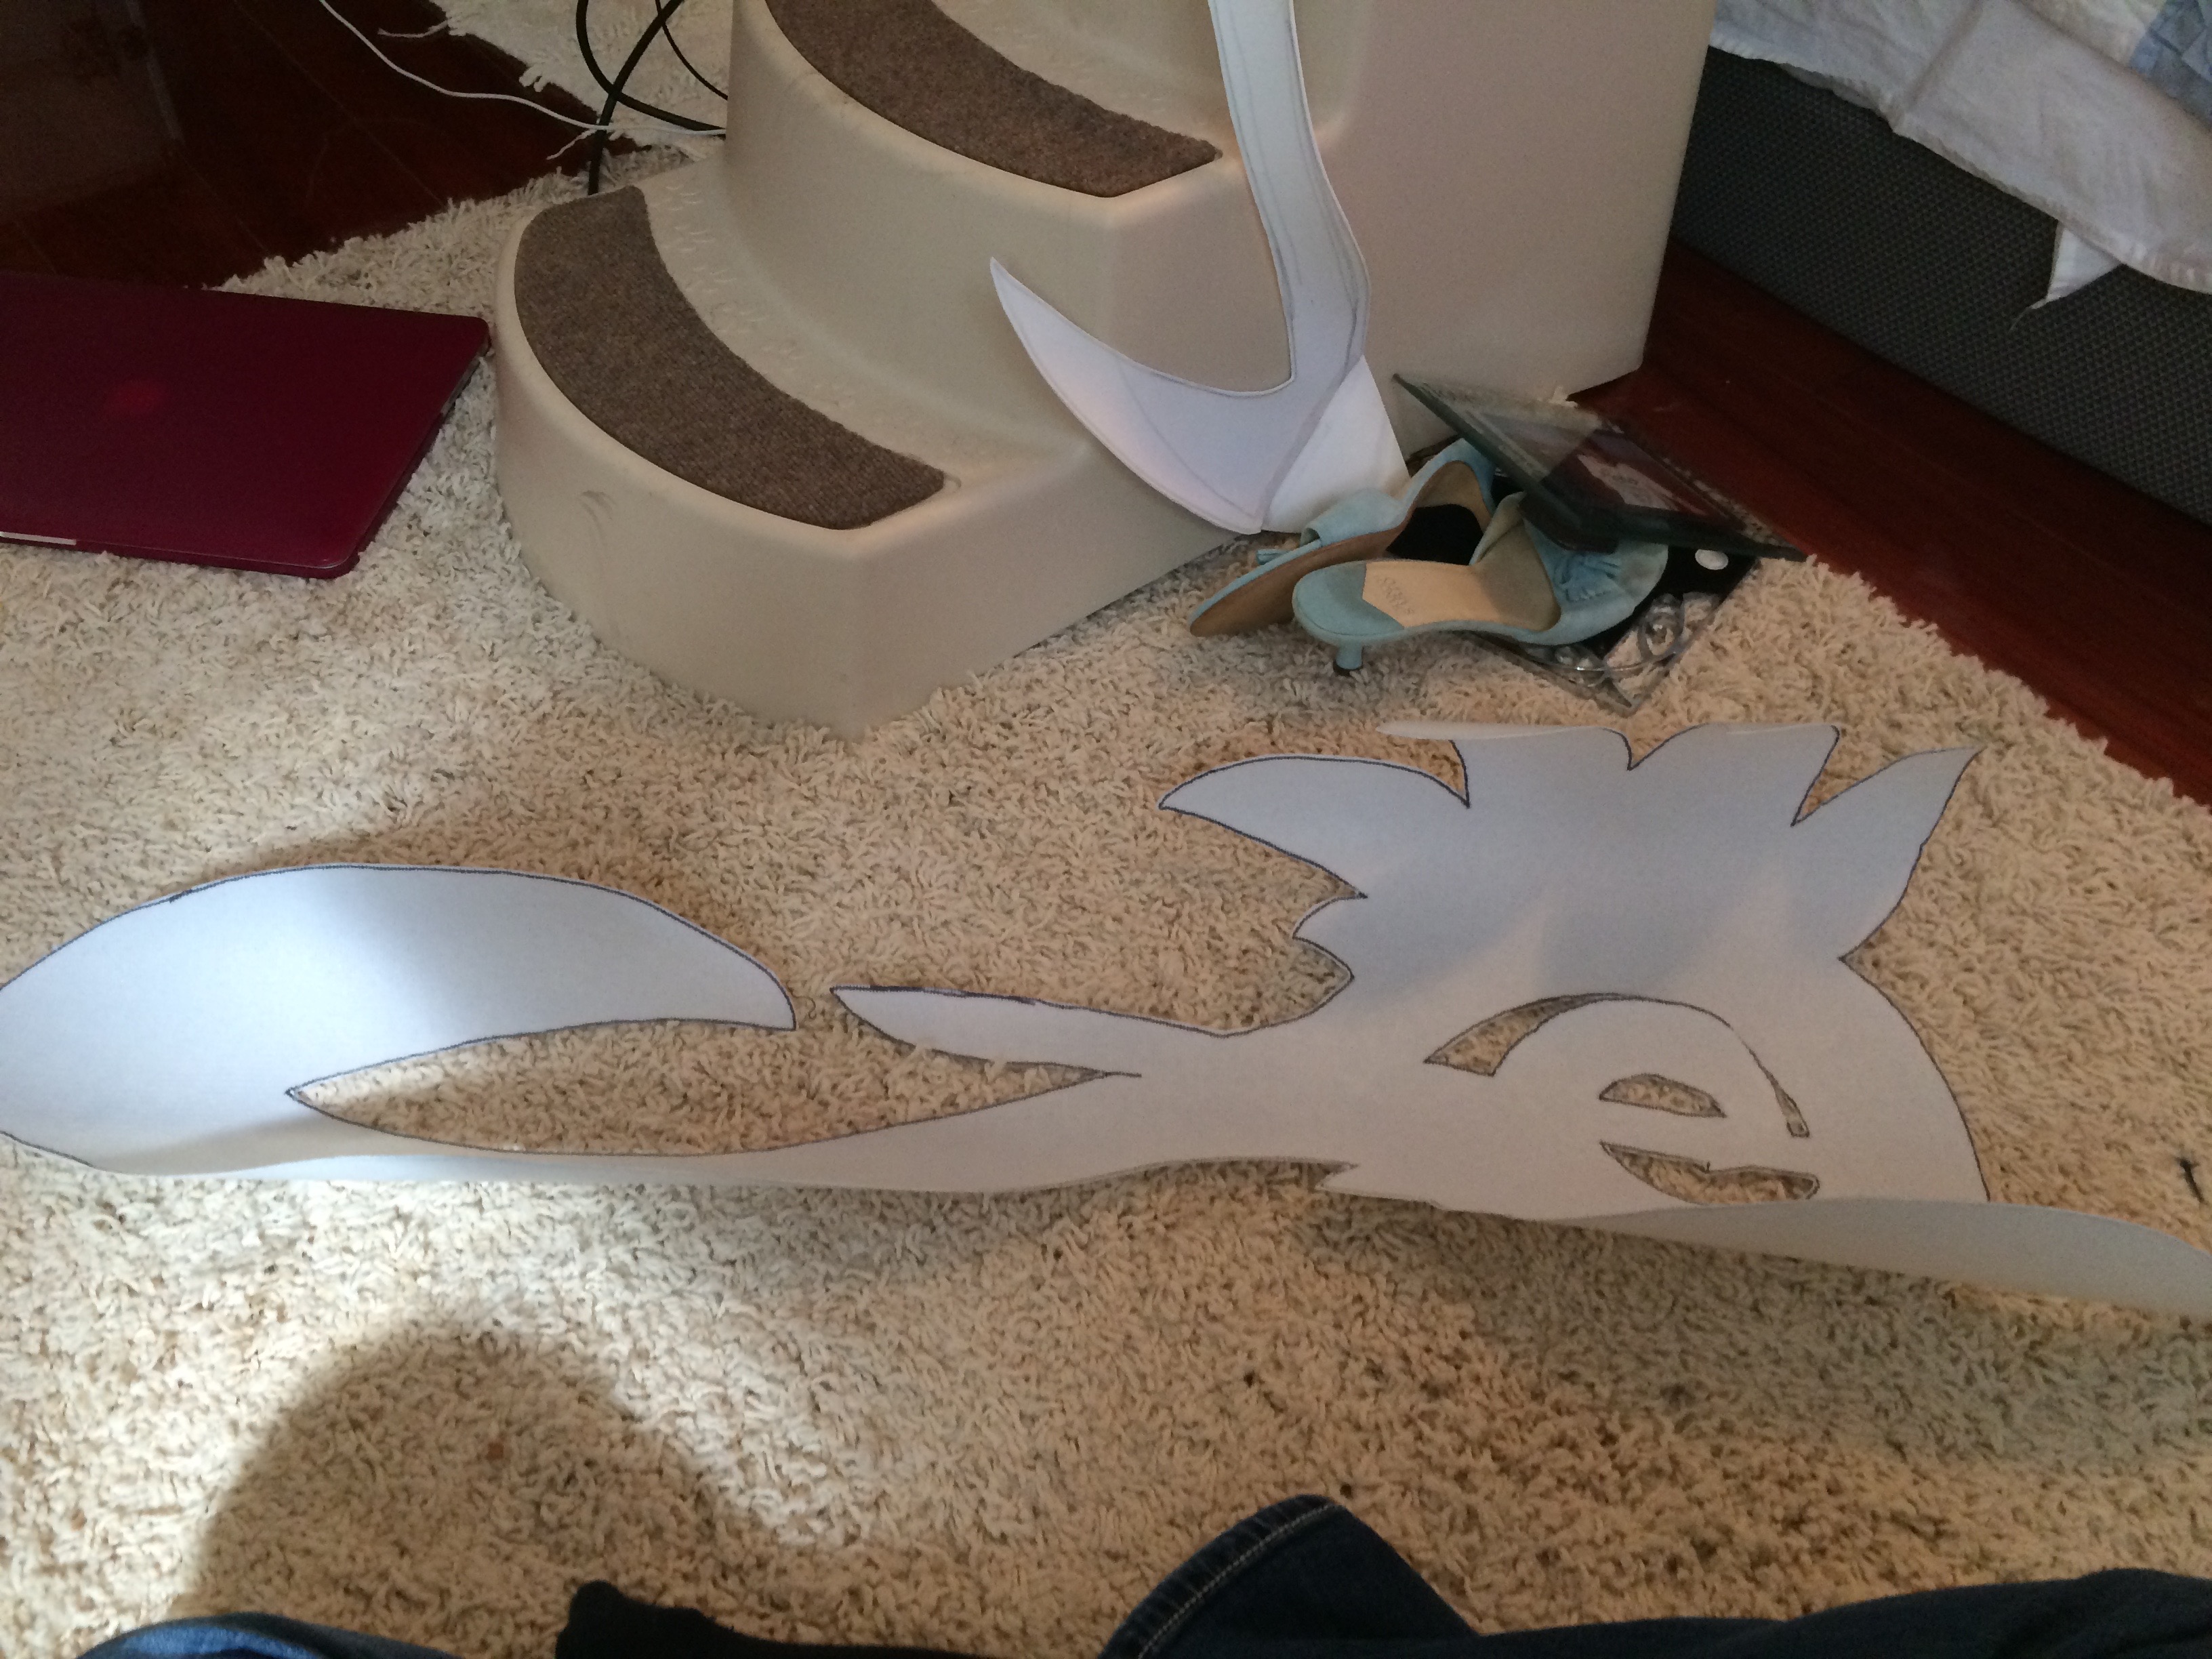
First thing is first, take a permanent marker and start using your artistic and geometry skills to trace the pattern on the WonderFlex. Unleash your inner artist.

Don’t worry about the black ink, we will be spray painting this and nothing will show. After you are satisfied with your drawing begin cutting it out. I suggest using a pair of scissors designated just for cutting WonderFlex out. WonderFlex is pretty rough on your scissors and dulls them pretty quickly. So make sure you don’t use your sewing scissors on this material.
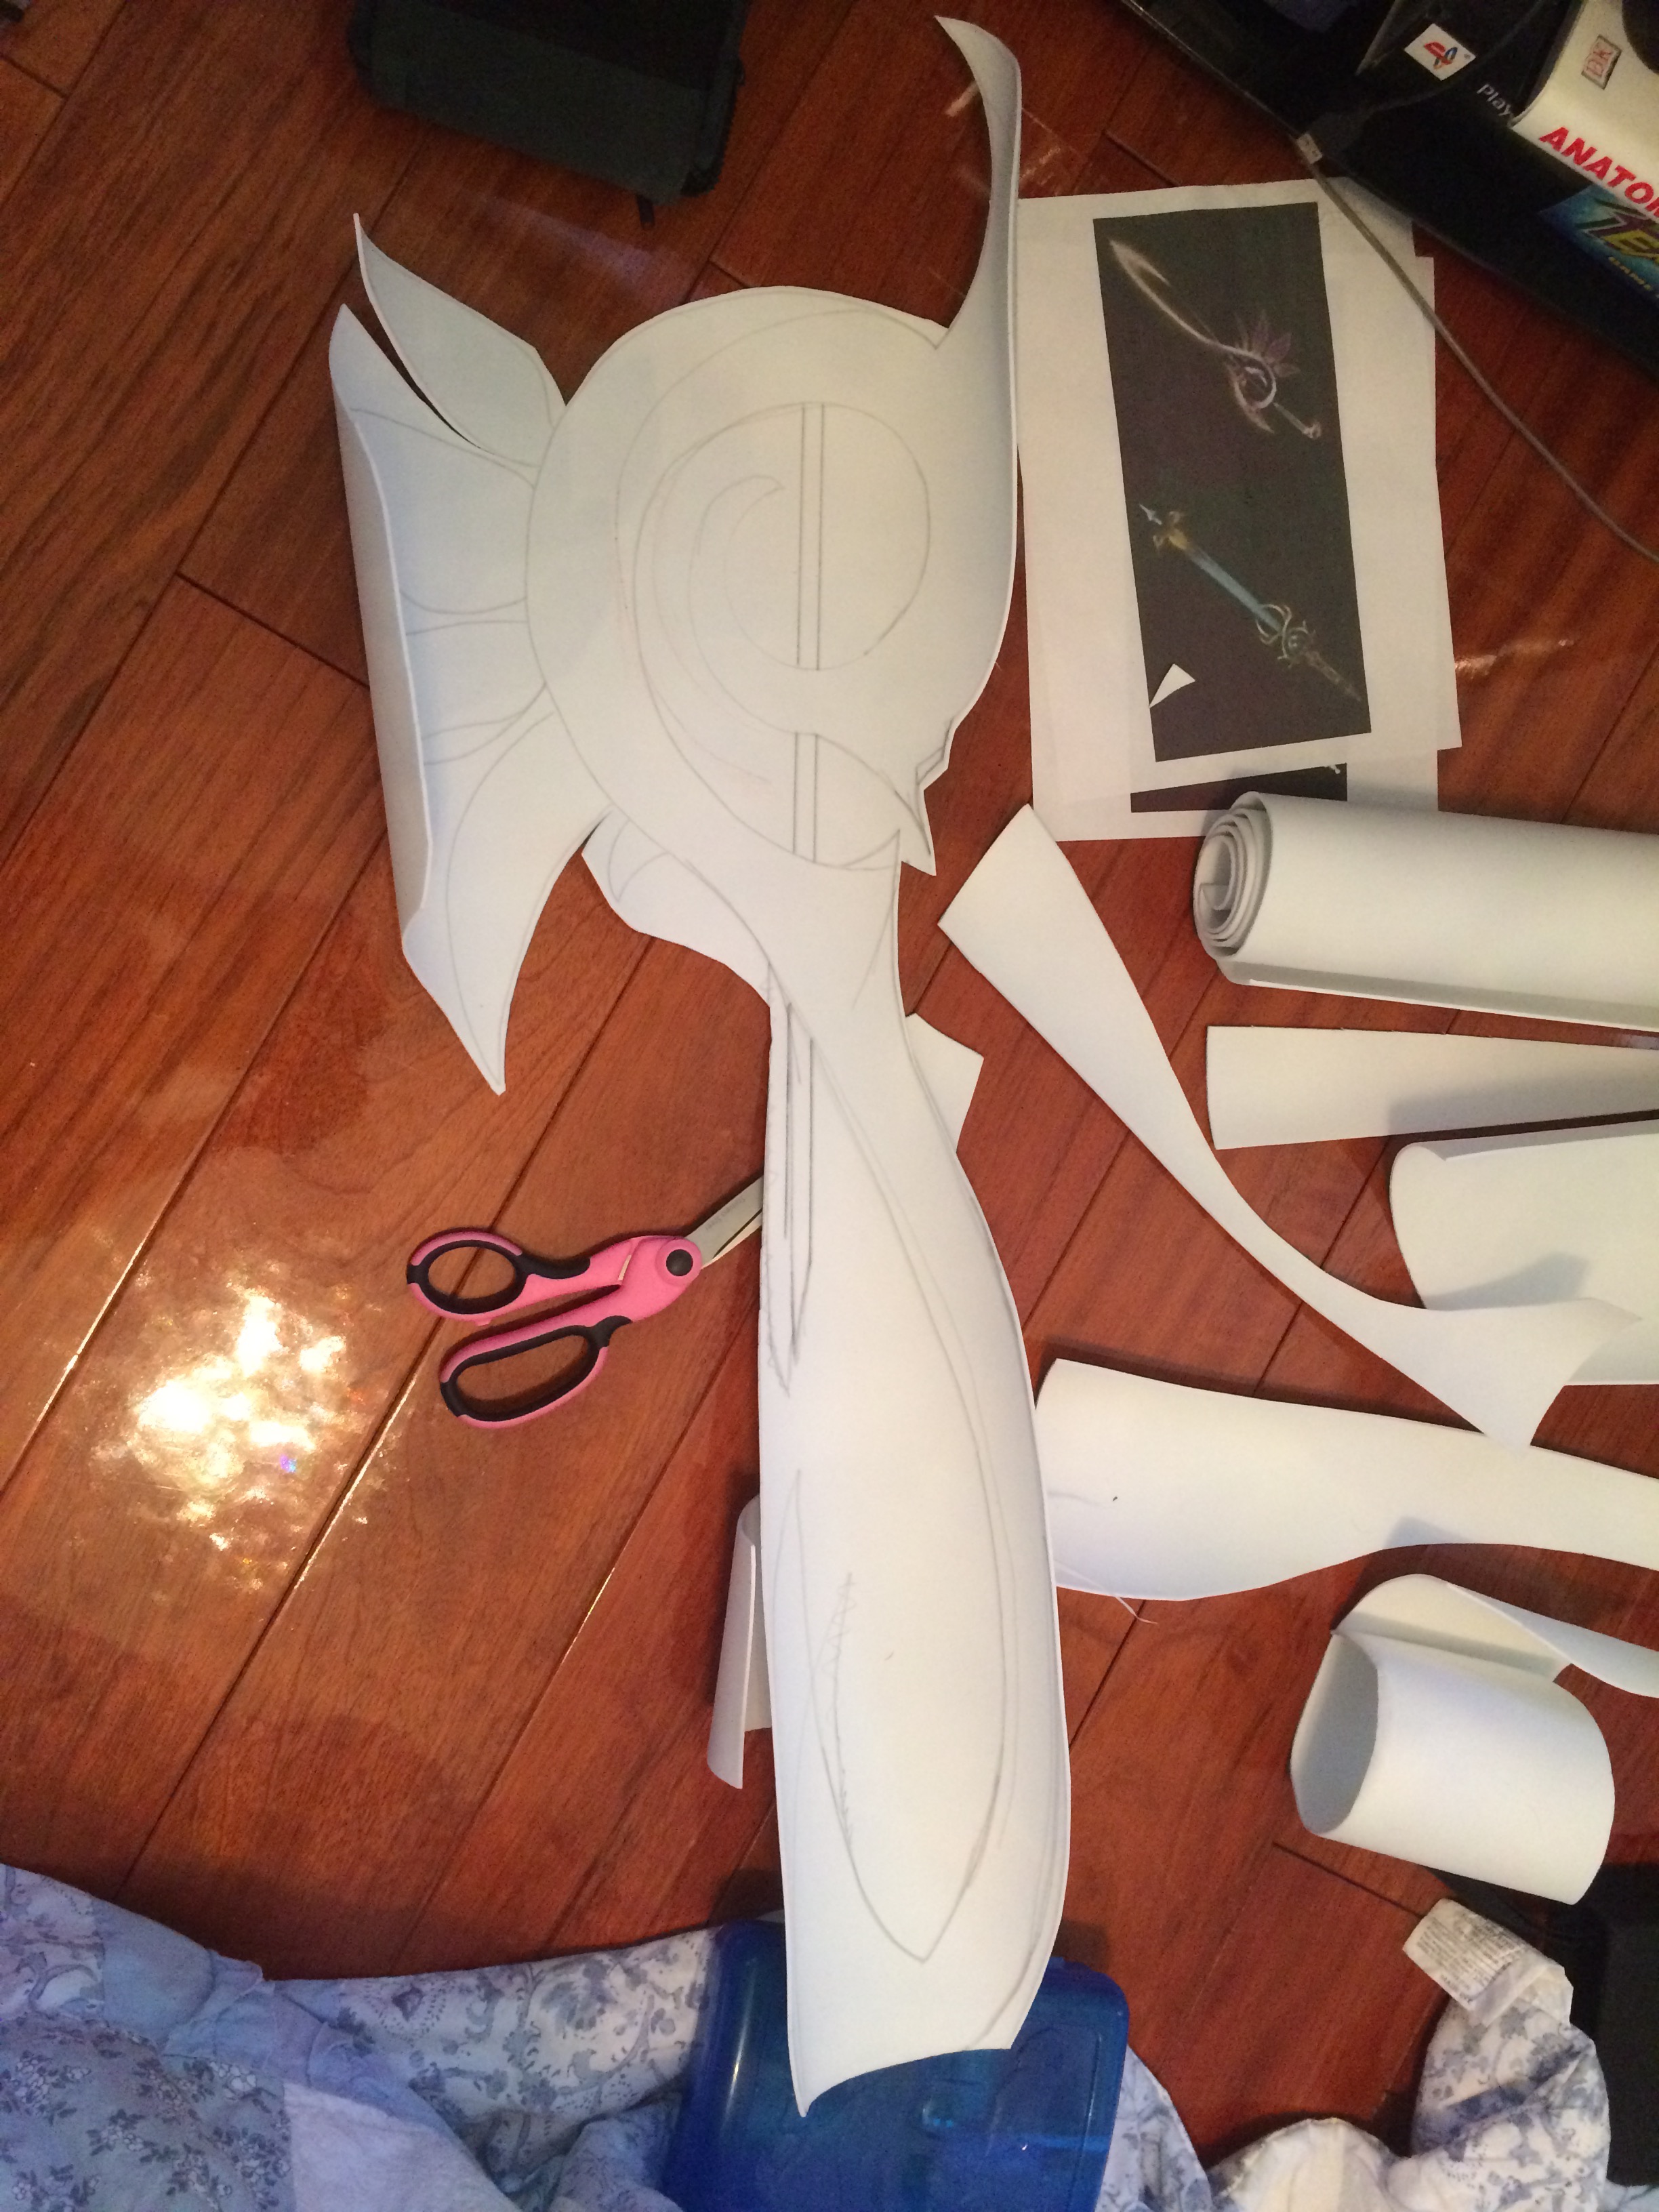 ->You can kind of see my reference in the top right corner
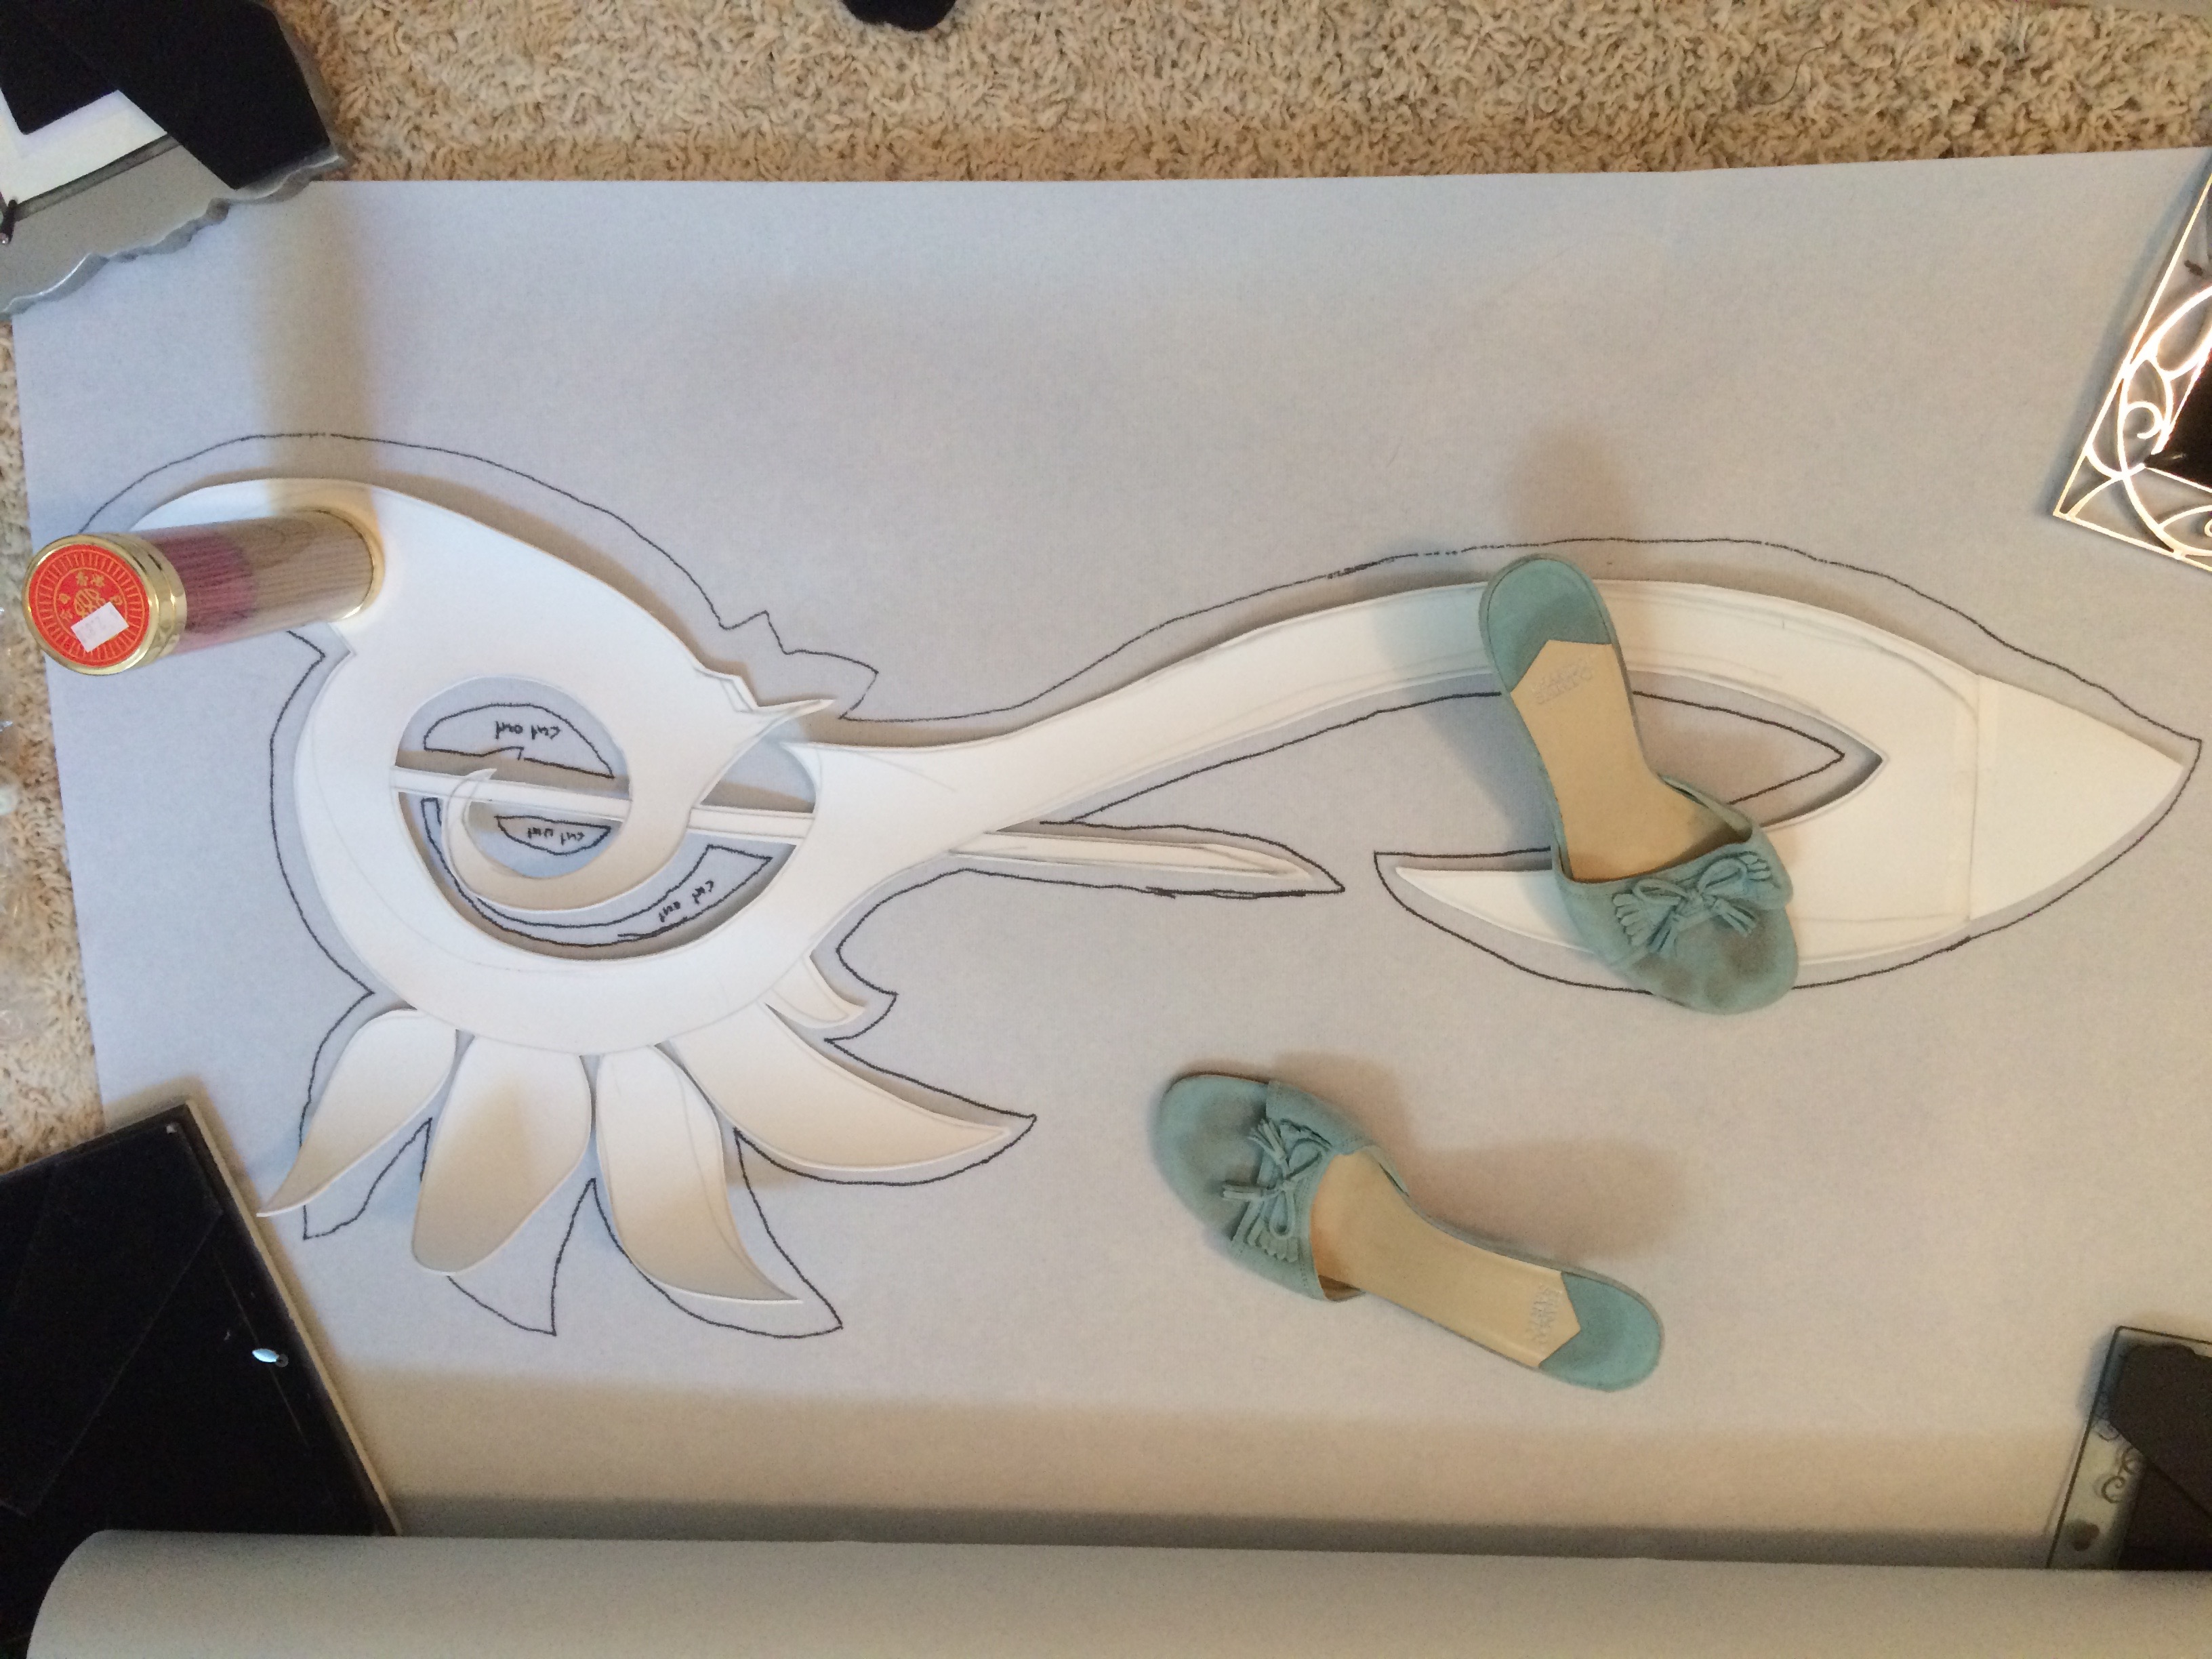
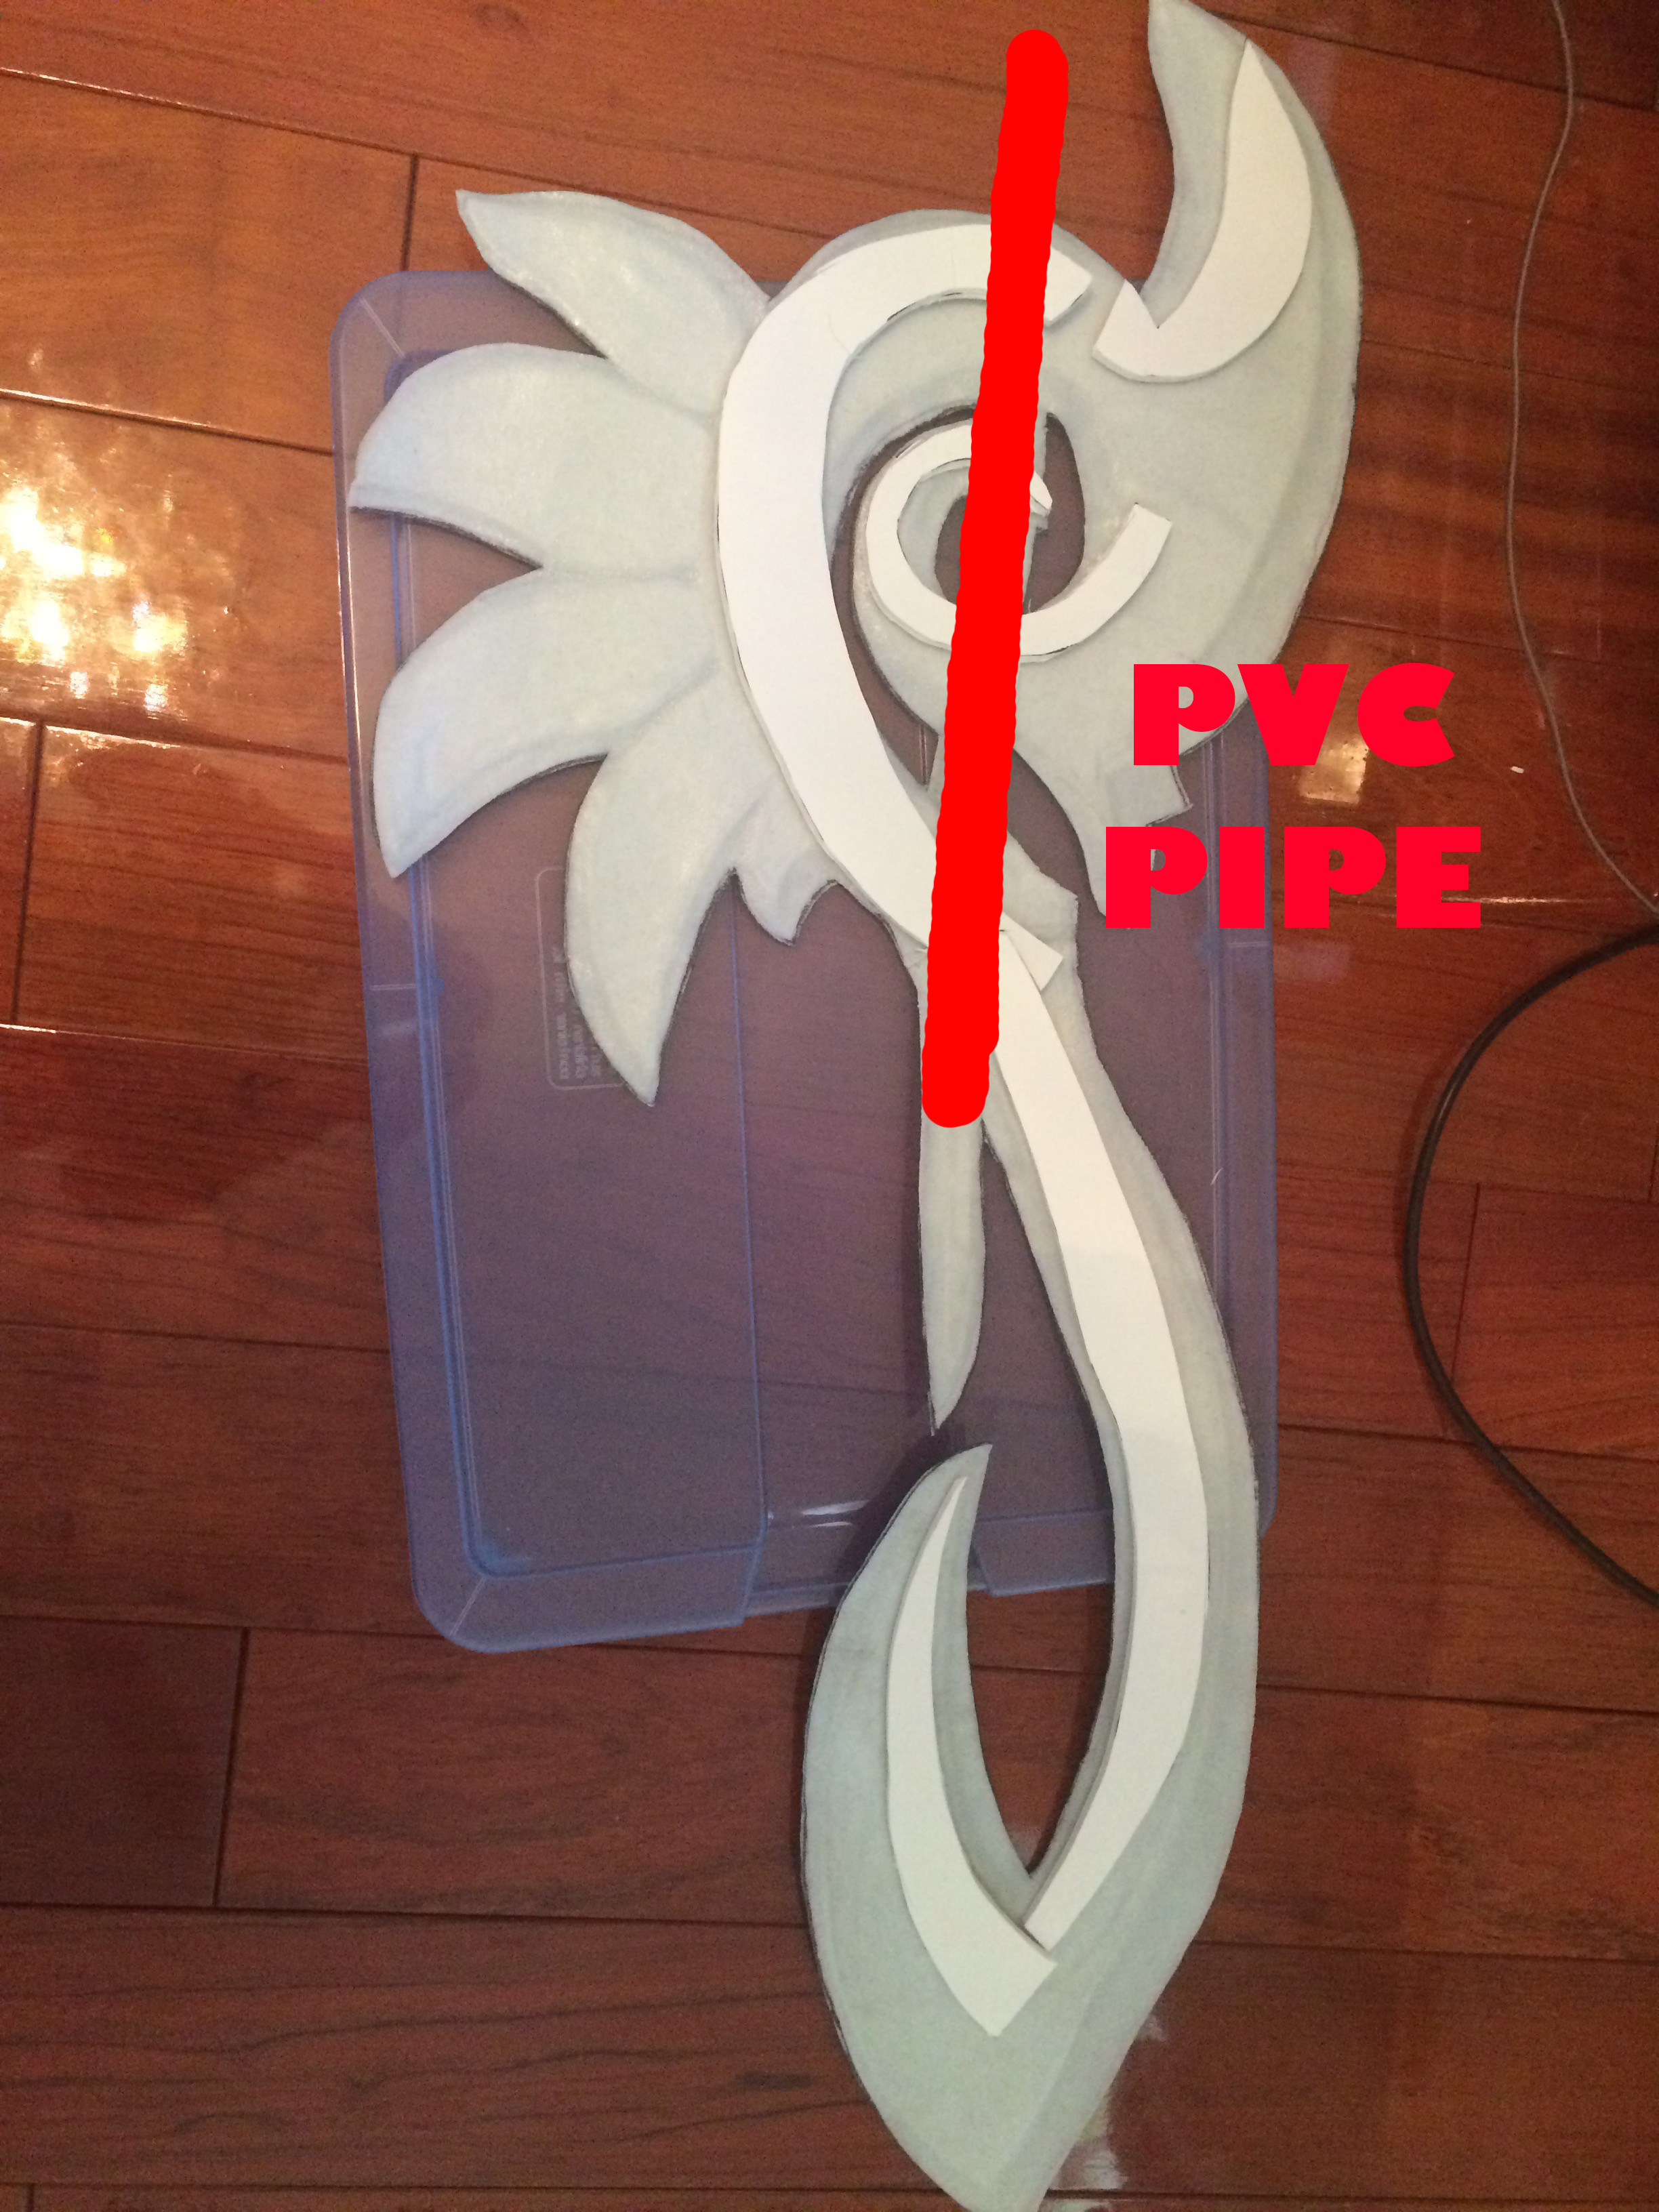
This is what your pattern will look like after you finished cutting it out. Notice how the bottom of the sword (bottom of picture) is cut off. This is because I cut the pattern out height-wise instead of length-wise on the WonderFlex. This isn’t a big deal. I just cut out an extra piece and heated it to the bottom. You notice that there are some places that that still need to be cut out. This is the hard part in my opinion, especially in the handle area where there was a lot of detail and tiny areas to cut through. Plus the WonderFlex keeps folding in on itself.
In the end you should have a sheet that looks roughly like this:
 -> Annoying folding…
Next step: cut out four of these patterns, so start tracing! You will need to cut out 3 in the direction that you see in the picture below and 1 in the mirror version or the image (don’t forget to do the mirror version, I messed this up and it was frustrating). Later on you will be pressing and heating the rough sides of the WonderFlex to each other.
In addition, cut out 1 of the pattern from craft foam. If you can make it skinnier than your WonderFlex patterns. This is used for detailing in the sword. When you heat the WonderFlex it will meld to the craft foam and give it a raised texture. This is optional, I just thought it looked good. Especially on the petal/wing areas on the side of the sword.
After you have cut out all 4 pieces of your pattern (and your 1 of craft foam) we are now going to start fusing the pieces together. Place the craft foam on the ROUGH side of one of the patterns of WonderFlex. Take the 1 mirror version of that WonderFlex piece and with ROUGH SIDES FACING EACH OTHER line them up as best as possible. Paper clips help.
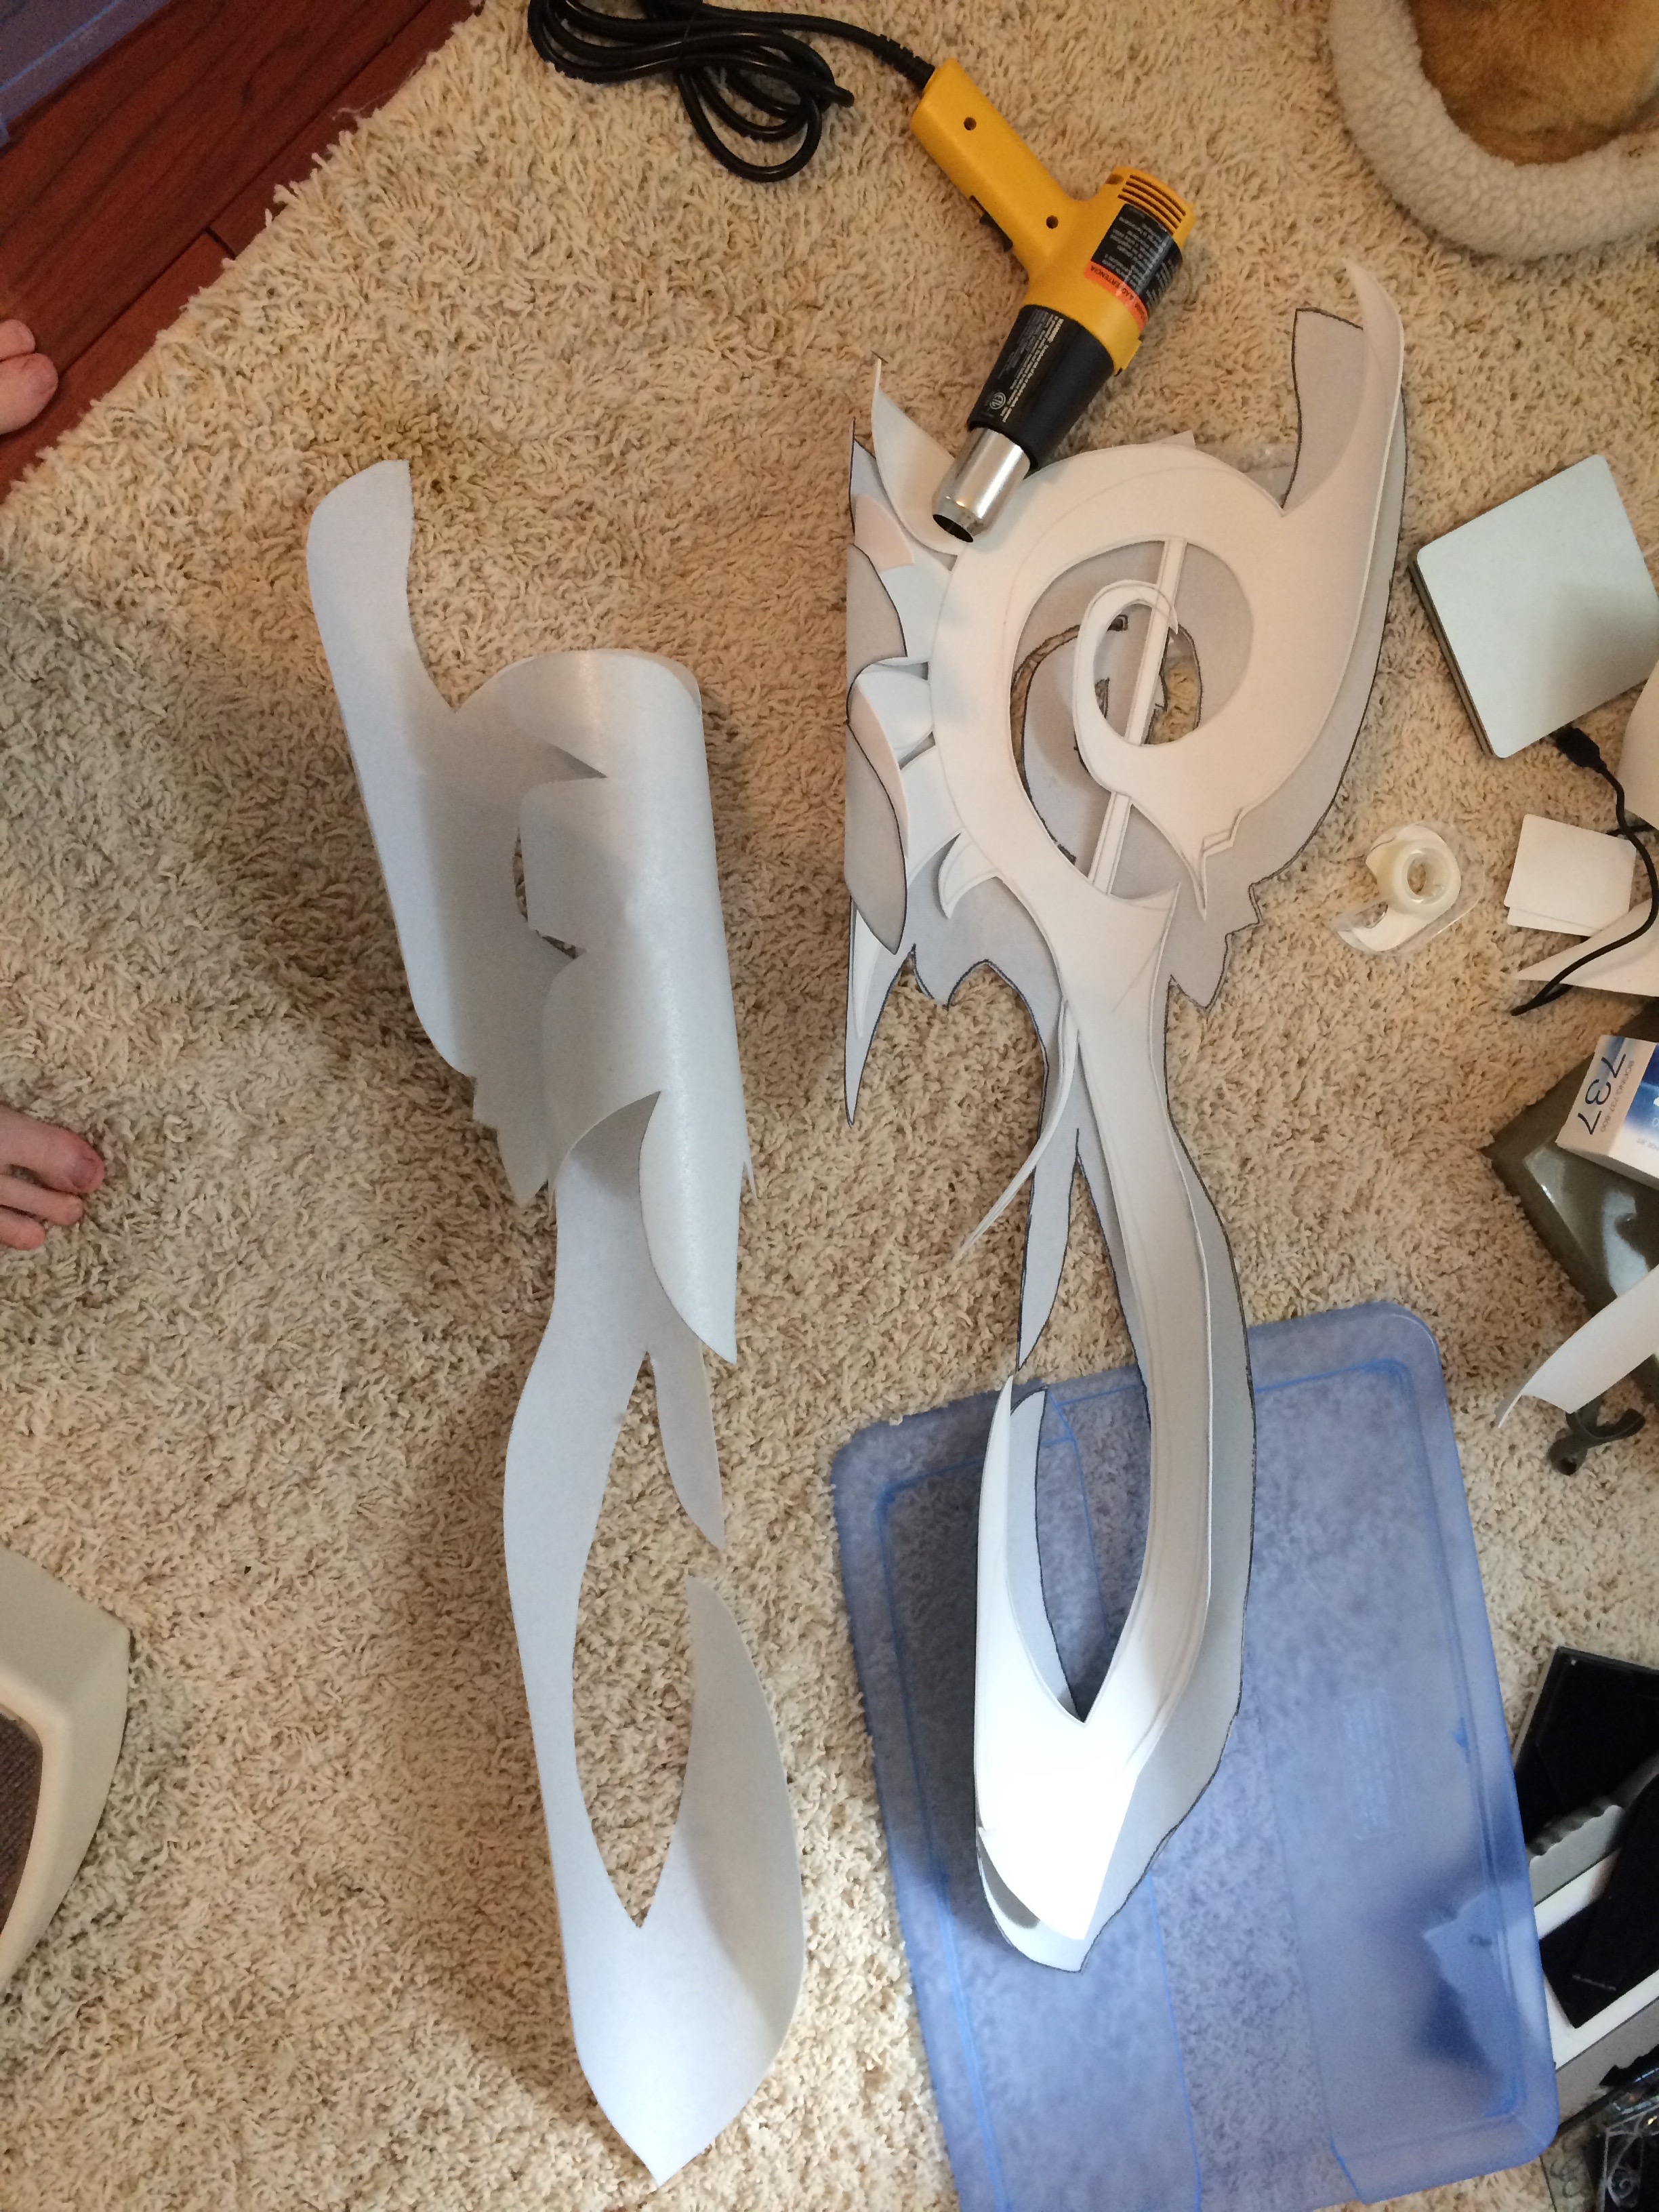
Using your heat gun (please get one, especially if you use this material a lot), begin to work in sections. Move your heat gun back and forth over an area you will notice the WonderFlex become saggy and look shiny meaning that it is now malleable. WARNING: Do not overheat this material. The plastic will begin to come off the sheet and you will see a net-like texture beneath it which holds the plastic in place. If this happens spread the plastic to cover the netting (very hot, wear gloves!) and let it cool. Begin to push the edges of the two wonder flex pieces together sealing the craft foam between them. Take your time and let areas cool before you move to another section. You will get the hang of it. Watch out for the heat though. I am used to working with this stuff so the heat doesn’t bother me too much. When you are first starting off it can be pretty hot, so I suggest wearing some heat resistant gloves.
In the end you should have something like this:
Now you would think that we are done. However, the reason I cut out two more identical layers was an issue of stability. WonderFlew can get heavy sometimes and even though it is VERY hard to break (trust me, I ran over this stuff with my car and it was perfectly fine) it does wobble a bit and makes it feel very unstable. The more layers you put on, the better.
So now we are going to add a second layer over this one with a couple extra details for support and looks. Using some hard poster board cut out areas that you want to stick out of the sword a bit more. This will make it look more detailed and provide more stability. In my case I put these pieces of foam board on the opposite side of the blade area, so that the blade would appear very thin compared to other parts of the sword. Now don’t do what I did and forget your PVC pipe. I did the wrong thing and forgot to include the pipe (which is the handle. I then had to open the WonderFlex layers to then shove it in. Stupid…
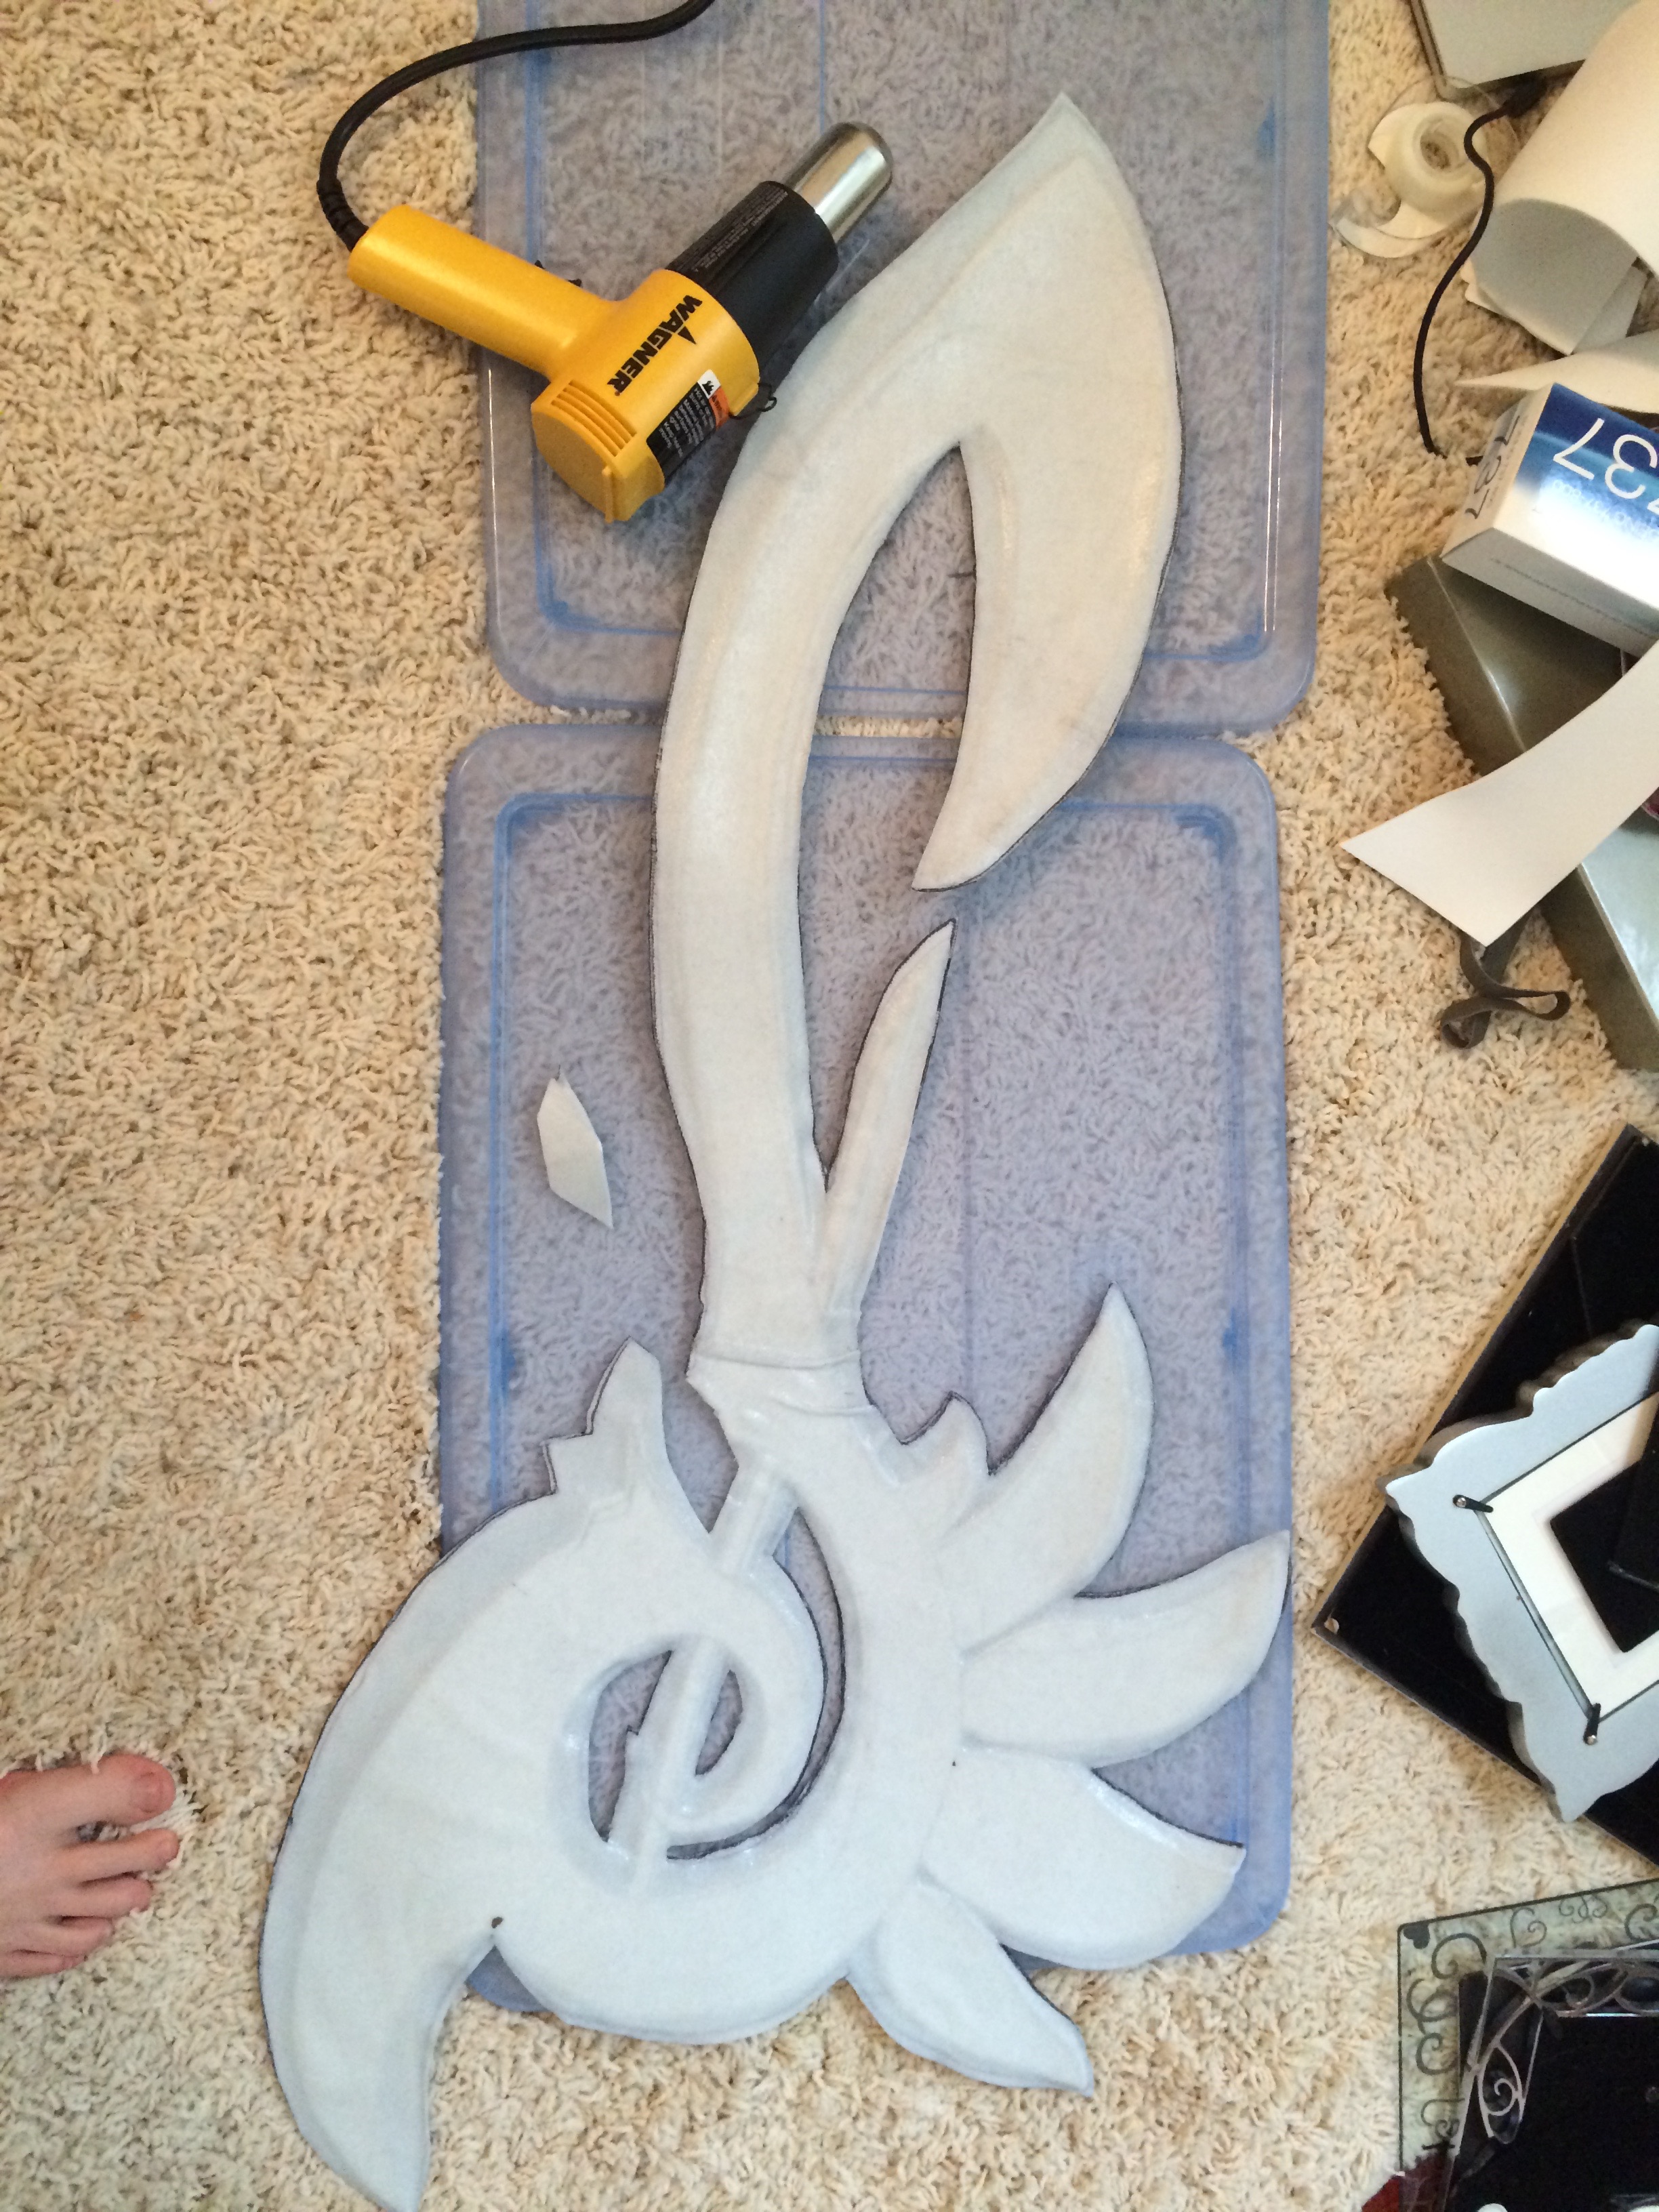
So referring to the picture above, line up your poster board detailed areas, and your PVC pipe. Take 1 of your Wonderflex sword patterns and place on top of the poster board and PVC pipe and start fusing together. It does not matter if the wonder flex is rough side up or down. This piece is mostly for stability and will be hidden. Finally take your last piece of WonderFlew sword pattern and line up all of the edges from the three layers beneath. Fuse this final layer. When heating the edges of the sword pinch them softly creating a sharpish- edge. In the end you should have something like this:
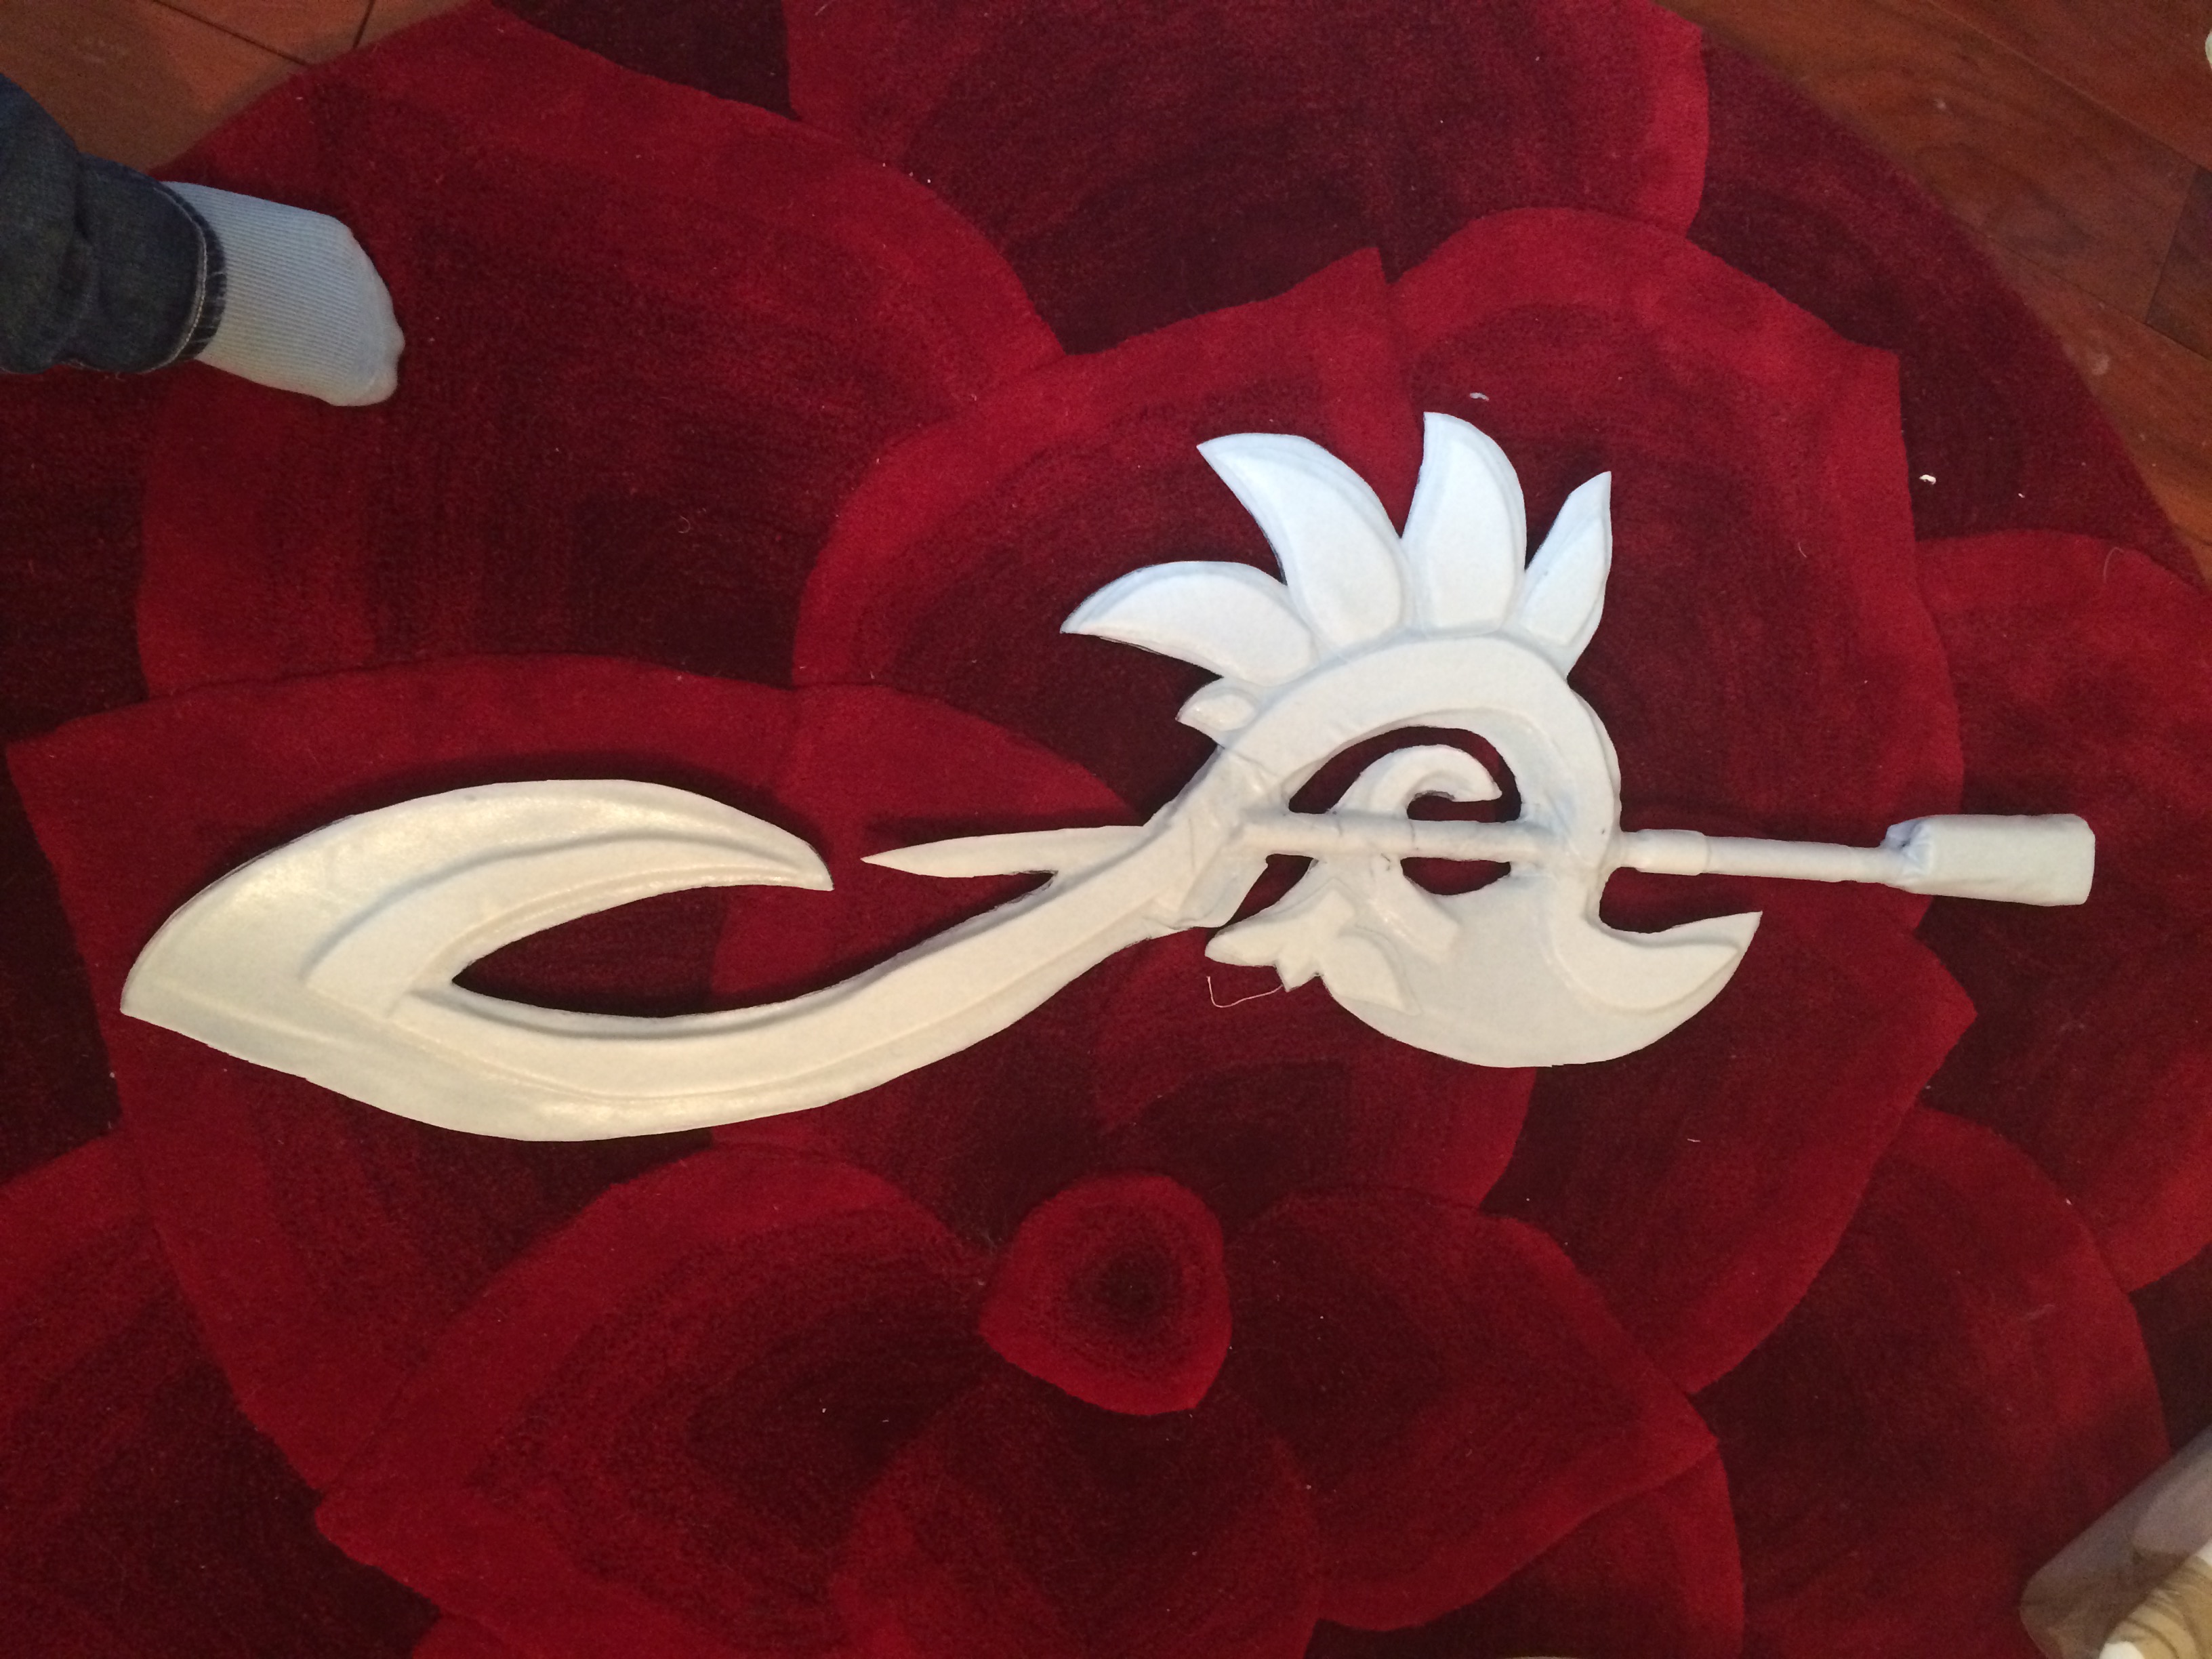
Notice how the poster foam board is coming through and giving it more detail and more shape instead of having a plain flat sword. Your choice though. Now if you are fusing the WonderFlex together and notice some areas that won’t wrap around the PVC pipe for instance, take your extra strands of WonderFlex and mold them together using your heat gun. You want to make sure all of the PVC pipe and you foam boards are covered with WonderFlex.
Now notice the top of the handle. Looks like a bow right? This is optional. The reference of the sword had a similar pattern at the top of the handle. I figured this would be a great place to store the LED lights battery pack. Now you can make this very easily, what I did was use some craft foam to form a small box. I then took a piece of wonder flex and heated it around the box and then heated it to the top of the PVC pipe. Sorry I don’t have pictures of this part, but it is fairly easy to replicate. Just make sure that the battery pack of your LED lights fit in this box. Leave one end of the box open (very top of the handle). You need to leave it open to slip the battery pack inside and to change the batteries if they run out.
Before we deal with the LED lights we move on to something more fun: Painting!
Now, once again you don’t have to follow my color suggestions. These are just the colors that I used. So please use whatever colors you think are good for your project.
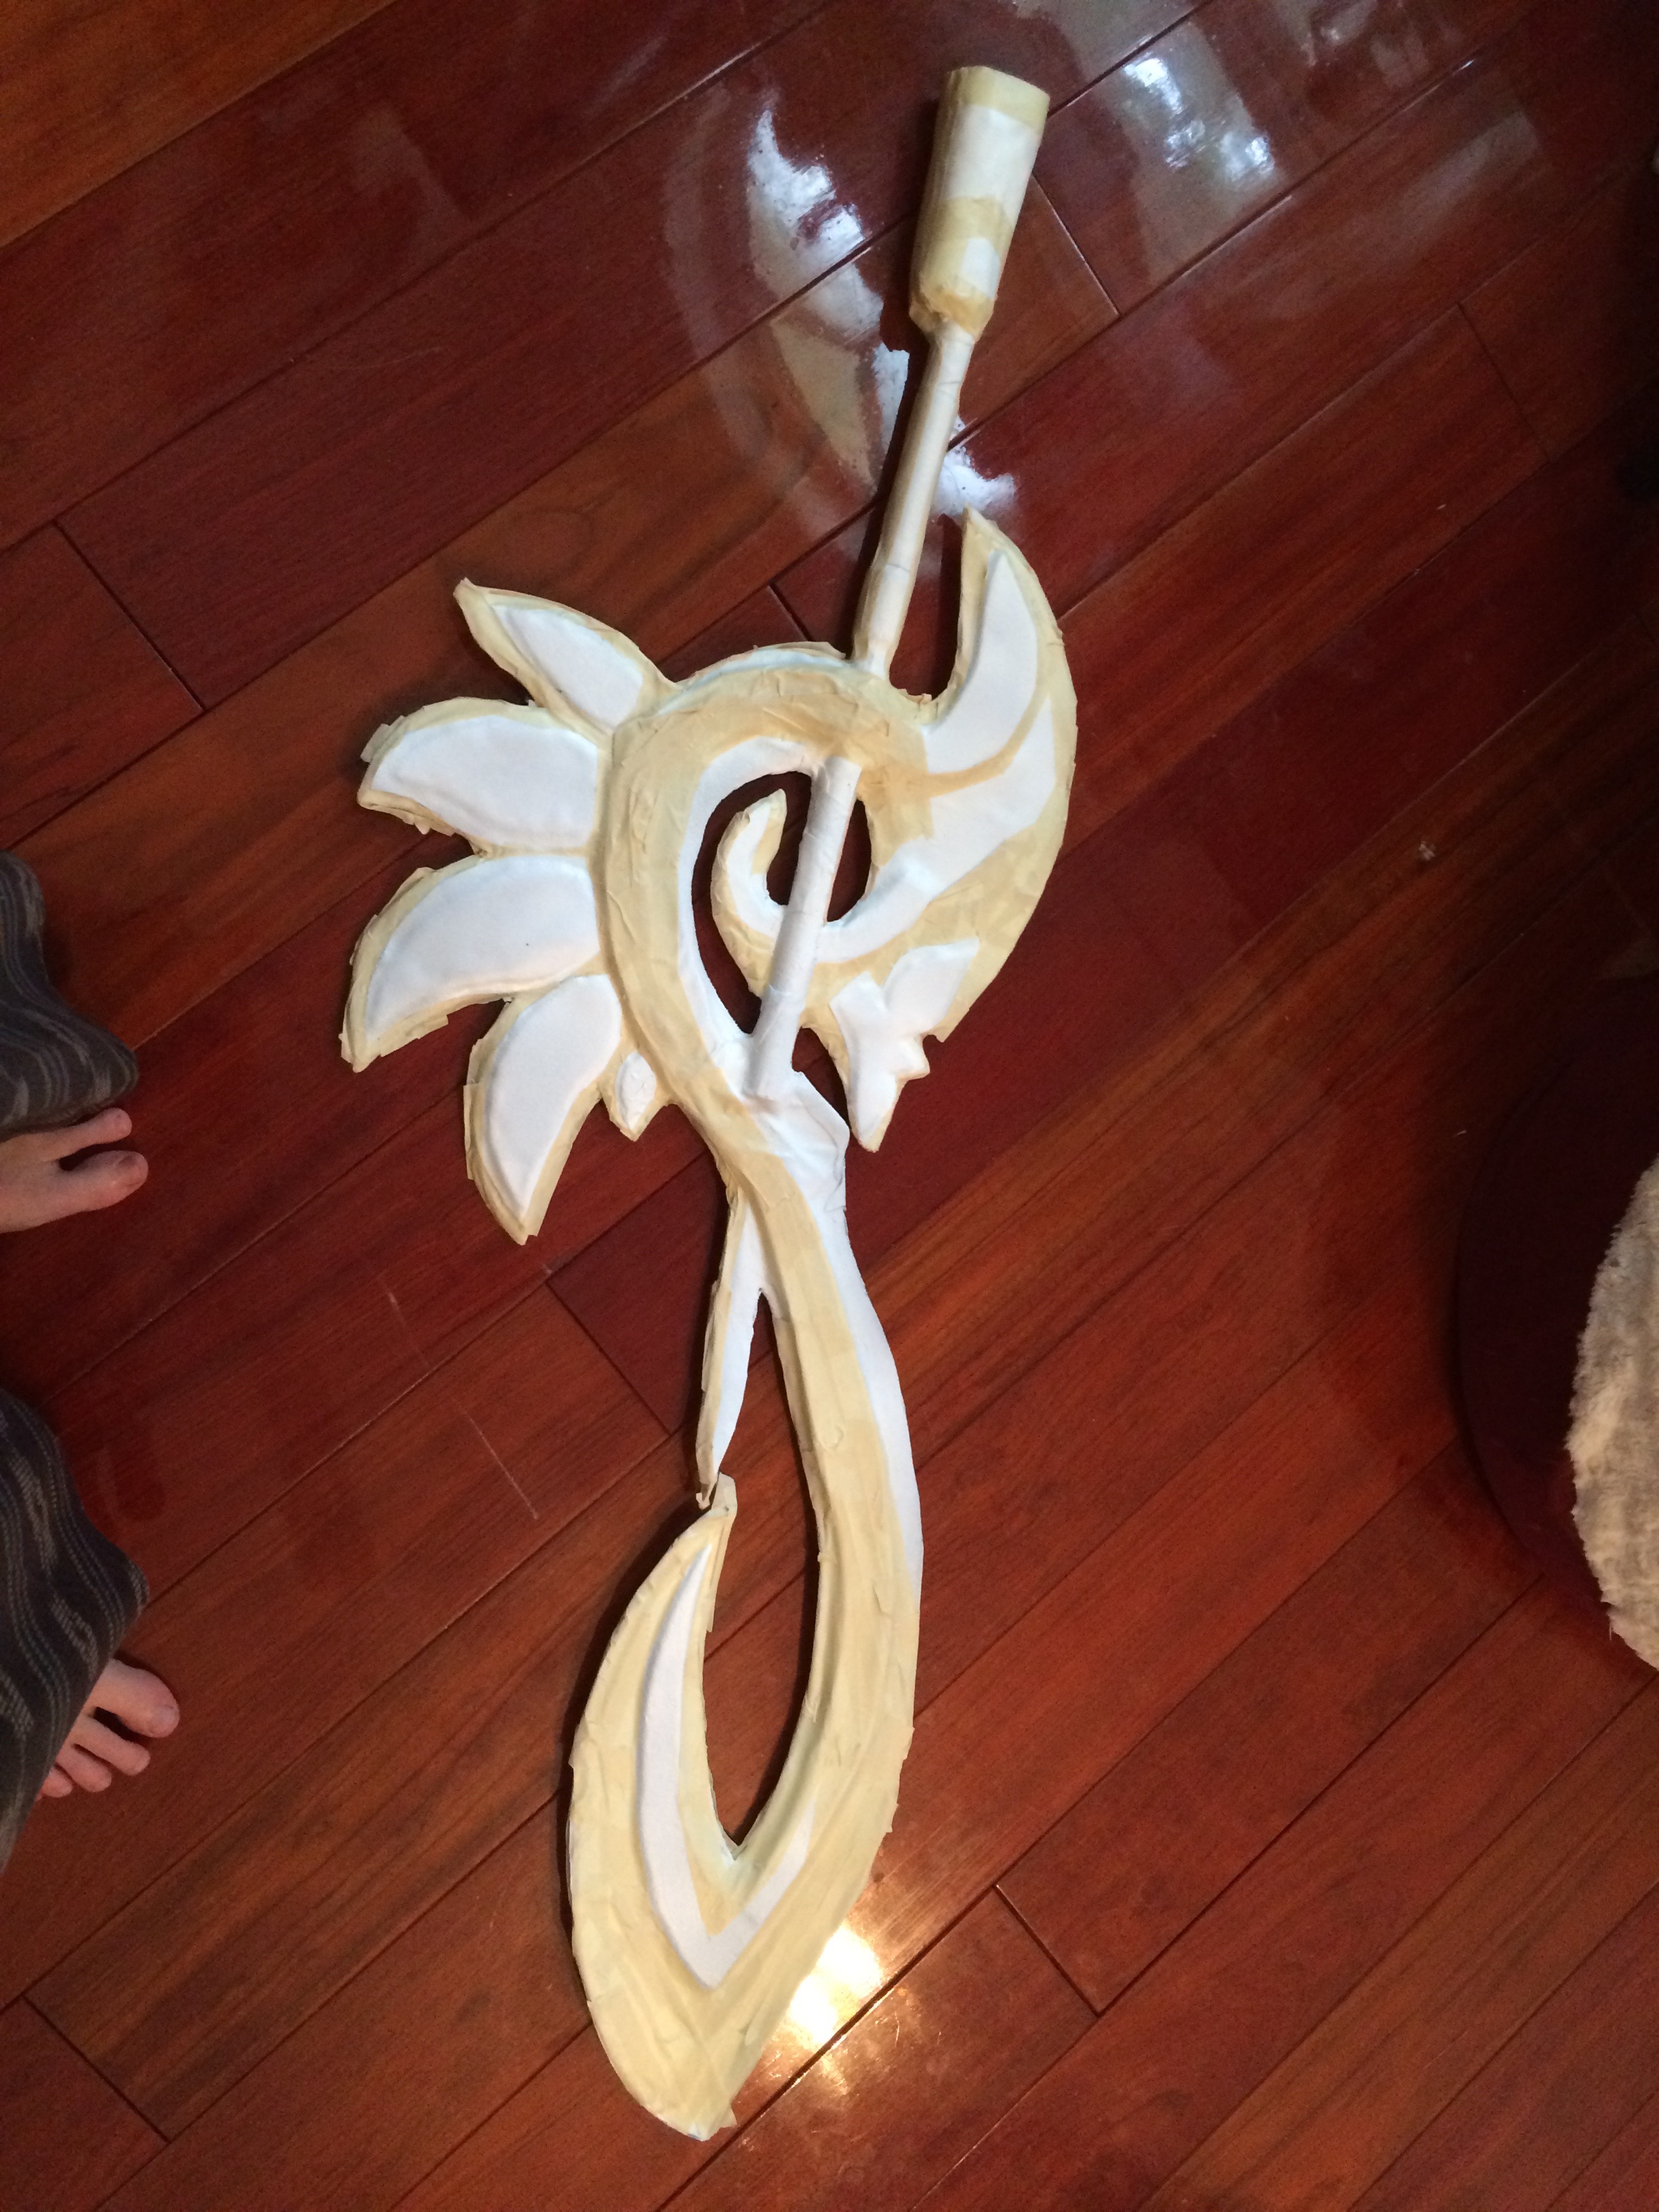
Take your white spray paint and spray the whole sword top to bottom (I hope you are spray painting outside of your house). Do two coats. Make sure that the sword is completely cool, you don’t want to spray paint this when the WonderFlex is still warm and malleable.
Next take your painters tape (please use painters tape, if you use regular tape you will just peel of the paint) and cover some white areas. This is to prevent other spray paint colors from leaking onto the white area. Using my only reference to this weapon, it seemed that the blade area and edges of the sword were lighter in color. So I left them white by covering them in tape. After you are satisfied with your tape coverage take your sword outside again and grab your purple, pink and yellow spray cans along the way.
 -> Be smart and wear a face mask and sun glasses. Must be sexy sunglasses….

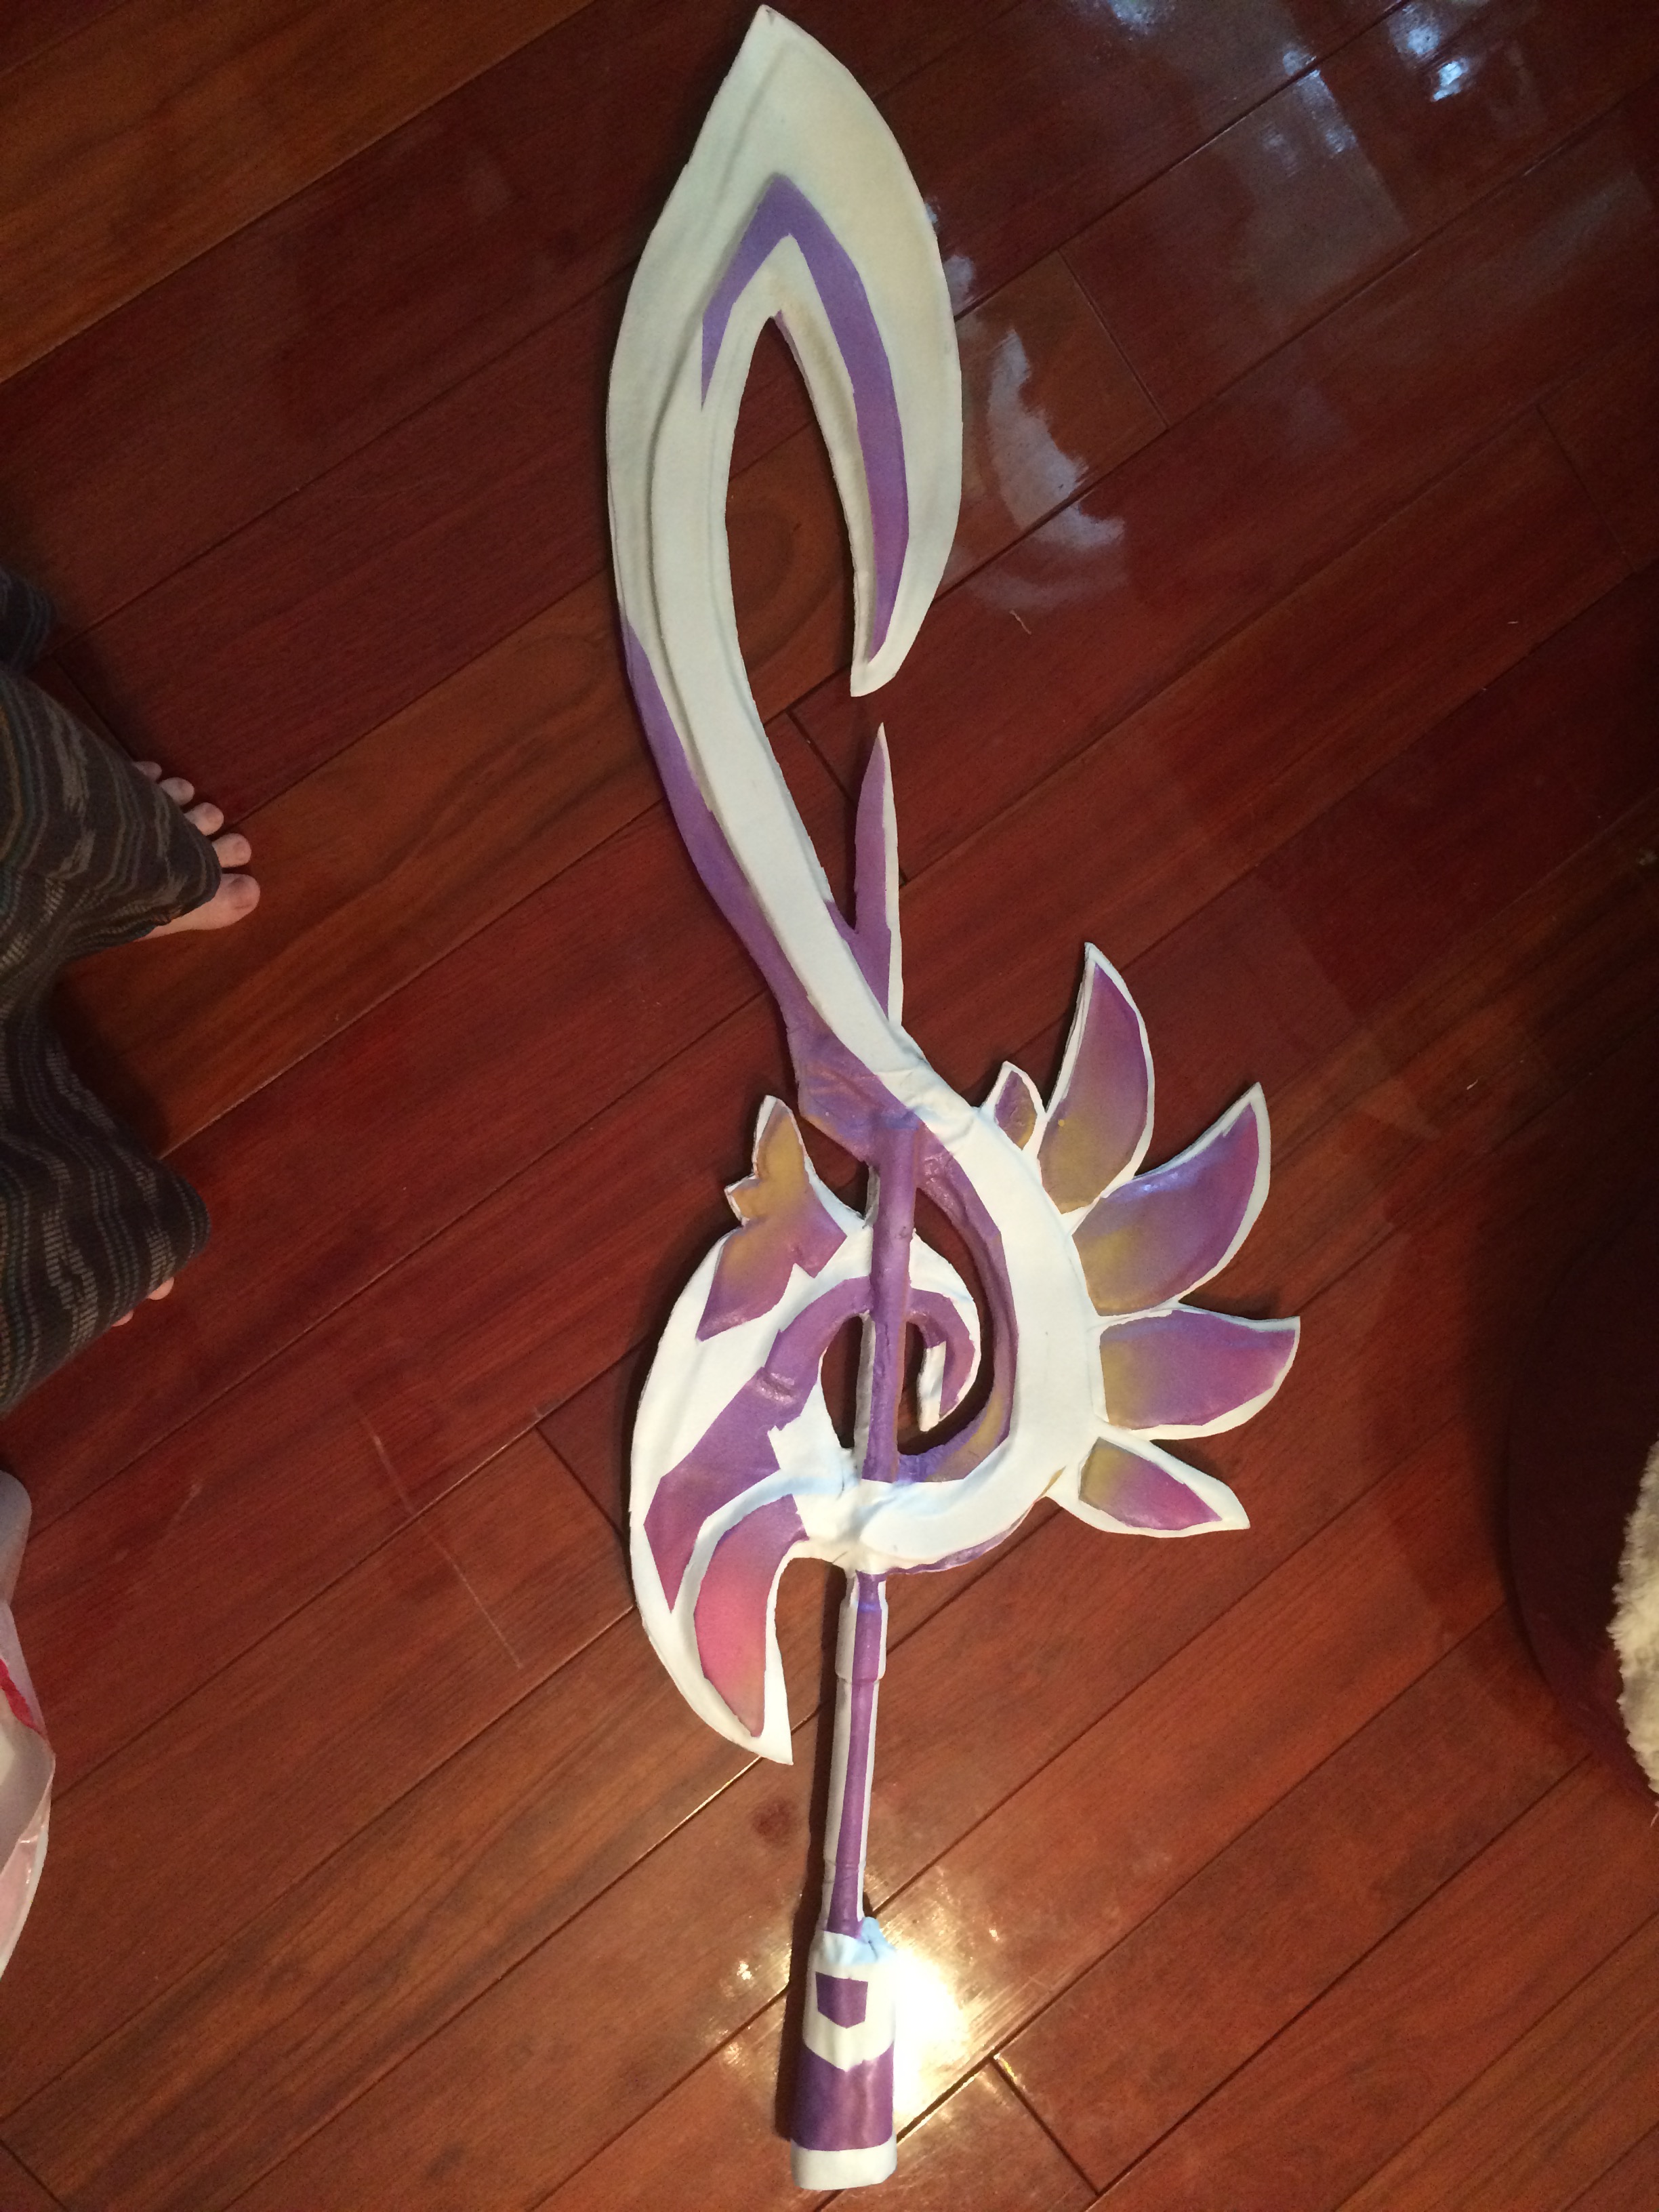
Start spray painting using all of these colors. I started with purple which encompassed the vast majority of the exposed white area. I let it dry and flipped the sword over to add some pink details over the purple. To prevent the pink overtaking the purple hold the spray can further back from the sword and quickly move over the length of the sword in one quick swoop. If you want more pink, repeat the process until you are satisfied. Let dry and then repeat on the other side of the sword. Finally, I used a very small amount of yellow. This was mostly for the petals/wings on the side of the sword. Very quickly, and from a slight distance away, I sprayed a small amount of yellow across the petals and a little on the blade. In the end this is what it looked like (tape still on):
And now we remove the tape:
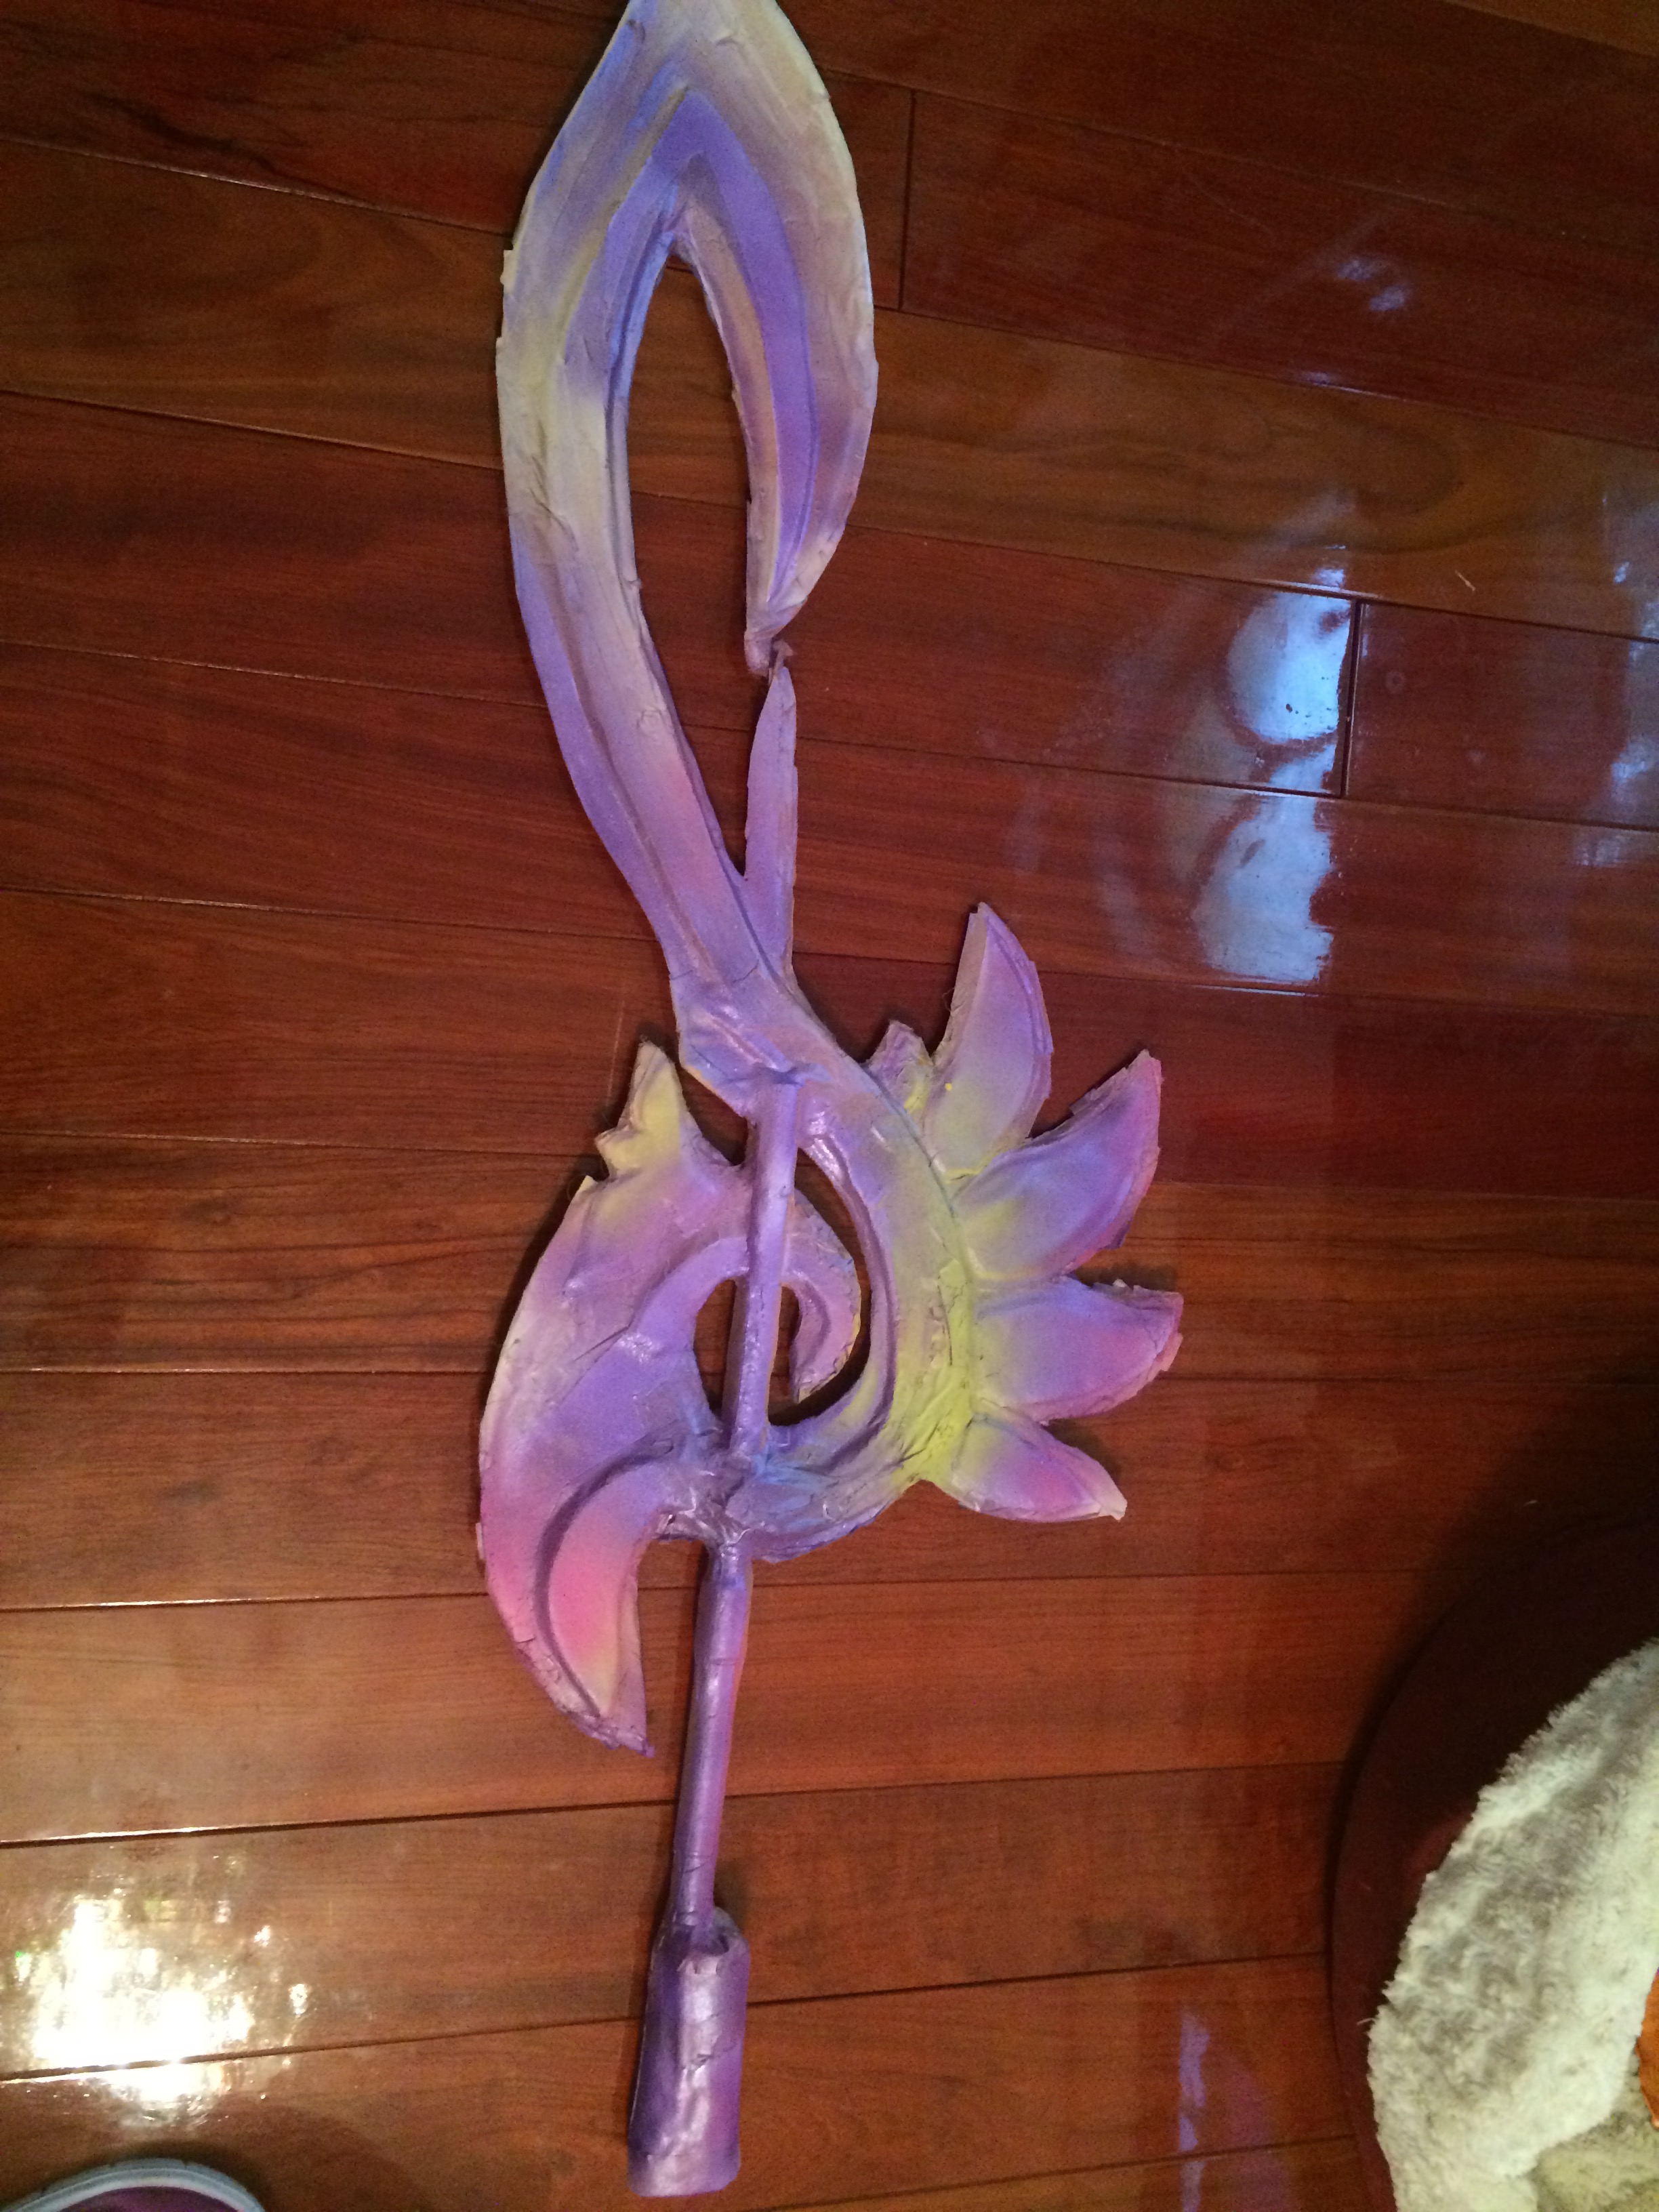
At this point I thought that the white was overpowering the sword so I use my favorite quote: “when in doubt, add more glitter.”

I found some plastic gems at my local art store for super cheap and began to hot glue them along the sword until both sides of the sword looked like the image on the top right. I still wasn’t satisfied with the white so I moved onto my final painting project: silver glitter paint.

Using a Martha Stewart silver glitter paint I covered both sides of the sword until the white areas began to sparkle a bit. Not the best pictures but cameras don’t do this project justice. Here is a zoomed in picture of the silver details:
 -> Still blurry sorry….
Finally our final step, LED Technology.
Side Note:
I must mention something before continuing with this part of the tutorial. Cosplaysupplies.com now offers transparent WonderFlex which allows you to see through your props. This is the best material when working with LED technology as you can encase your lights within the WonderFlex and you can still see it light up. At the time I was doing this prop I could not access any of this material in a reasonable time. I suggest if you want to do LED lights on your props, pay the extra few bucks and get the transparent WonderFlex. This way you won’t have to deal with the hot glue sealing your lights to the outside of the WonderFlex. Plus it will look cleaner in the end. I will be using this technique for my 2016 Eternal Sailor Saturn Glaive.
Continue with this tutorial:
In the picture above you see some wires coming out of the handle. This is one of the battery packs stuffed in this holder (top of the handle). This is what the inside looks like:
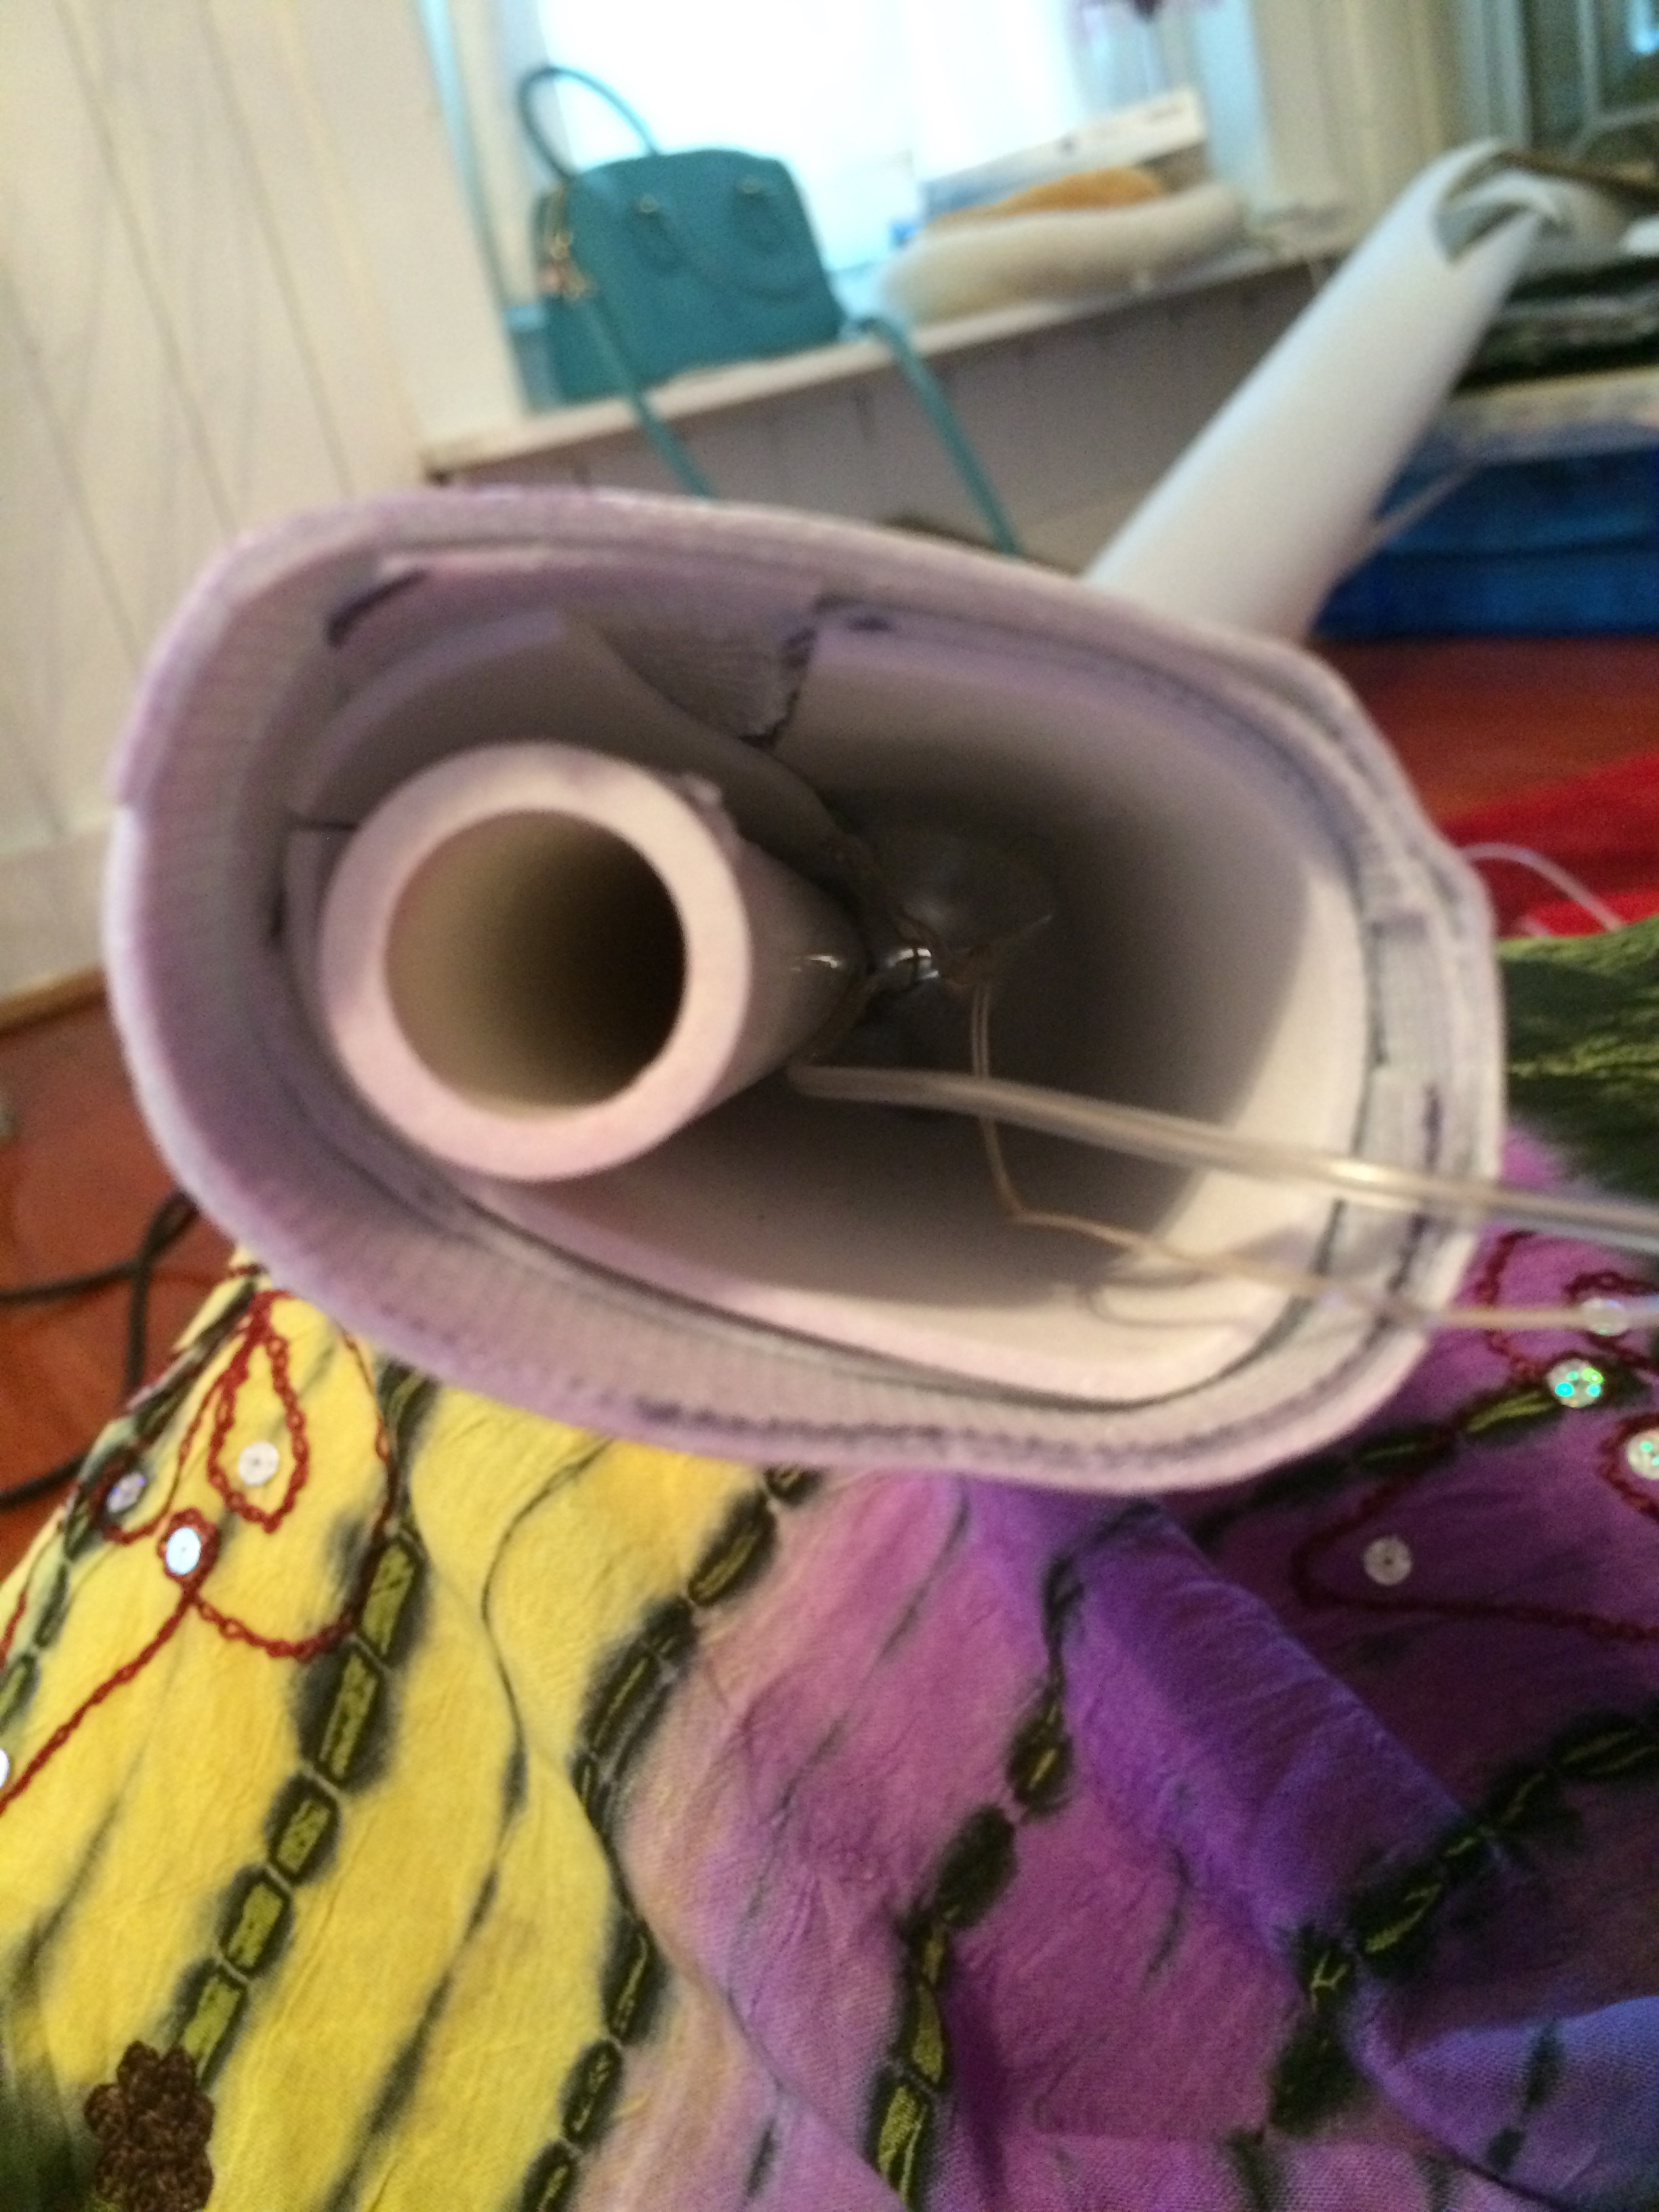
To the left you see the PVC pipe and on the right is where I placed the two battery packs. So now you are wondering where do the lights go? This is a little tricky and in order to cover the sword I needed two sets of LED lights to cover the full length of the sword. To begin, go to the bottom of the LED lights holder on you handle and poke a hole through with scissors. This is to allow for the lights to string through to the bottom of the sword.
 -> You can see the strand of lights coming out of the bottom on the right of the picture.
So your battery pack will stay in the box holder, but make sure you leave enough length of light strand inside the battery compartment so you can pull it out and change the batteries. So now you should have two sets of LED light strands hanging out of the top handle battery compartment. The nice thing about these lights is that they do very well with hot glue. The electrics are not damaged from the high temperatures of hot glue. What you are going to do is hot glue the strands down the handle and along the outside of the sword. and down the blade. You should have enough to cover the full length of the sword. One strand of LED lights will be on one side of the sword, and the other will be for the other. Work slowly with the hot glue and don’t cover your full strand of lights. Just glue some areas of the LED strand to the WonderFlex:
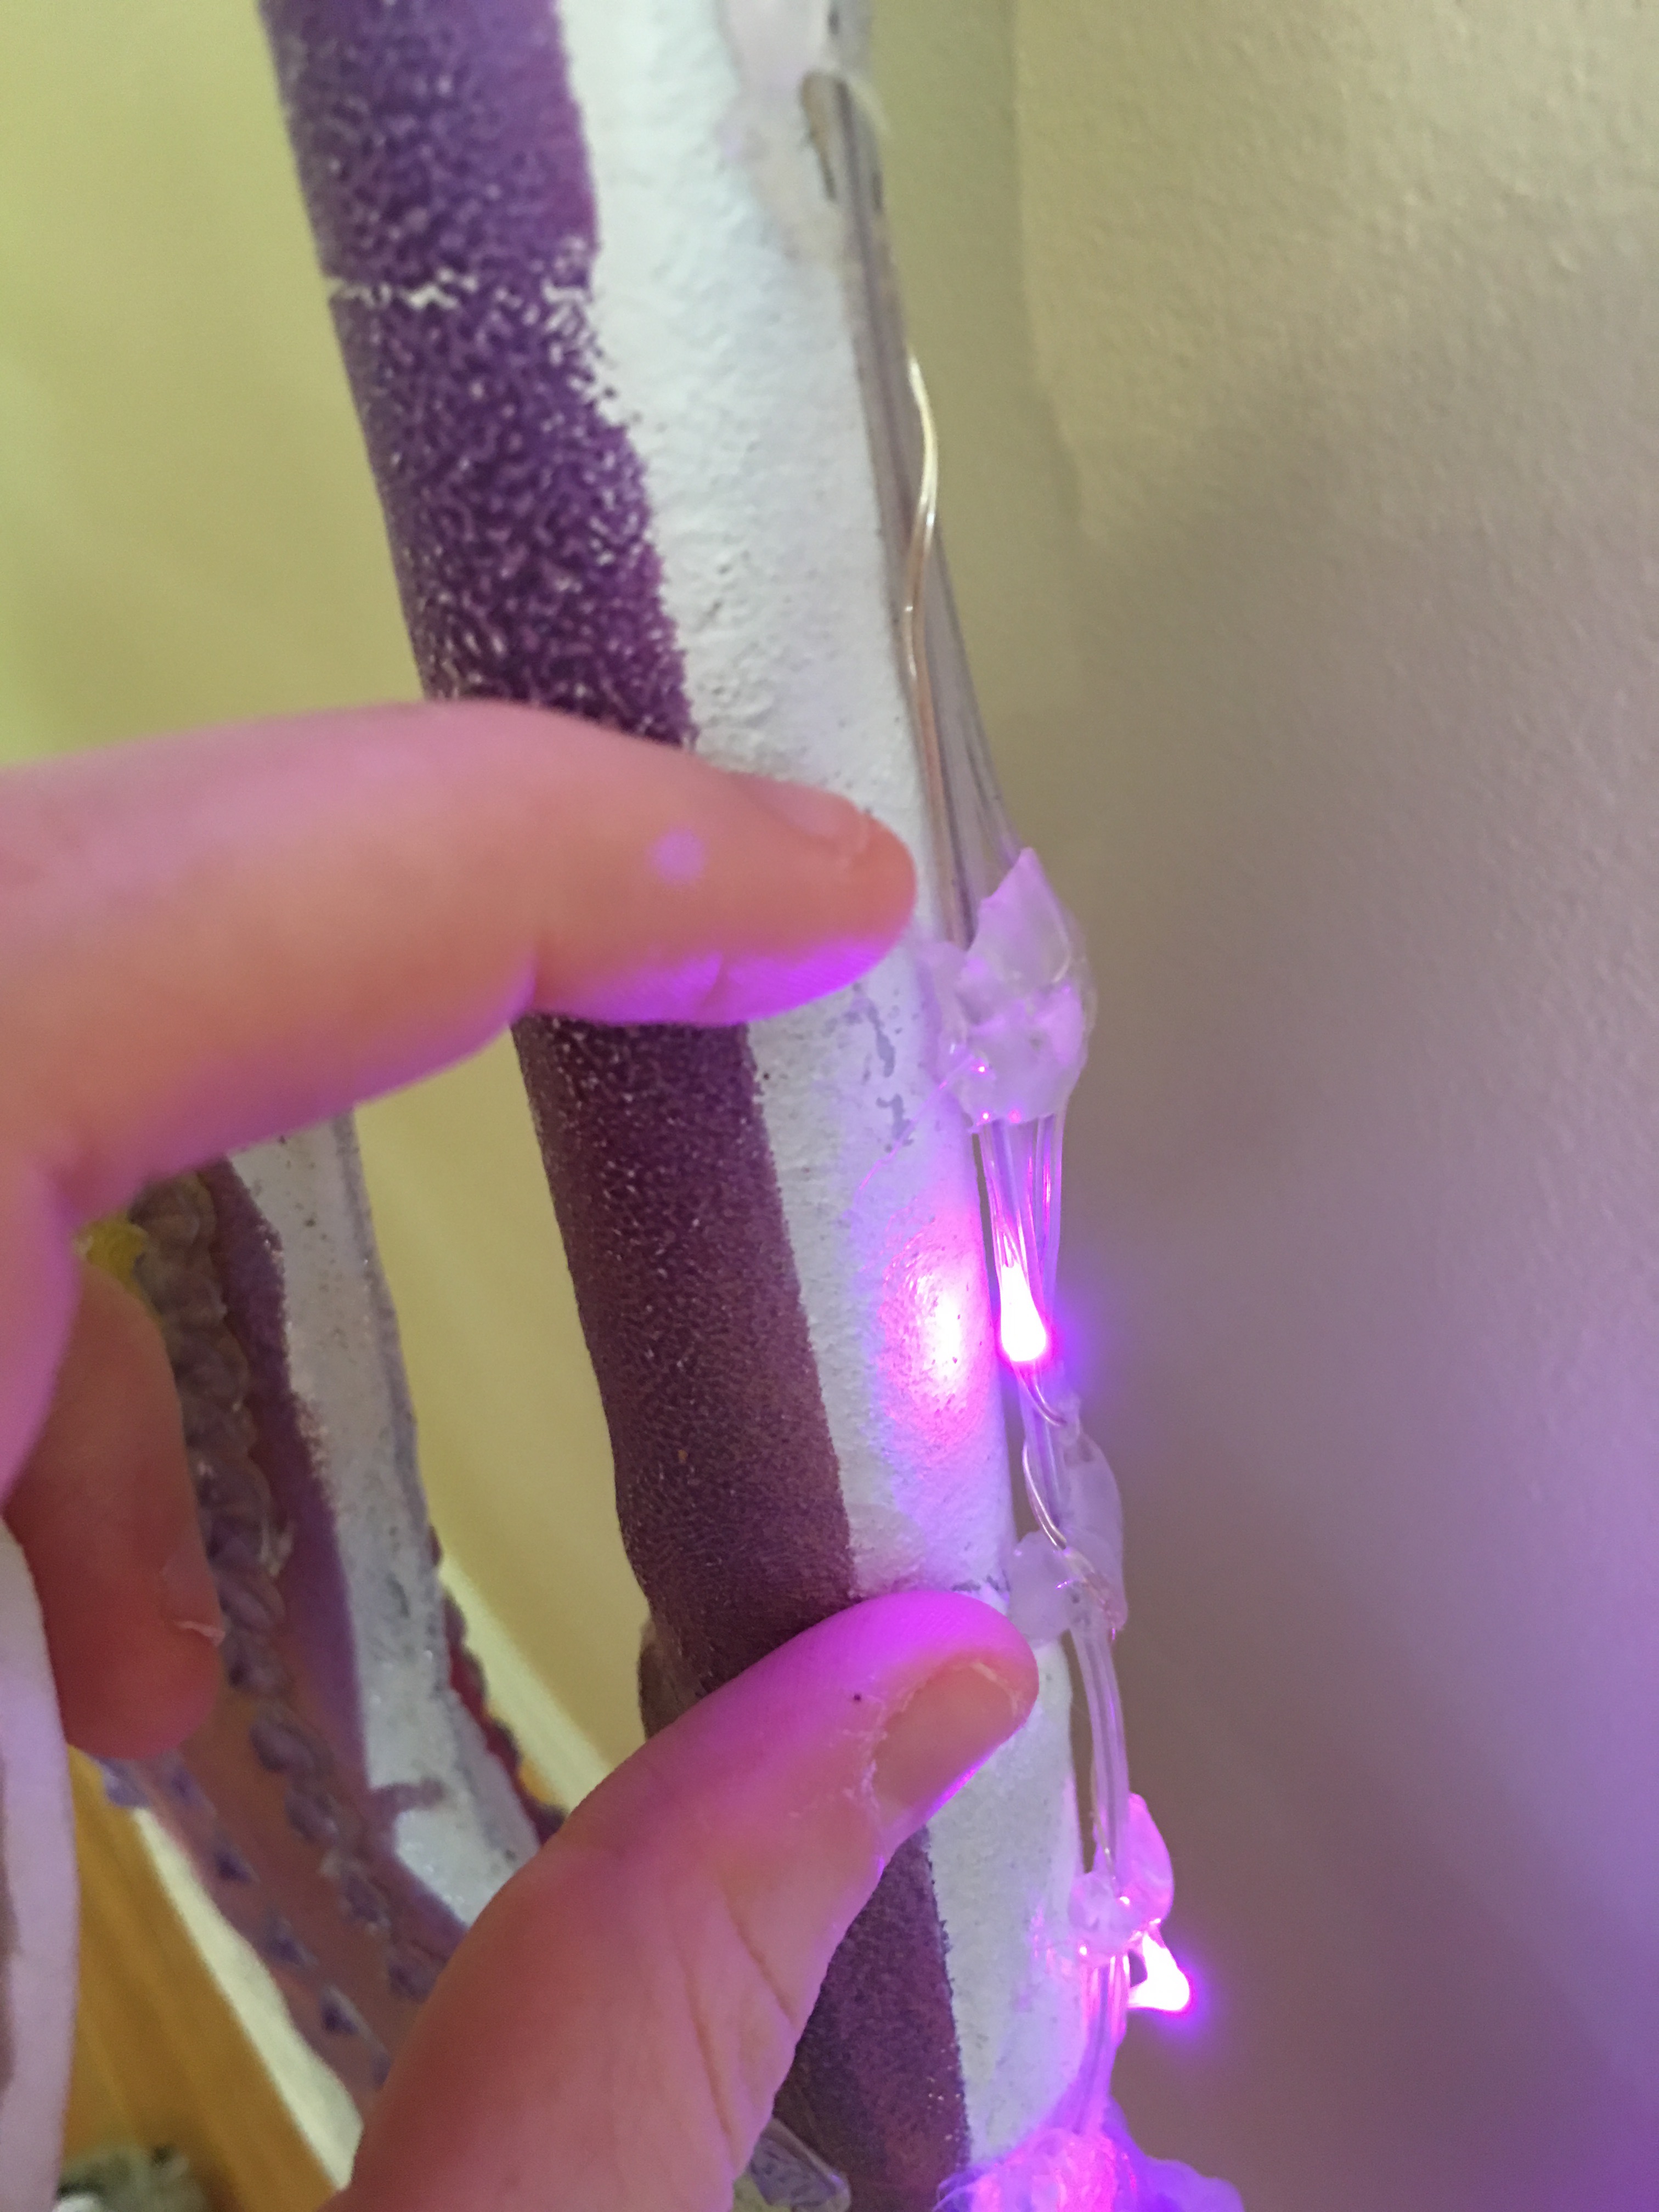
Notice where my fingers are pointing. These are areas that I hot glued the strand to the WonderFlex. Pretty much in between each light. What you should have in the end is something that looks like this:

The lights should reach all the way to the bottom of the sword and curl around the bottom and back up. Now, if you look closely at the “?” you can see something encircling the center of the treble clef. These are lights as well. A different type of LED light. I do not recommend these lights and thus I did not bring it up in this tutorial. These were very dim and hardly noticeable. Although I left them on the sword they really should be replaced with the purple lights. If you want to do this part in lights, get a 3rd set of LED lights from the link provided at the top of the page(Amazon). Similar to the first two LED strands, thread the lights through the tiny hole in the handle and wrap it around the handle all the way down to the center of the treble clef. I ran out of time and could not get a third set of lights shipped to me fast enough so I just used the bad lights that barely gave off any light.
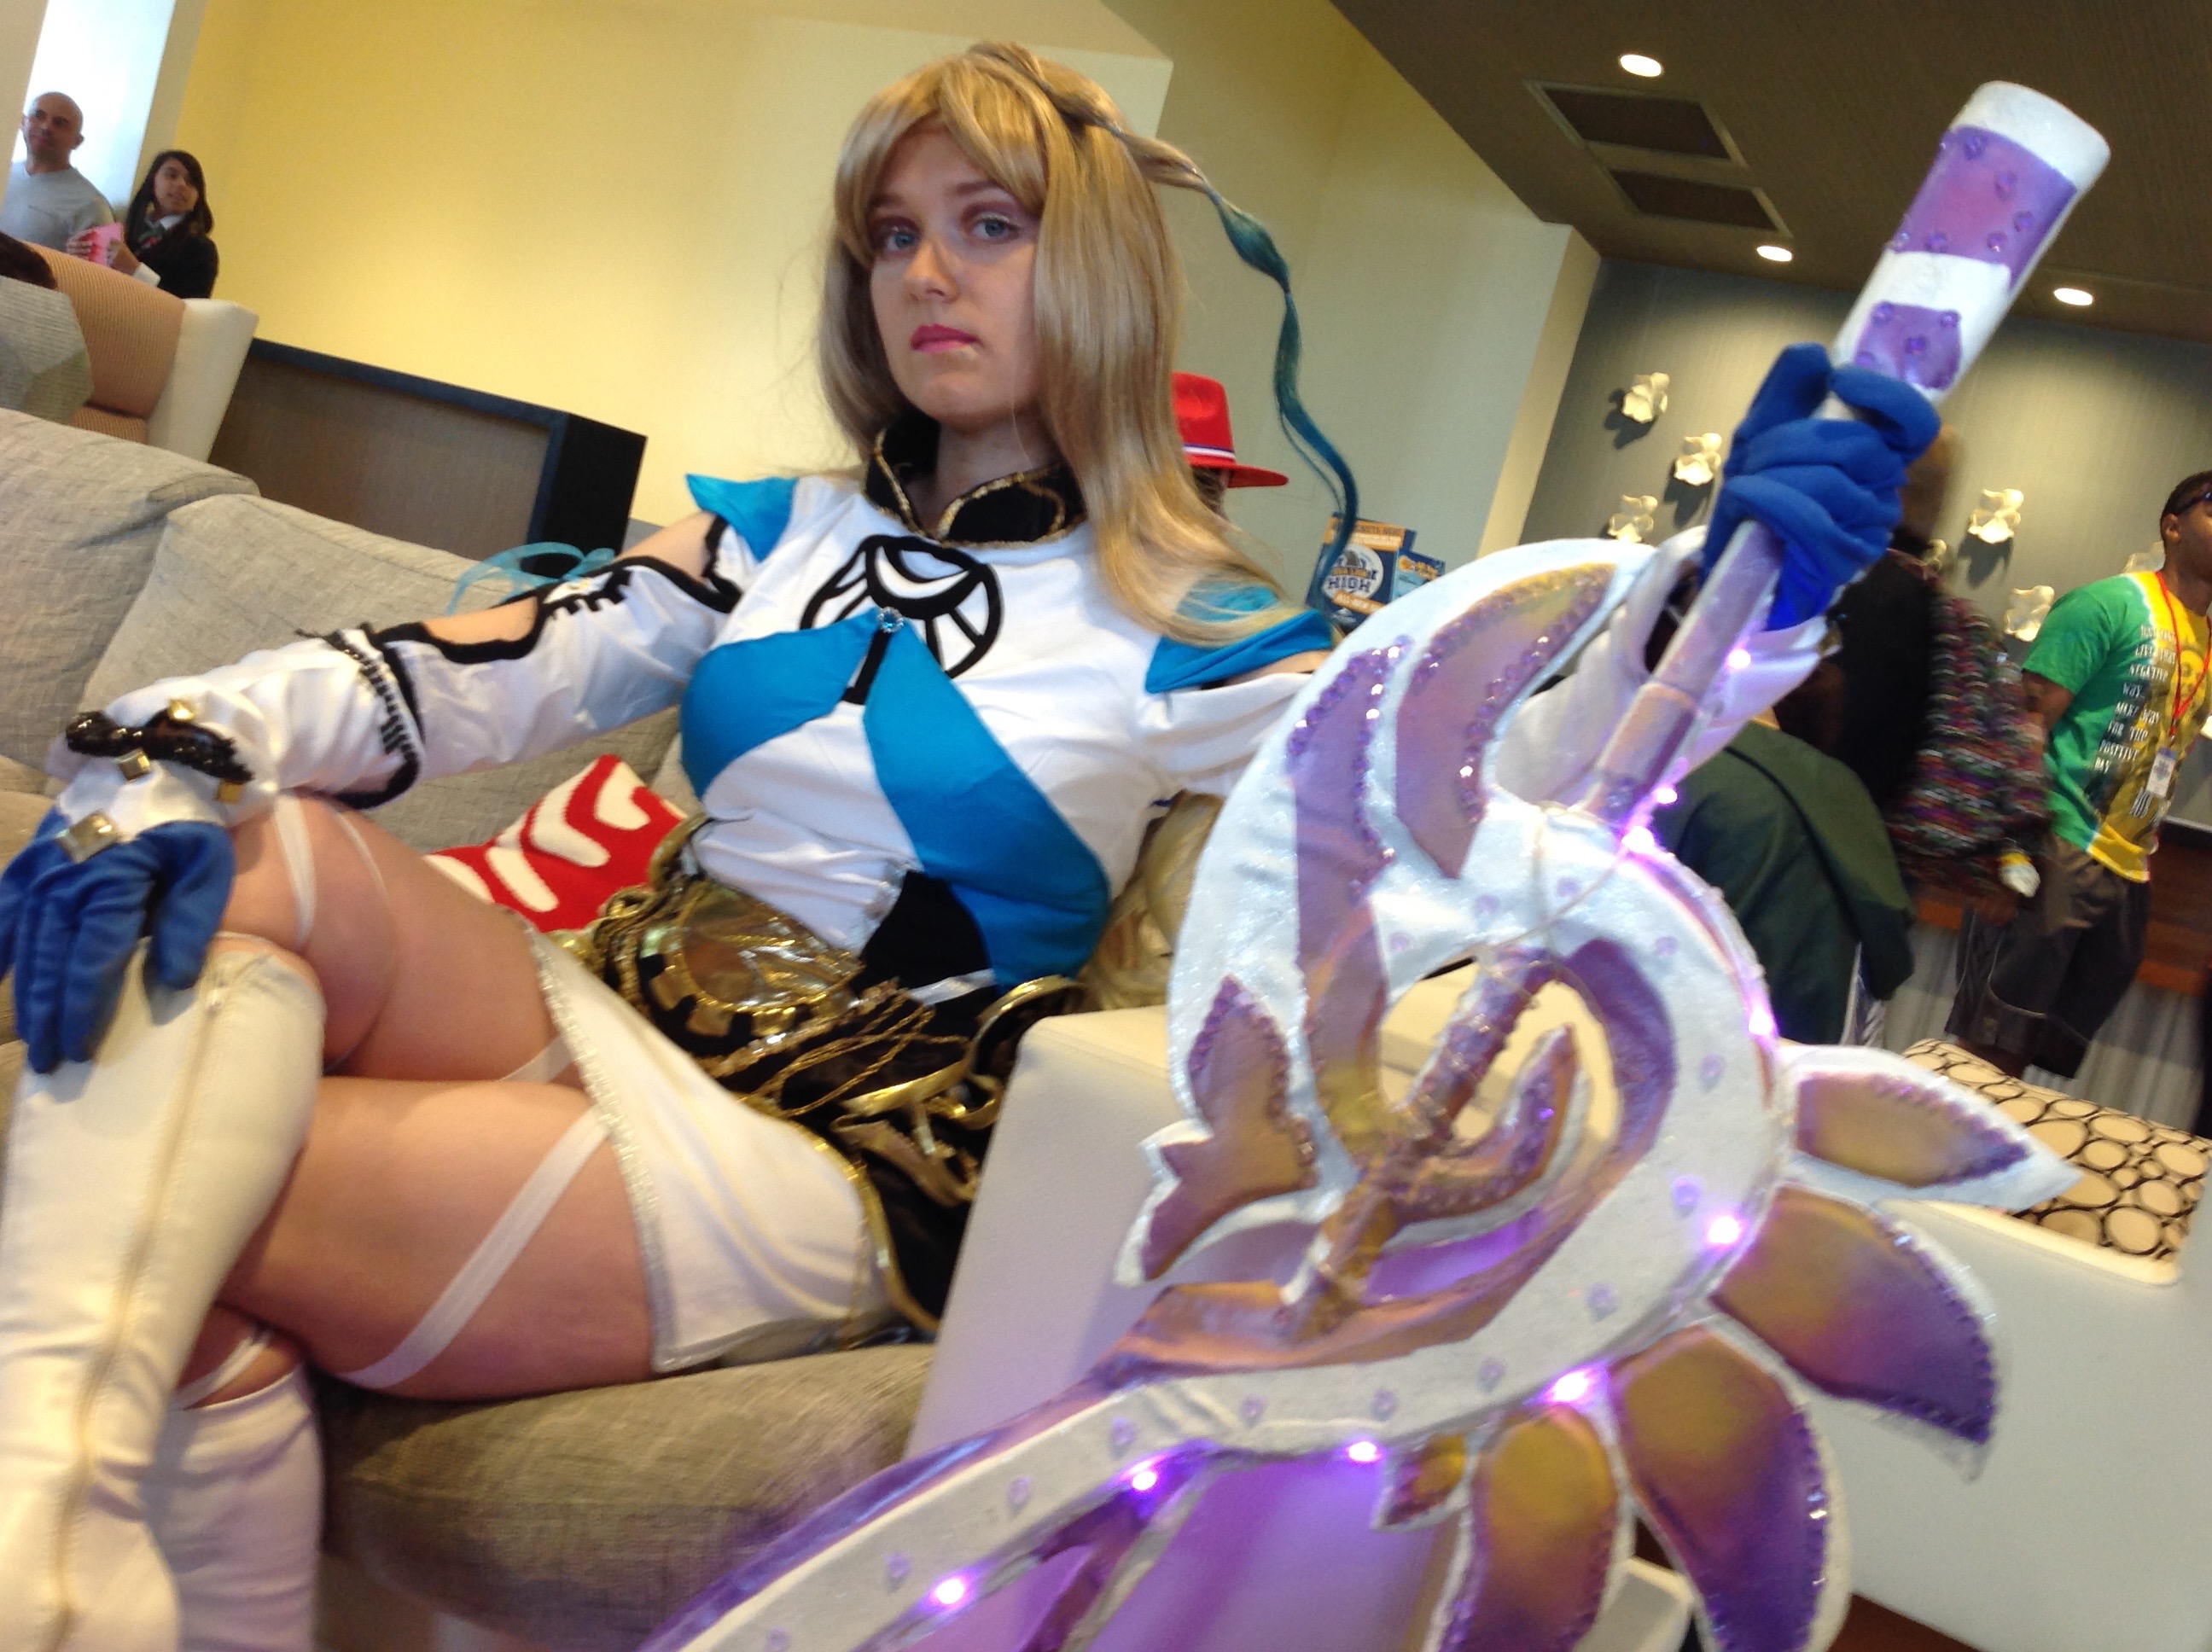
And there you have it! Your very own Tales of Xillia Weapon! Hope this helps with your project or give you ideas for any of your original works!
Ignore the blurry images. This is why you never take pictures on an iPad!