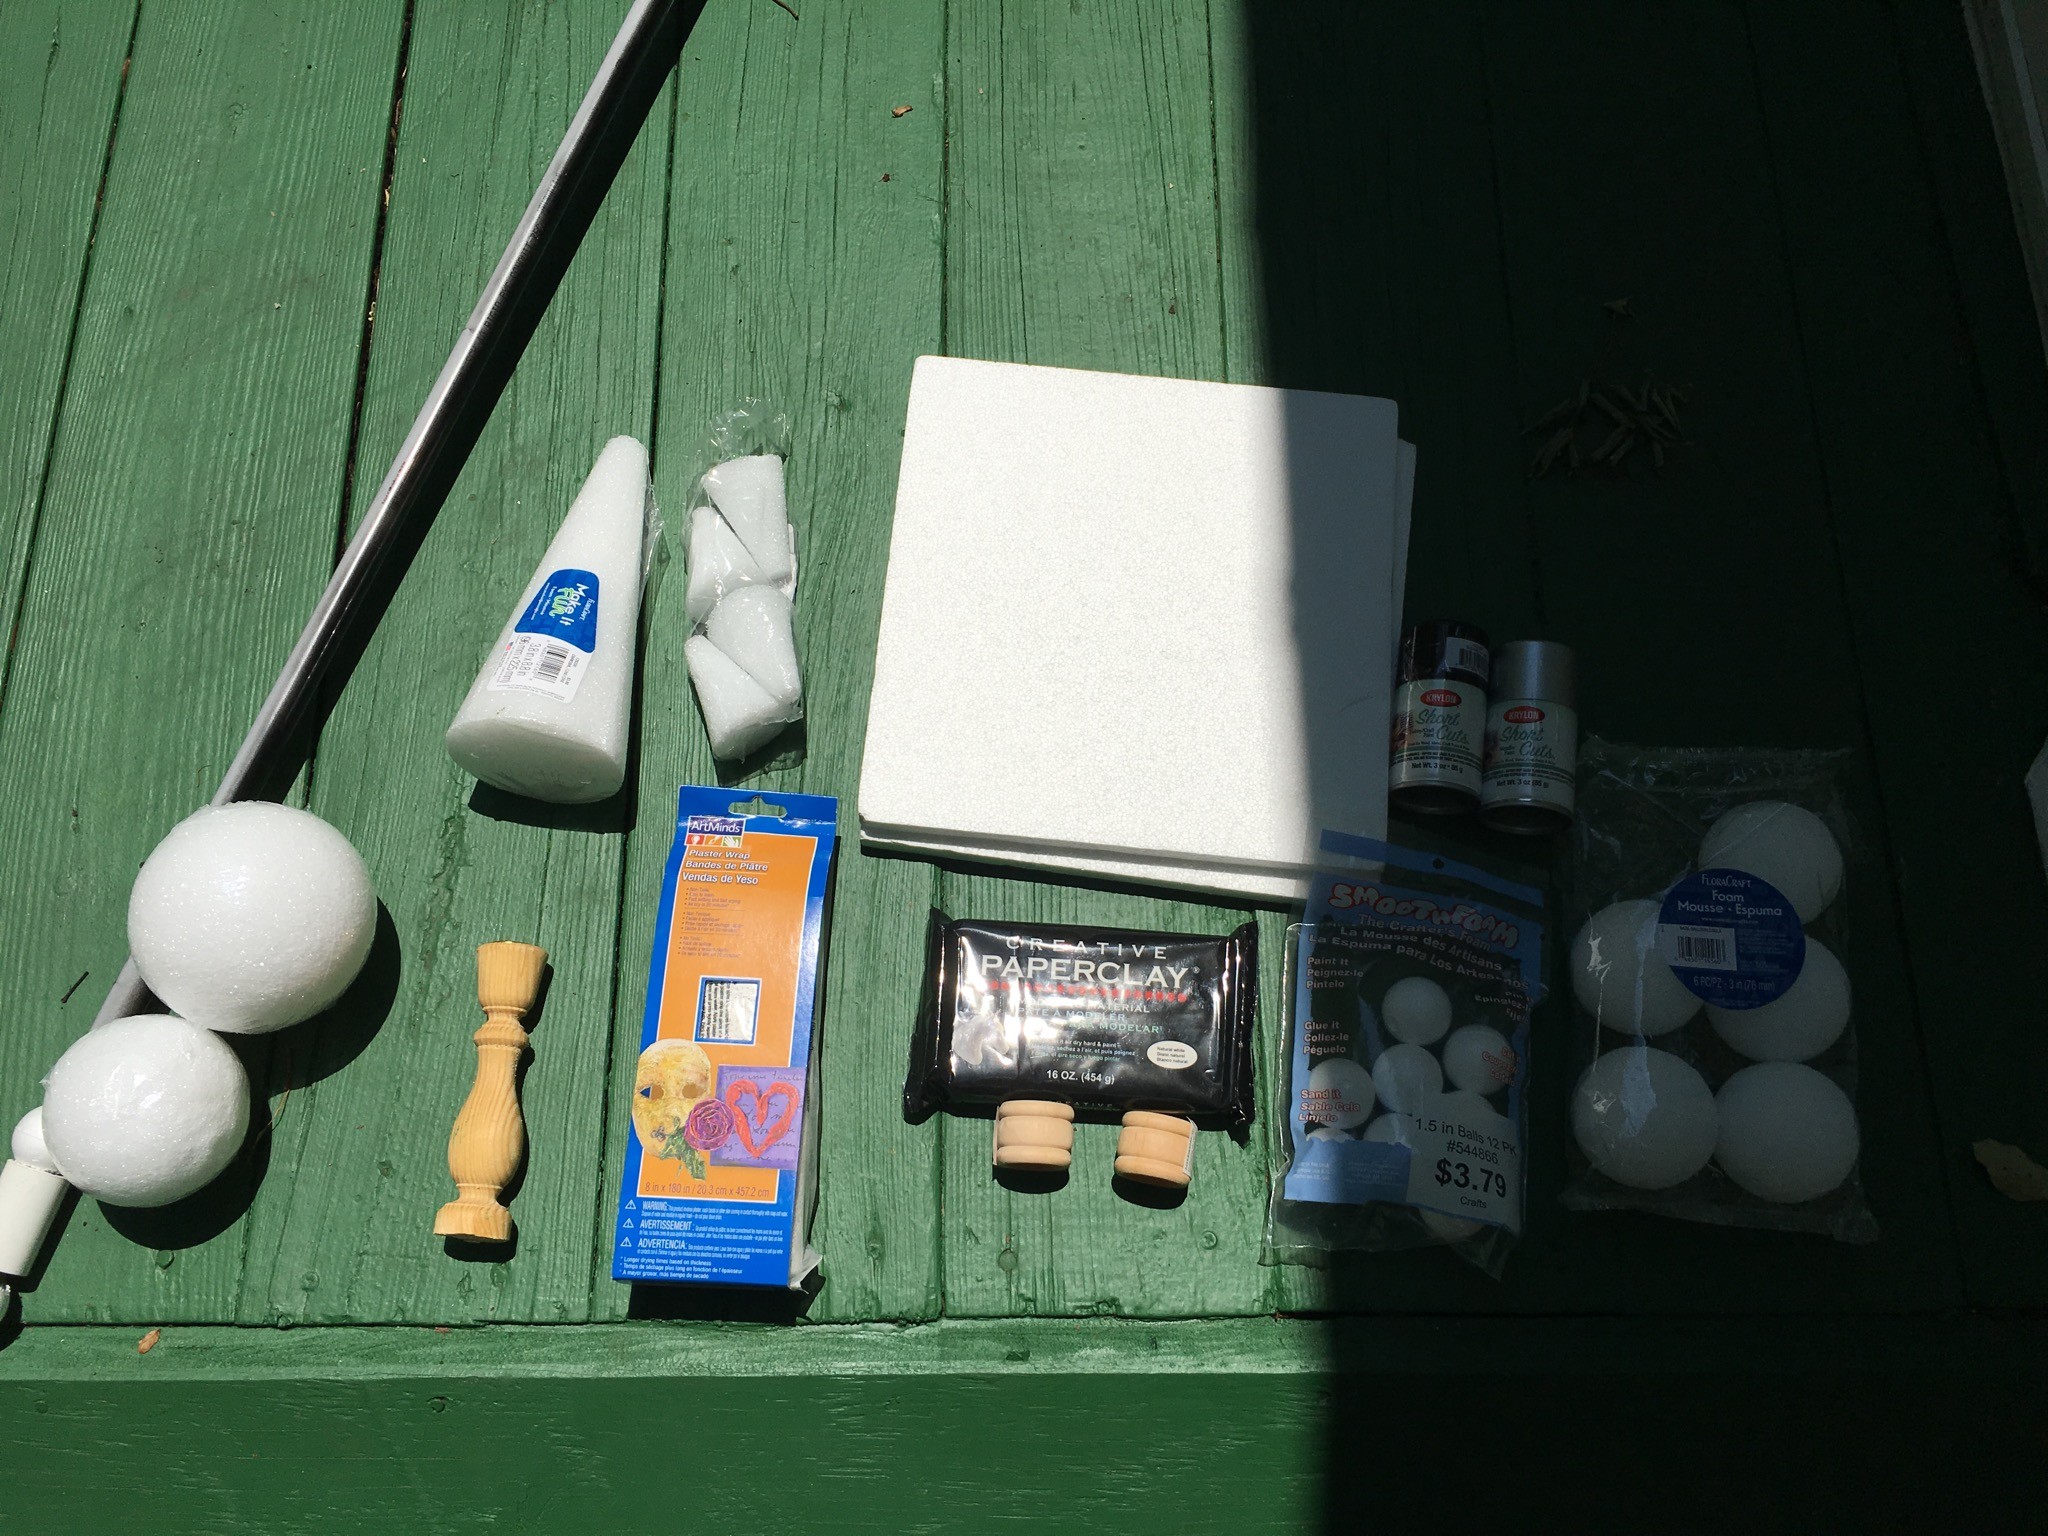
Materials Needed:
- PVC pipe (mine was about 5 feet tall)
- Transparent Worbla Thermoplastic (you can order some from www.cosplaysupplies.com – I got the “large” size)
- Sheet of plexiglass (from Home Depot)
- Dremel (I have a Dremel 3000) – If you do not have a Dremel I would suggest buying some sandpaper (fine) and a plexiglass cutter (though it will be difficult to to cut around corners).
- LED lights (bright white color) – I buy mine off of Amazon.com
- Wooden Candle Stick and Wooden Napkin Ring (x2) – You can find these at many Michaels stores
- PVC plastic tube (make sure it fits over your PVC pipe and that it is around 2-3 inches long.
- Styrofoam
- Cones (get about 2 large cones and 4 short cones, plus extras)
- Ball snapped
- Sheet of styrofoam
- Electrical Styrofoam Cutter
- Creative Paperclay (or regular craft clay)
- Plaster Wrap
- Wooden Candle Stick Holder and Wooden Napkin Holder (these can easily be found in craft stores – mine came from “Michaels”)
- Gesso
- Spray Paint (black and silver) – get a styrofoam friendly type of spray paint
- Dremel/Plexiglass Cutter: for cutting plexiglass
- Dremel Bit for Cutting Plexiglass Glass
- Glue: Hot glue and E6000
- Optional: black crystals, transparent gems, glitter, glitter glue.
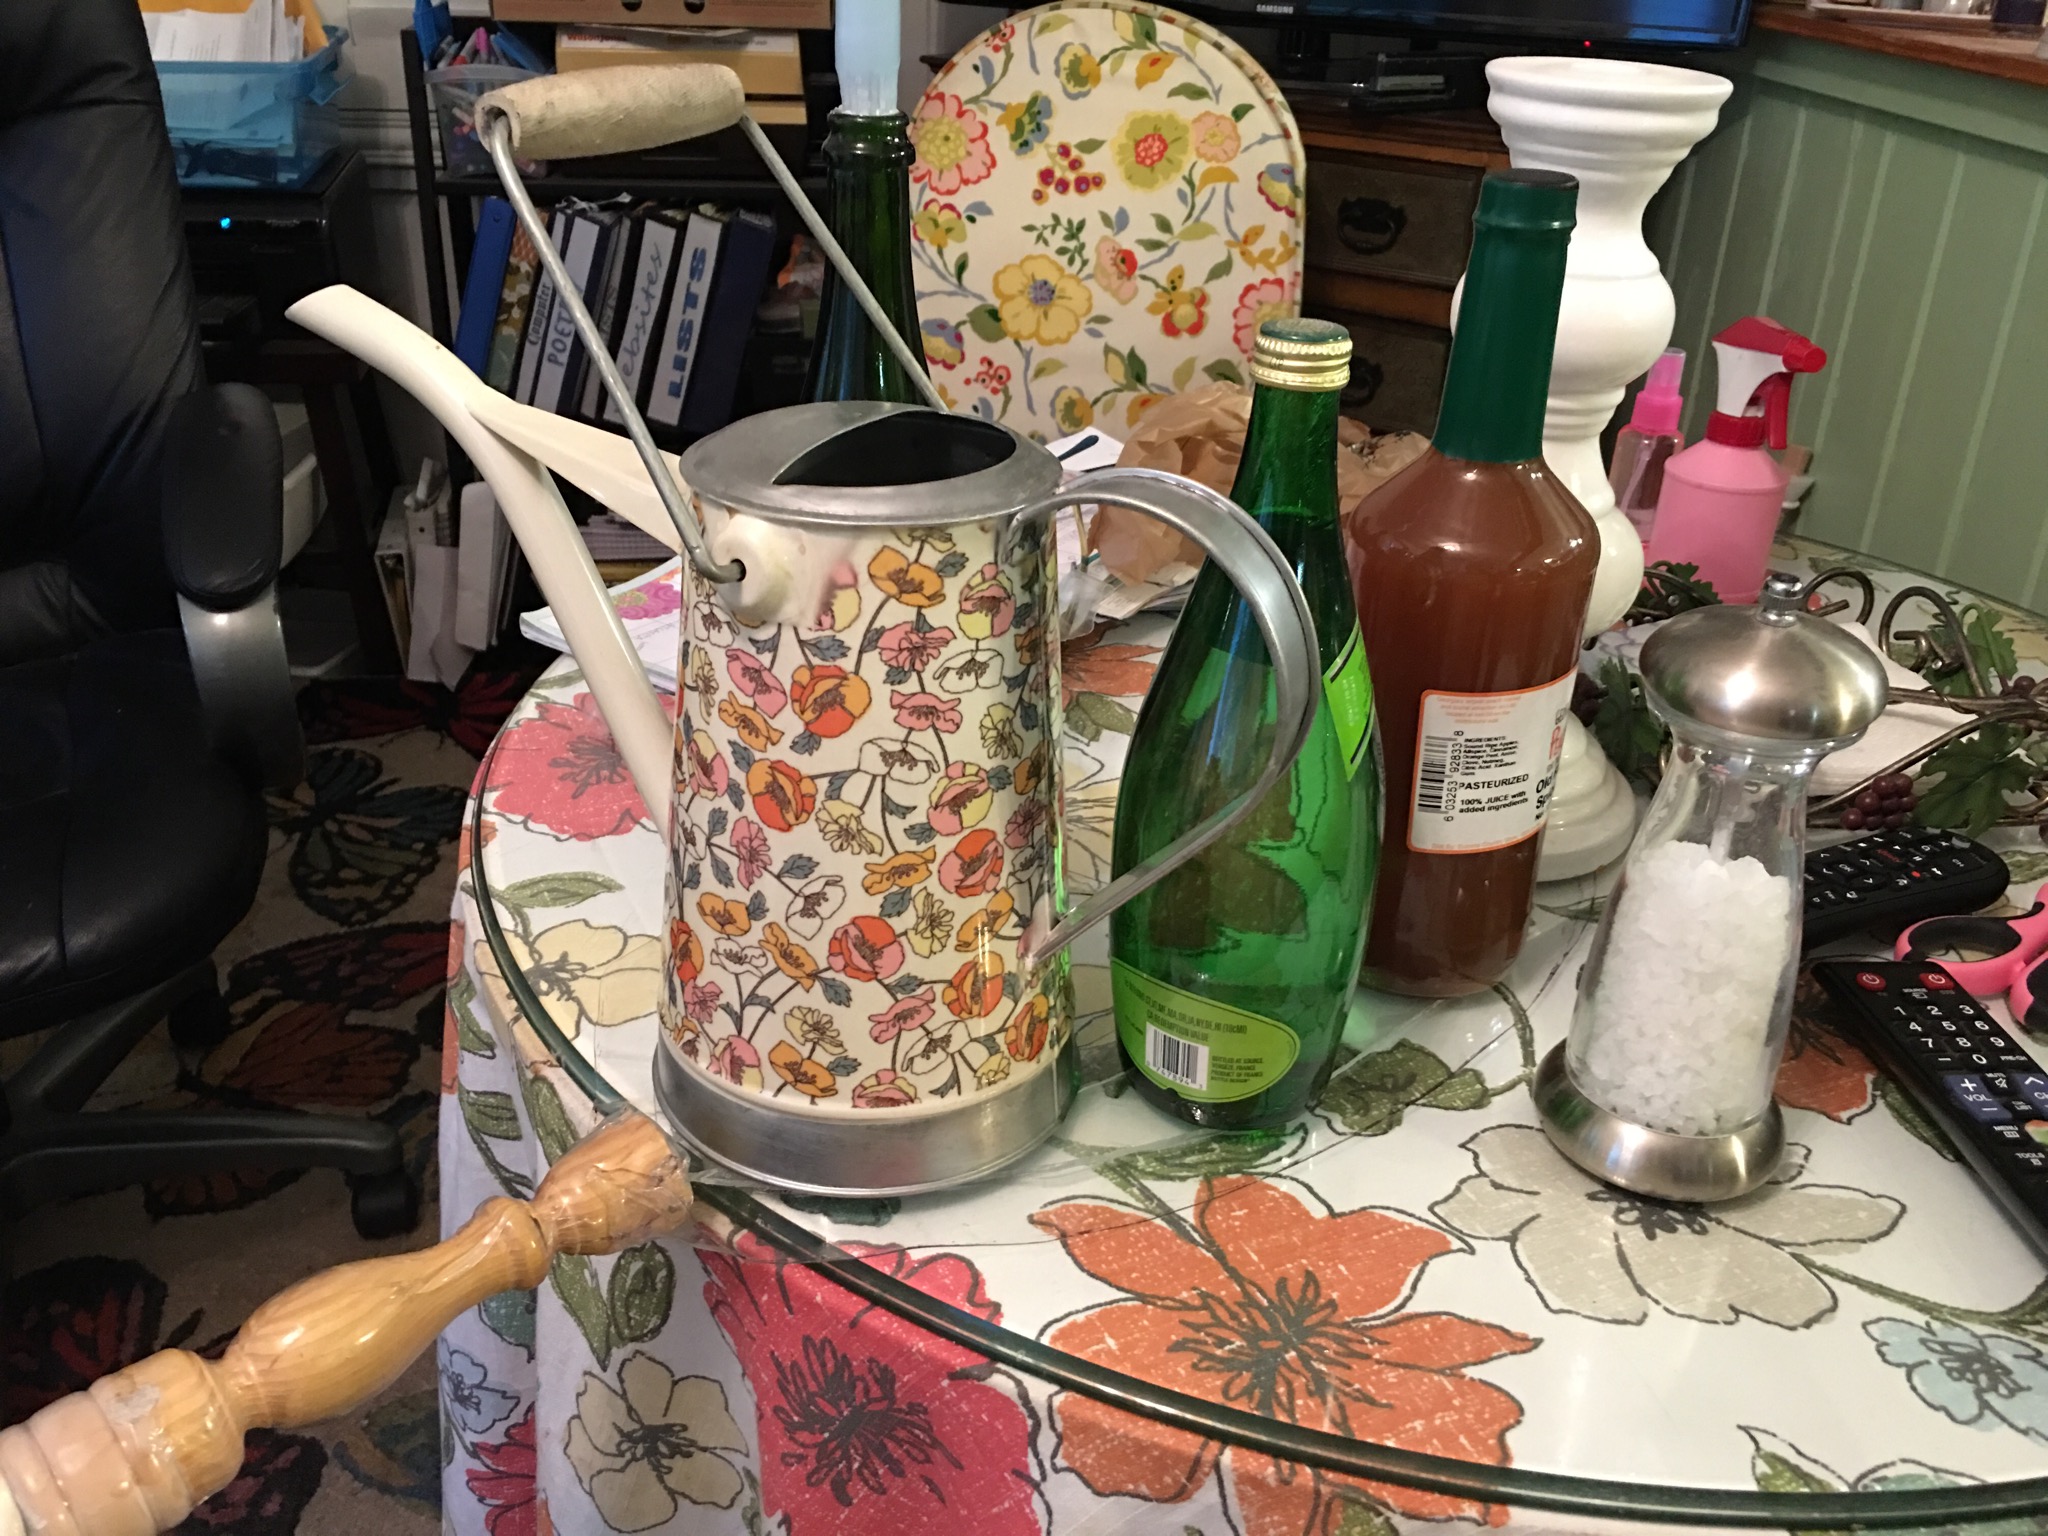
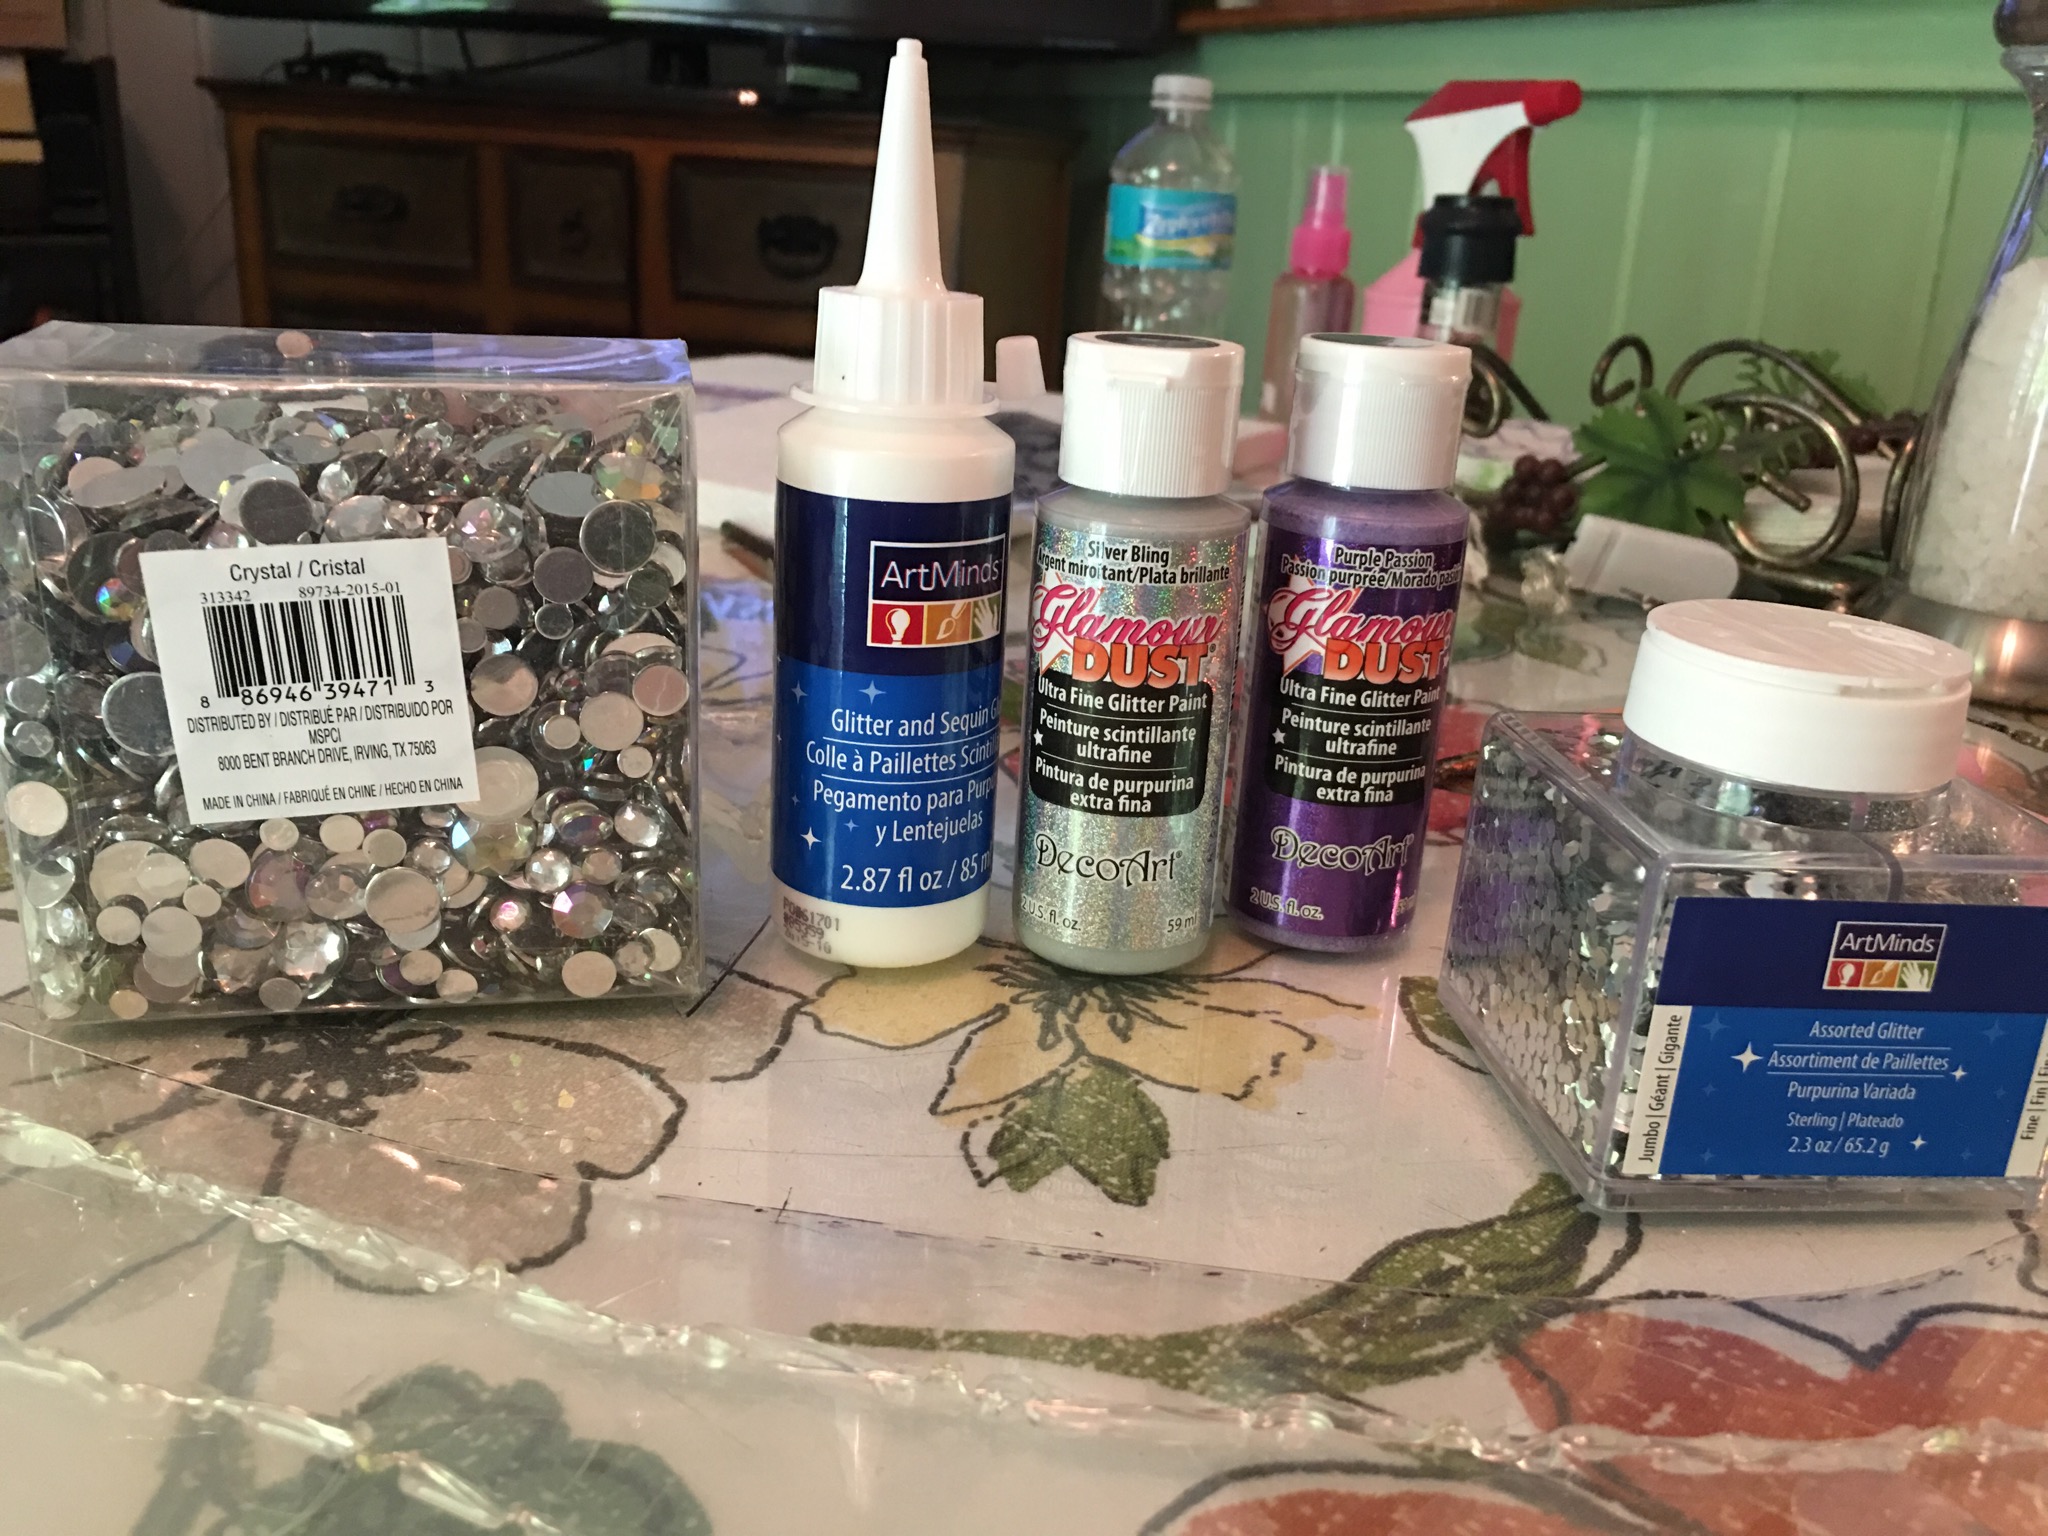
Pictures of most of my supply collection:

Before I begin I must warn everyone that this is a long tutorial and will probably take you a few days – weeks to complete. I started at the beginning of May and finished around May 16 (with me working every day on it.) So I suggest that you all start this project WAY before your event date. Let’s begin!
Step one: Gathering Supplies and References
Go get your change from your Piggy Bank and head out to your local craft store and Home Depot to buy the materials listed above. For the Worbla you can order some from www.cosplaysupplies.com , they ship very fast and are very reliable. If you want the transparent Worbla you must get a sheet of plexiglass. You will see why in the tutorial later, but transparent Worbla is very flimsy and needs support to keep the shape after heating. If you do not want to do the transparent Worbla I suggest buying regular Wonderflex. Very sturdy compared to Worbla and does not need plexiglass for support. You won’t have the cool transparent effect with the lights embedded within the plastic but it will be easier to build and more stable. Your choice.
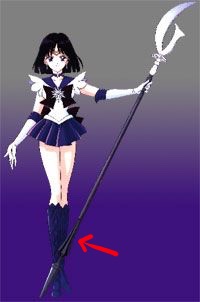
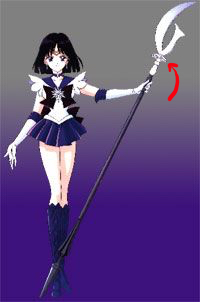
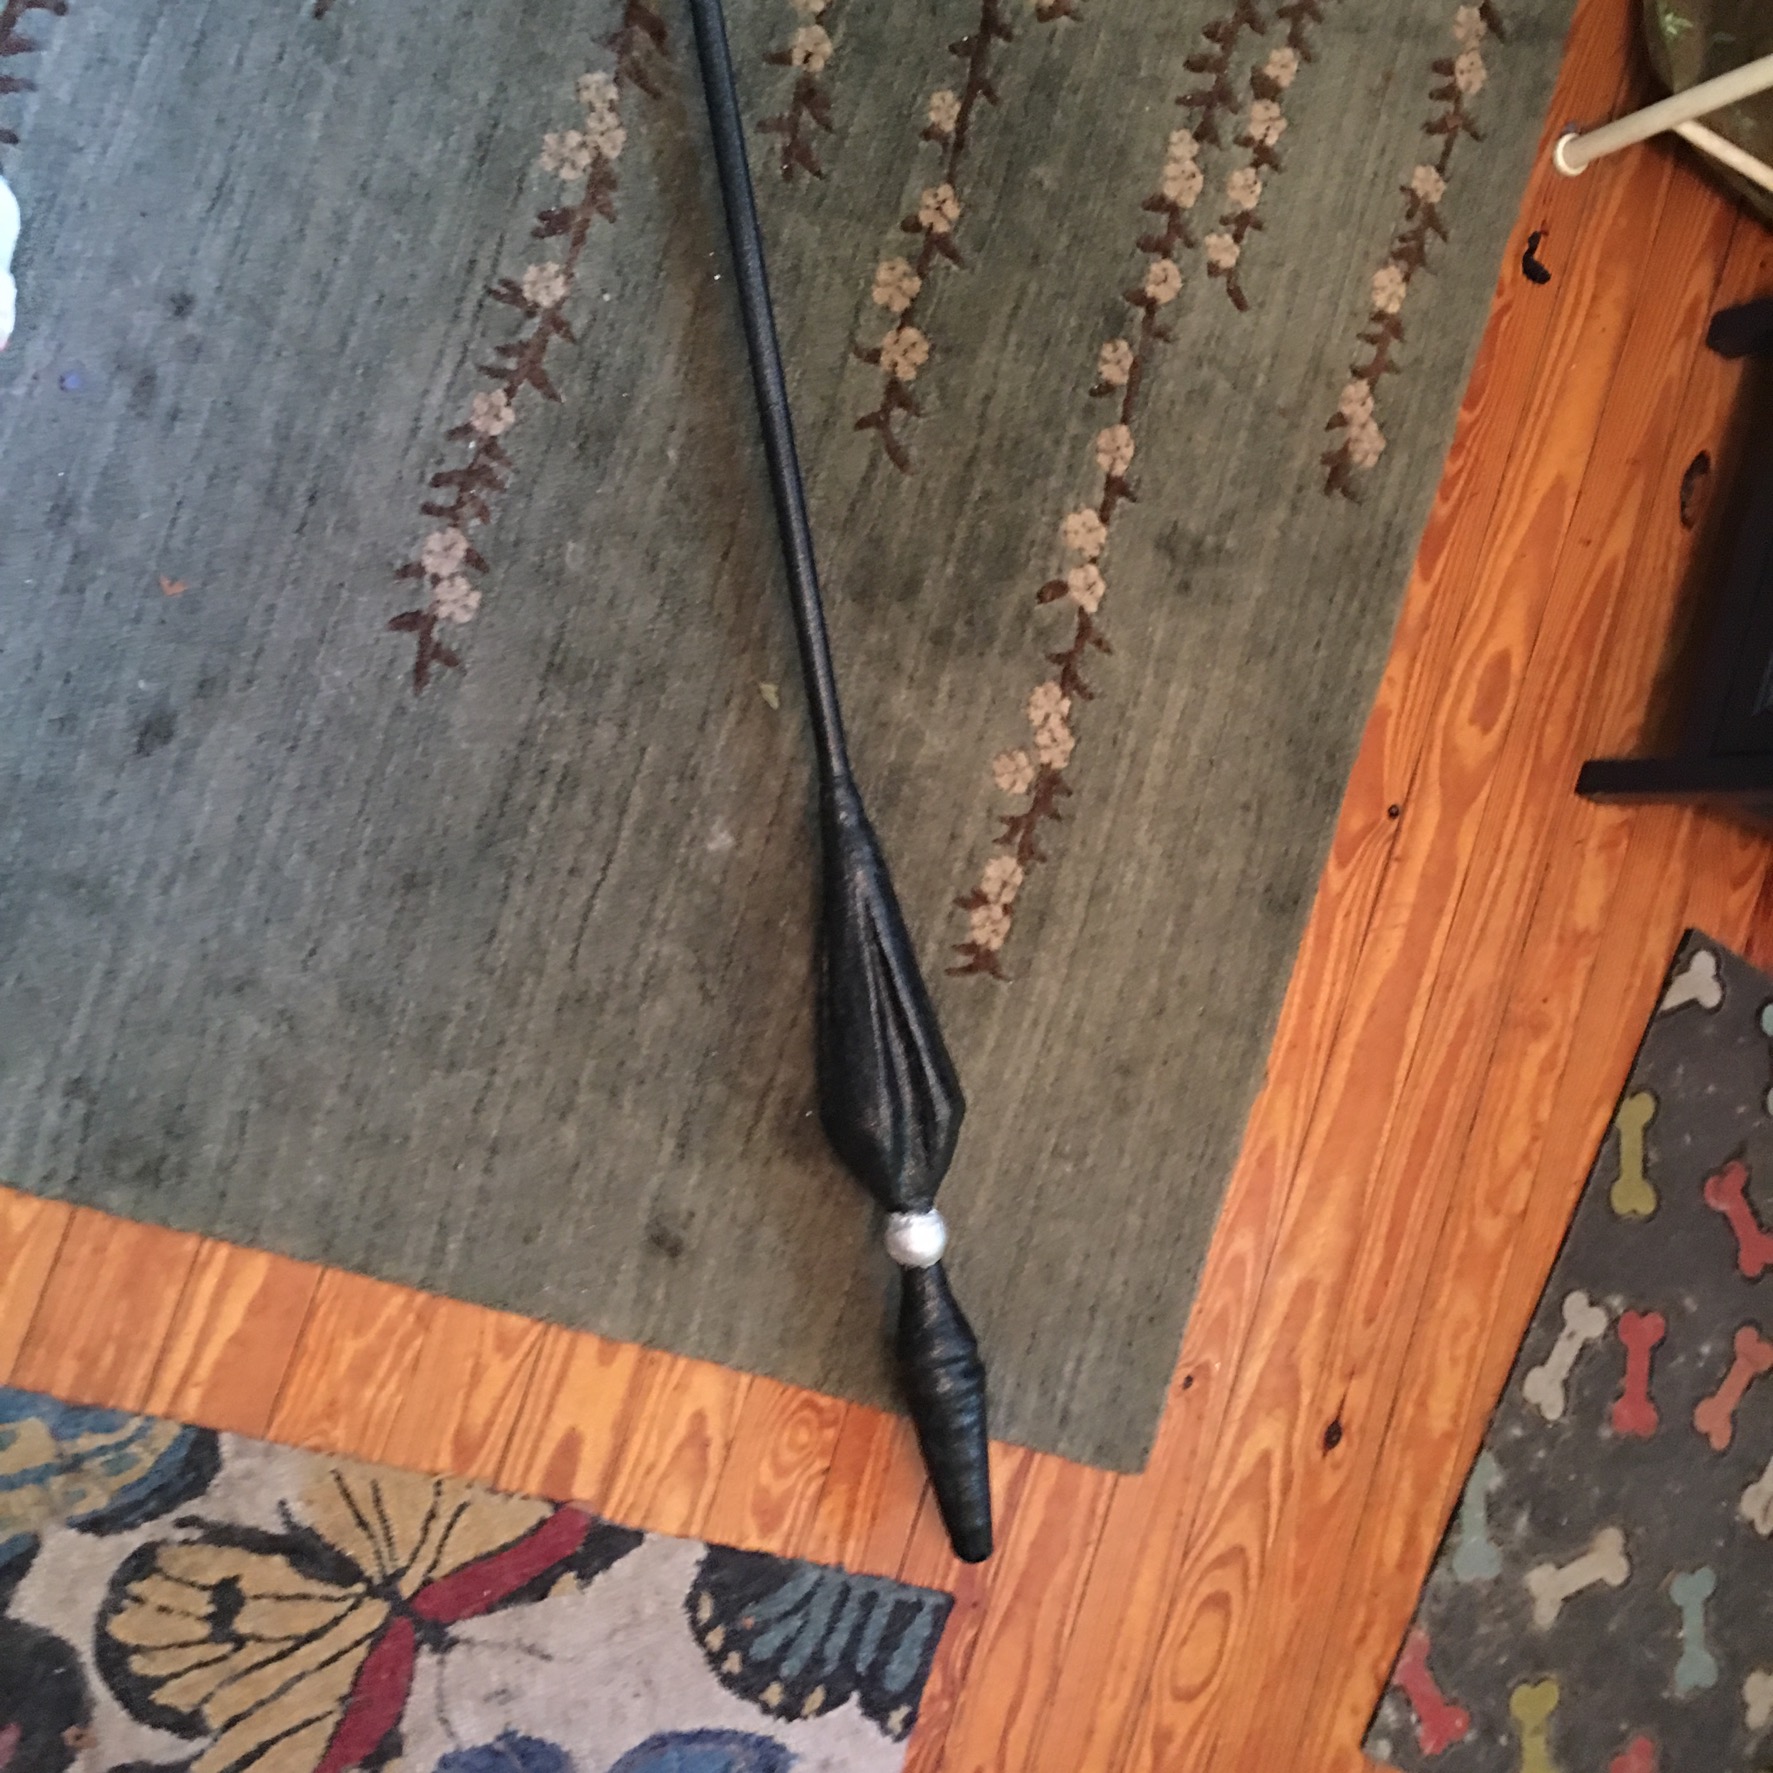
Once you have all of the materials start by looking at your reference of Sailor Saturn’s Glaive. There are many variations showing a different design of her Glaive. The anime version is different from the manga version which is different from the millions of fan art versions. For my Glaive I used the following image:

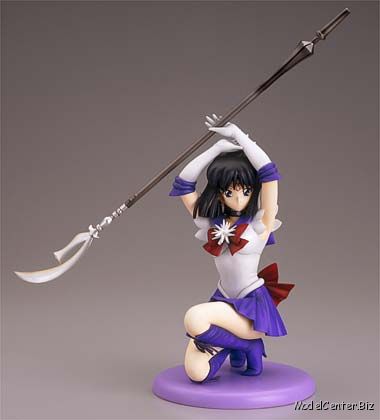
Now keep in mind, I like to make my cosplays a bit different from the original character. This is sort of a “signature mark” for me. However the overall shape and detail of the Glaive will be kept the same.
Step 2: PVC Pipe
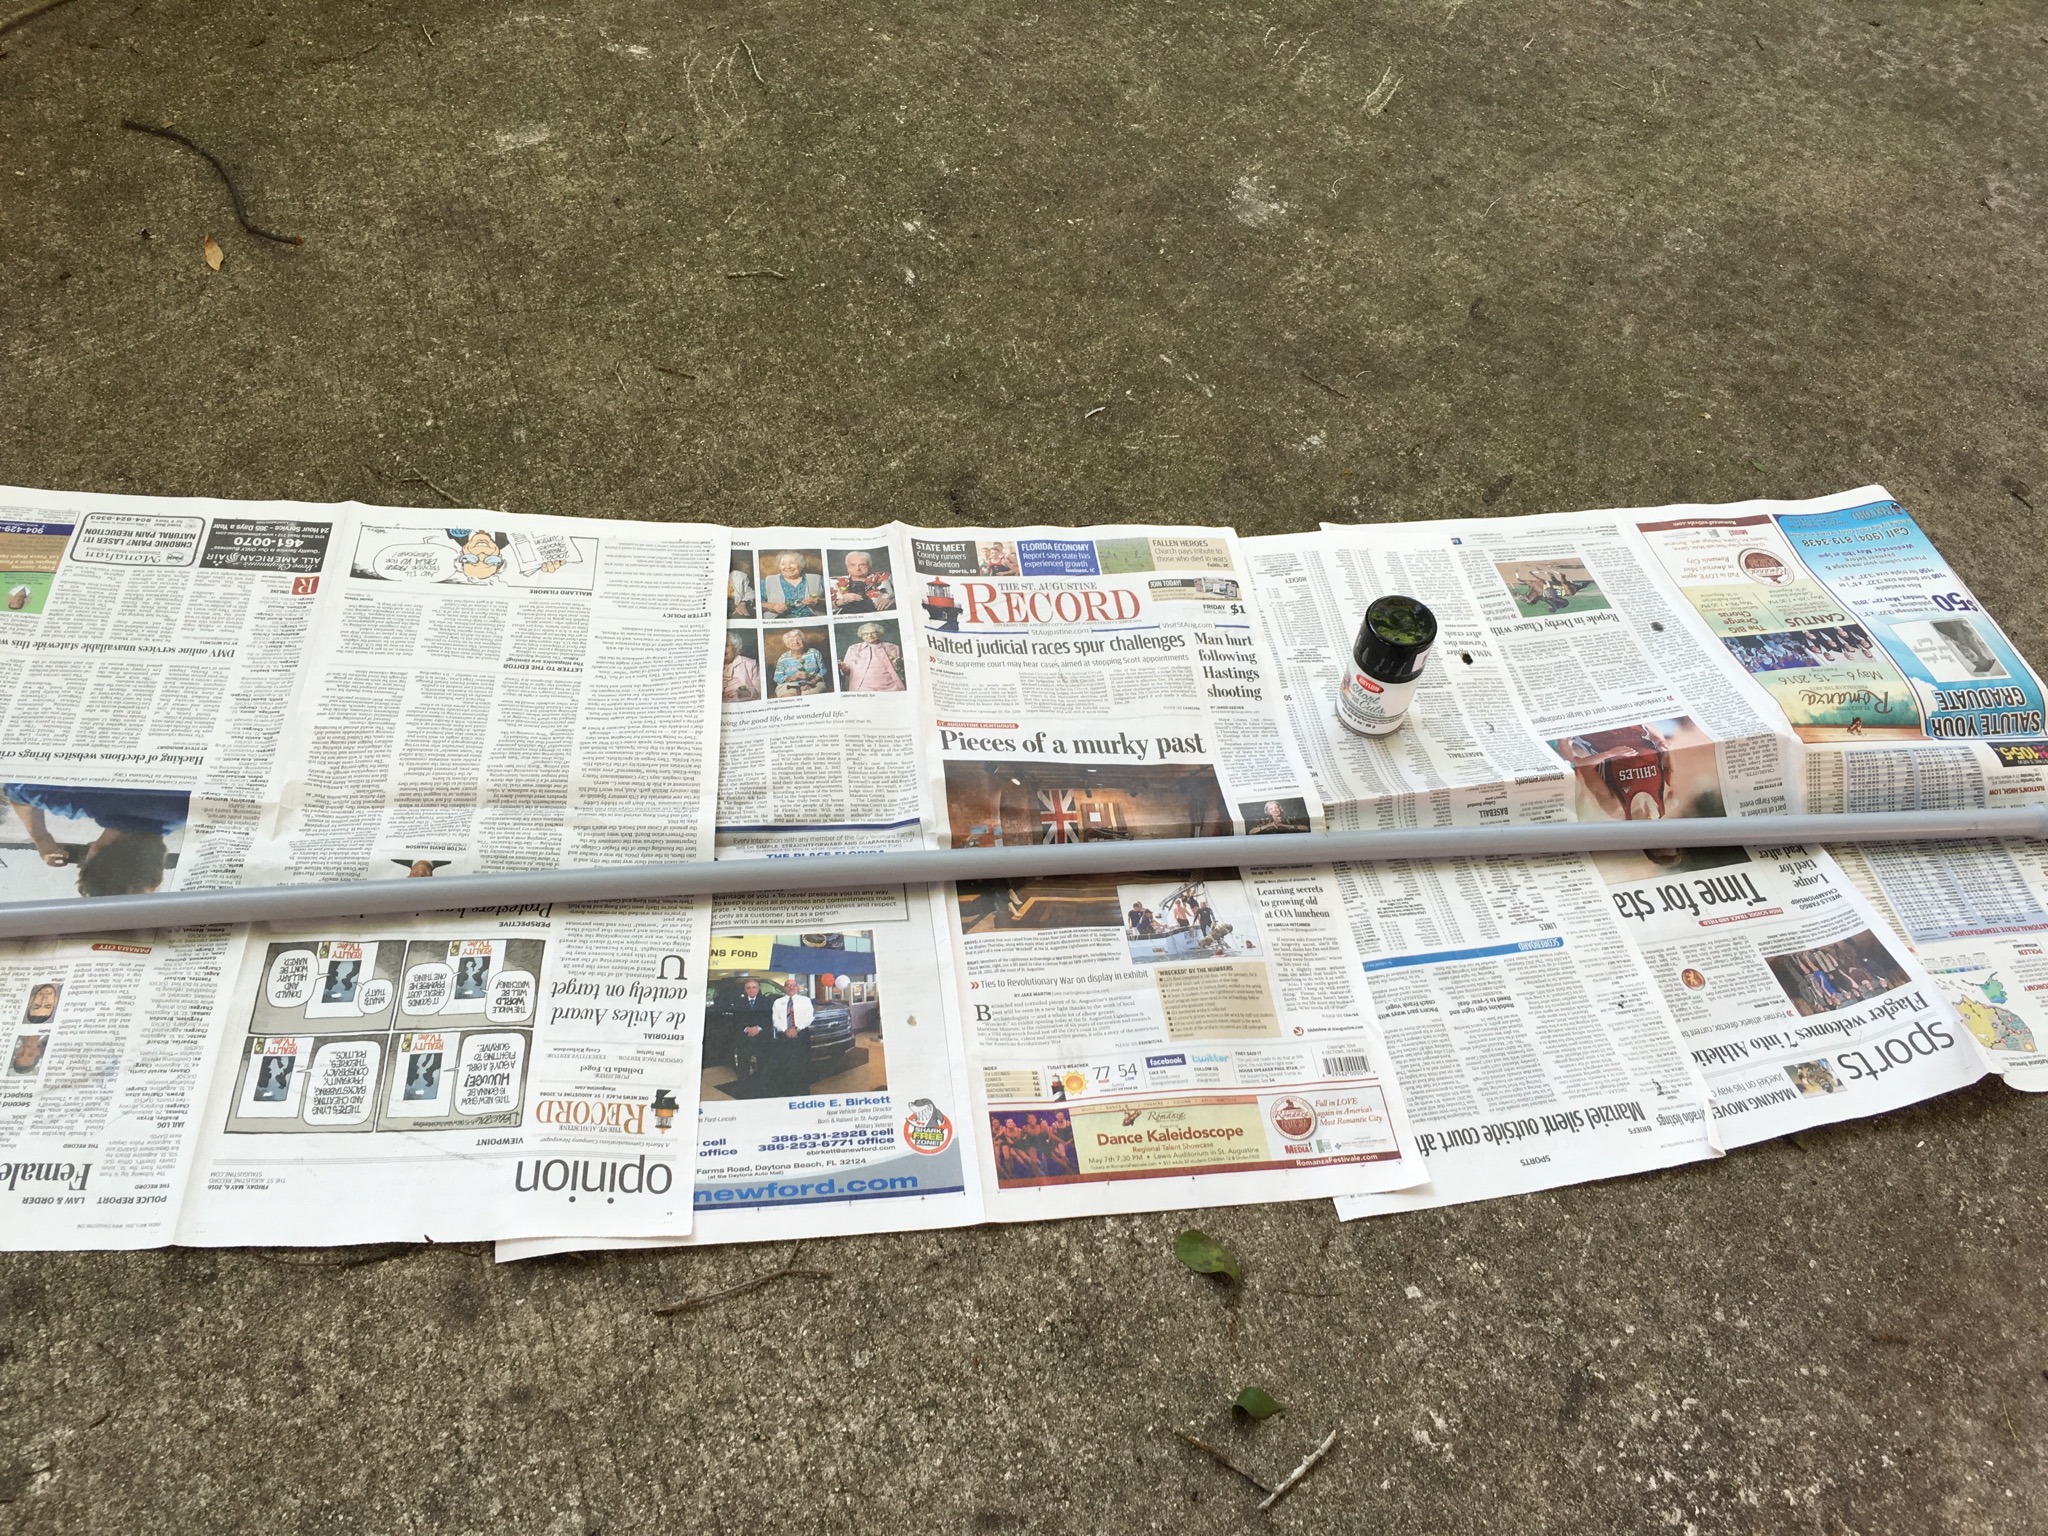
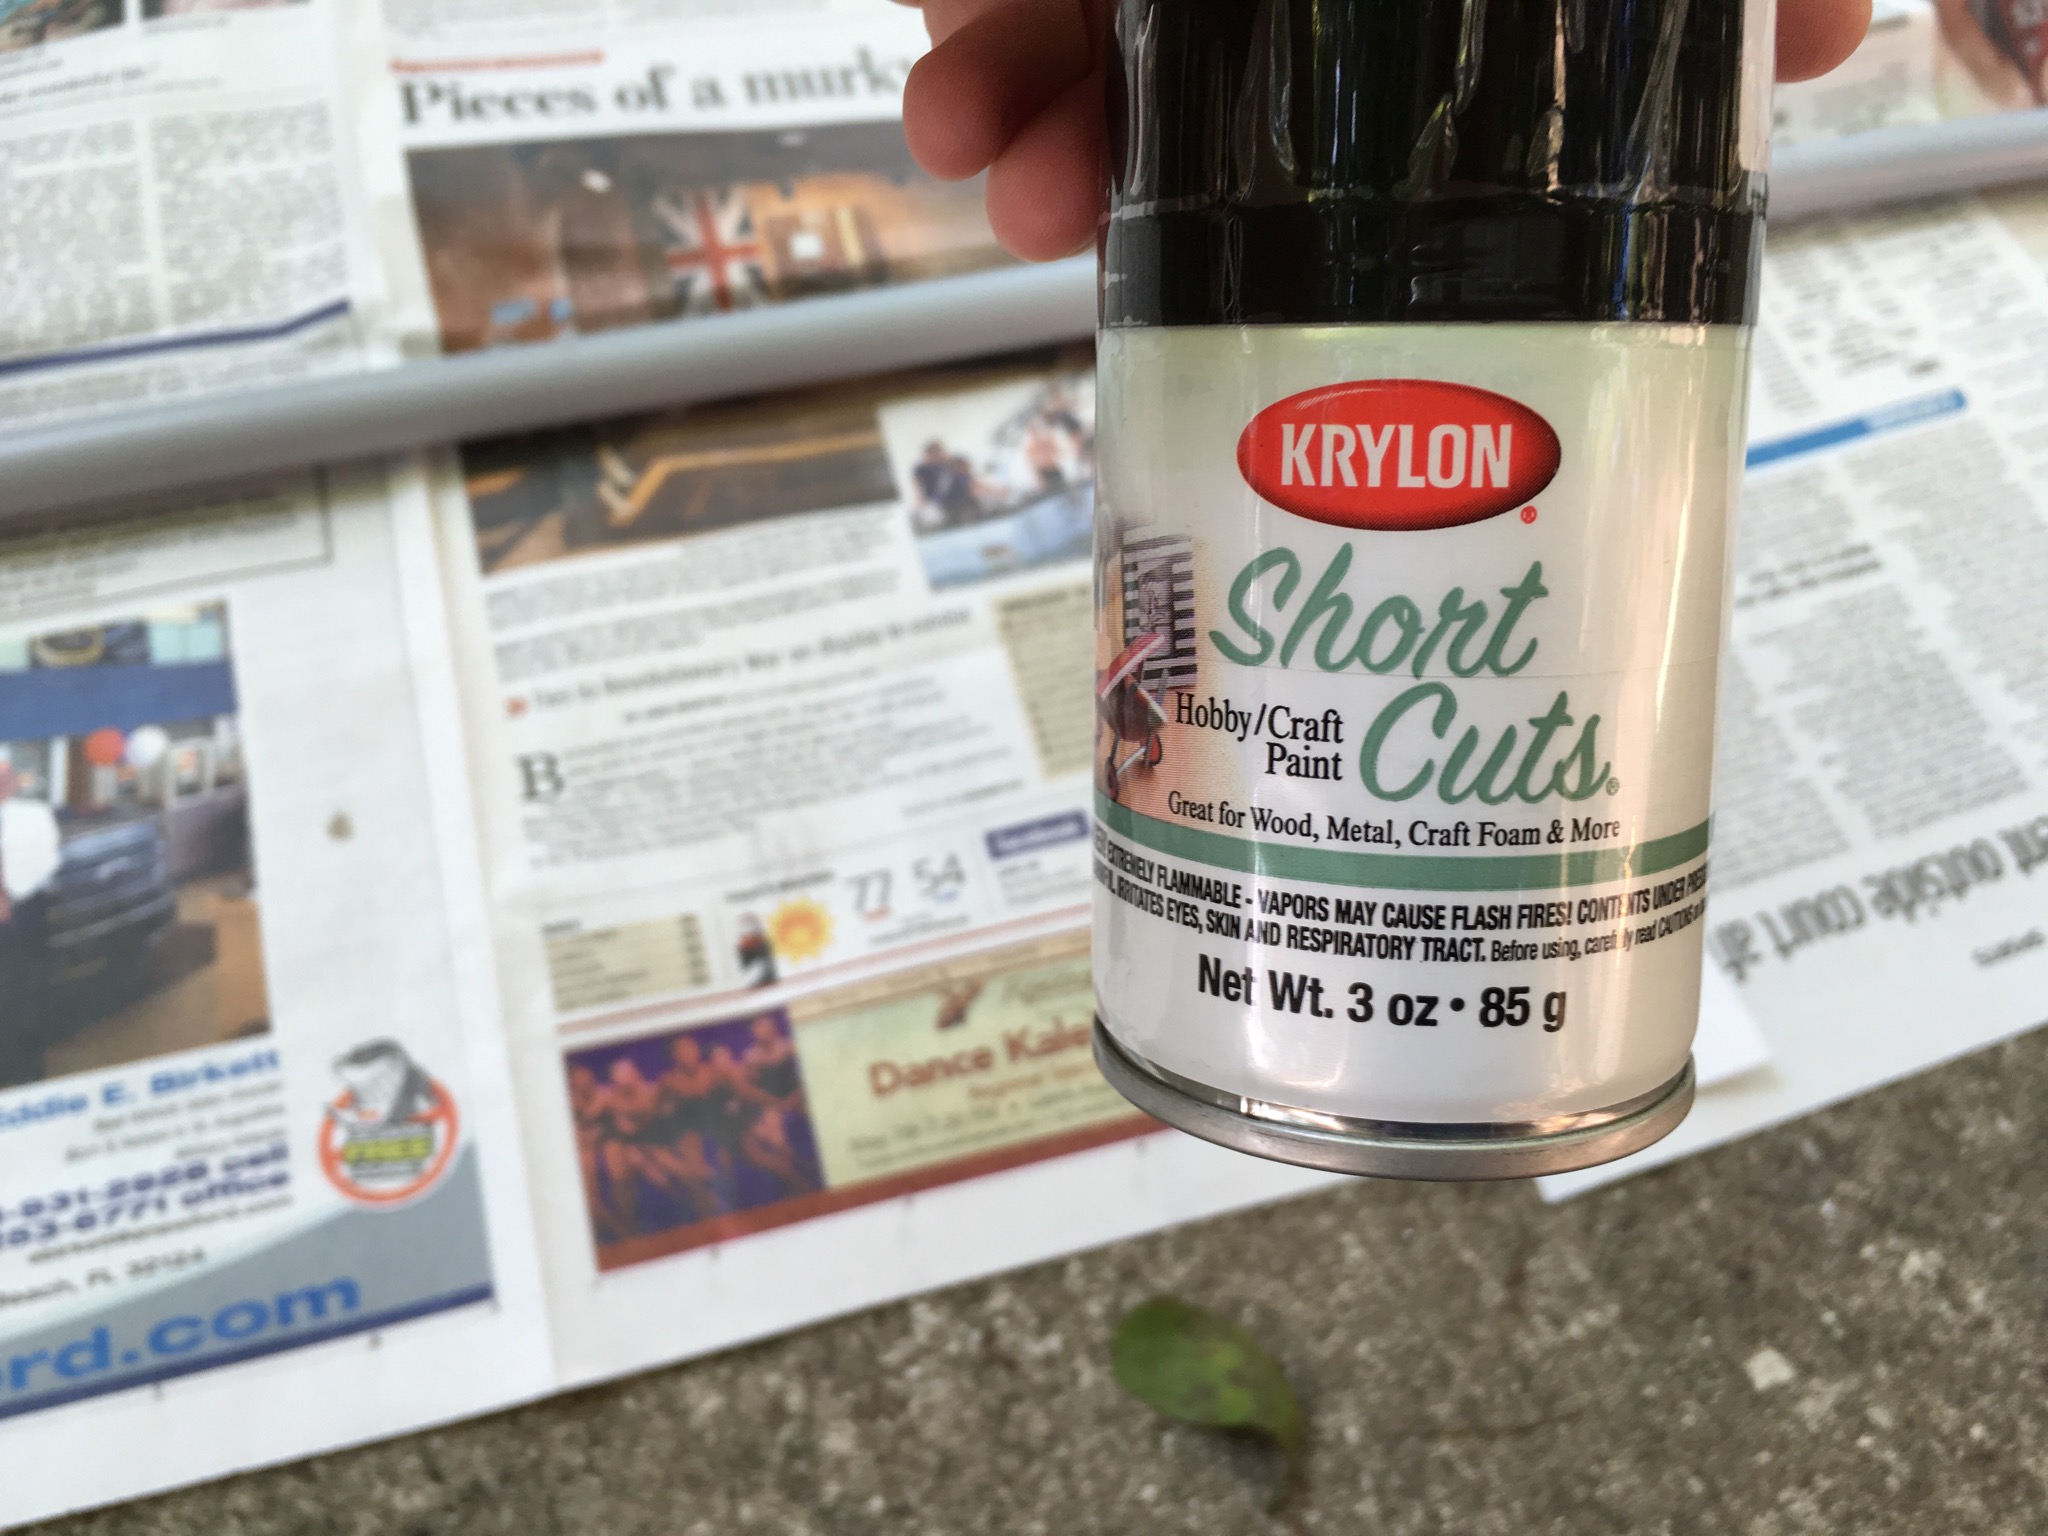
Get your PVC pipe (I got mine from Home Depot) and get it cut to your desired height. I got mine cut to be 5 feet tall. I started out by spray painting the PVC pipe solid black using regular Krylon spray paint. The reason you spray paint the PVC pipe to begin with is because once the styrofoam and the plaster goes on you won’t be able to access parts of PVC pipe, and you don’t want the gray color of the pipe to show through.
Step 3: Styrofoam; Bottom of Glaive
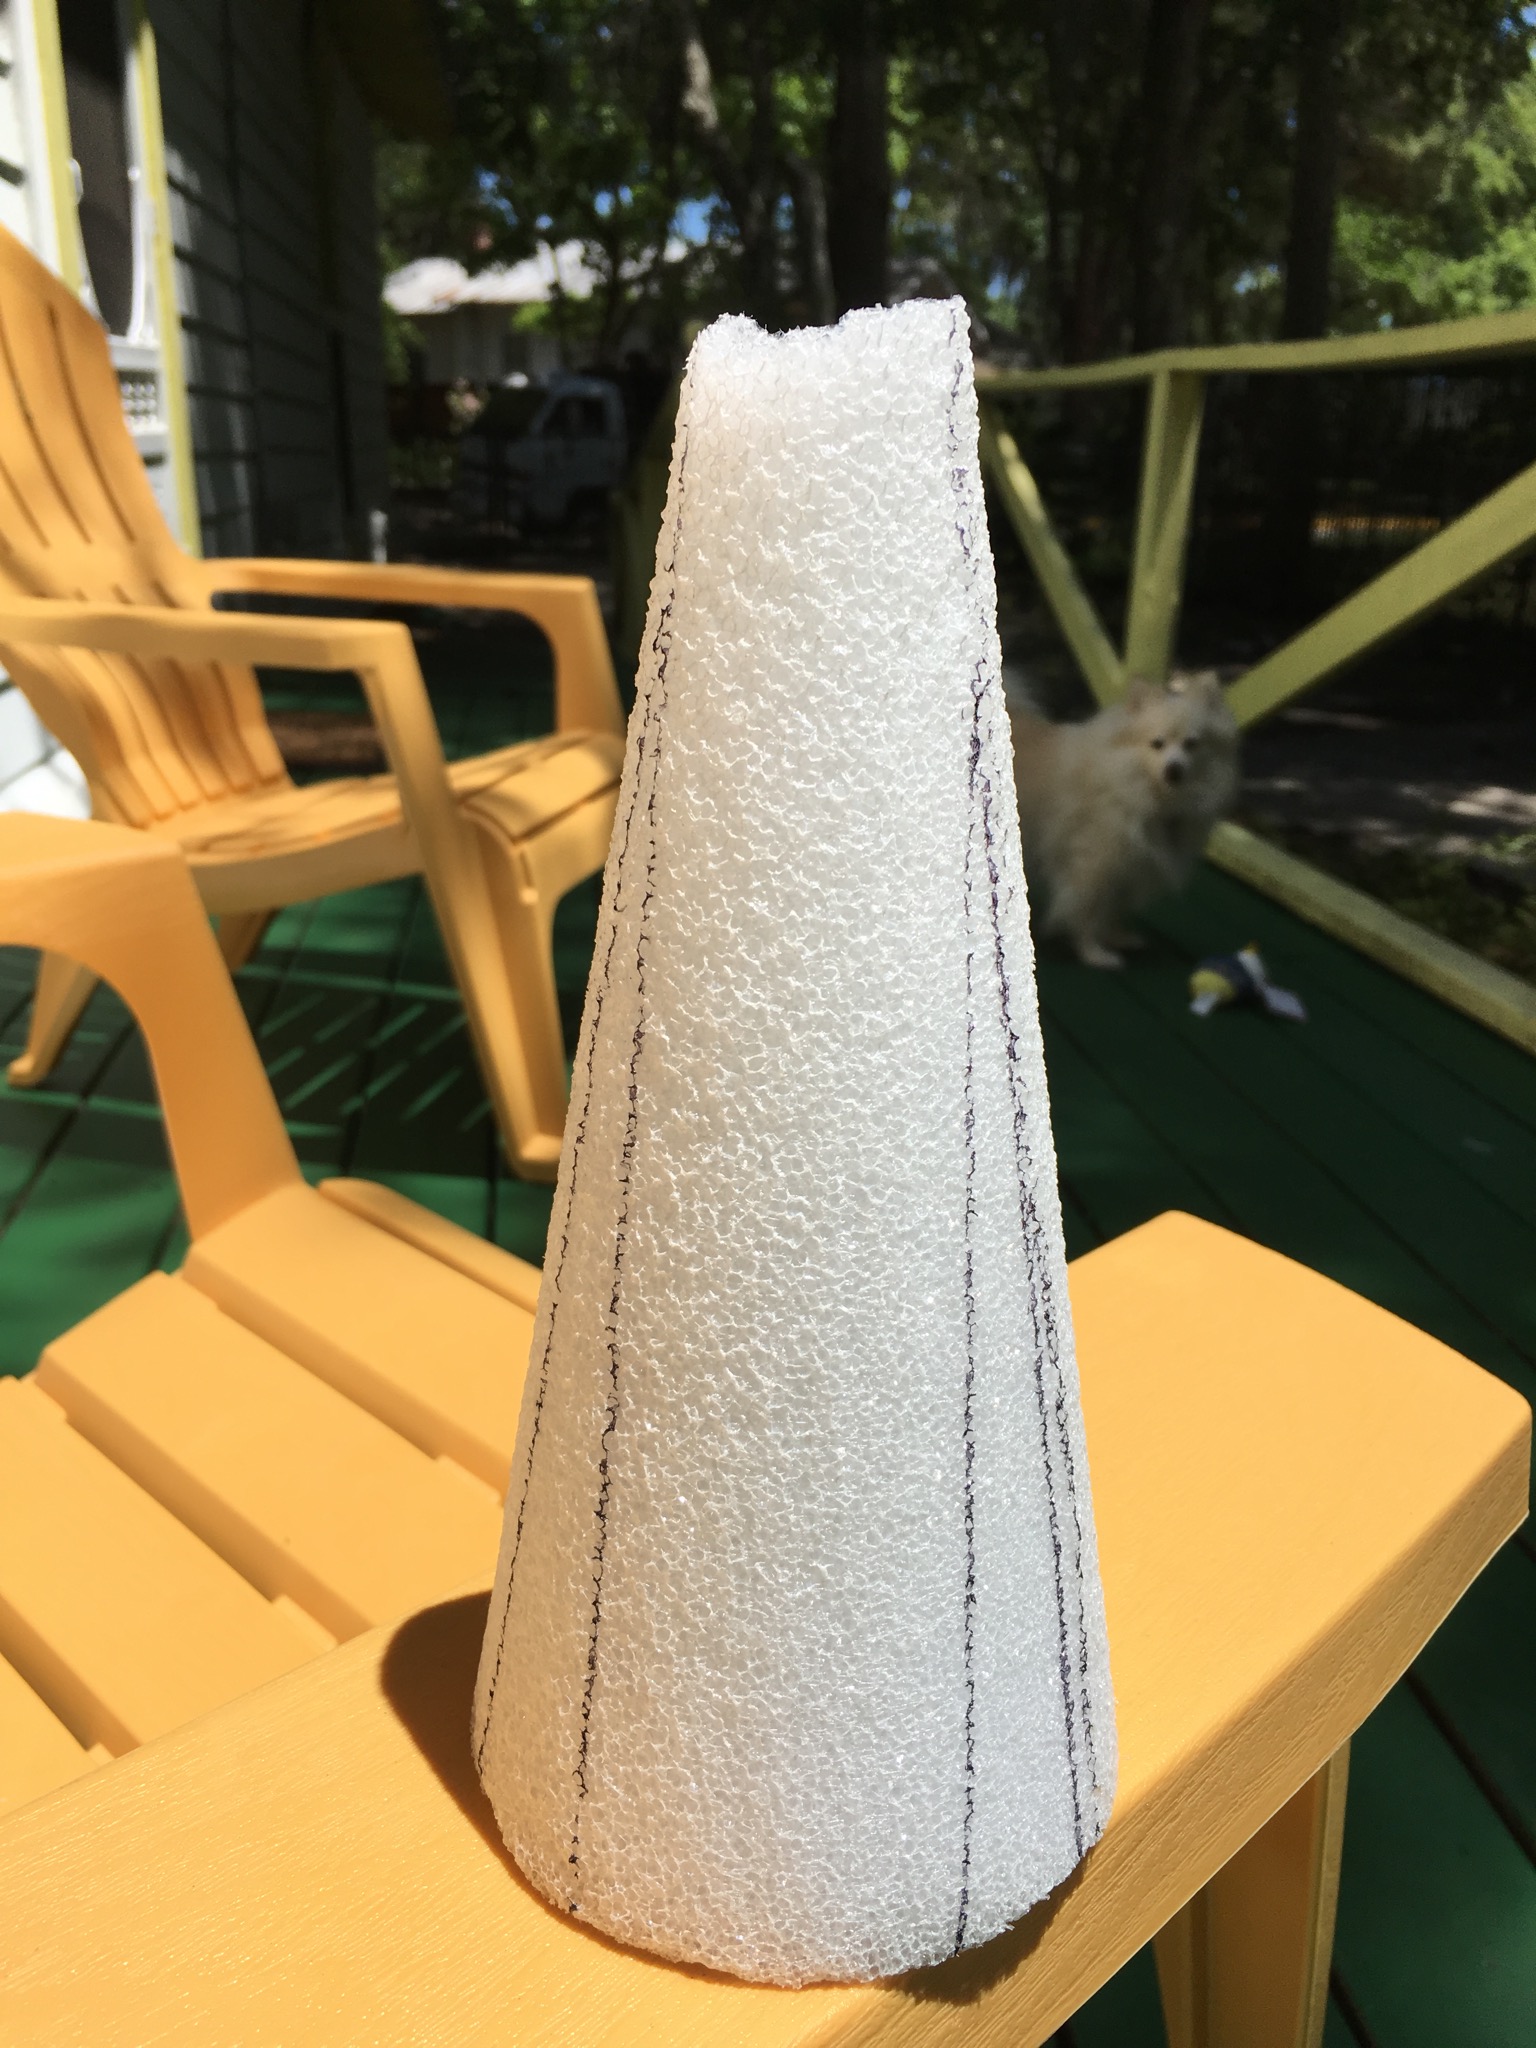
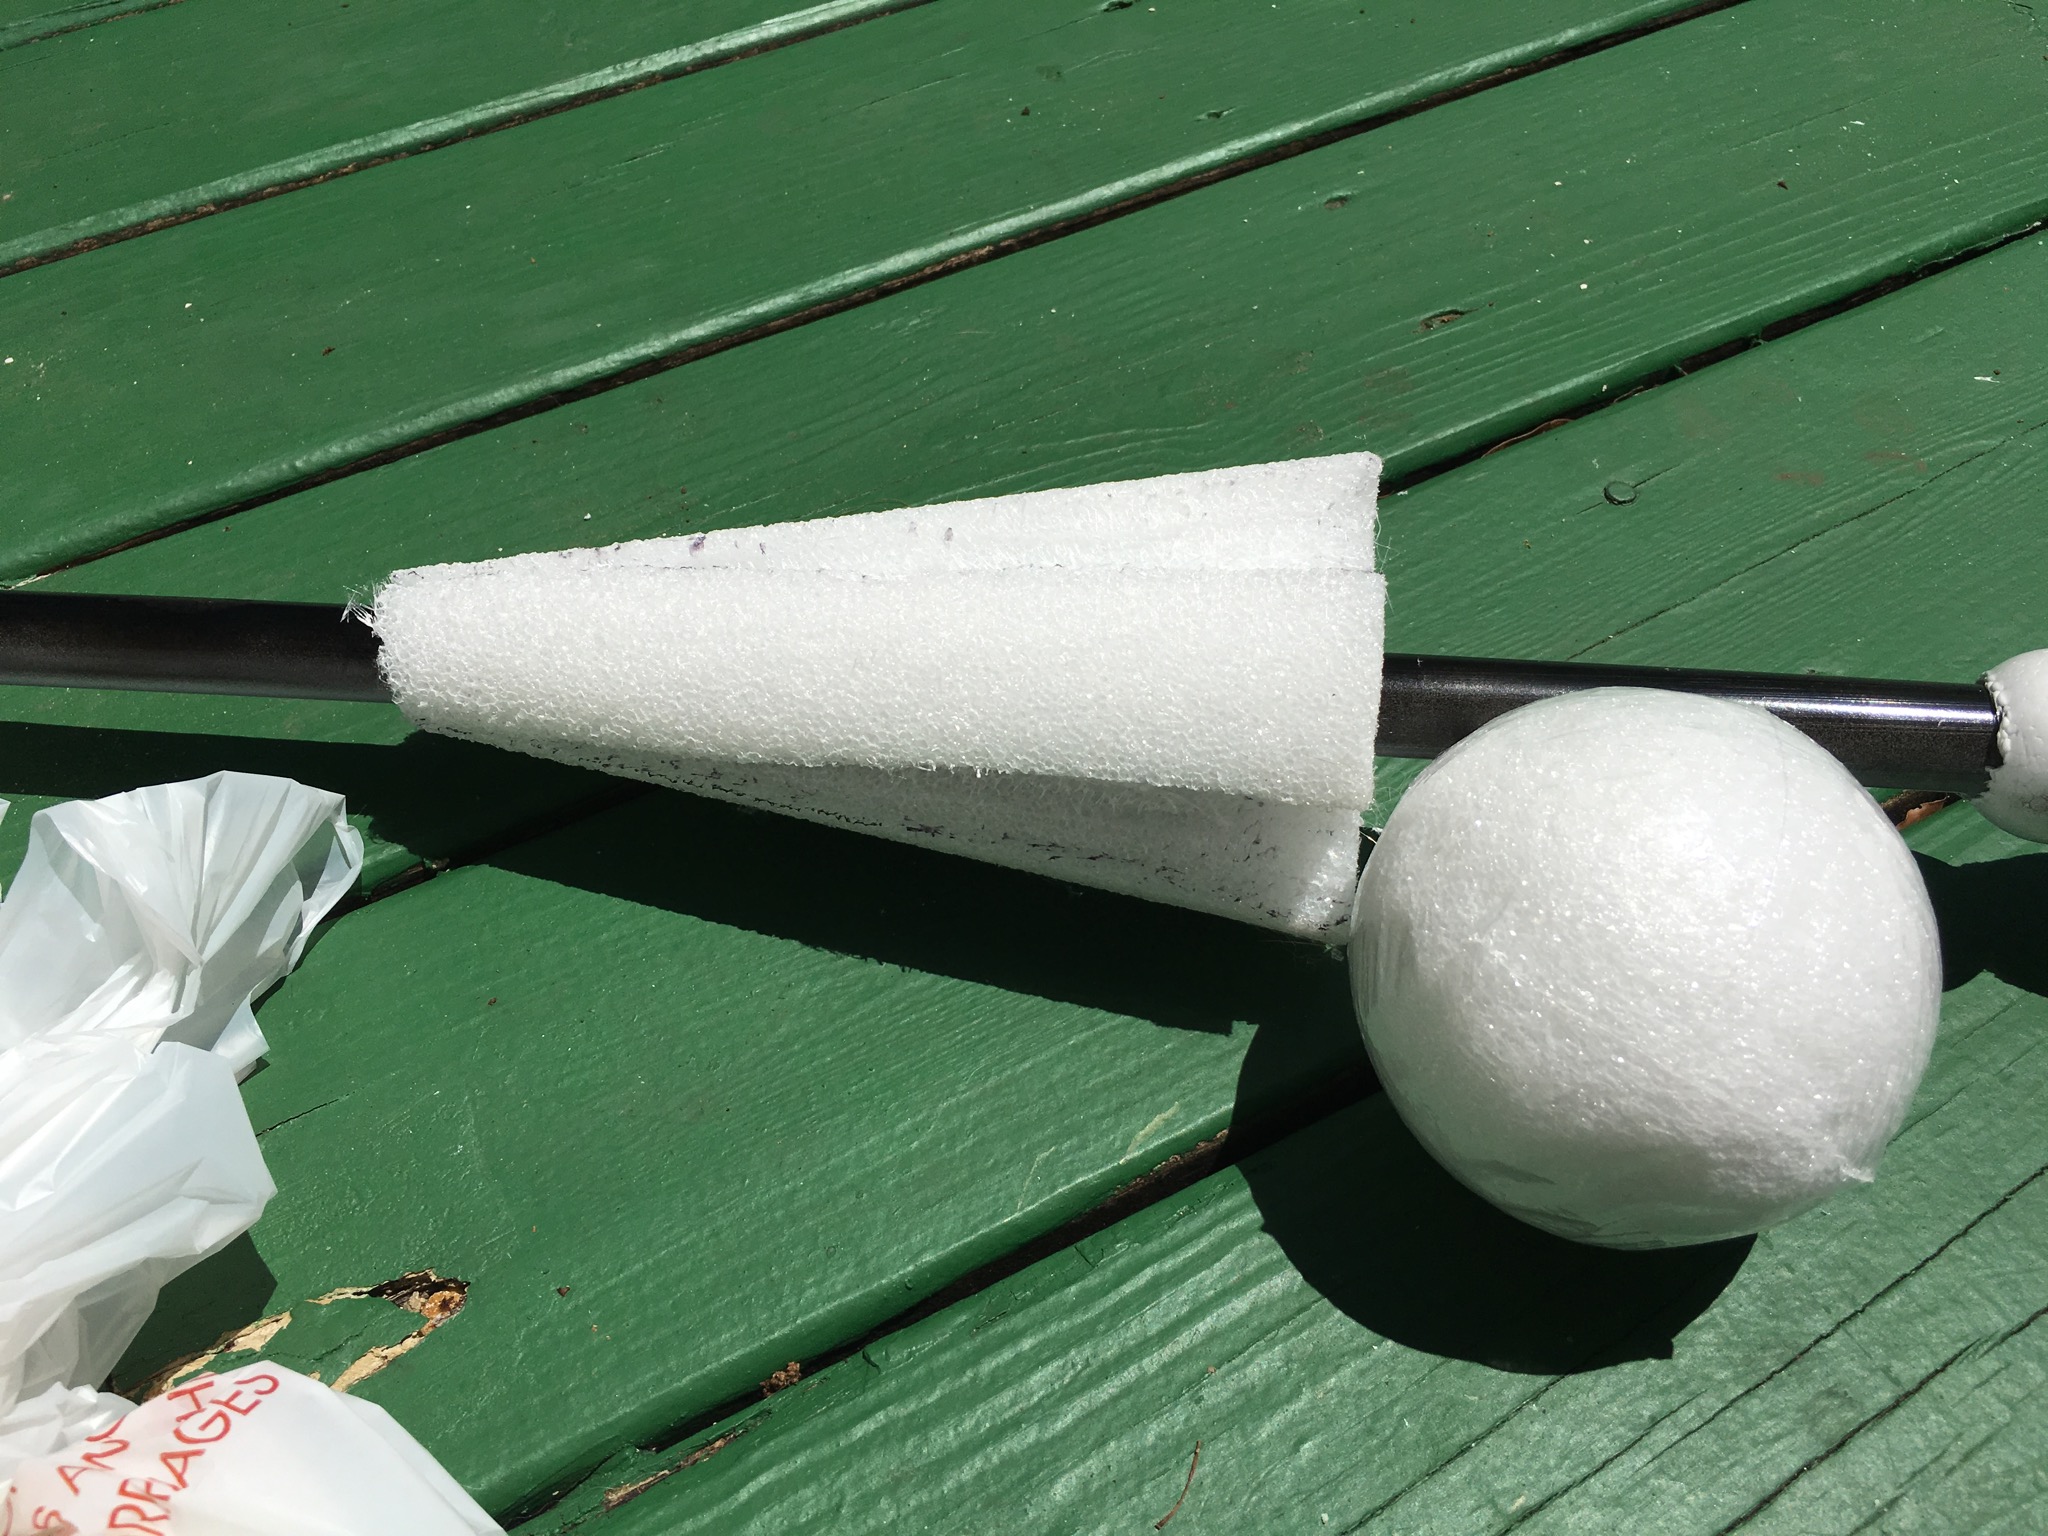
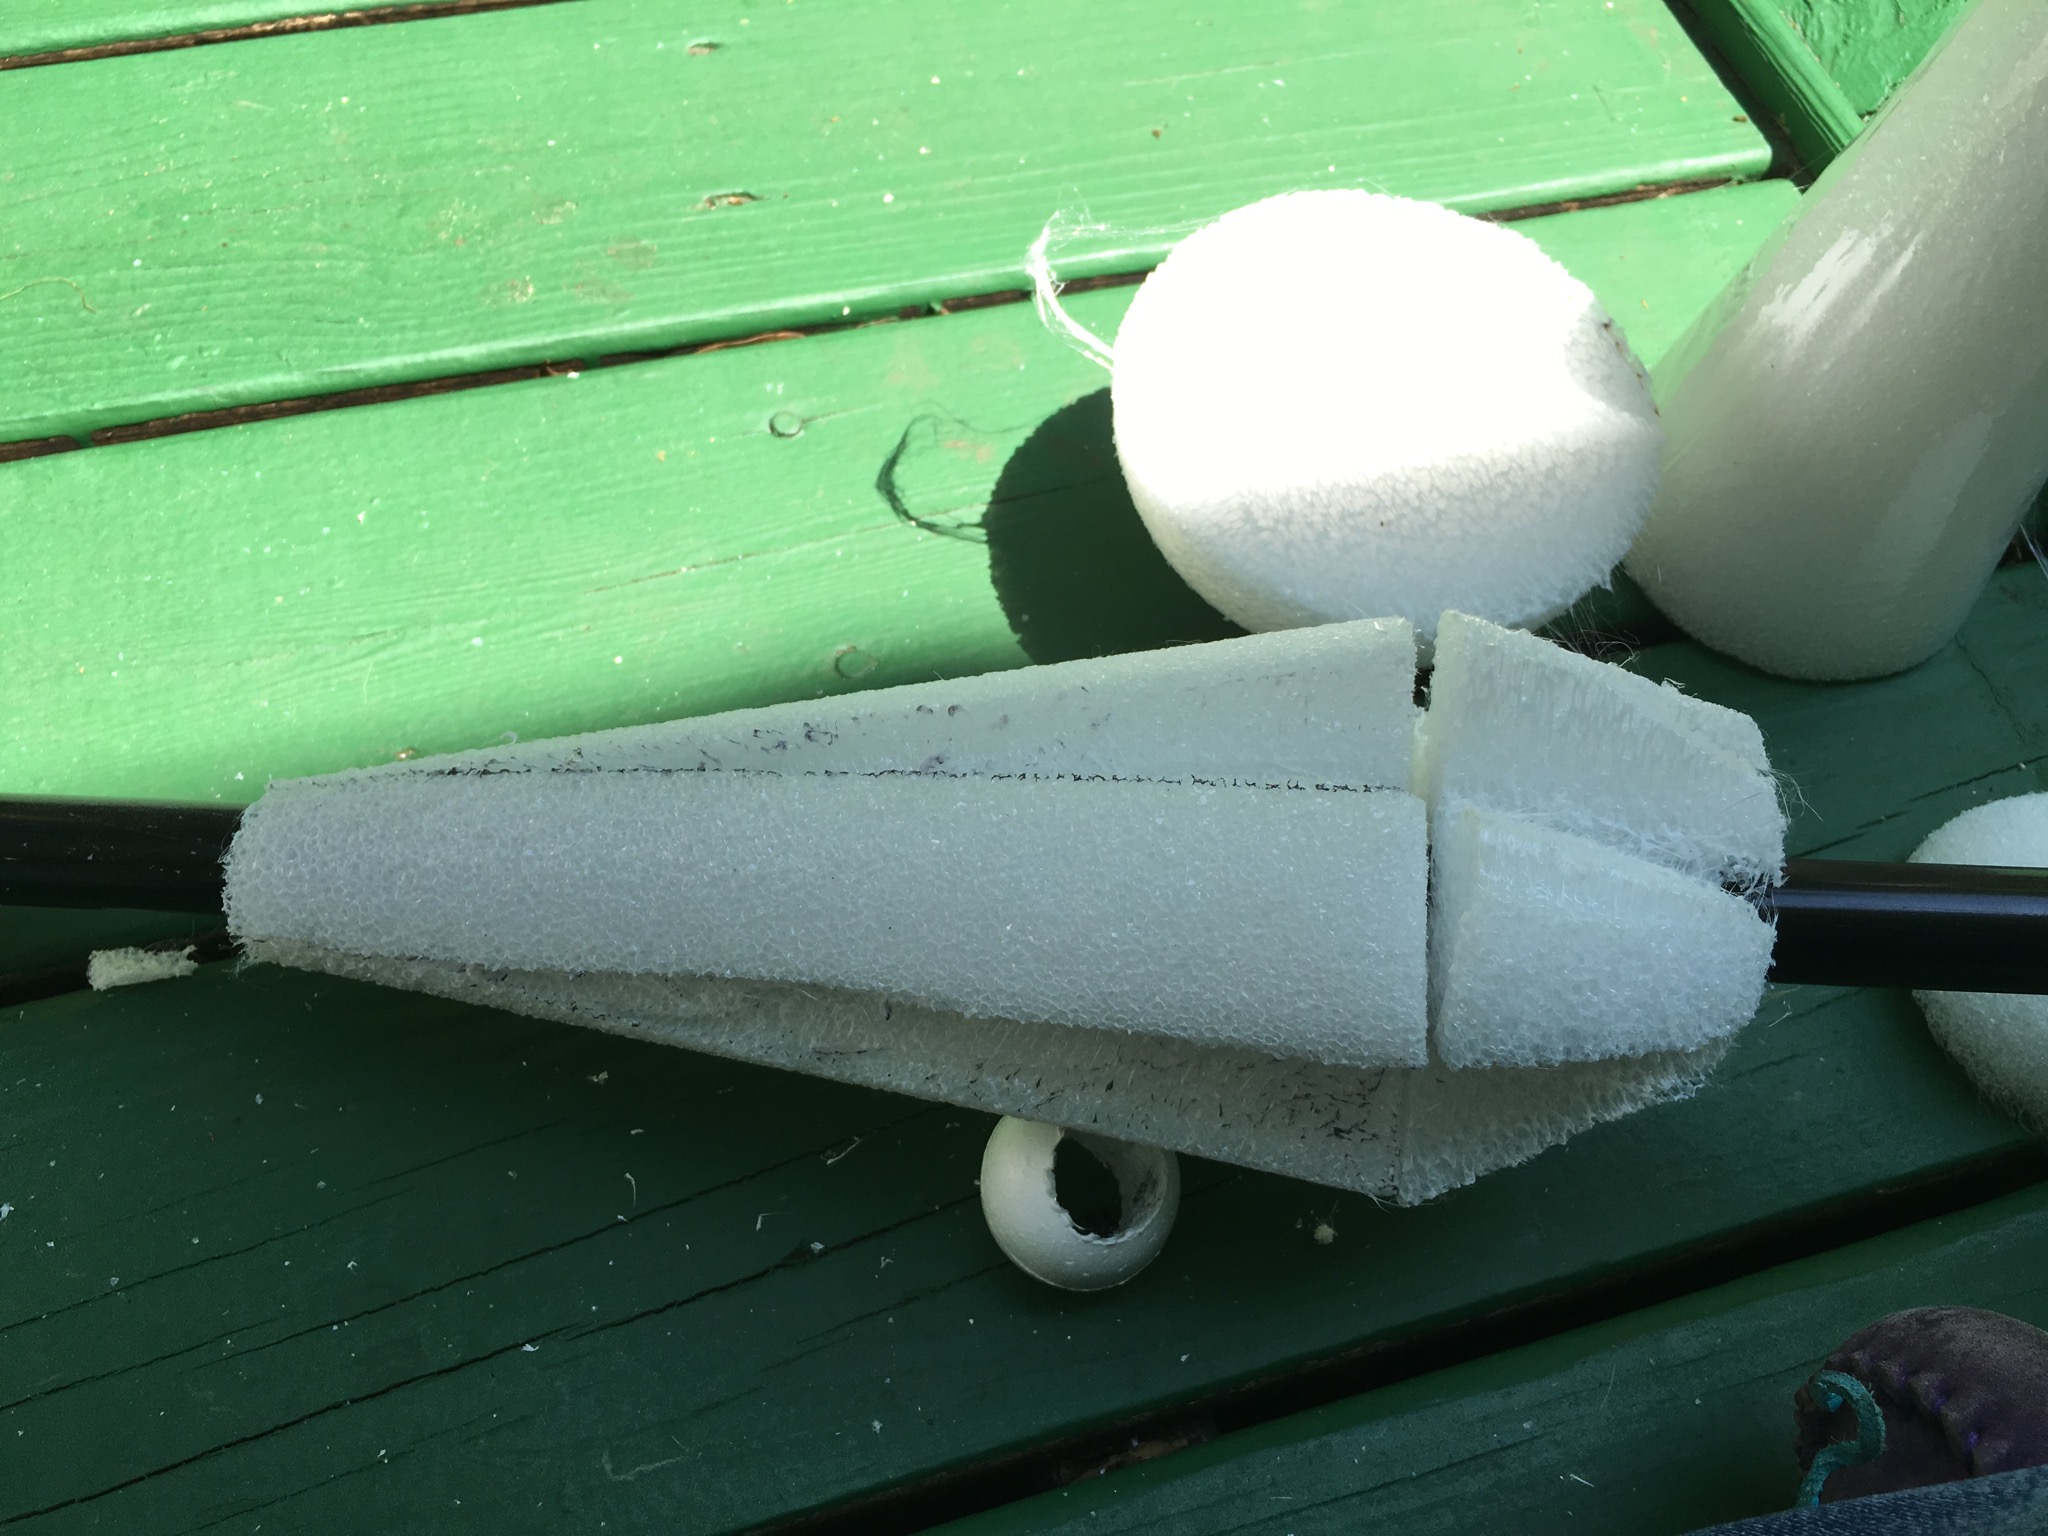
Move onto the styrofoam. We are going to start with the labeled section below.
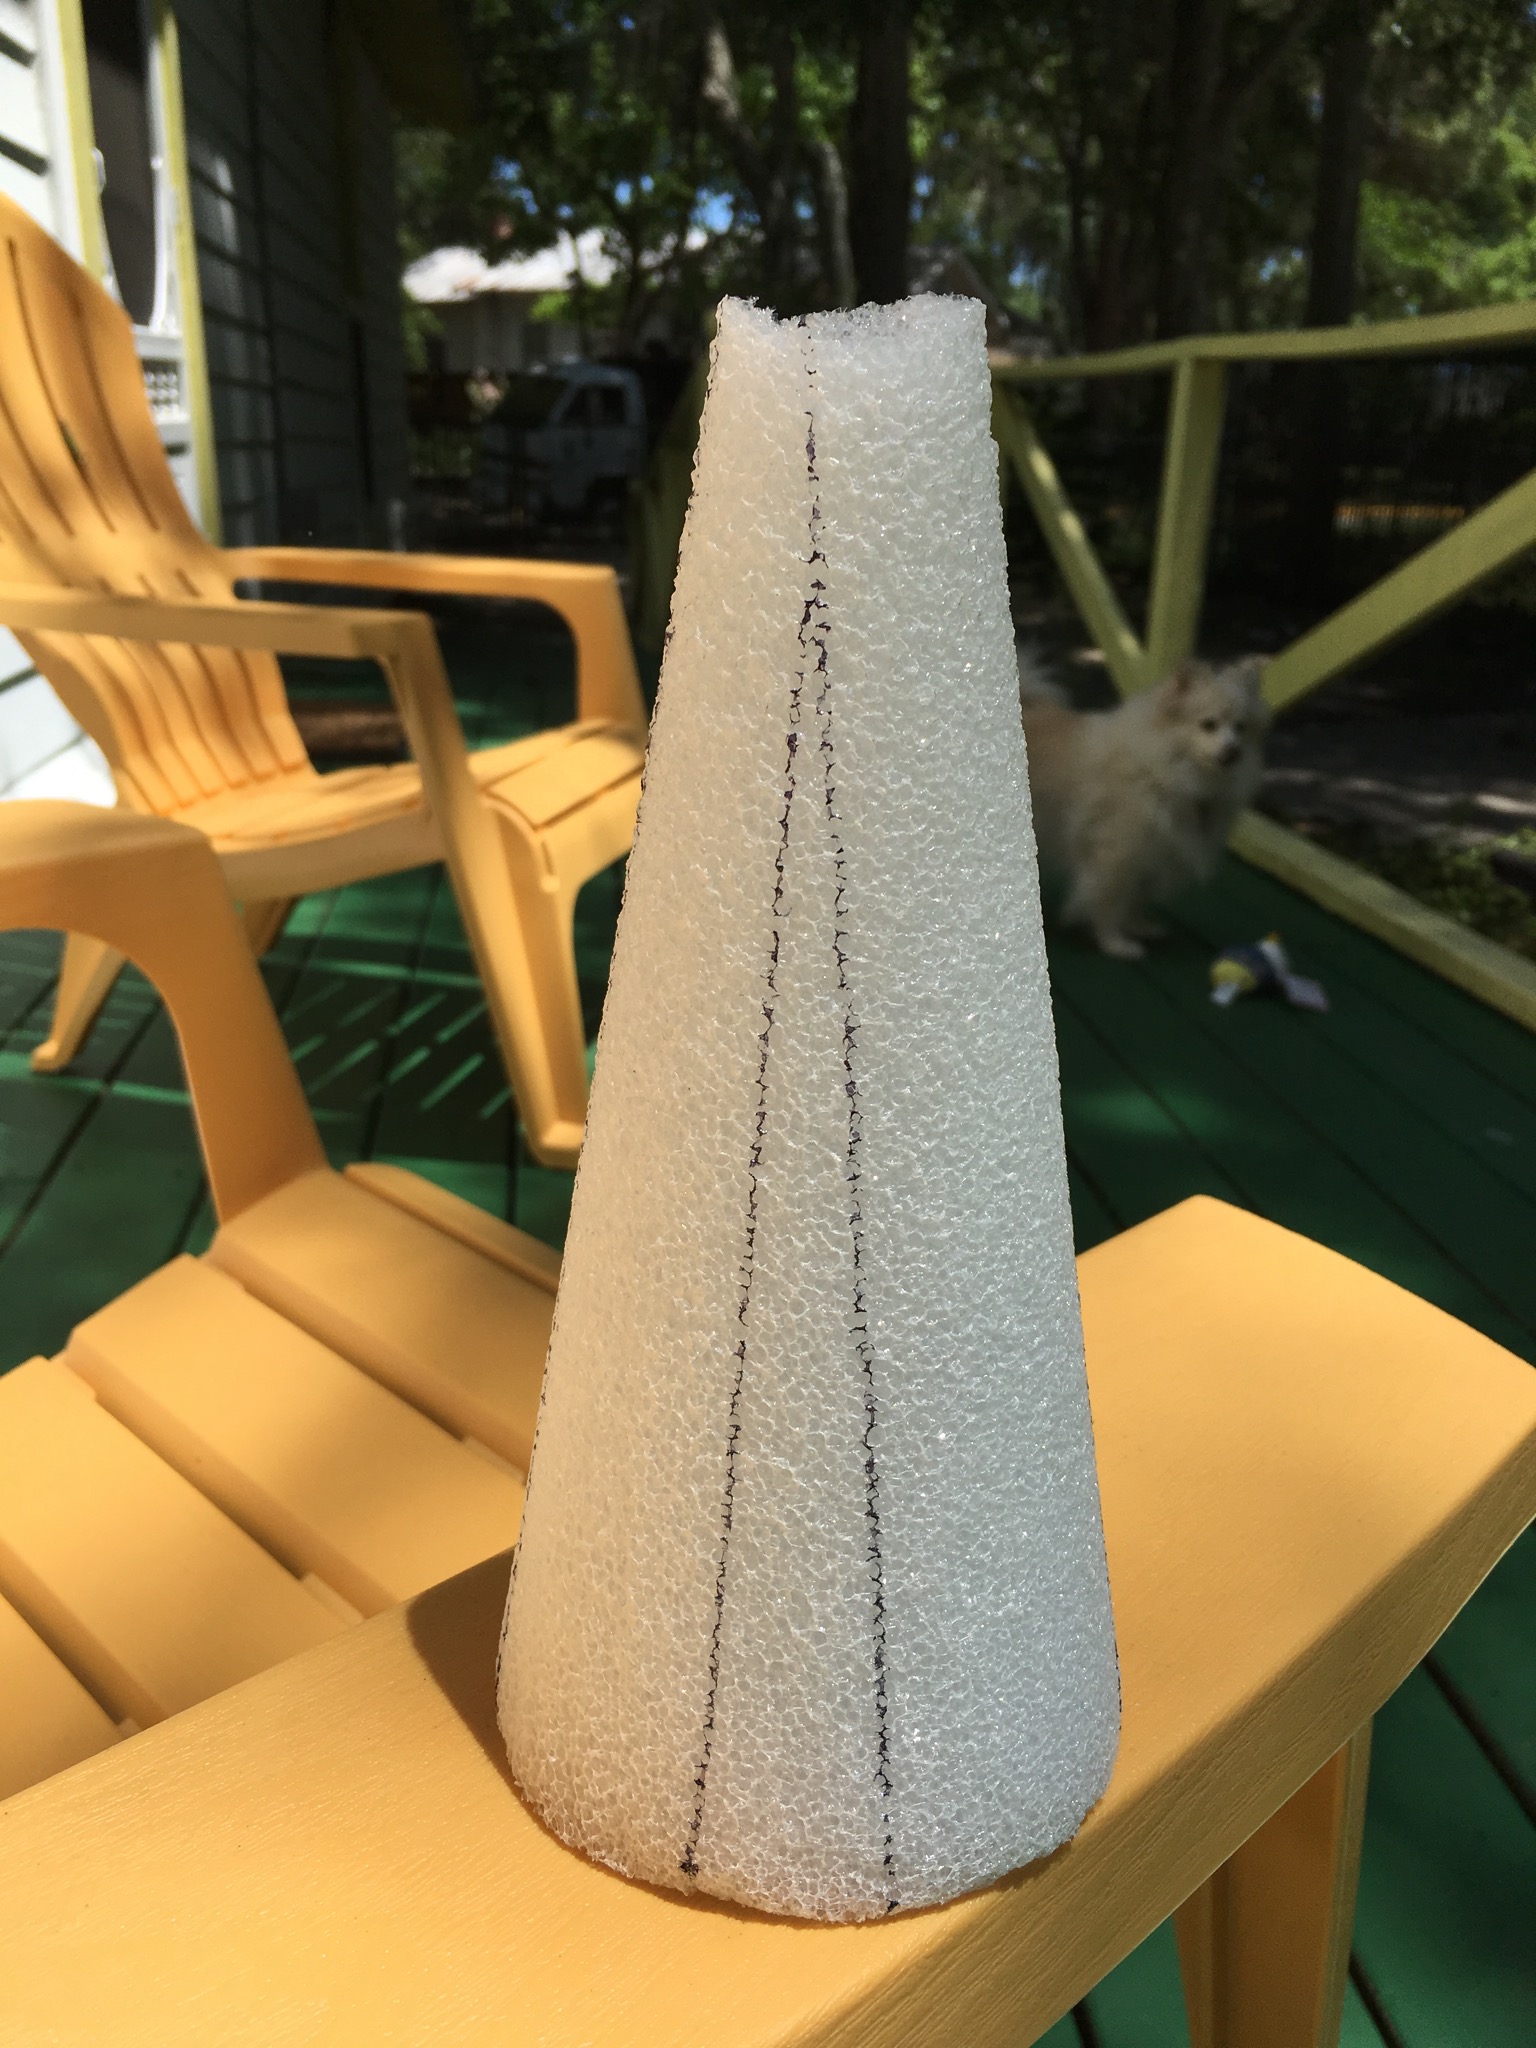
This is the “artistic part” of the staff due to the grooves shown. Start with your tallest cone of styrofoam and slowly start to screw your PVC pipe into the center of the cone. Use a back and forth twisty motion. It may take a few minutes but eventually you will pierce through the other end. Note: Start from the bottom of the cone and work your way to the tip of the cone. Do not worry if the top breaks apart. We can fix this with clay and plaster. In the end you will have something that looks like this:
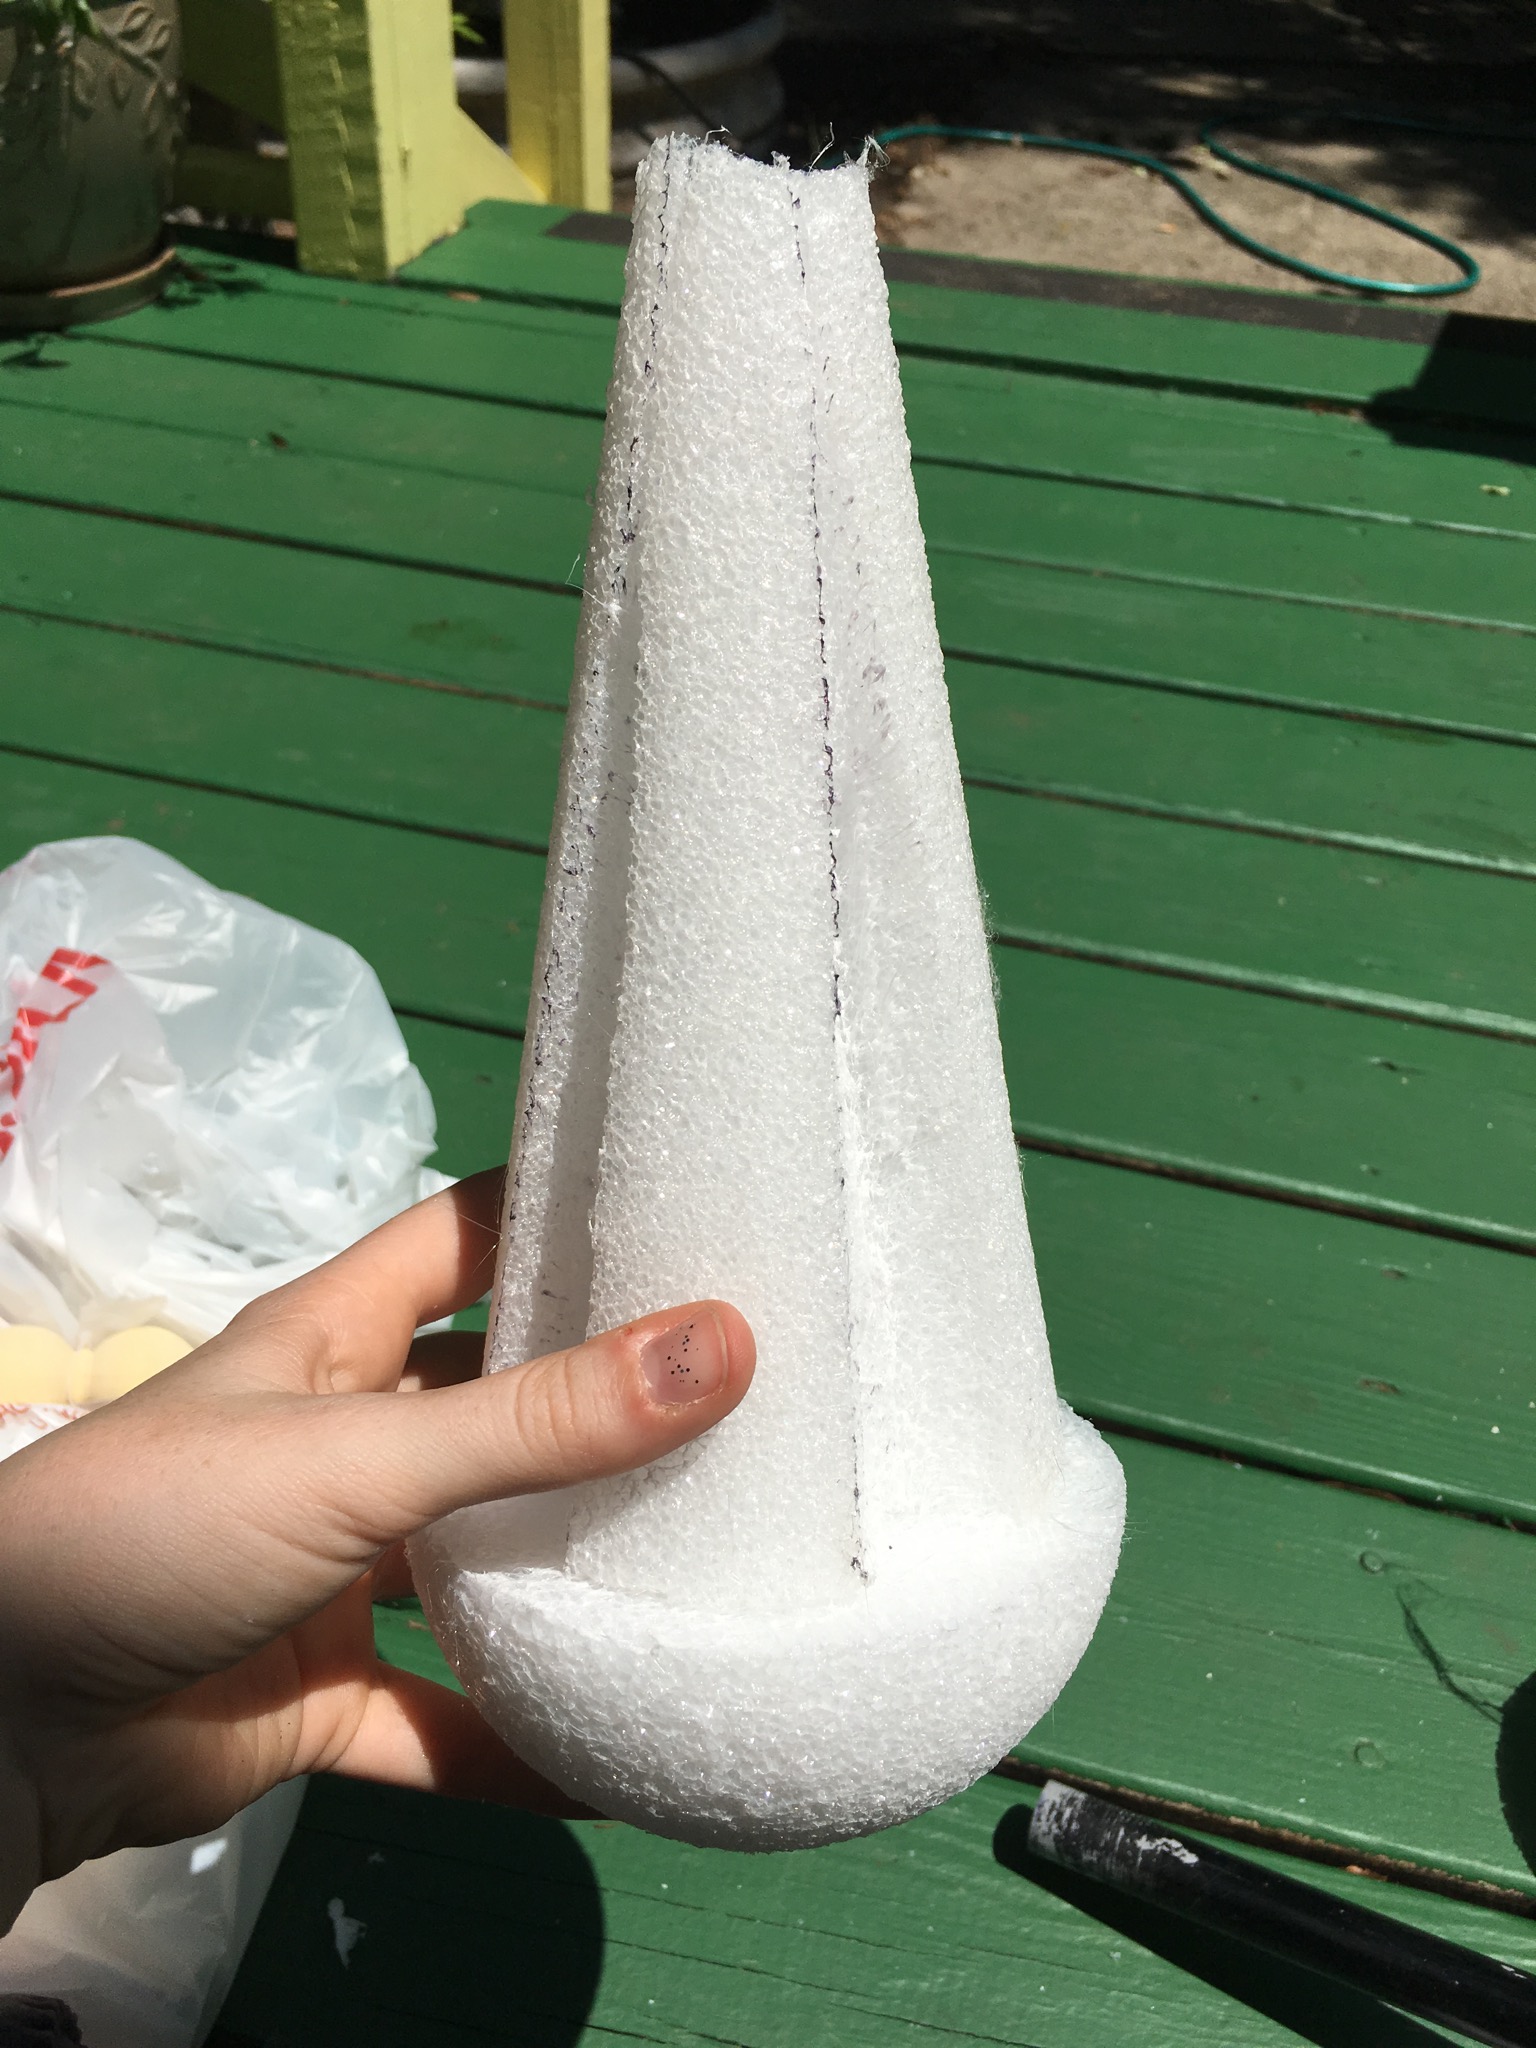
Next we have to use a Sharpie marker to draw the grooves. For mine I measured about an inch wide at the bottom of the cone and then connected these two points towards the top of the cone. In total I had about 4 grooves, spaced about 3-4 inches apart.
Now for the cutting part. I implore you to use a styrofoam heat cutter. You can easily find these cutters at your local craft store. Here is a picture of what the tool looks like:

This tool goes for around $9.99 and it is amazing! The only problem is that it is very delicate. Do not try and push your way through the styrofoam so fast. The needle part will start to bend and eventually snap. Be patient as you carve through the styrofoam. This tool uses high heat to melt the styrofoam and you will immediately notice the styrofoam turning into wispy webs as you carve through. Be careful not to burn yourself!
Note: If you buy this tool it will say that you can only use “FloraCraft Foam” to cut. This is not true! I have used this on smooth foam and green foam (not sure the technical name) and it works perfectly!
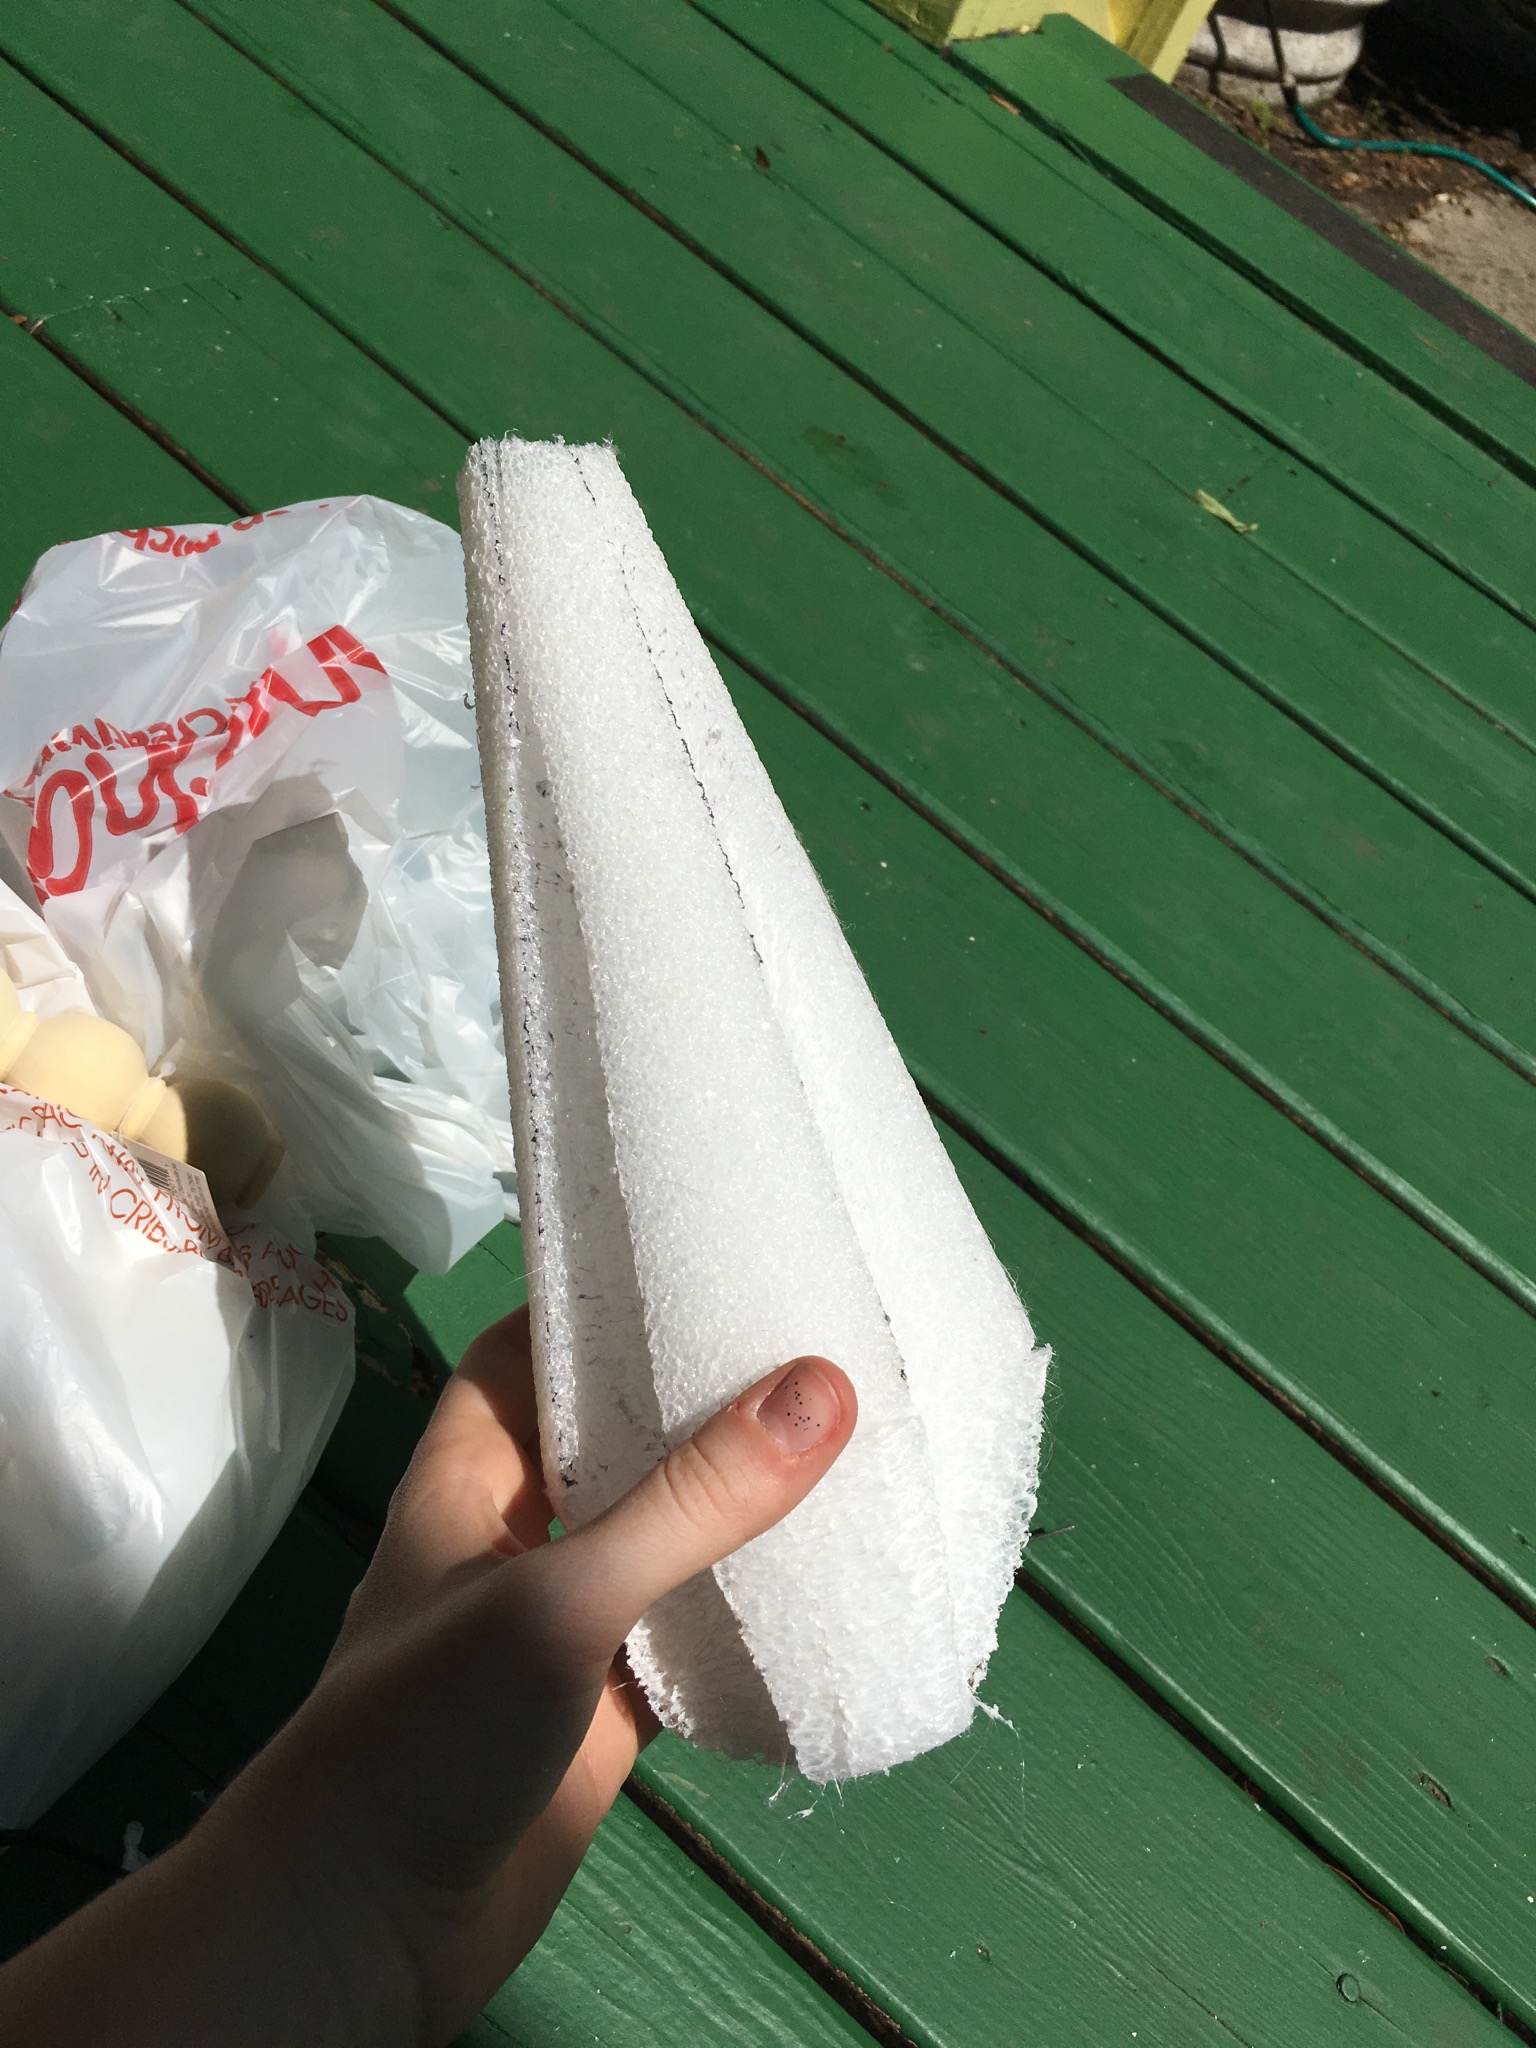
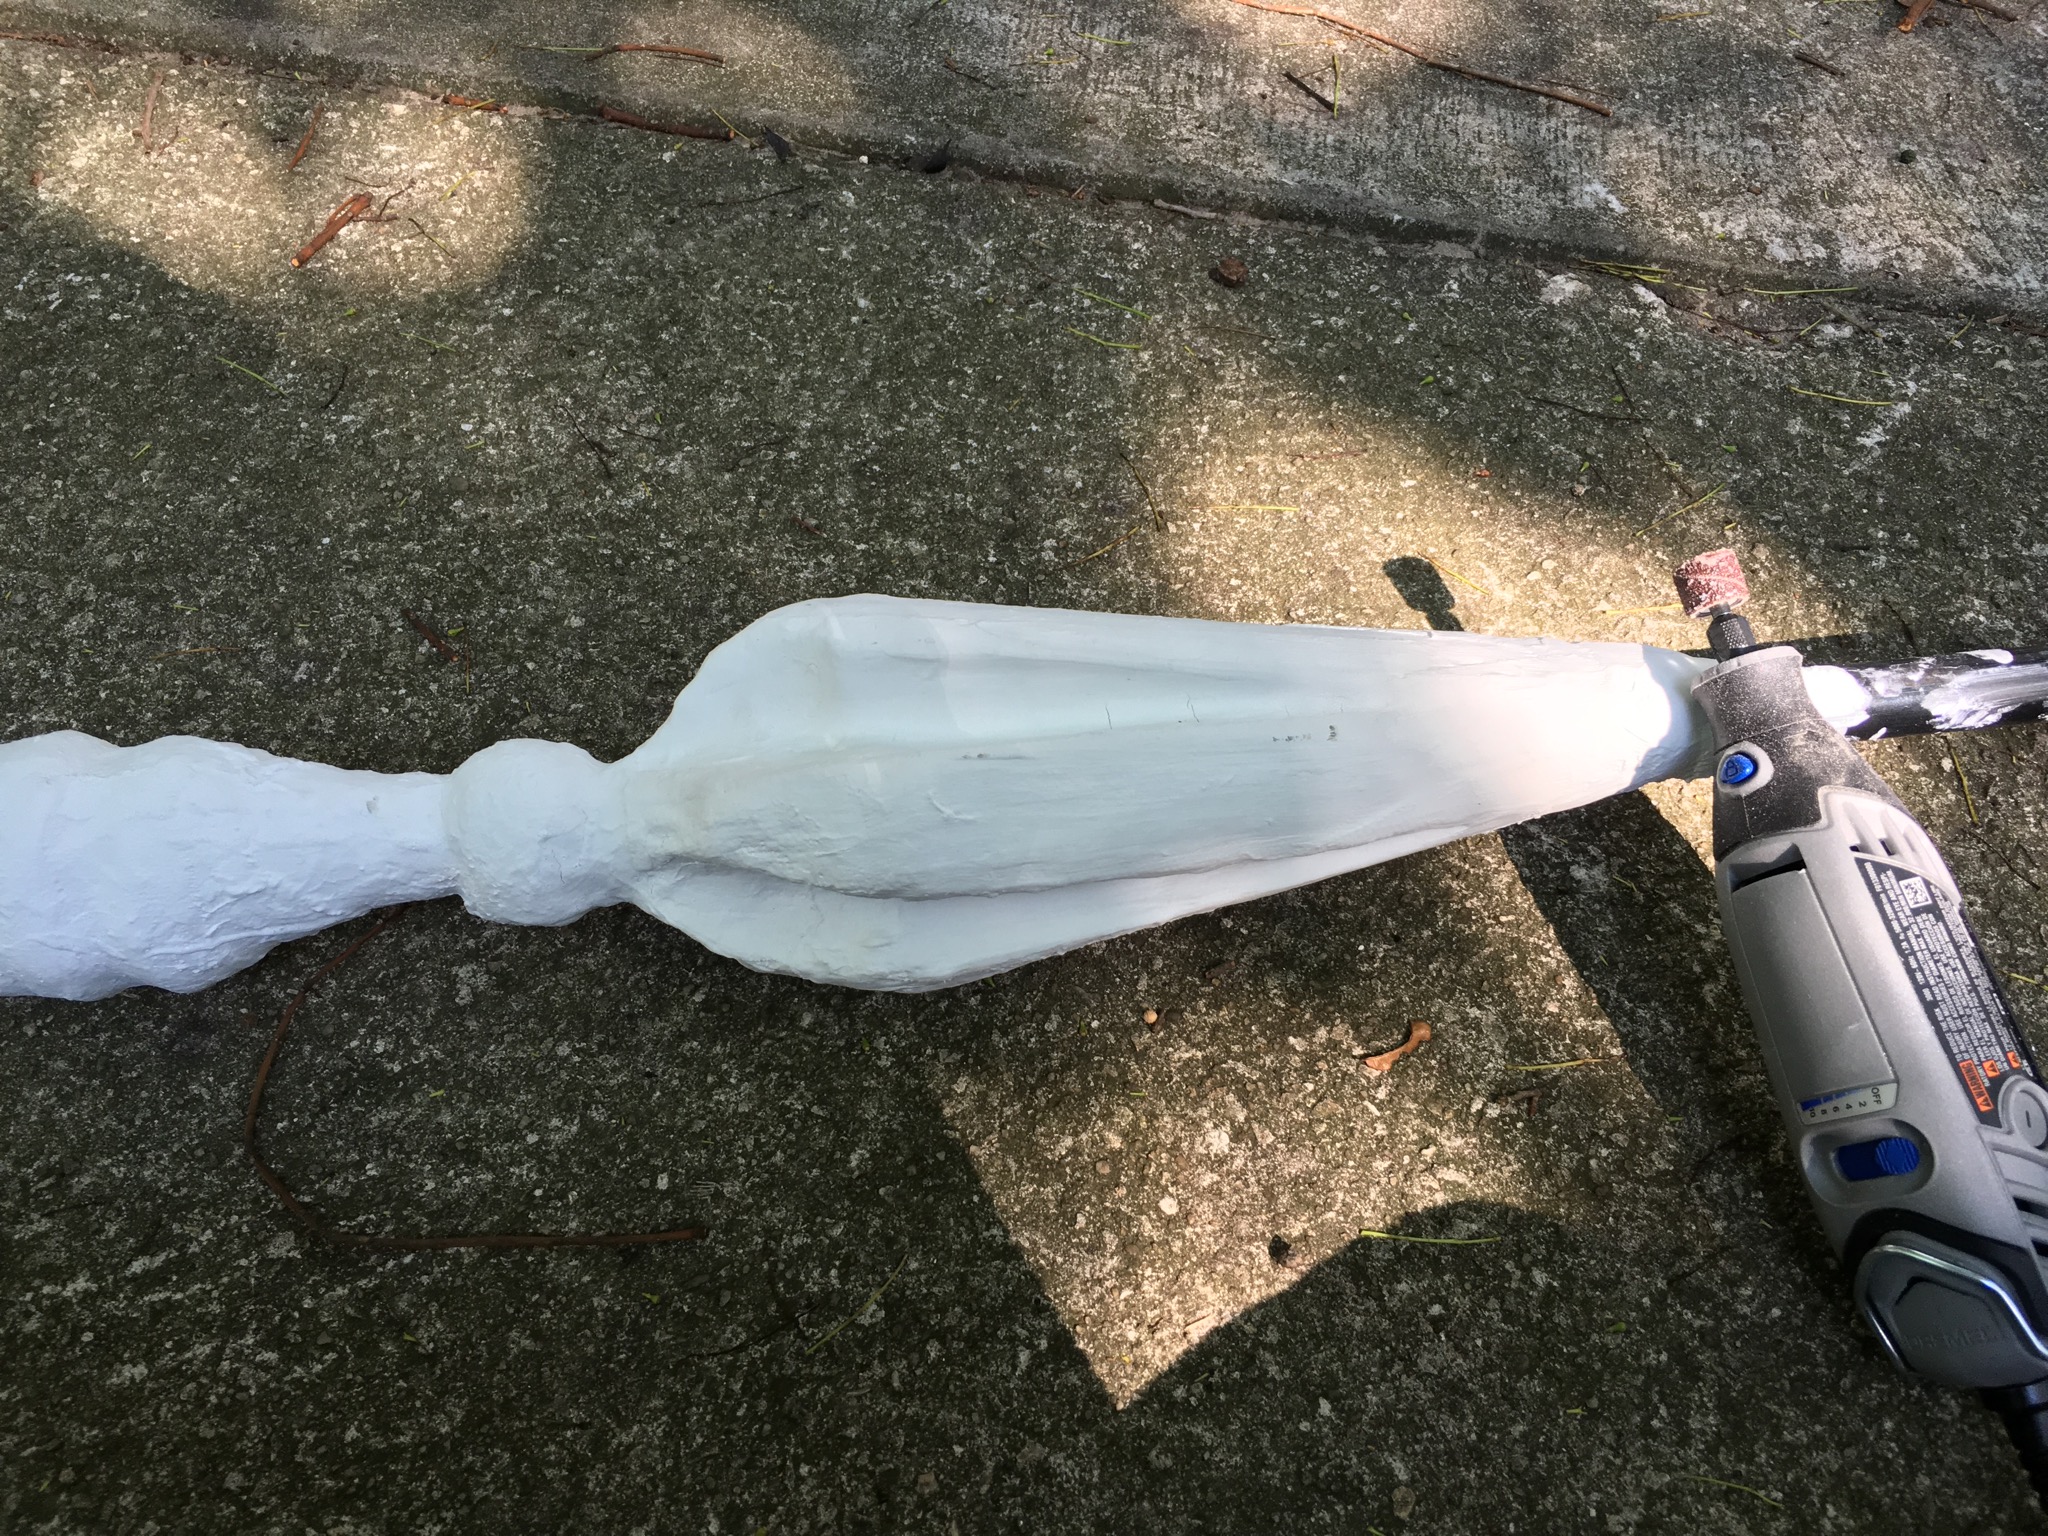
Using a triangular cut you are going to cut into the styrofoam between your designated lines. It should look something like this in the end after you cut through all 4 of your grooves (be careful not to cut into the hole where your PVC pipe goes! If you do, don’t panic. Plaster will save it!)
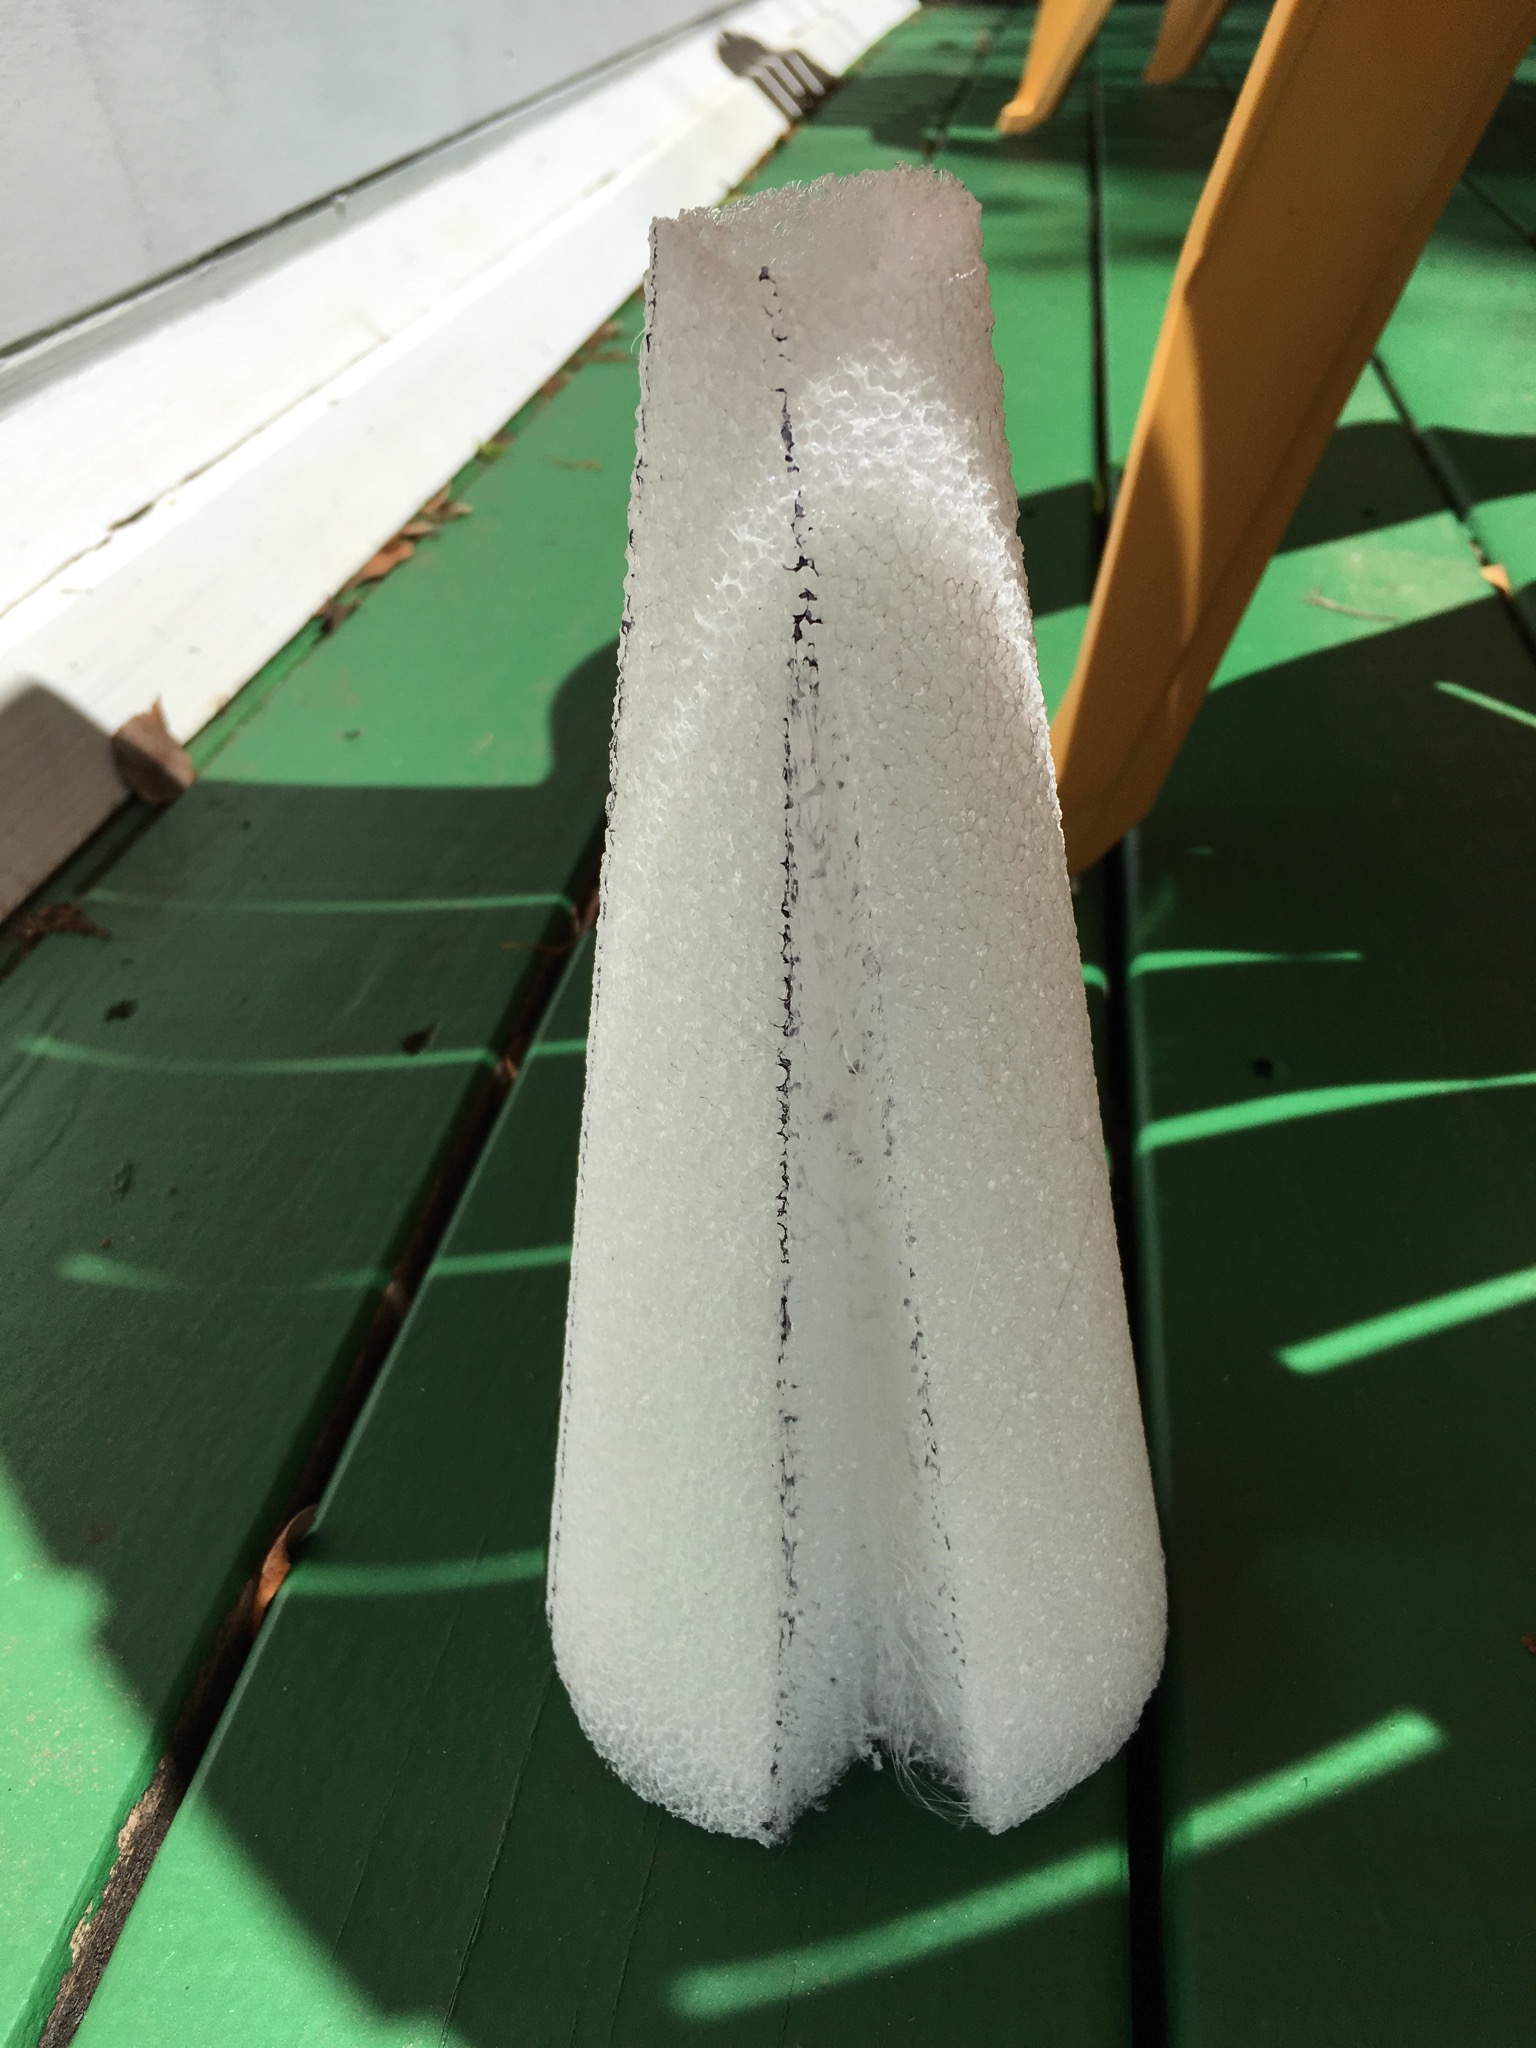
Your goal is to look at the bottom part of the cone and make each of these cuts as close as possible so that it looks like a perfect “x”. However, this can be hard (especially if your measuring skills are off like mine are usually). Try and get them as close as you can.
Now that the top part is completed you need a smaller bottom part that is connected to the top part with the same grooves (see your reference picture to know what I am trying to say).
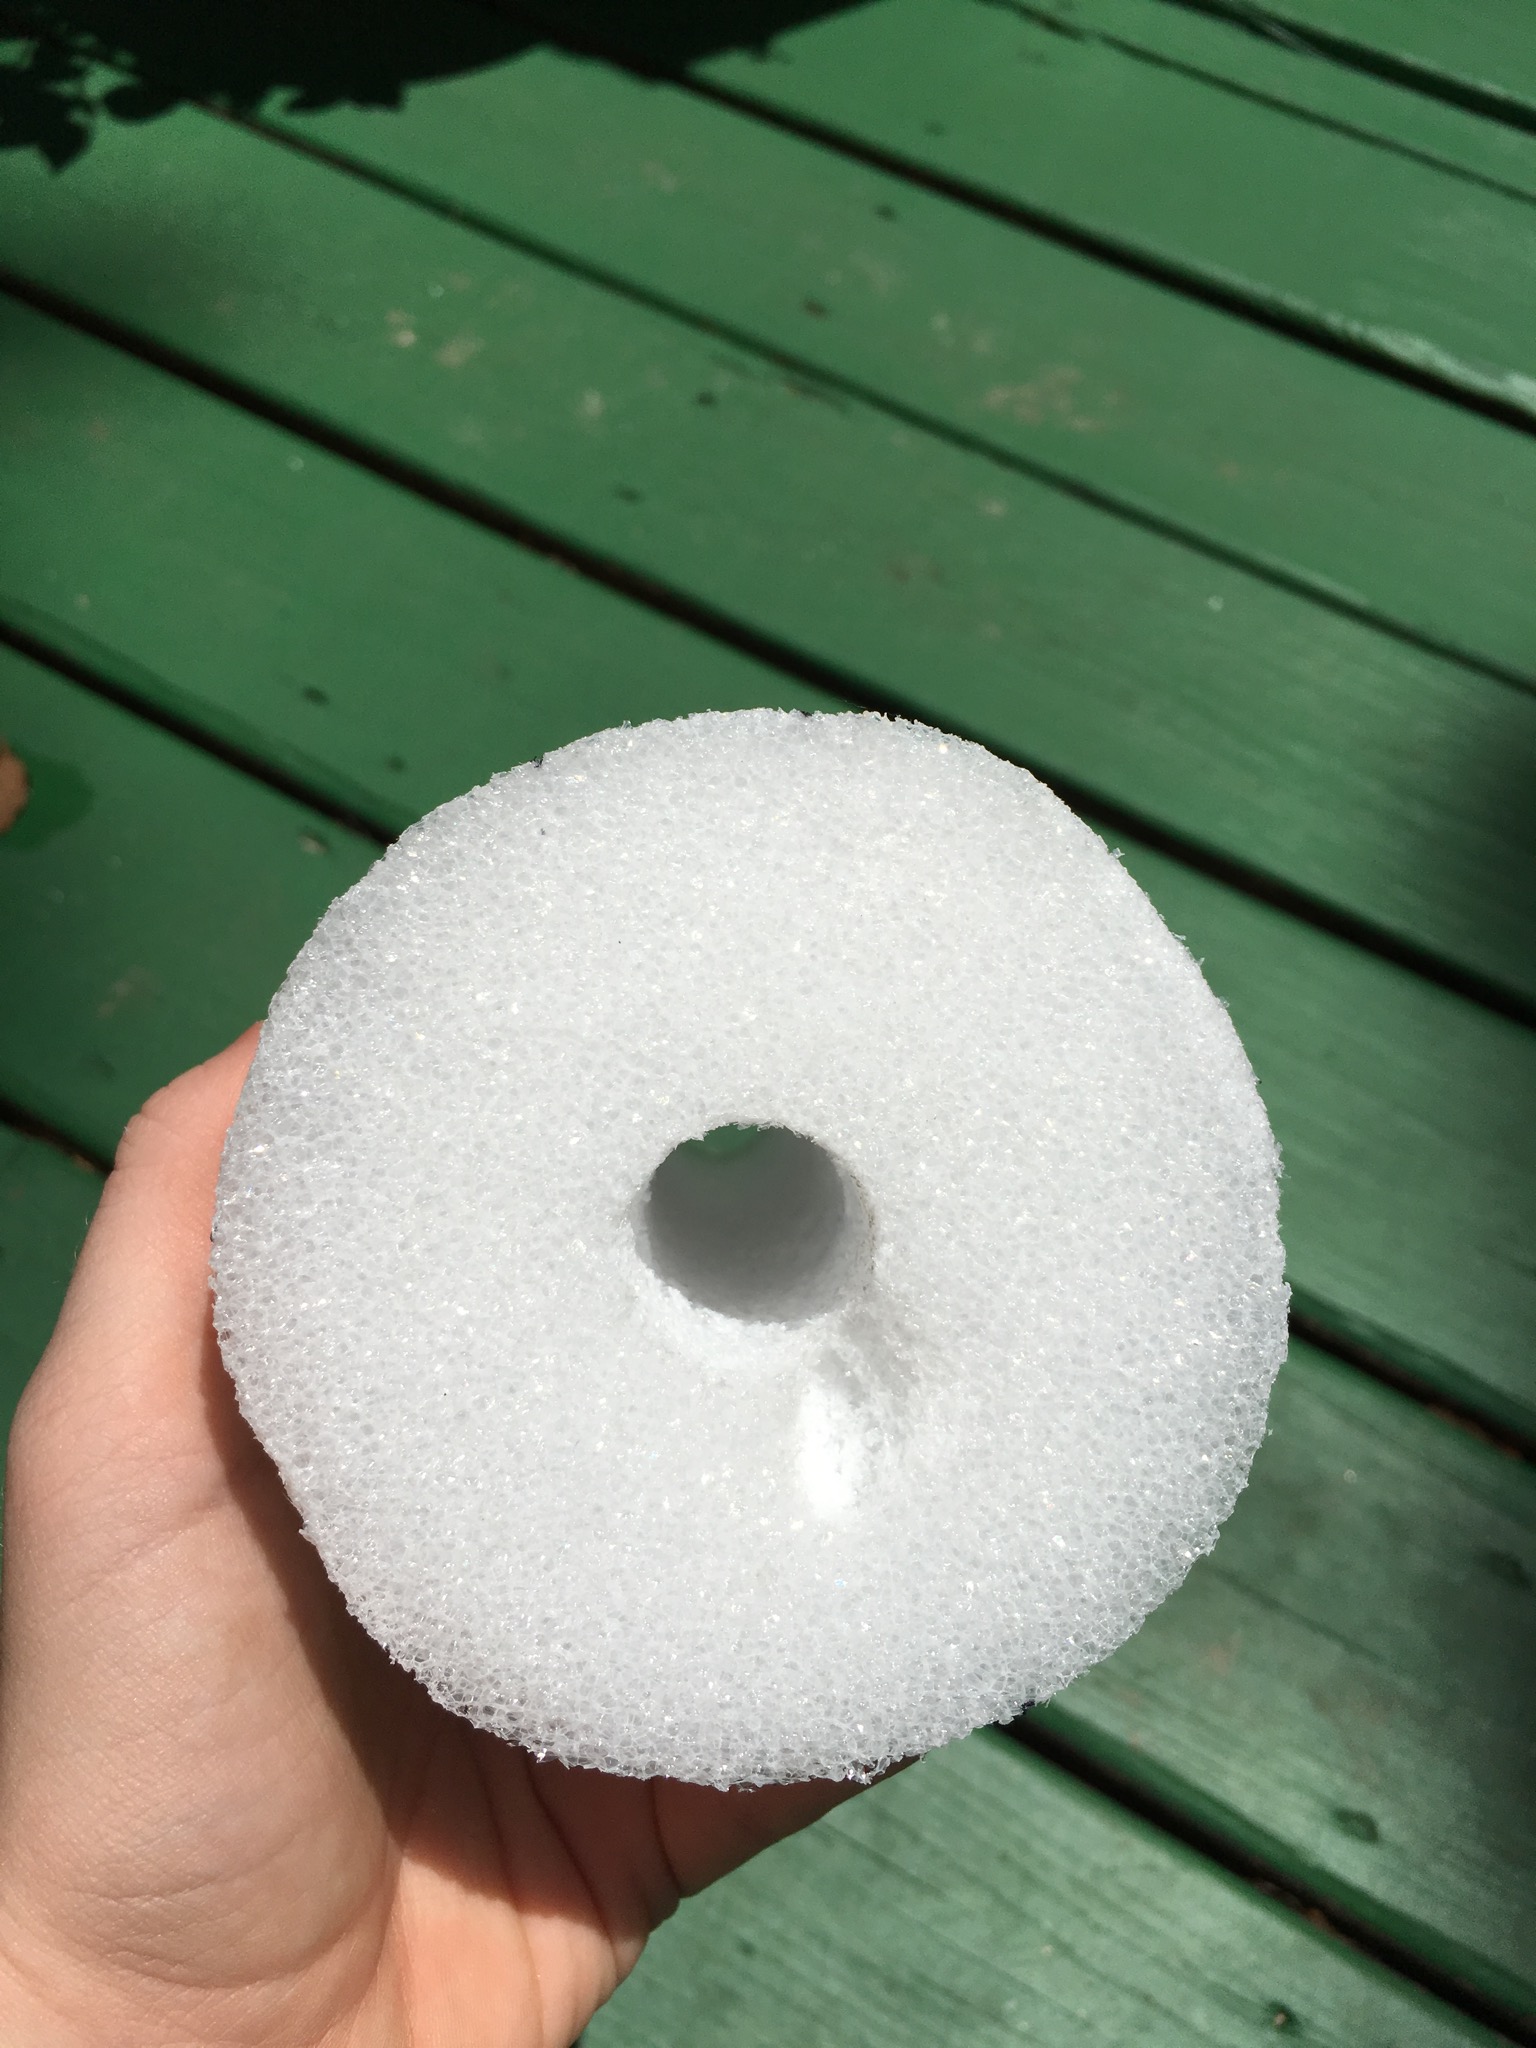
Grab your large styrofoam ball and cut it in half.
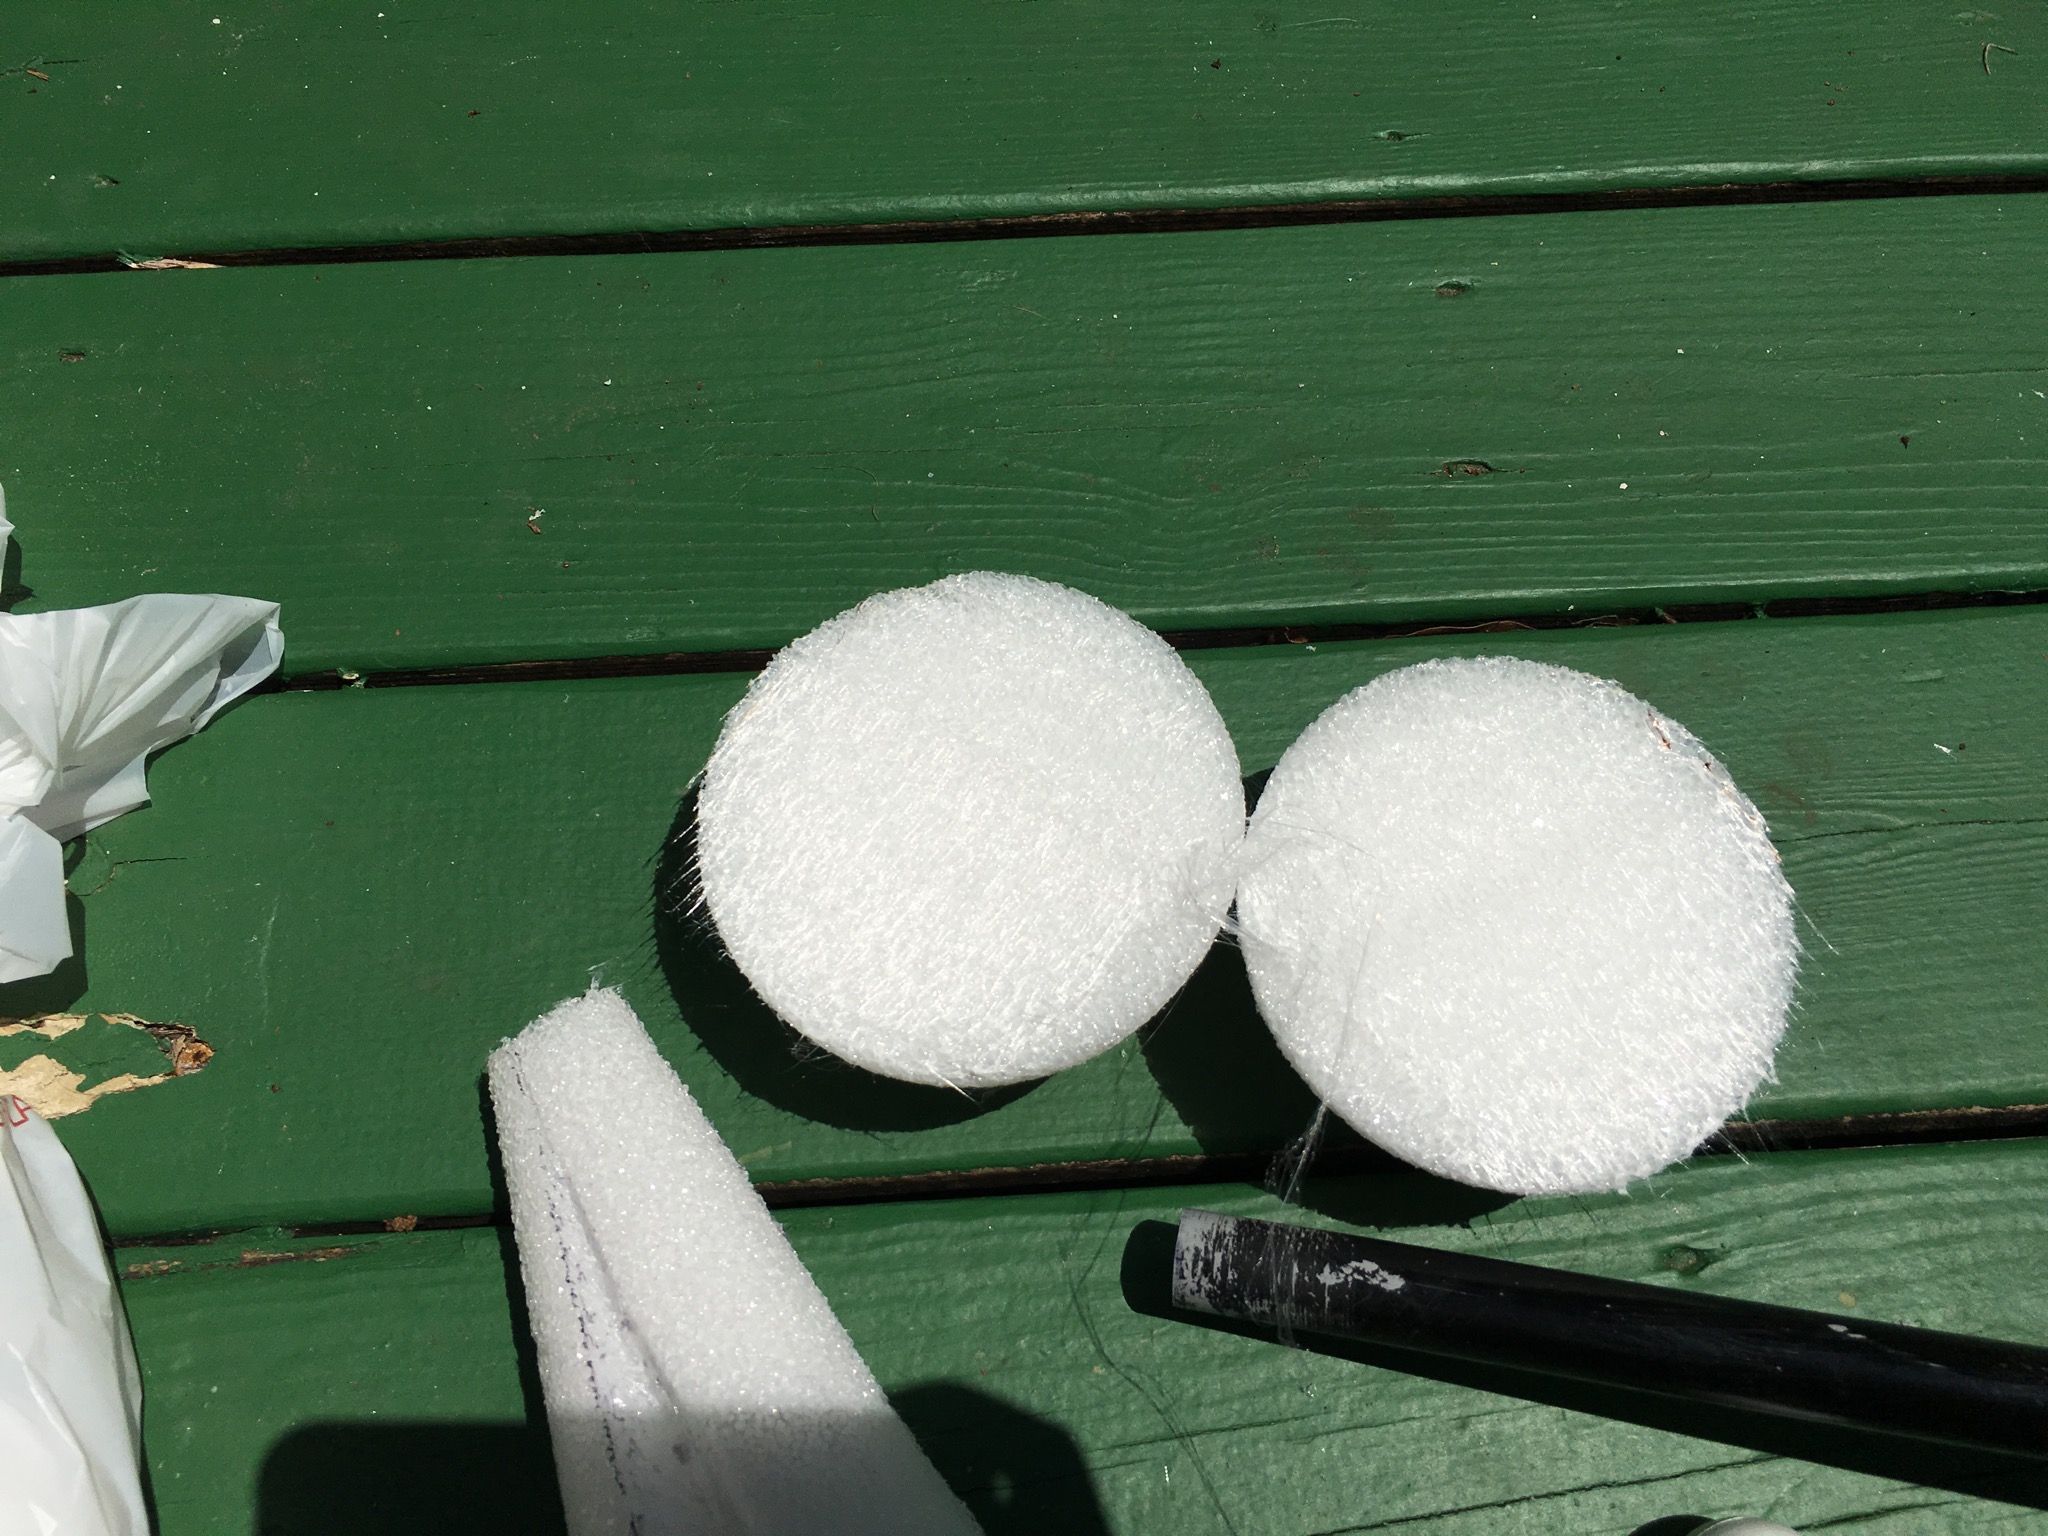
Stick one of the half balls to the bottom of your carved out cone:
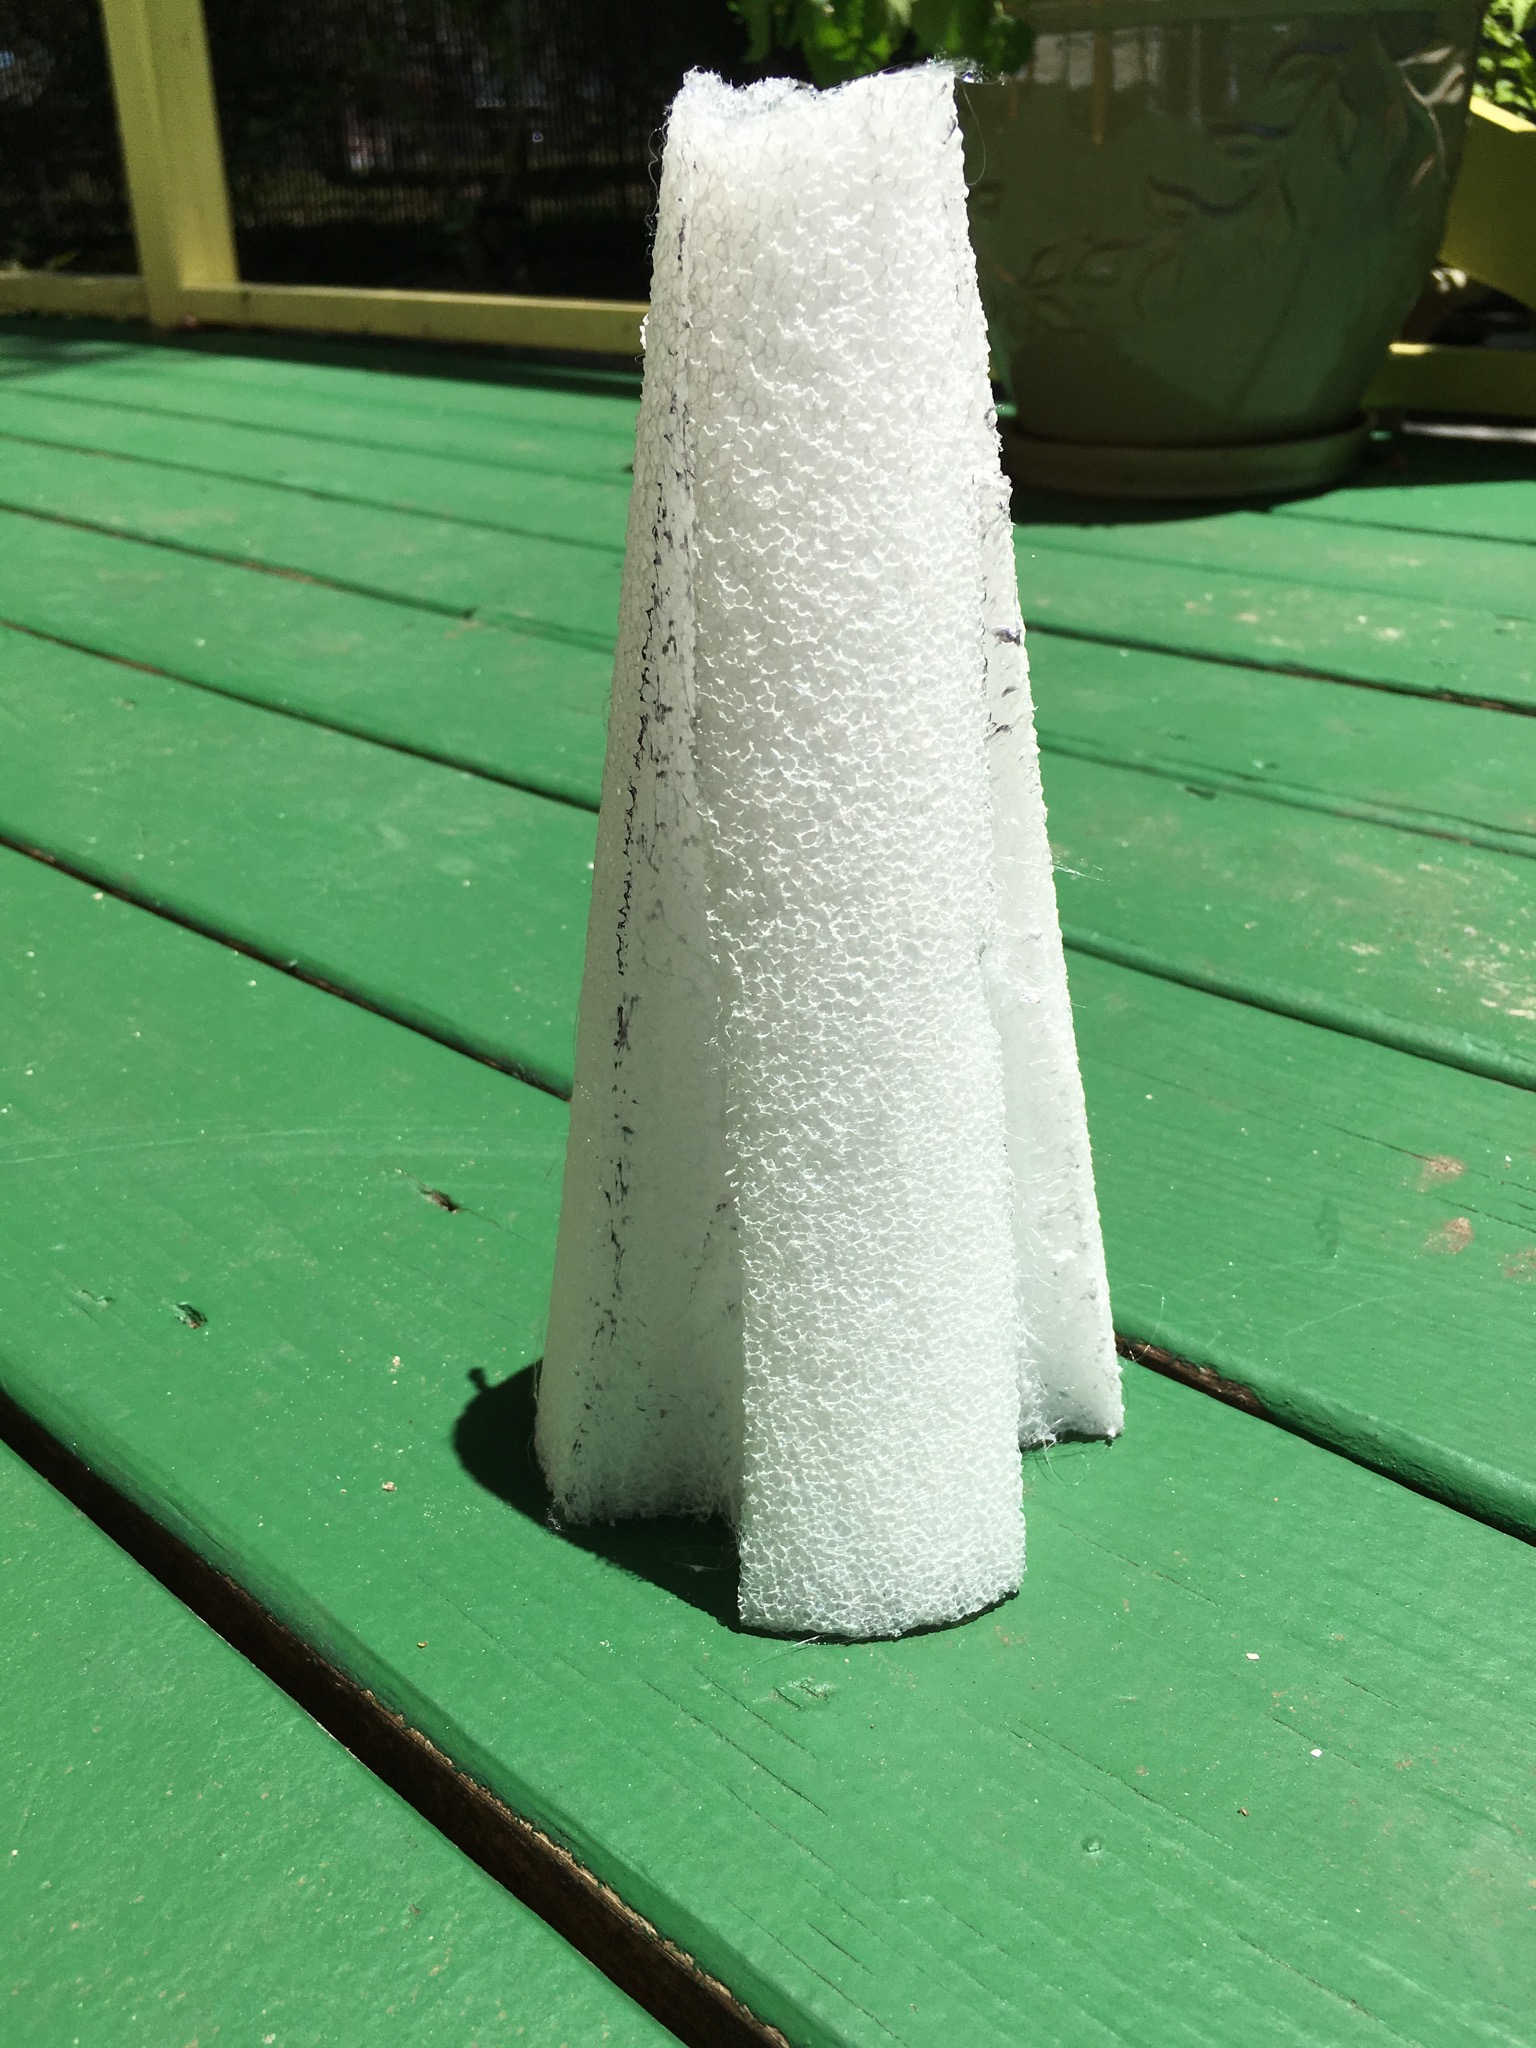
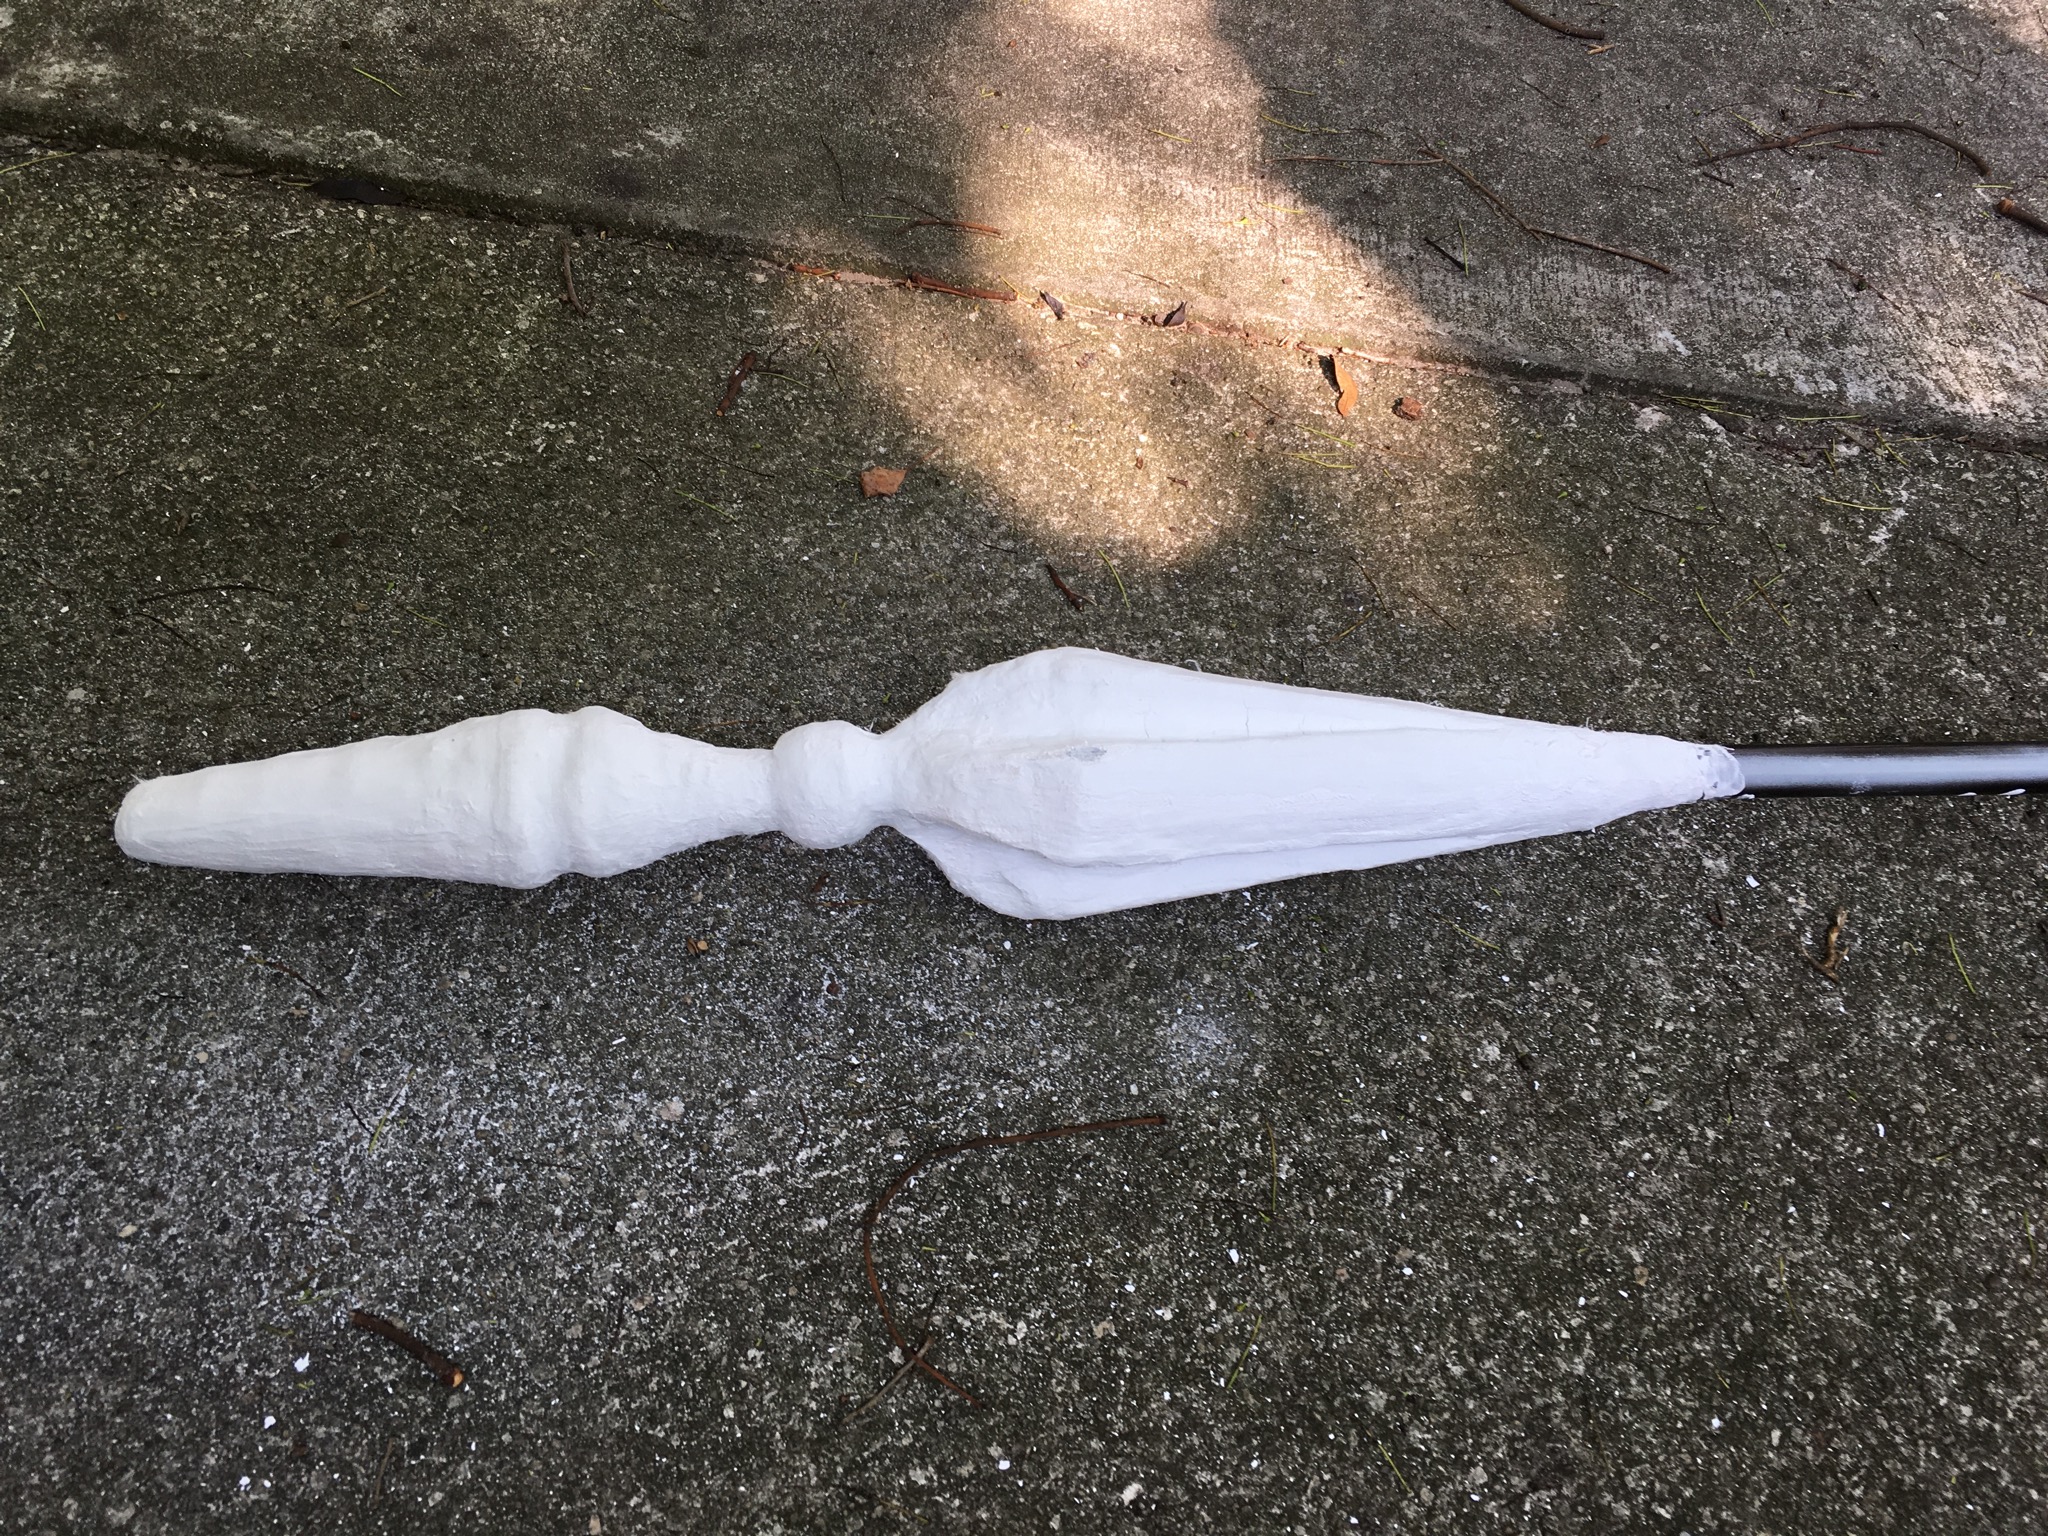
Don’t panic if it is too large, this is why we use the styrofoam cutter. Using tape to hold the two pieces together you are going to continue your grooves from the cone to the half circle. The grooves on the bottom will also come to a point at the very bottom, similar the cone. In the end you should have something like this:
You can now insert your PVC pipe into the top of the cone and screw it into the bottom half that you just completed.
Now the picture above shows a problem. There is a “crack” between the two parts. This is not a problem. We will use clay to cover this area up. In the meantime ignore it and we will move on to completing the remainder of the bottom of the Glaive.
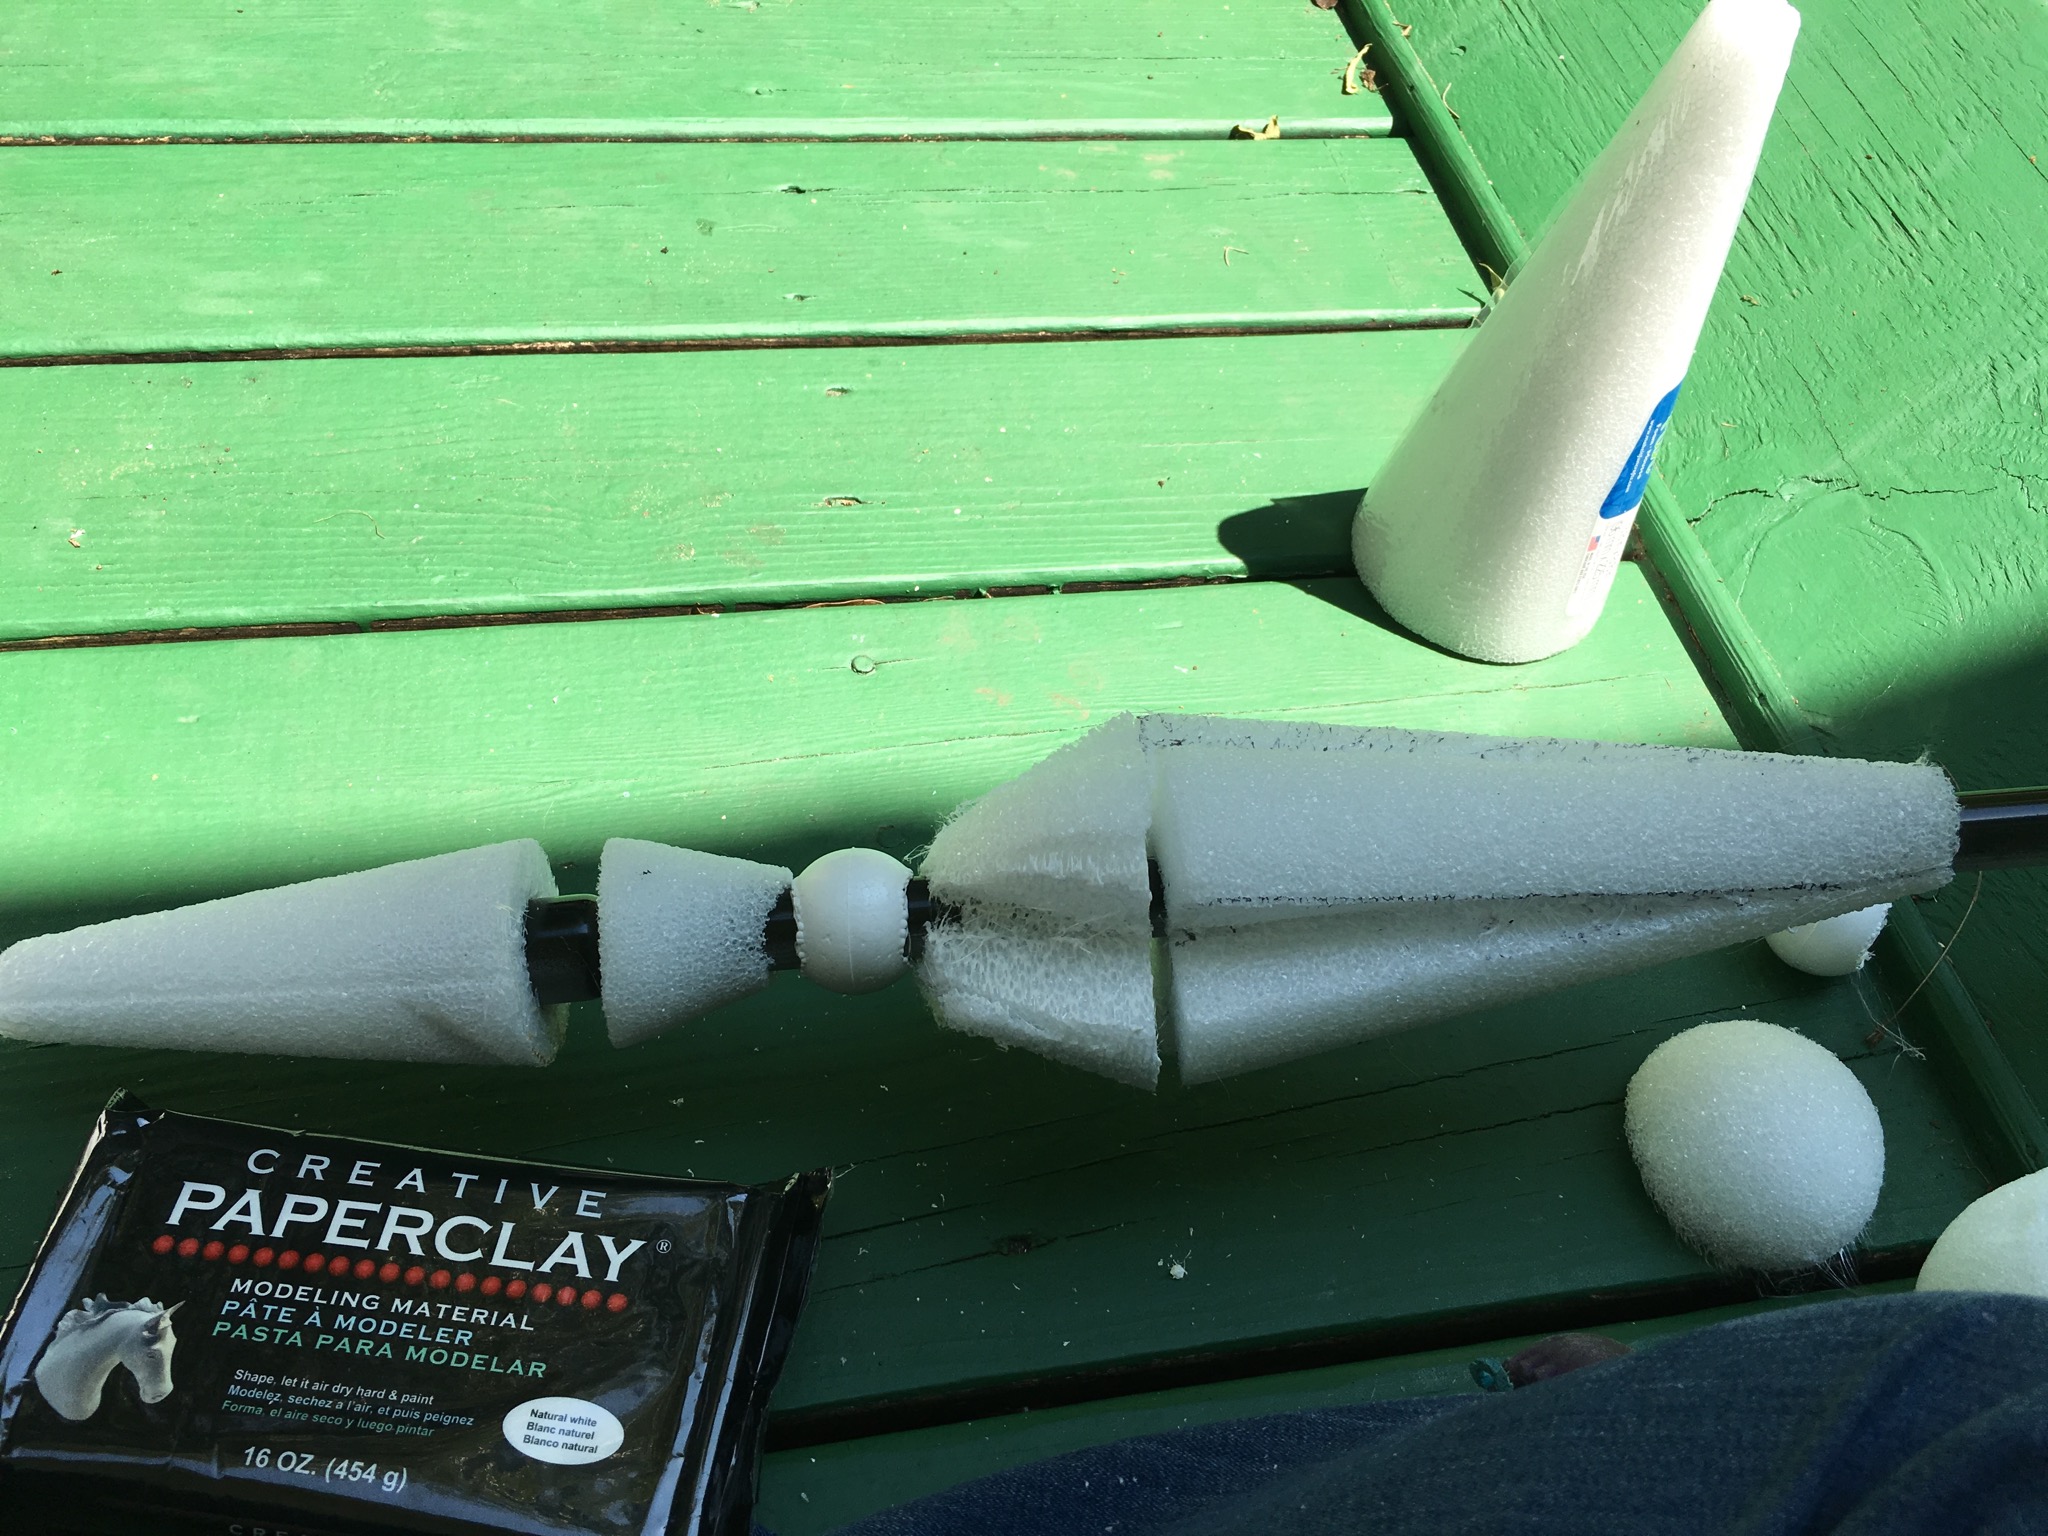
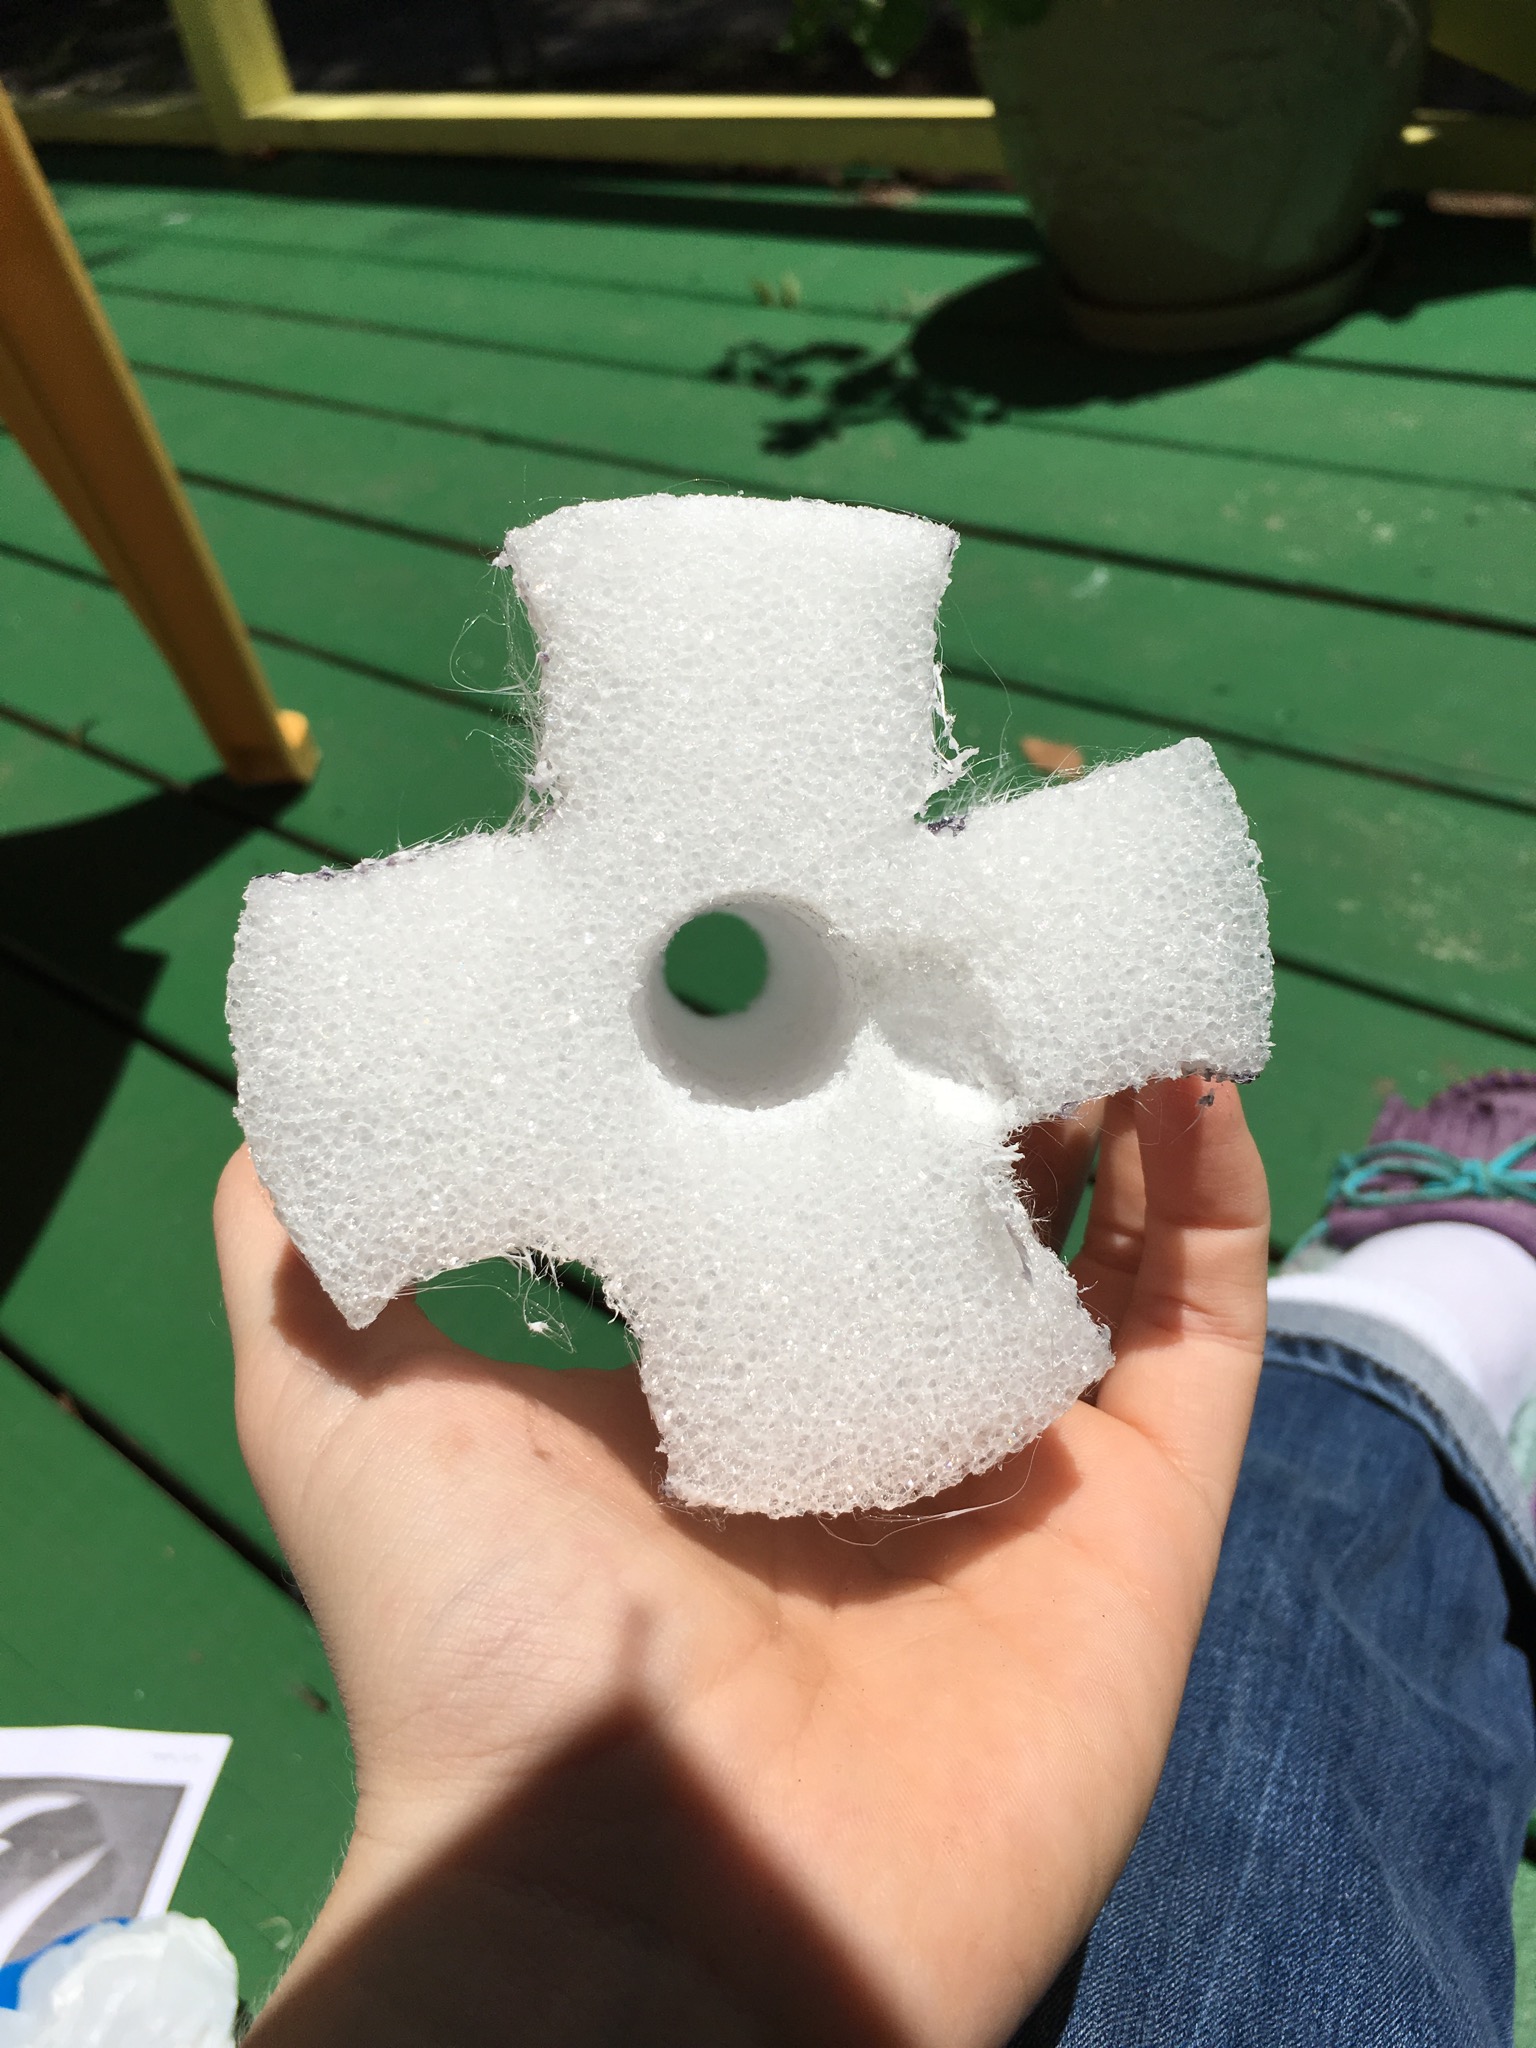
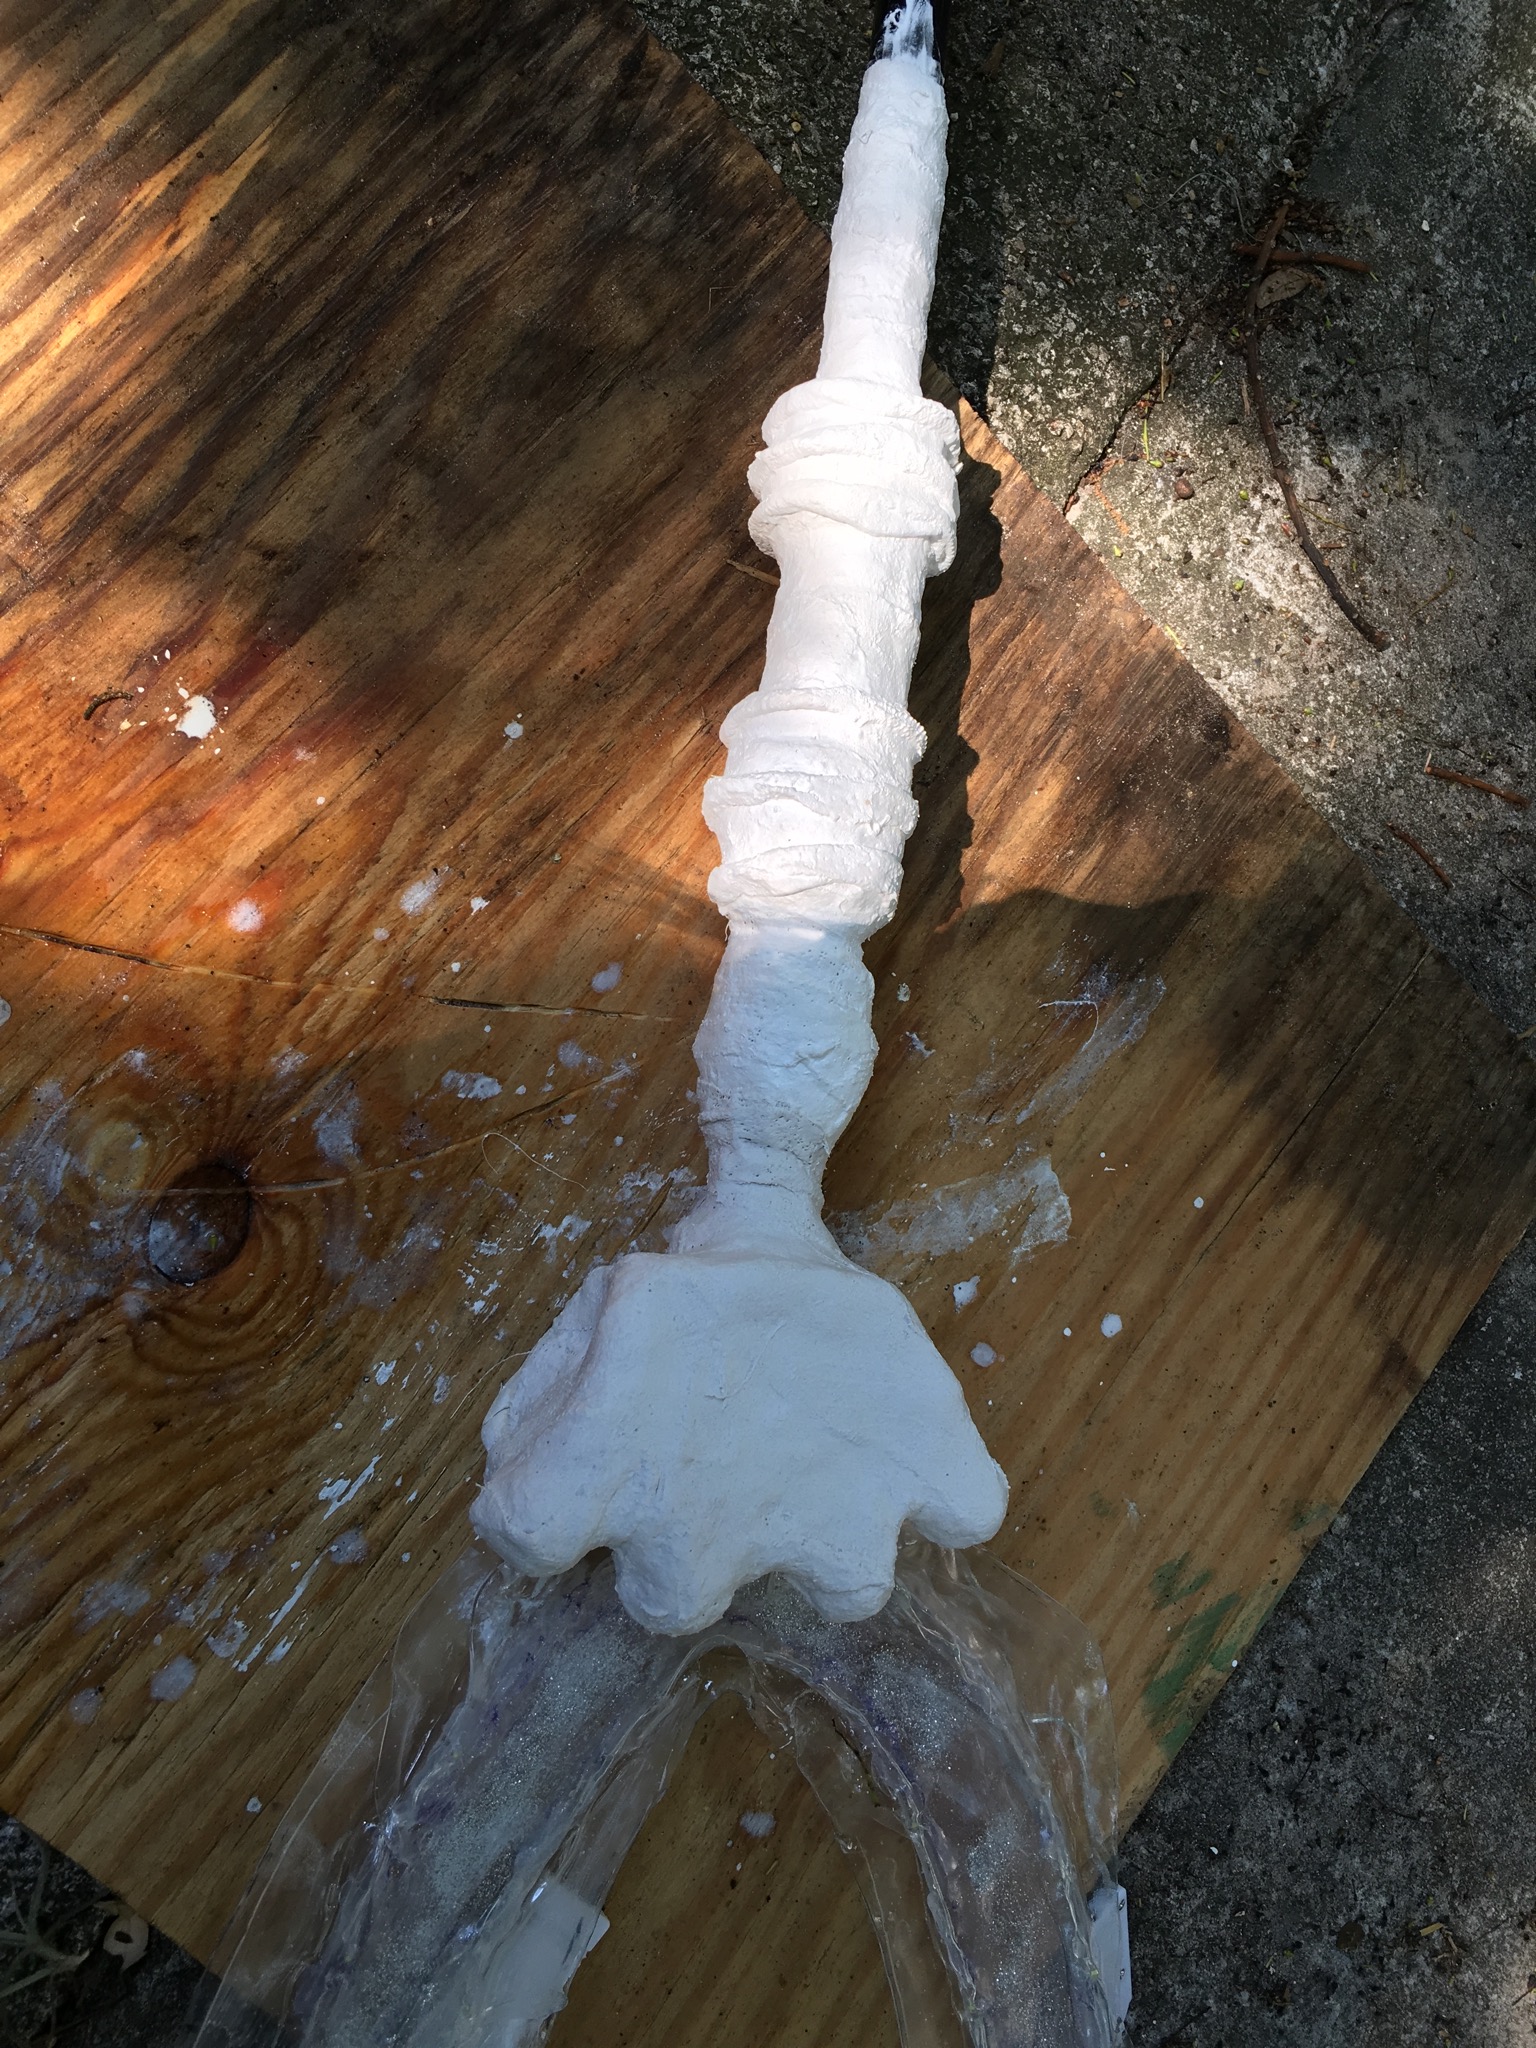
This part is fairly easy and just requires you screwing in a few styrofoam pieces onto your PVC pipe. Push your carved area up to make room for the rest of the styrofoam. Get a small styrofoam ball and either screw it in the PVC pipe of cut out a hole using your styrofoam heat cutter (use the cutter, it’s easier). Slip this on the PVC pipe underneath your carved out cone. Next take a small cone and repeat the process underneath the small ball. You will likely damage the top of the cone as you pierce it but don’t worry. Just make sure you get it on the pipe. Finally take your medium sized cone and insert the PVC pipe into the bottom of the cone but DON’T GO THROUGH THE WHOLE CONE. Stop the piercing about 1/3 – 1/2 way through the length of the cone. In the end the bottom of your PVC pipe should look something like the picture featured above. Now… Note all of the spaces and cracks. This is the time start making thing more smooth.
Step 4: Smoothing the styrofoam at the bottom of the Glaive.

I use “Paperclay” for my clay. This stuff goes for about $9.99 at Michaels and it is fairly light once it dries. Start working this clay into the cracks and grooves so that your PVC pipe underneath all of the styrofoam is completely covered. The clay can also be used to make the small round ball (underneath your carved out cones) more round. This was how the bottom of the Glaive looked after I applied the clay:
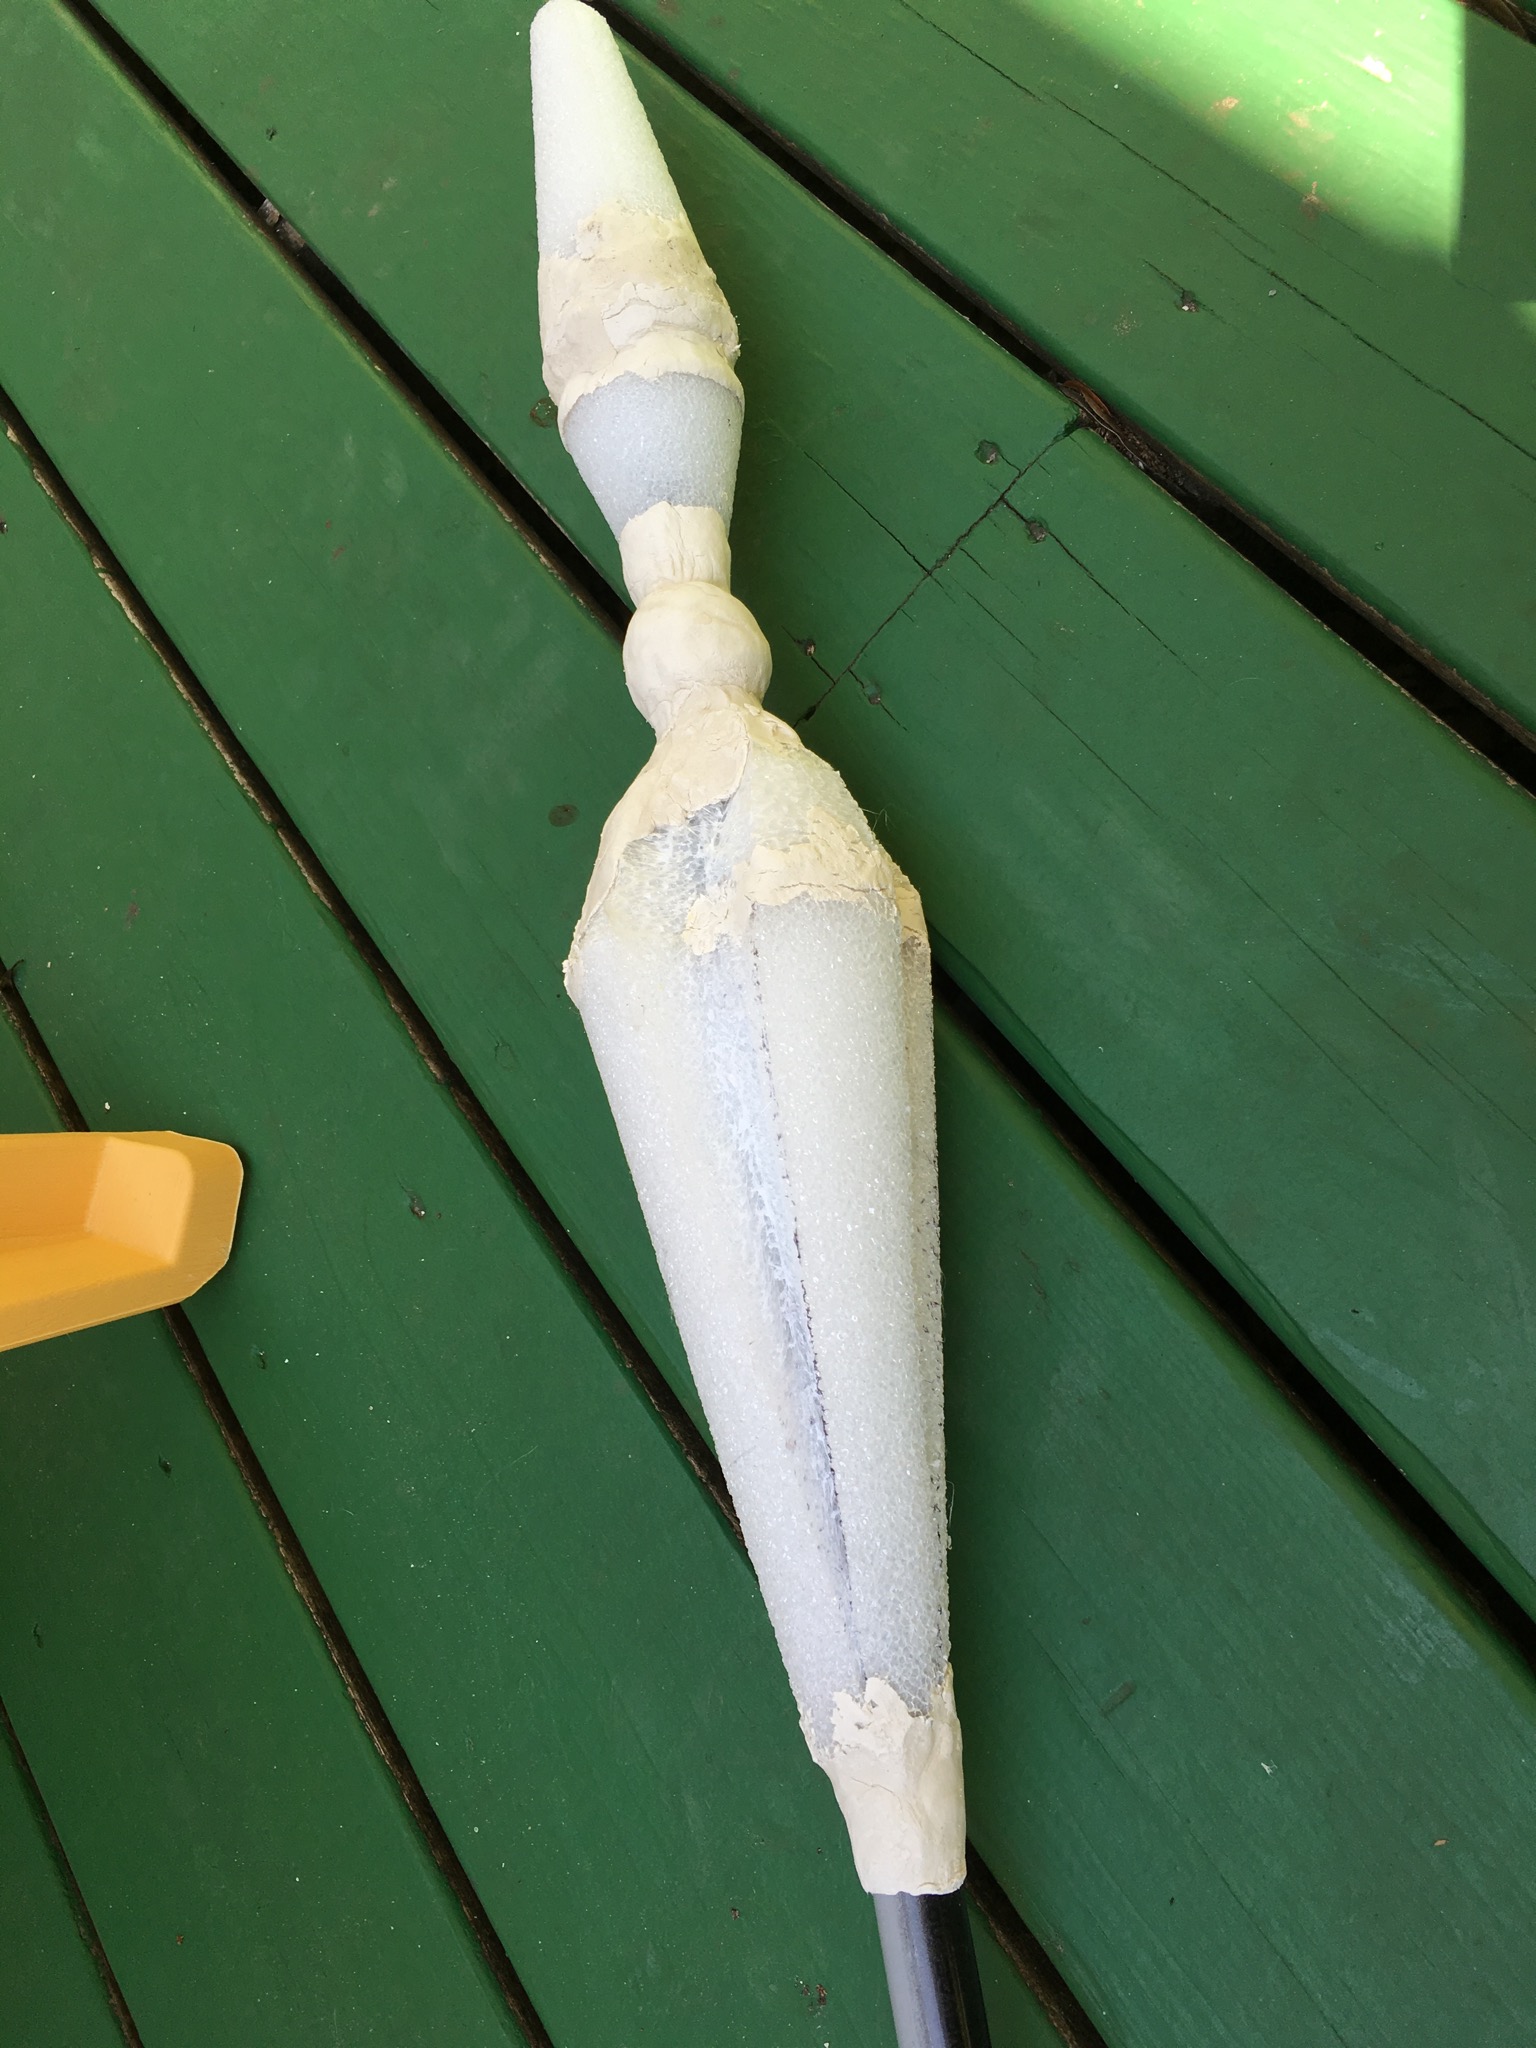
Notice how everything appears to be one large piece. Let the clay dry for about 24 hours. However, this clay is not very strong, so don’t be surprised if cracks appear. This will be fixed with plaster later on. For the moment lets work on the top of the Glaive.
Step 5: Details at the top of the Glaive
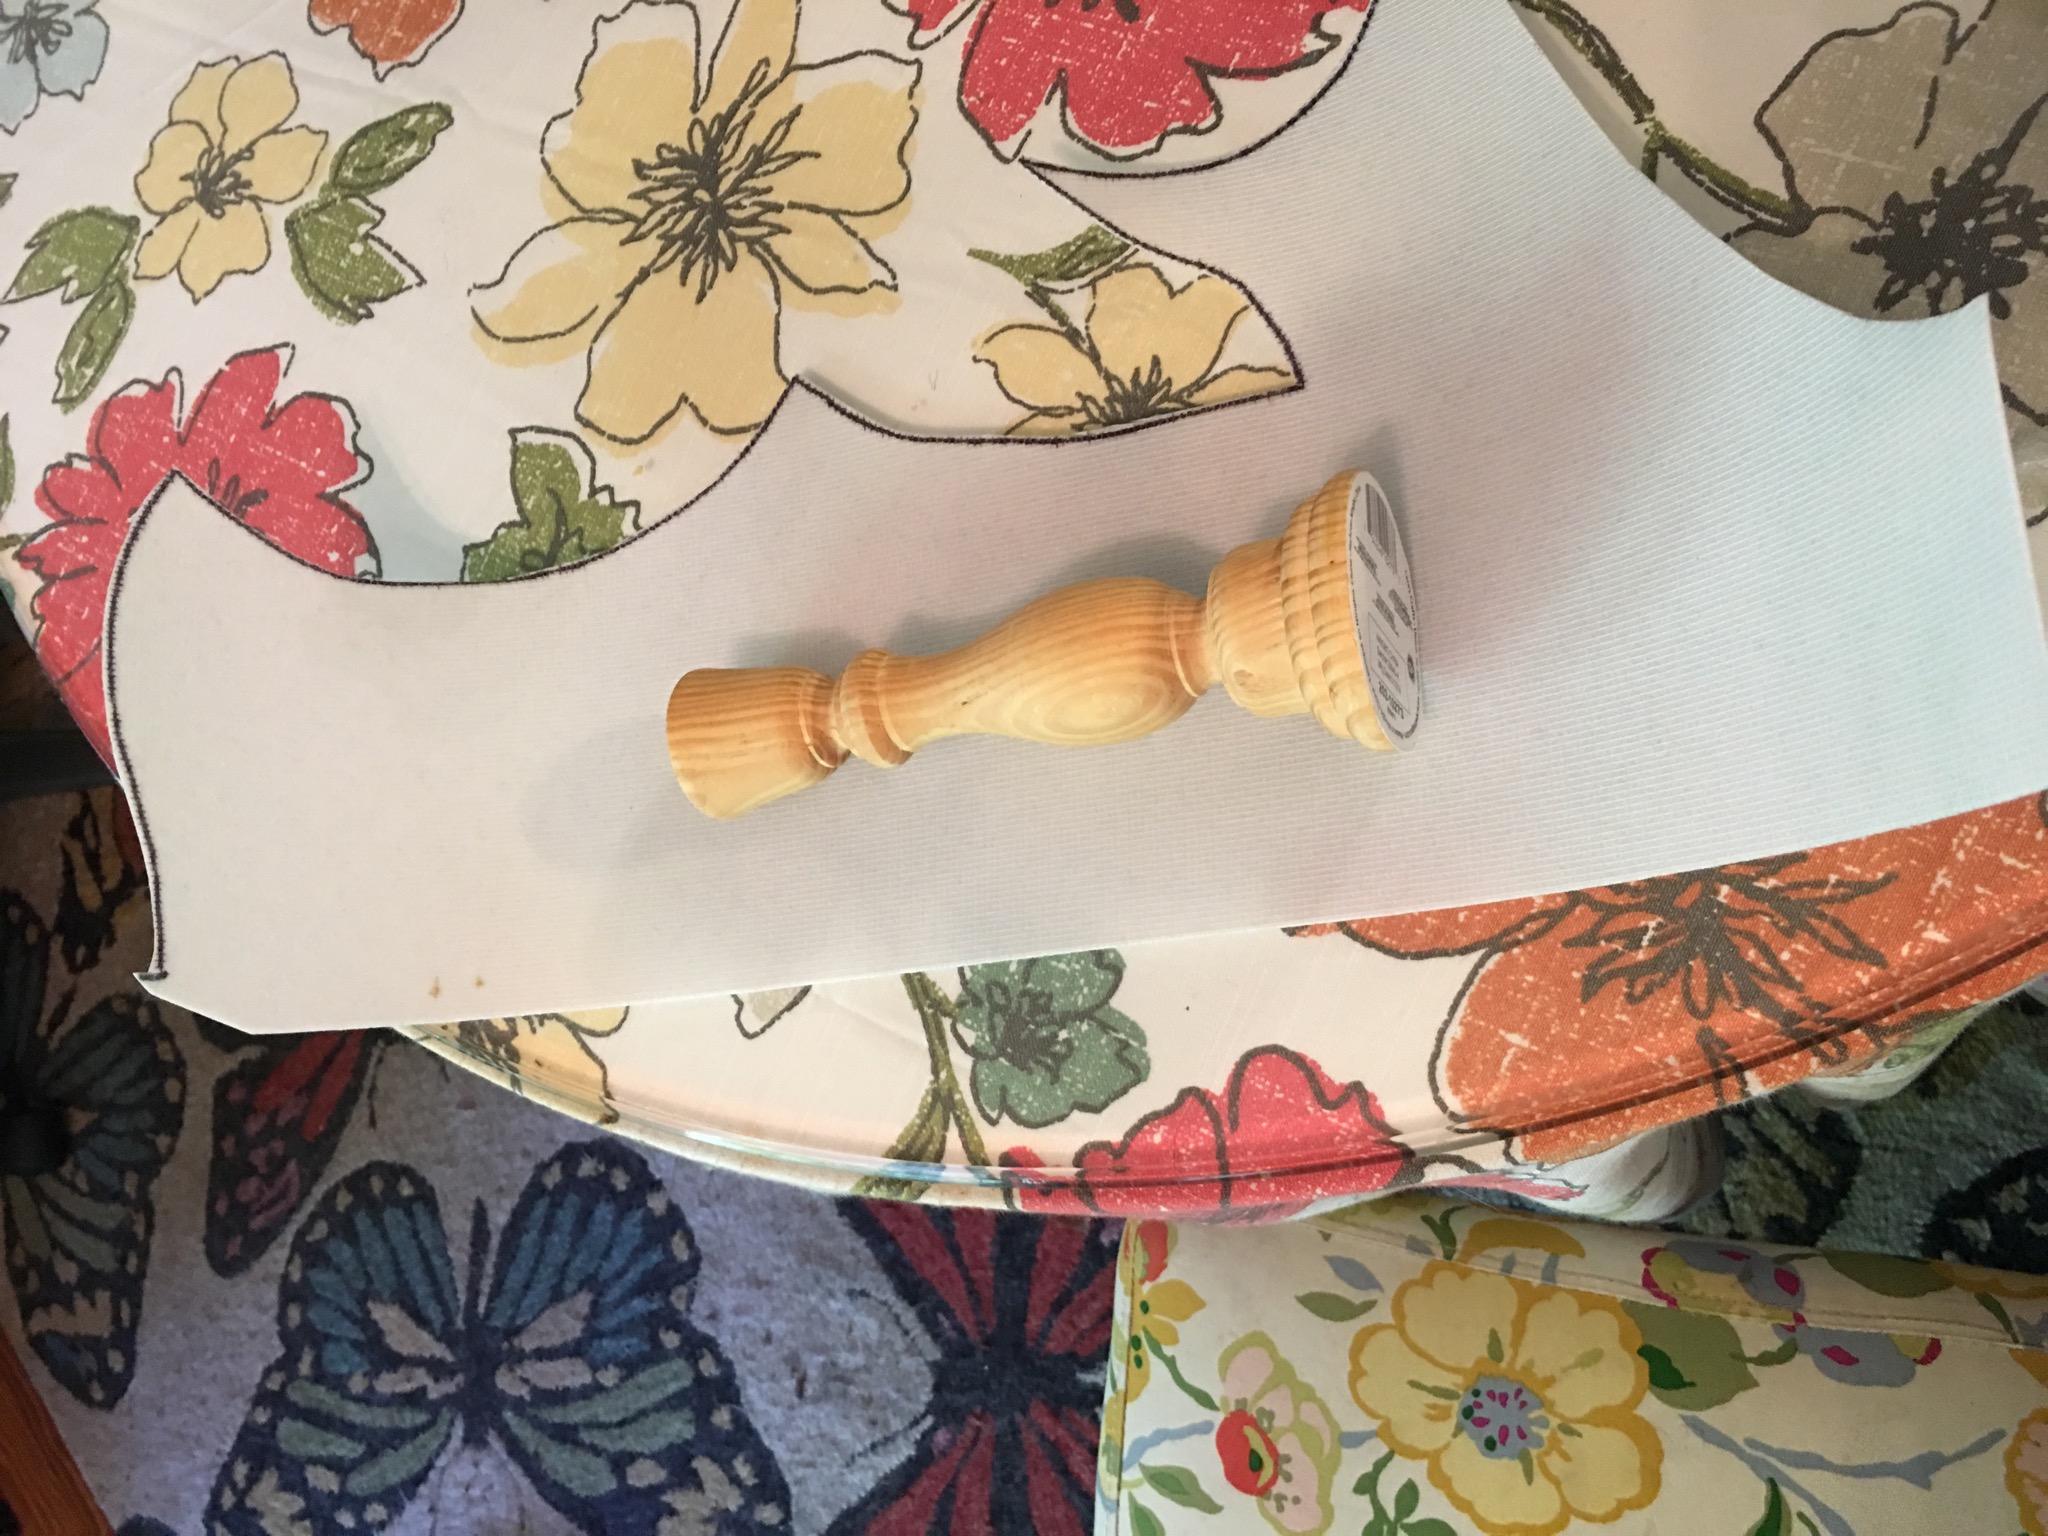
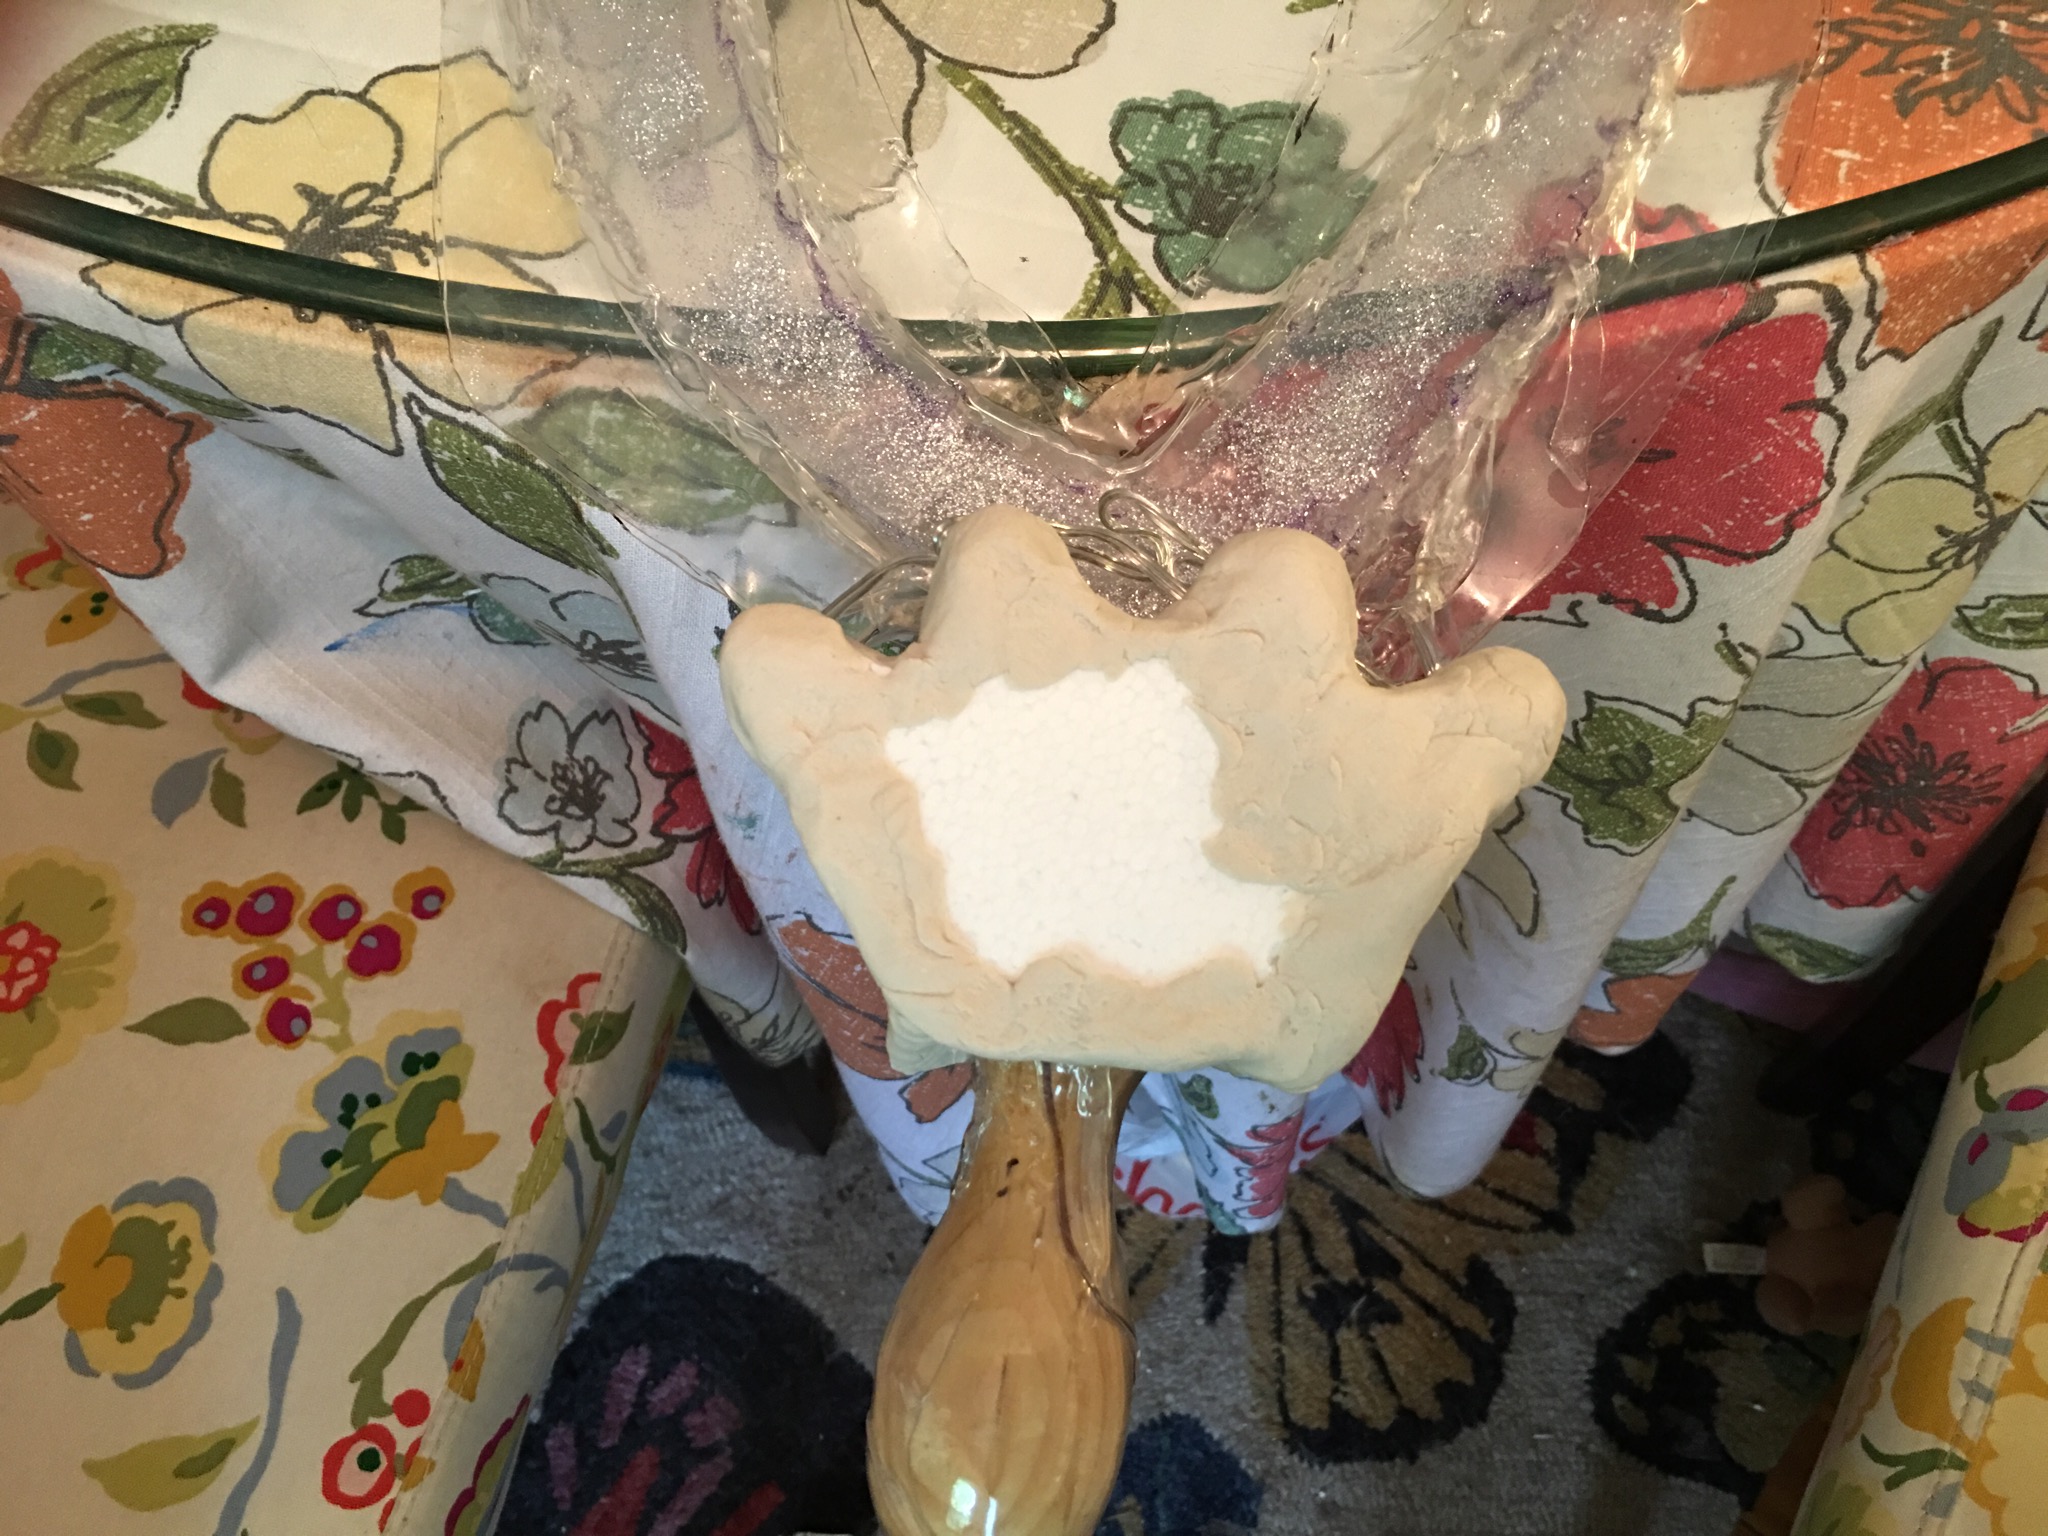
Now you are probably wondering from the material list above: why the candle stick. Well, my carving skills are not the best and if you look at the top of Sailor Saturn’s Glaive you will see some detail that looks sort of like the candle stick I got:

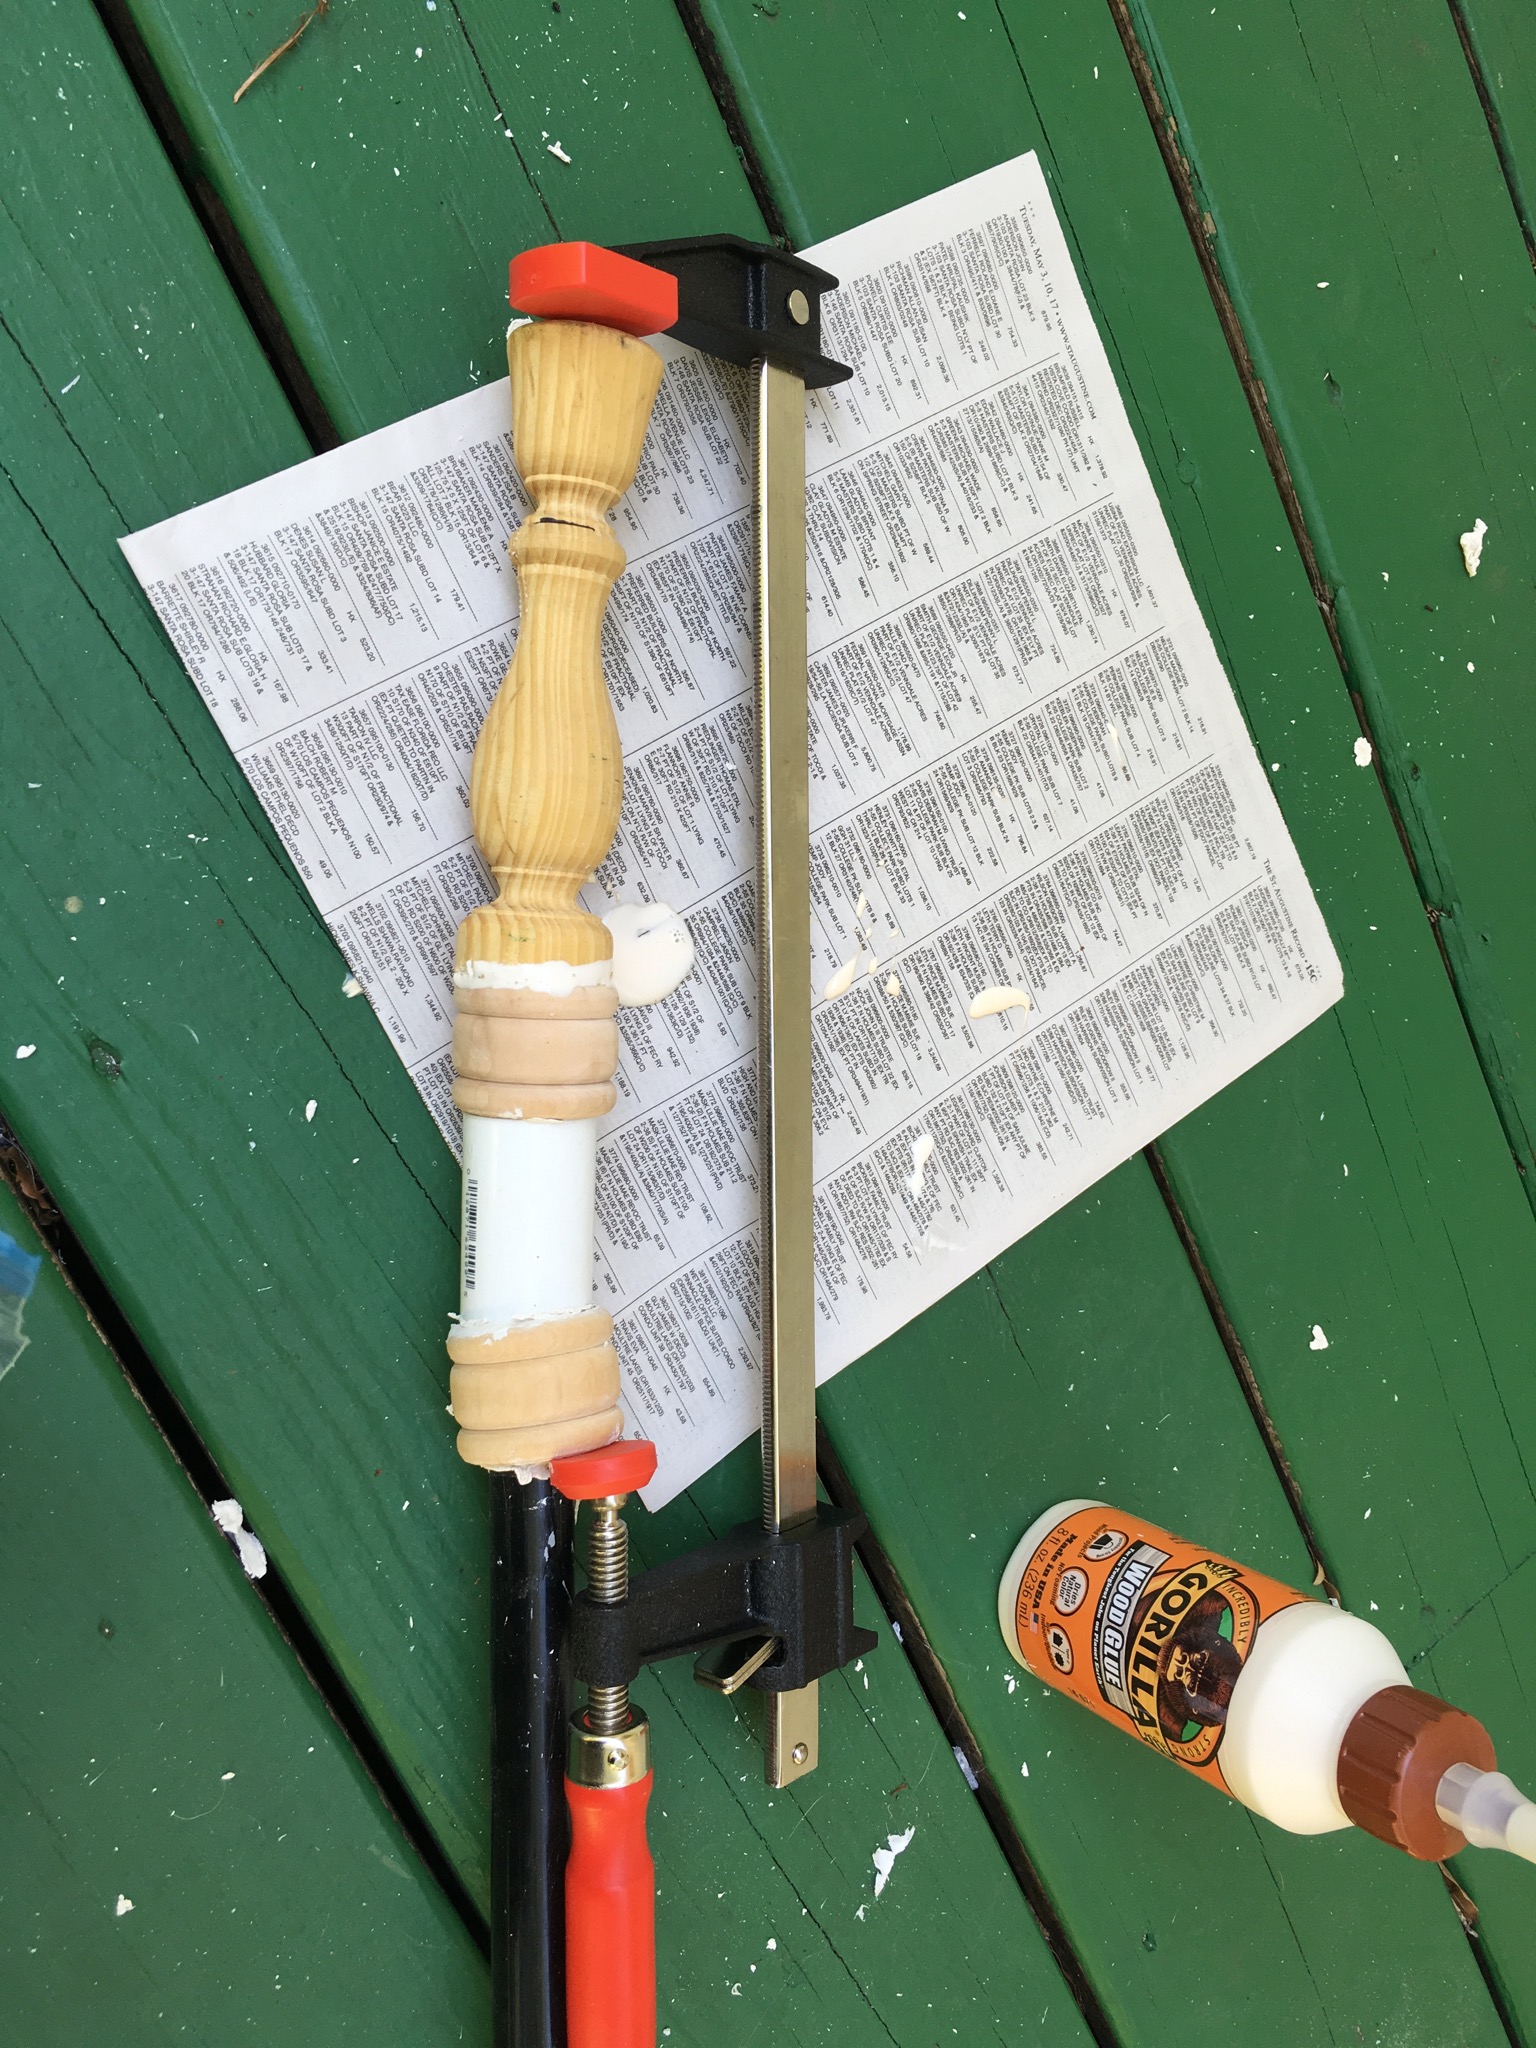
However, the candle stick was not completely perfect. I had to saw off the bottom to get the shape I desired:

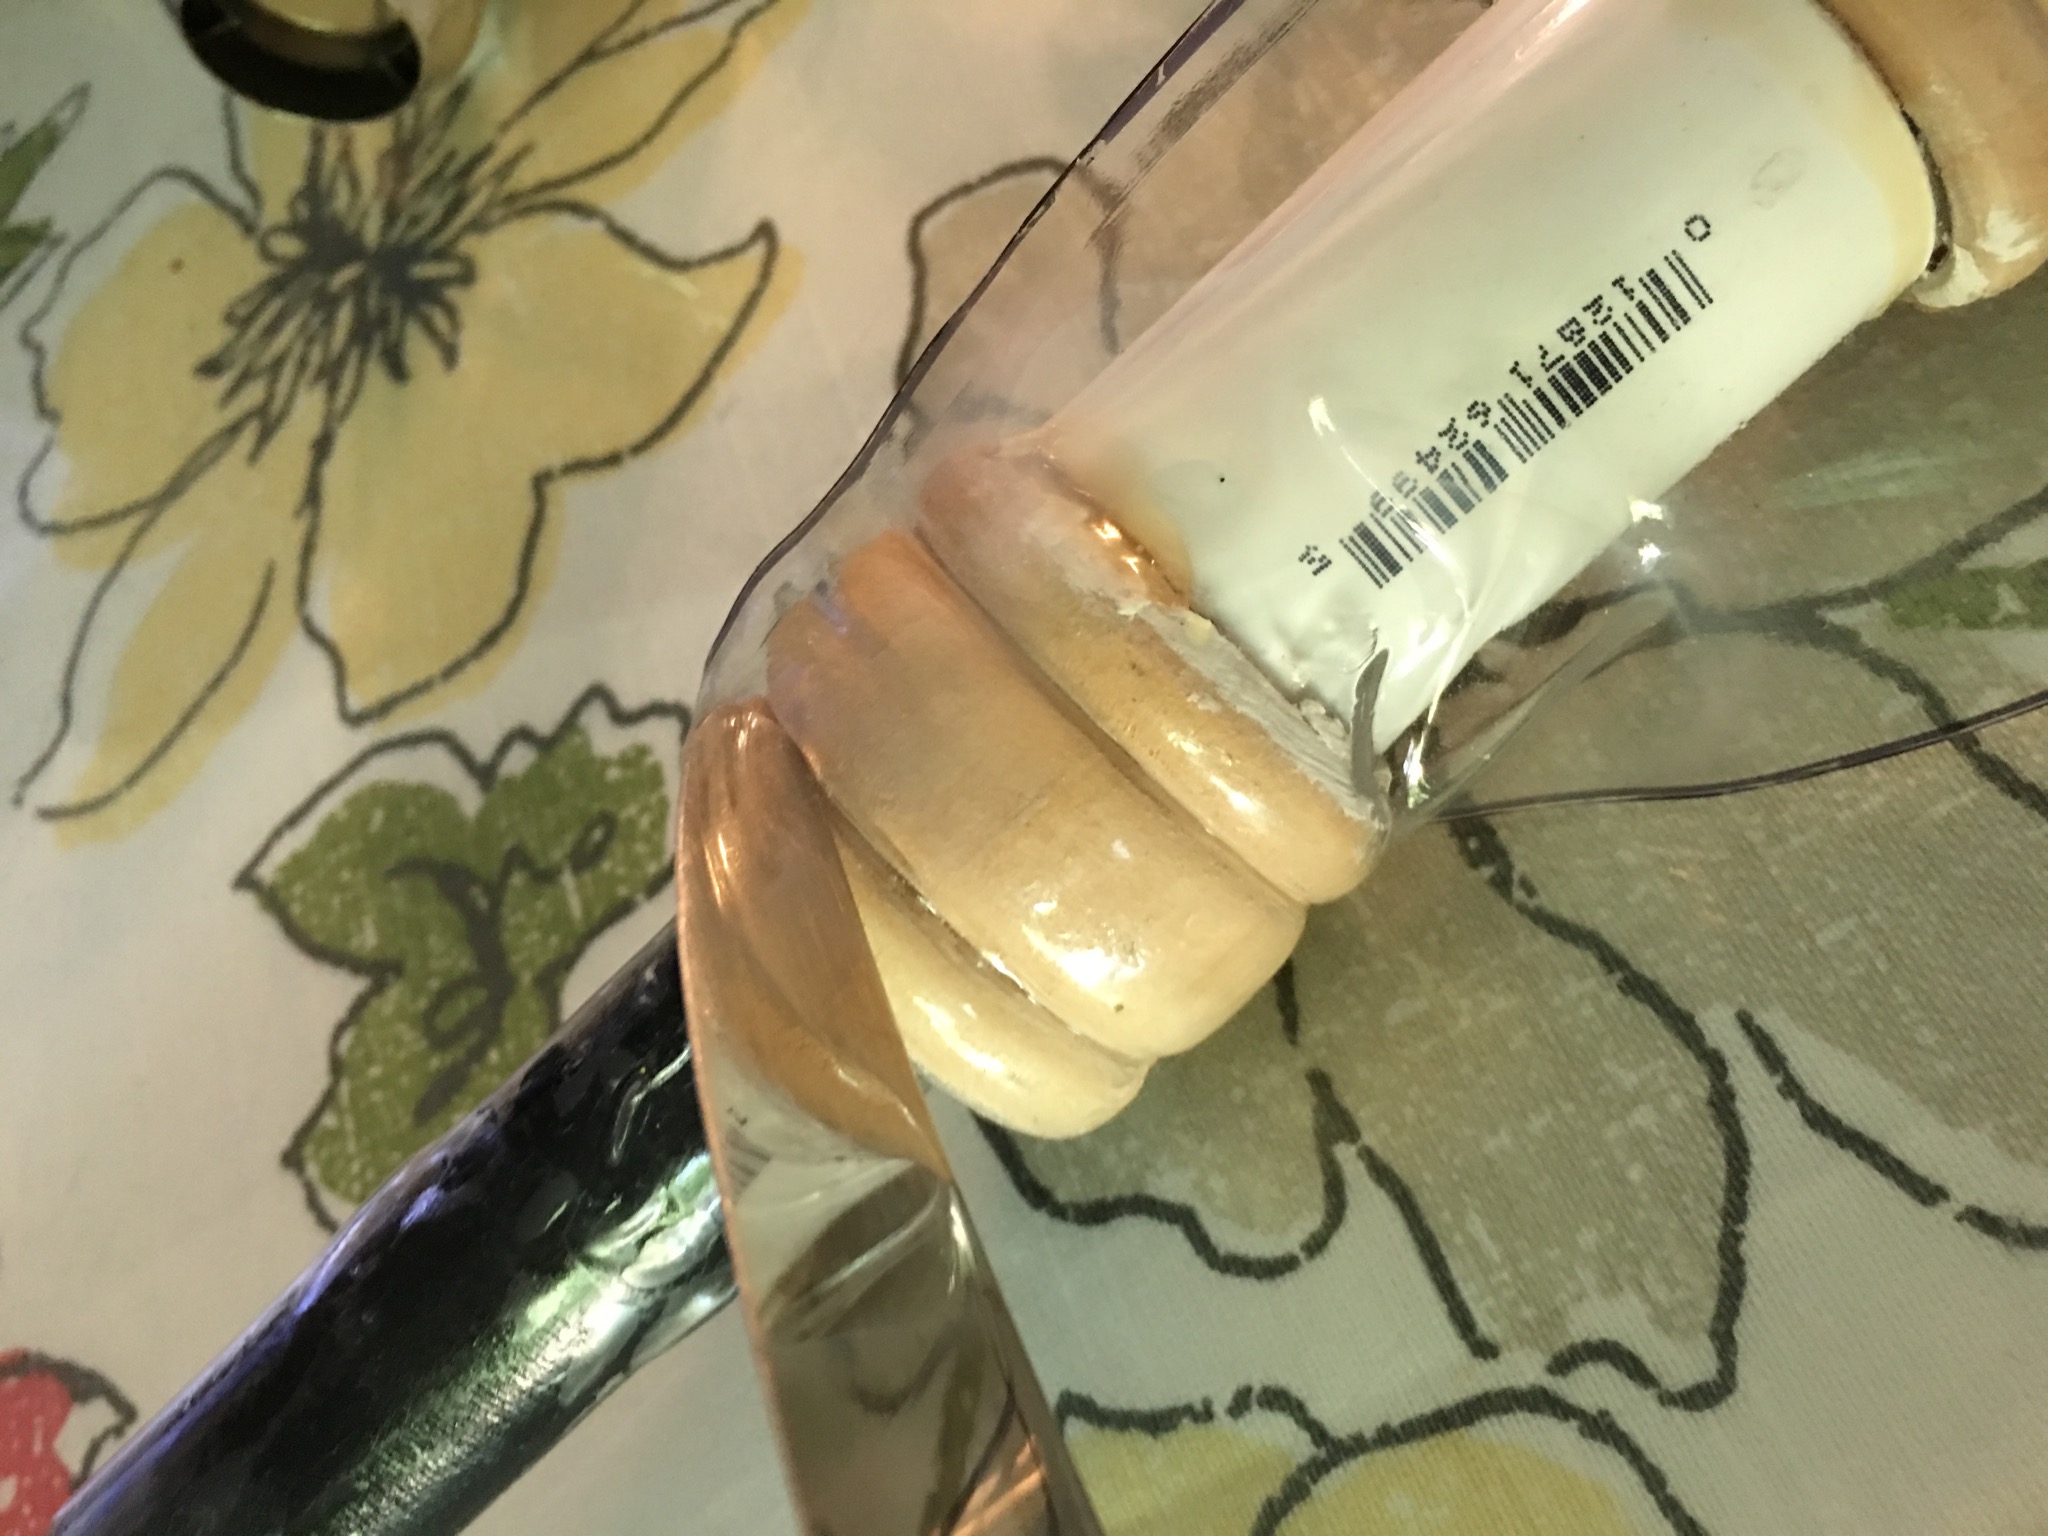
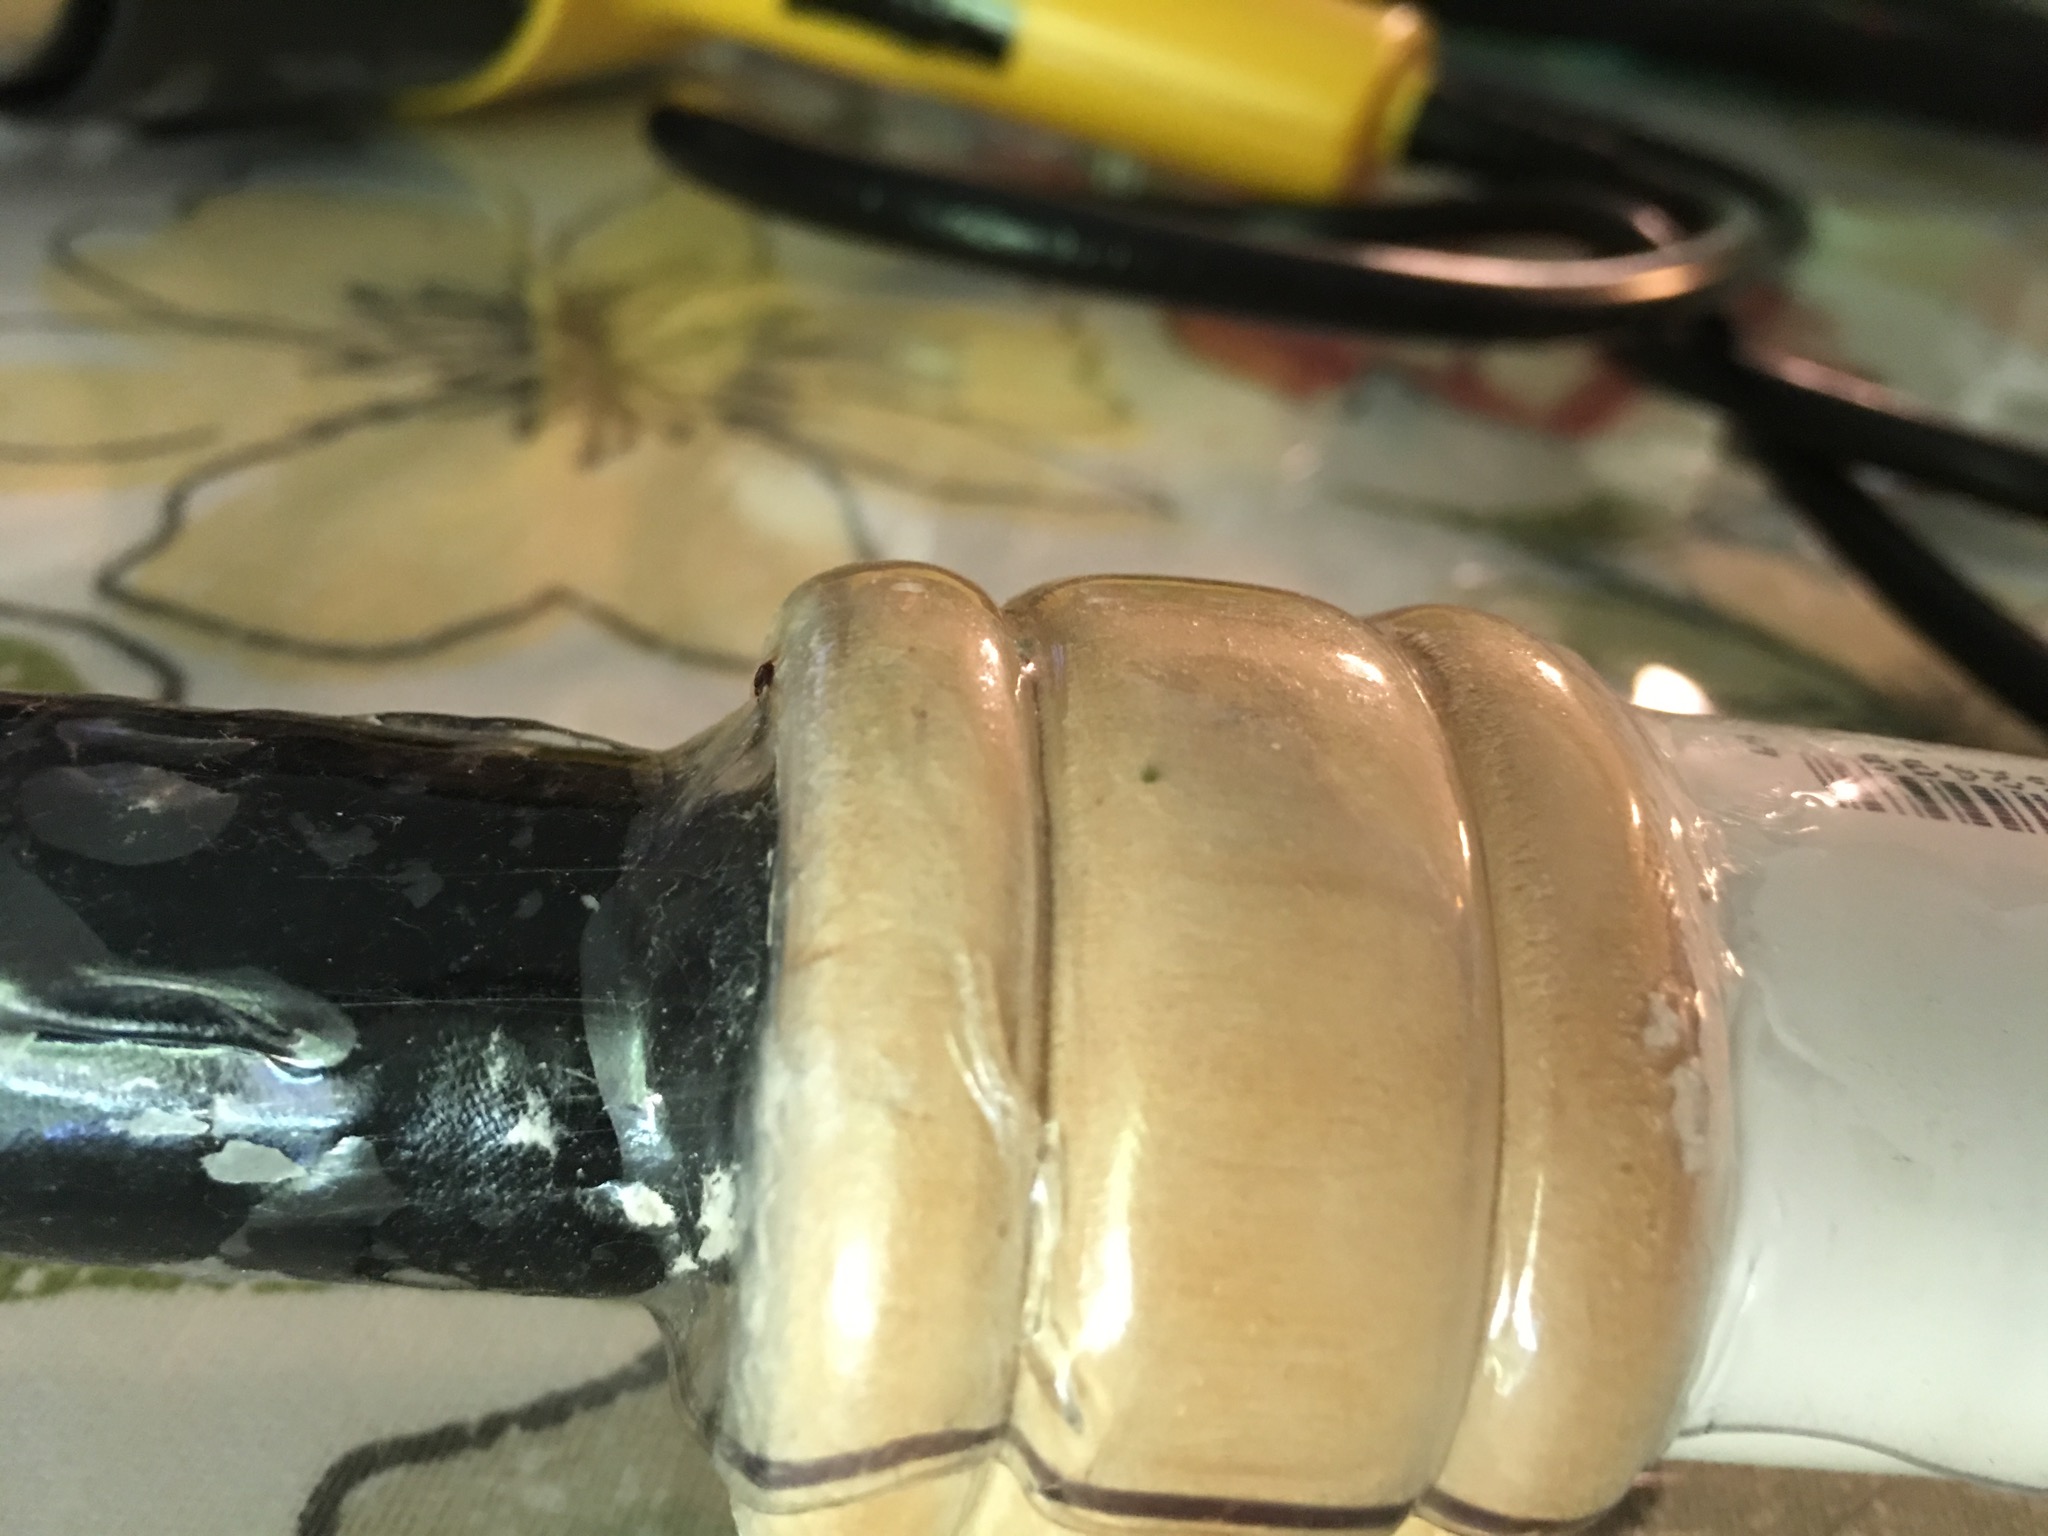
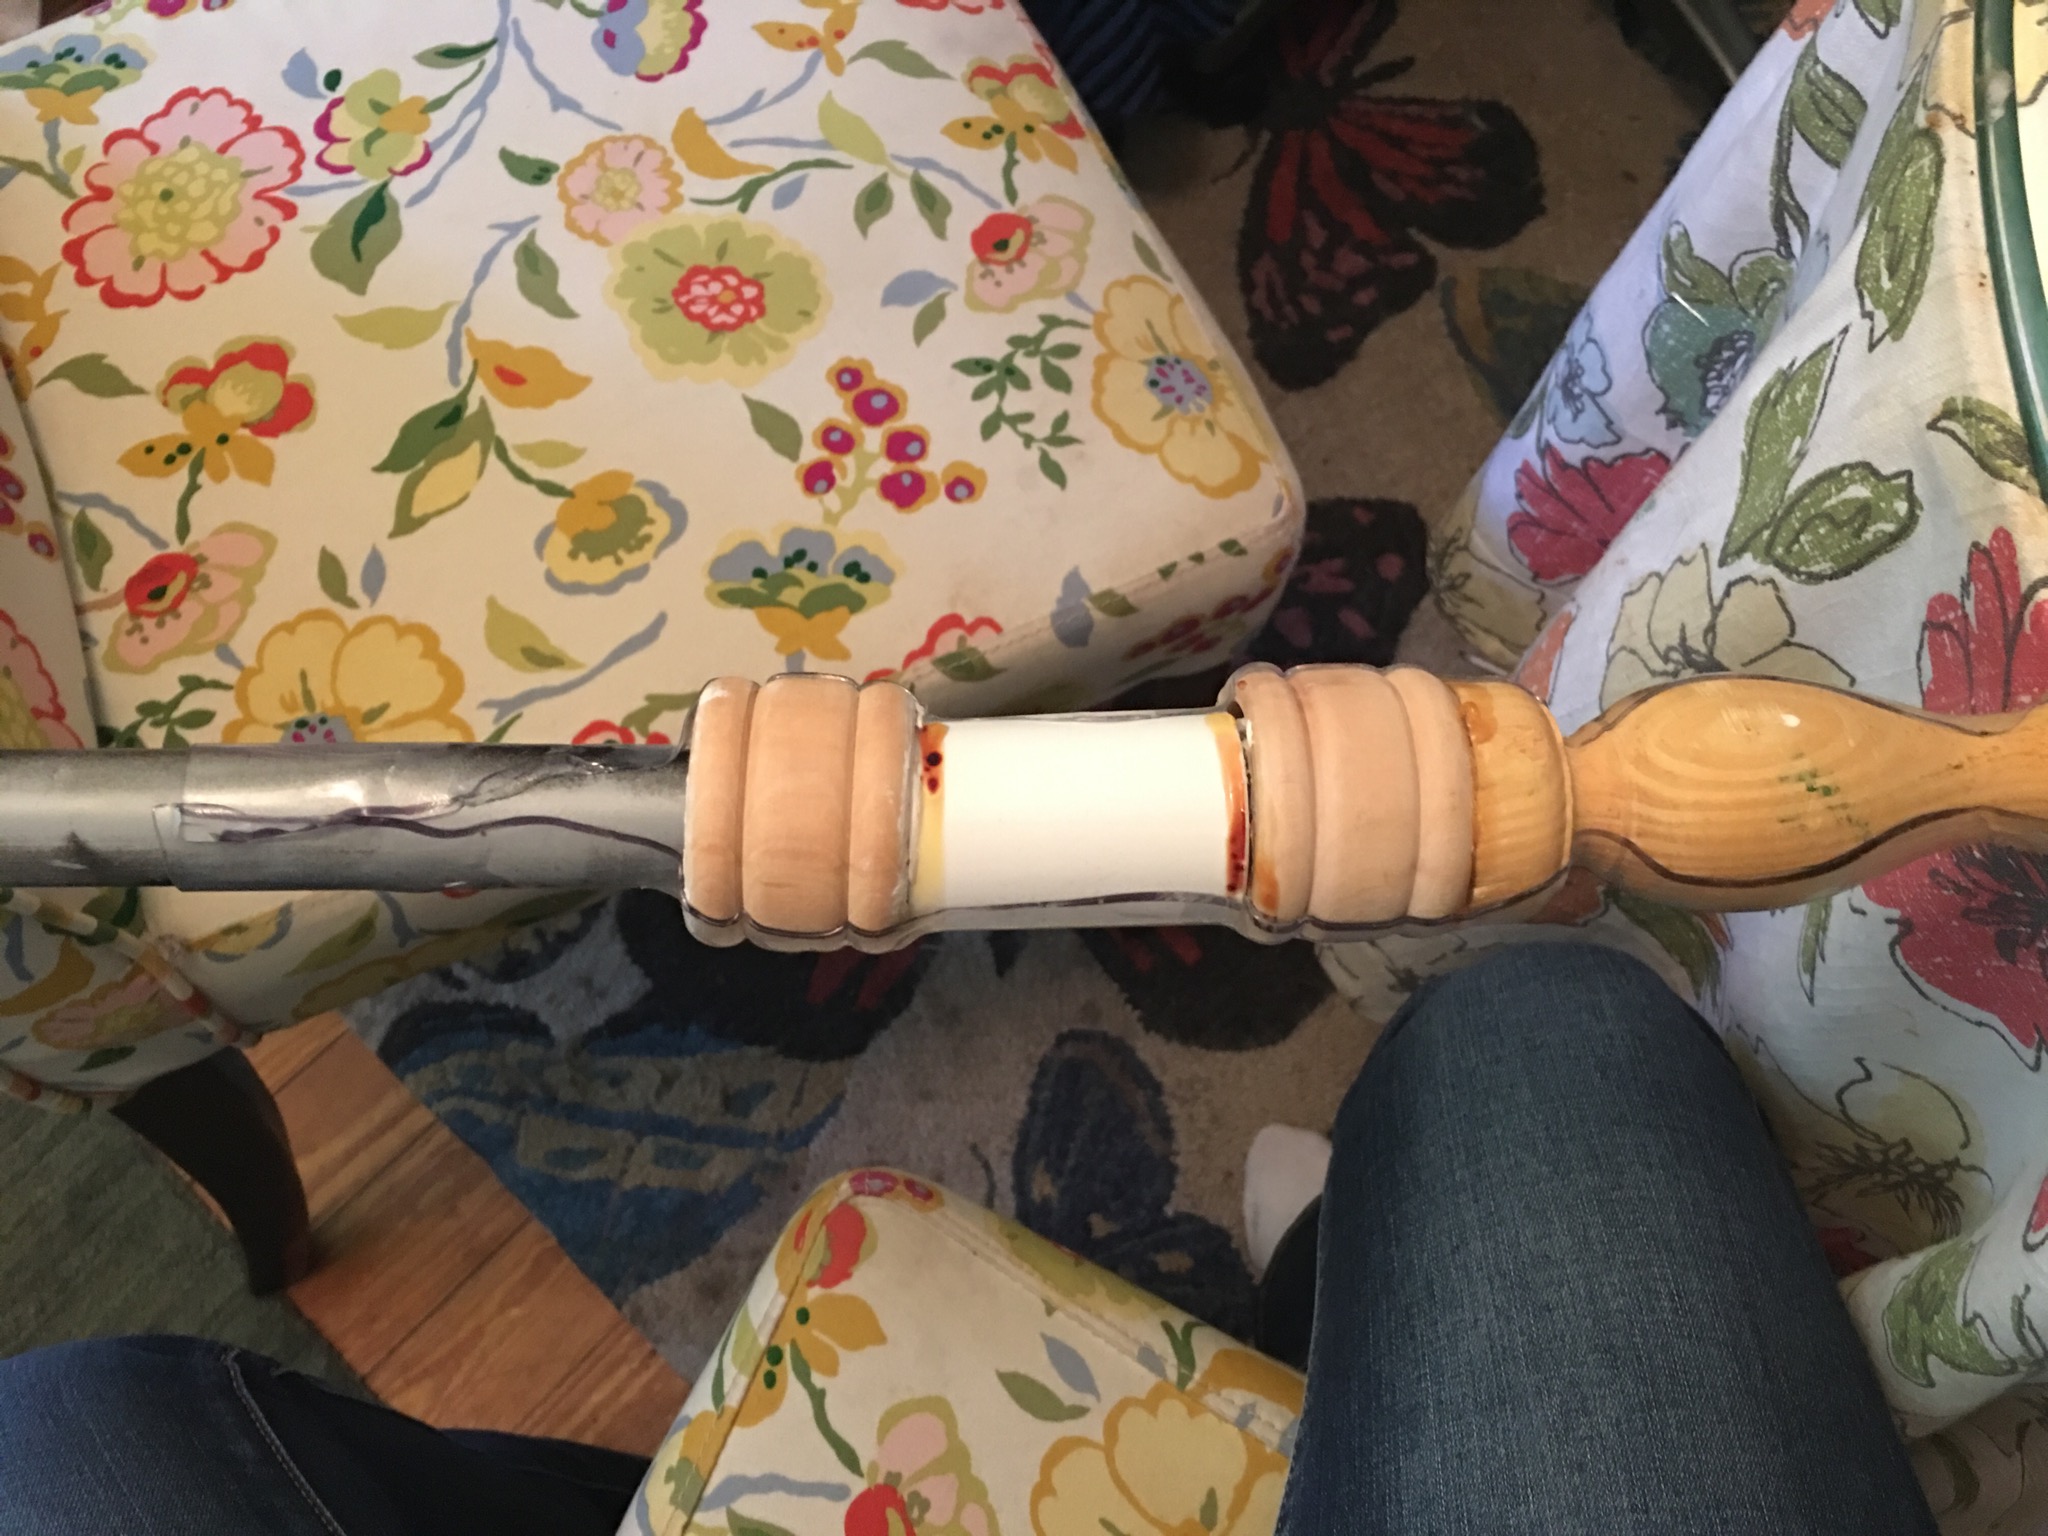
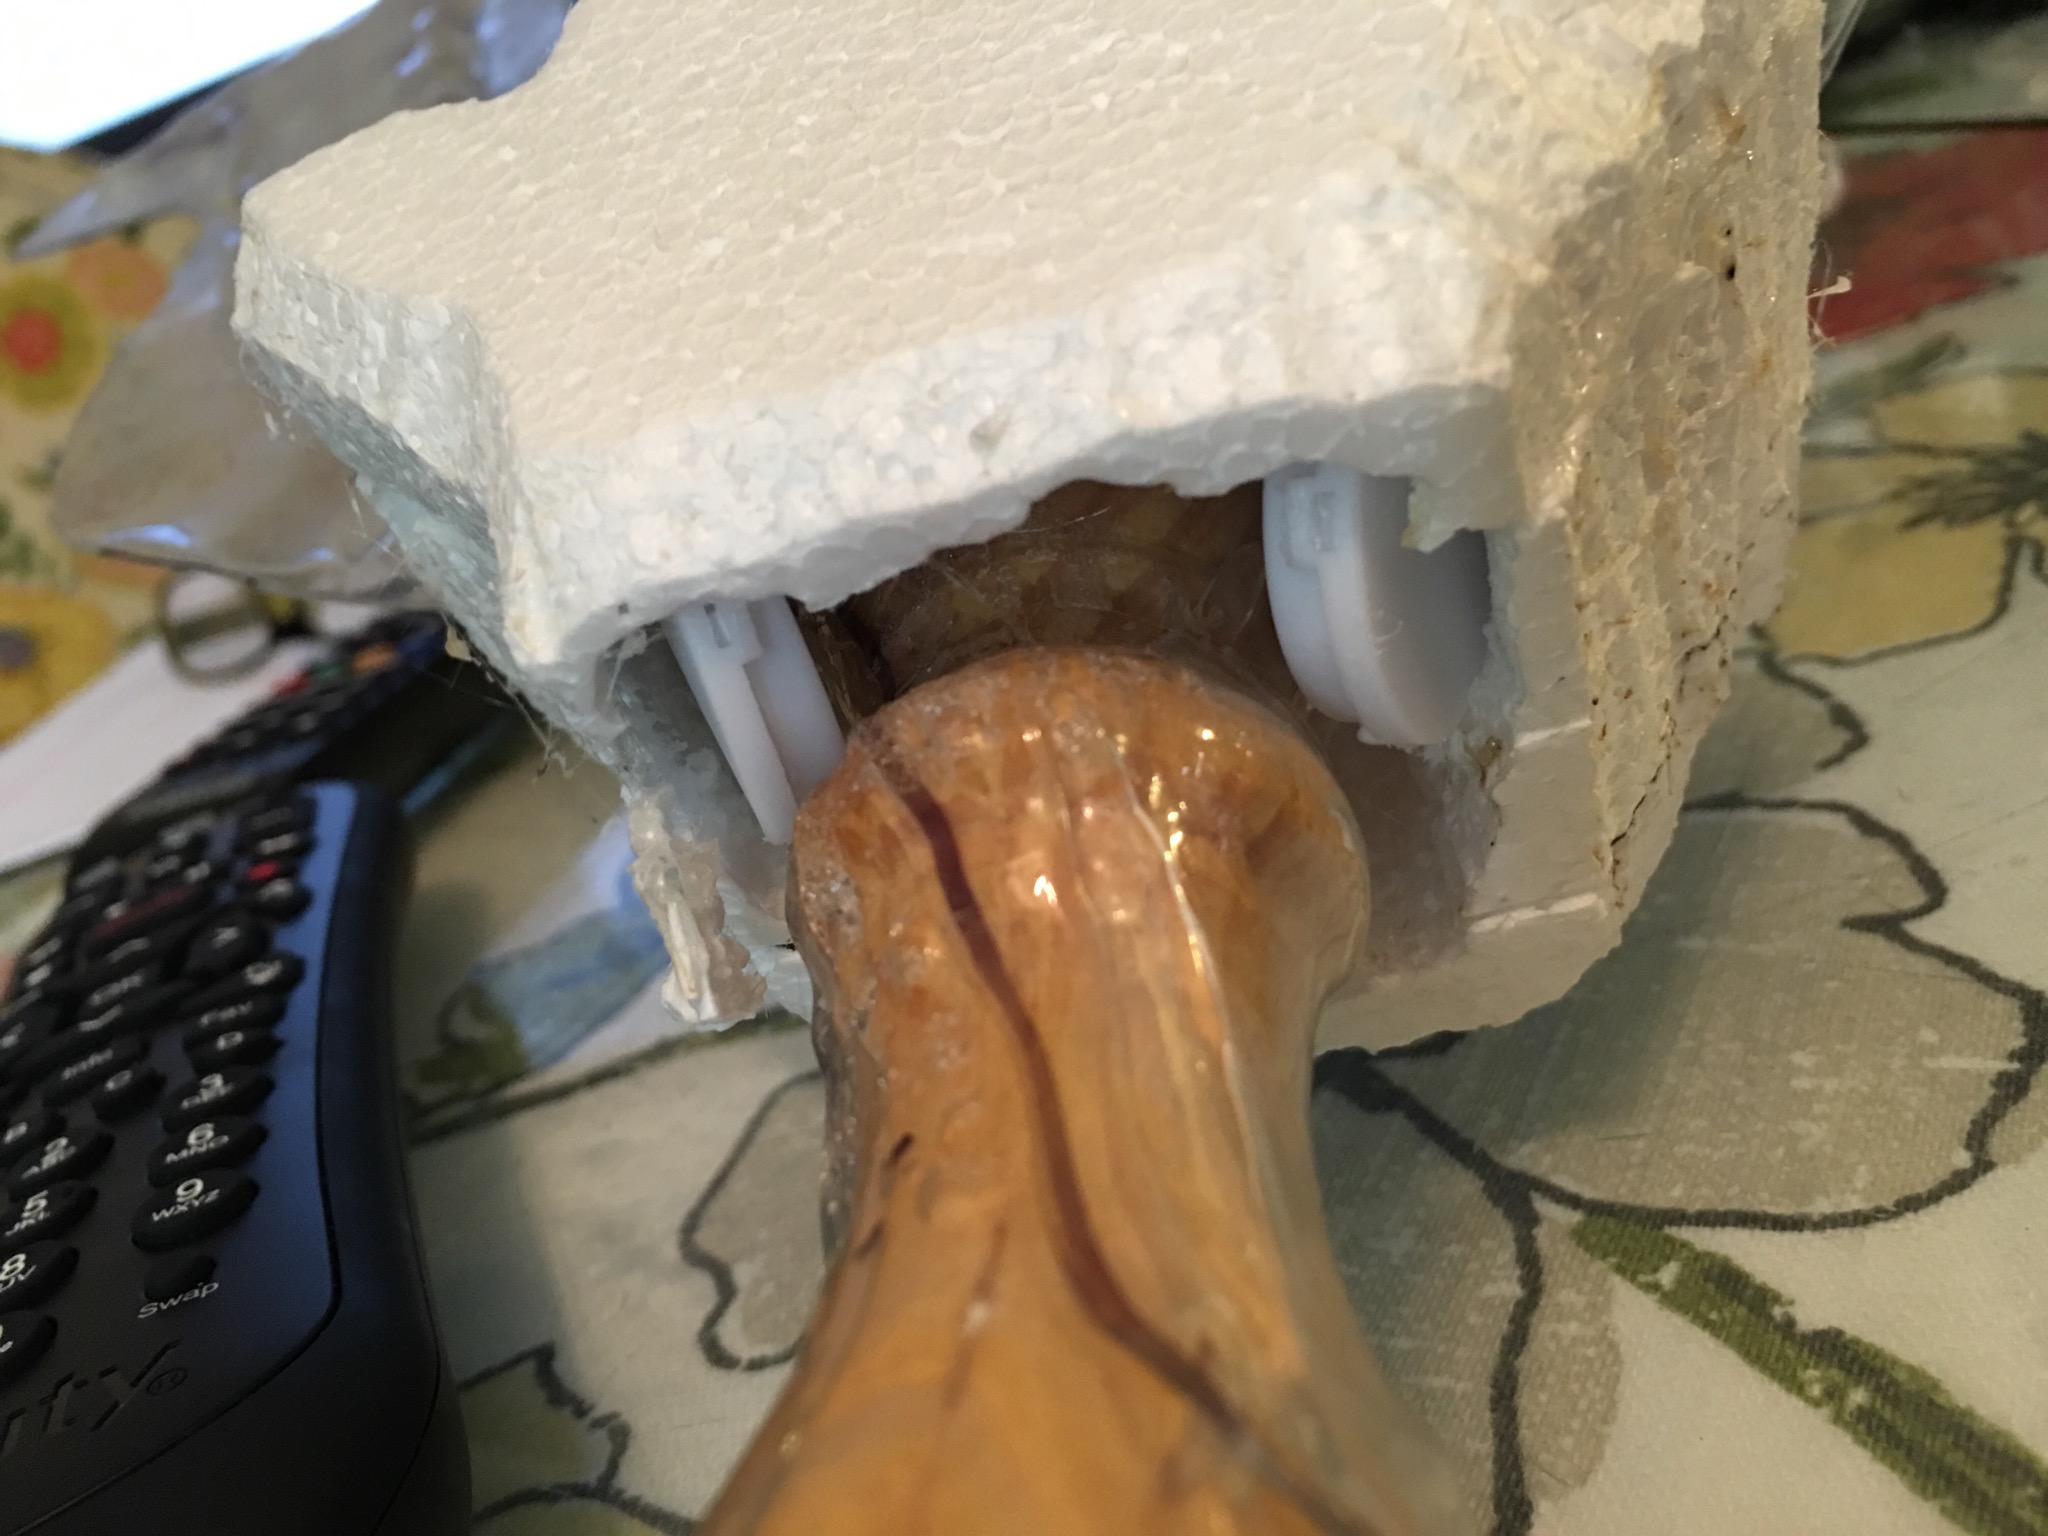
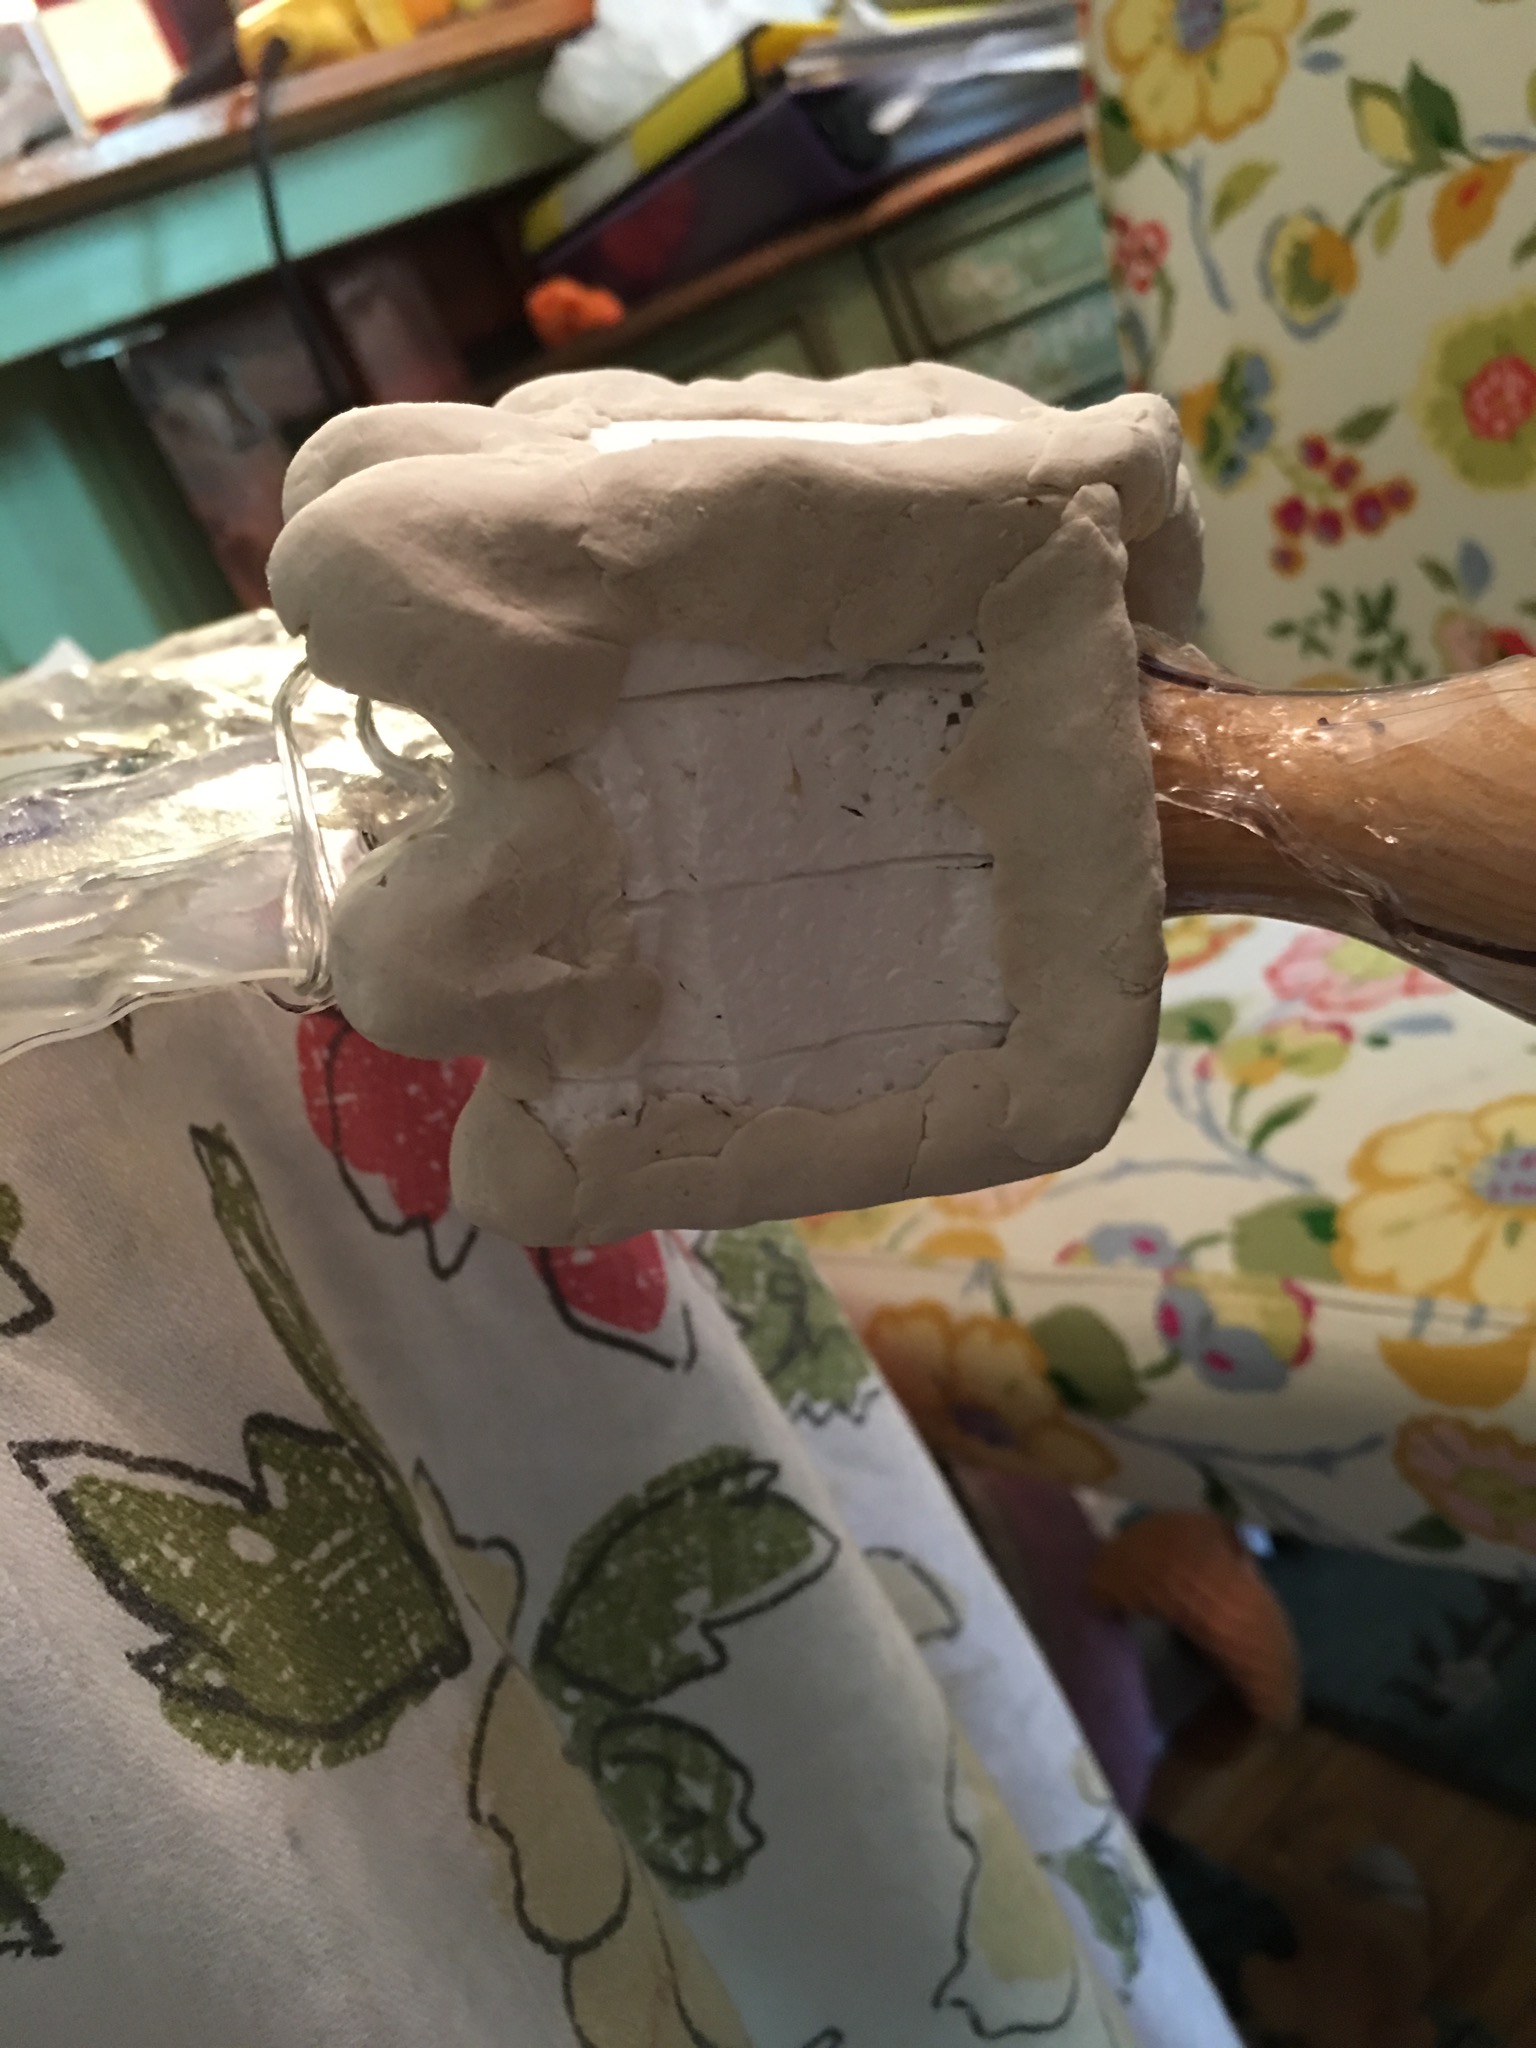
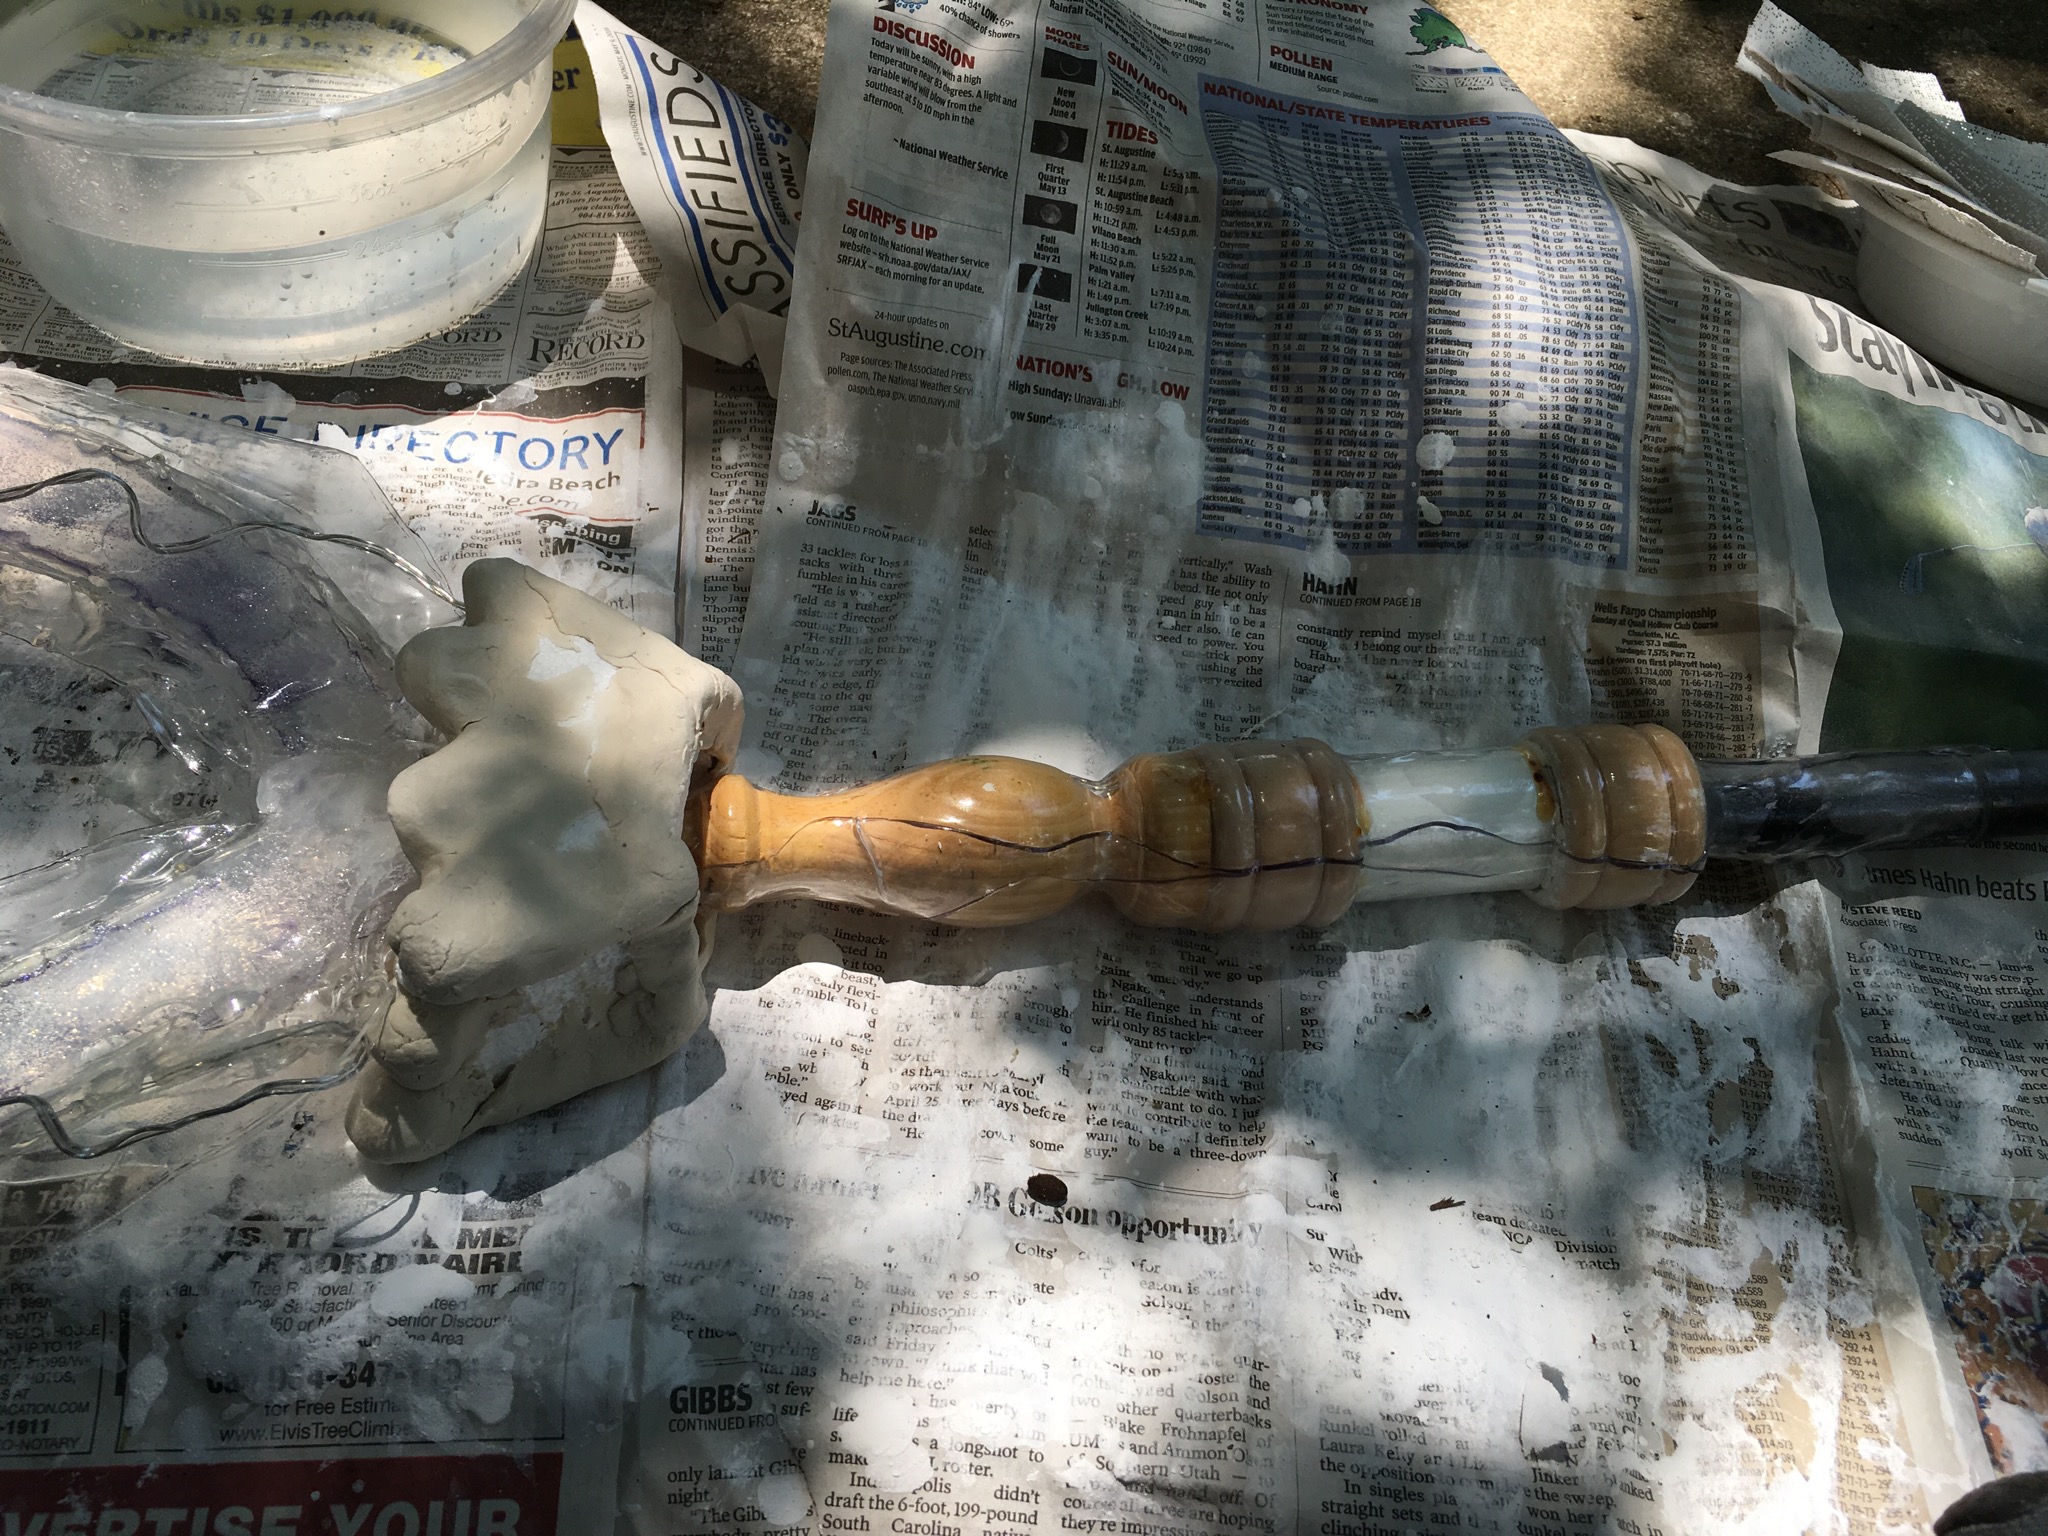
Put the candle stick aside for the moment and we will work from the bottom up. This part is fairly easy. You need your two wooden napkin rings (I chose these because of the grooves in the wood) and place the 2-3 inch PVC tube between the napkin holders. Now you need to somehow securely attach these pieces to the PVC pipe. I took some of the Paperclay and filled it into the gaps and then proceeded to shove the PVC pipe through the three items.
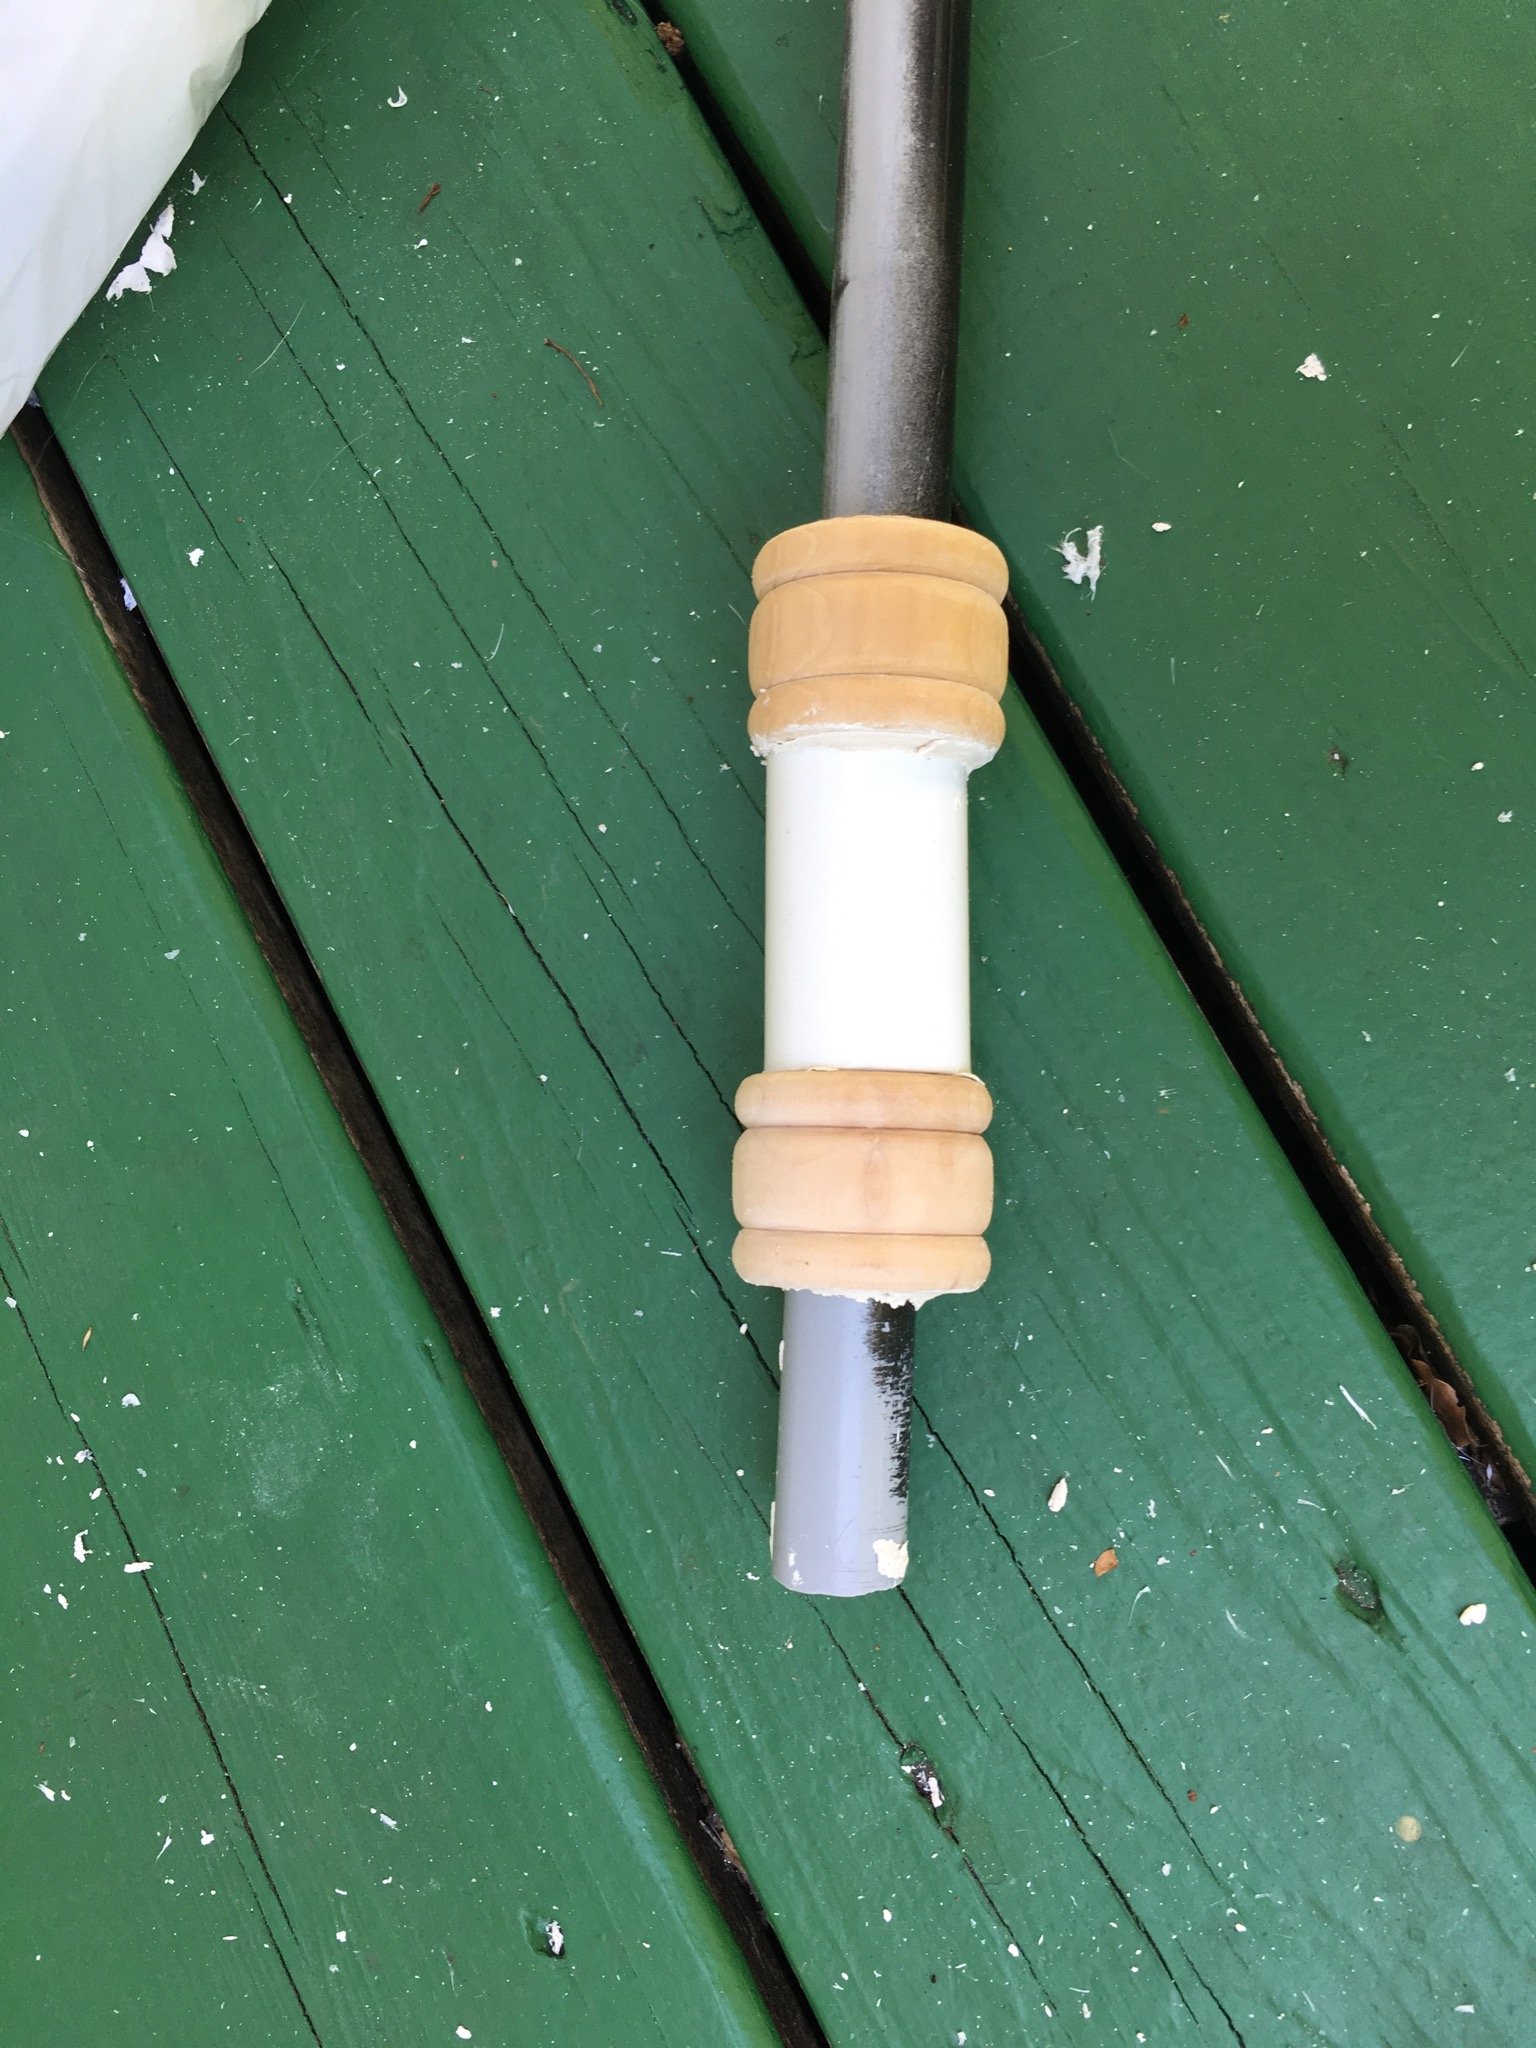
Not pictured above, but move these three items to the very top of the PVC pipe in preparation for the next step.
Now, I want to say that if you have the power tools required for this, use them! I unfortunately do not have very many cool power tools. If you do however, take your candle stick and drill a hole big enough for your PVC pipe to fit through. This will make the Glaive more stable. However, if you are like me you need to find another way to overcome this problem. Find the toughest glue you can find (I use “Gorilla” glue for wood). Cake the glue on the bottom of the candle stick and using a clamp attach it to the napkins holder ring below. Let dry for about 24 hours. You may also need to add some more glue along the edges to secure a bond.
Now if you are still worried about the stability of the top don’t worry. I had the same problem. I made a technique in the next few section that helped add support.
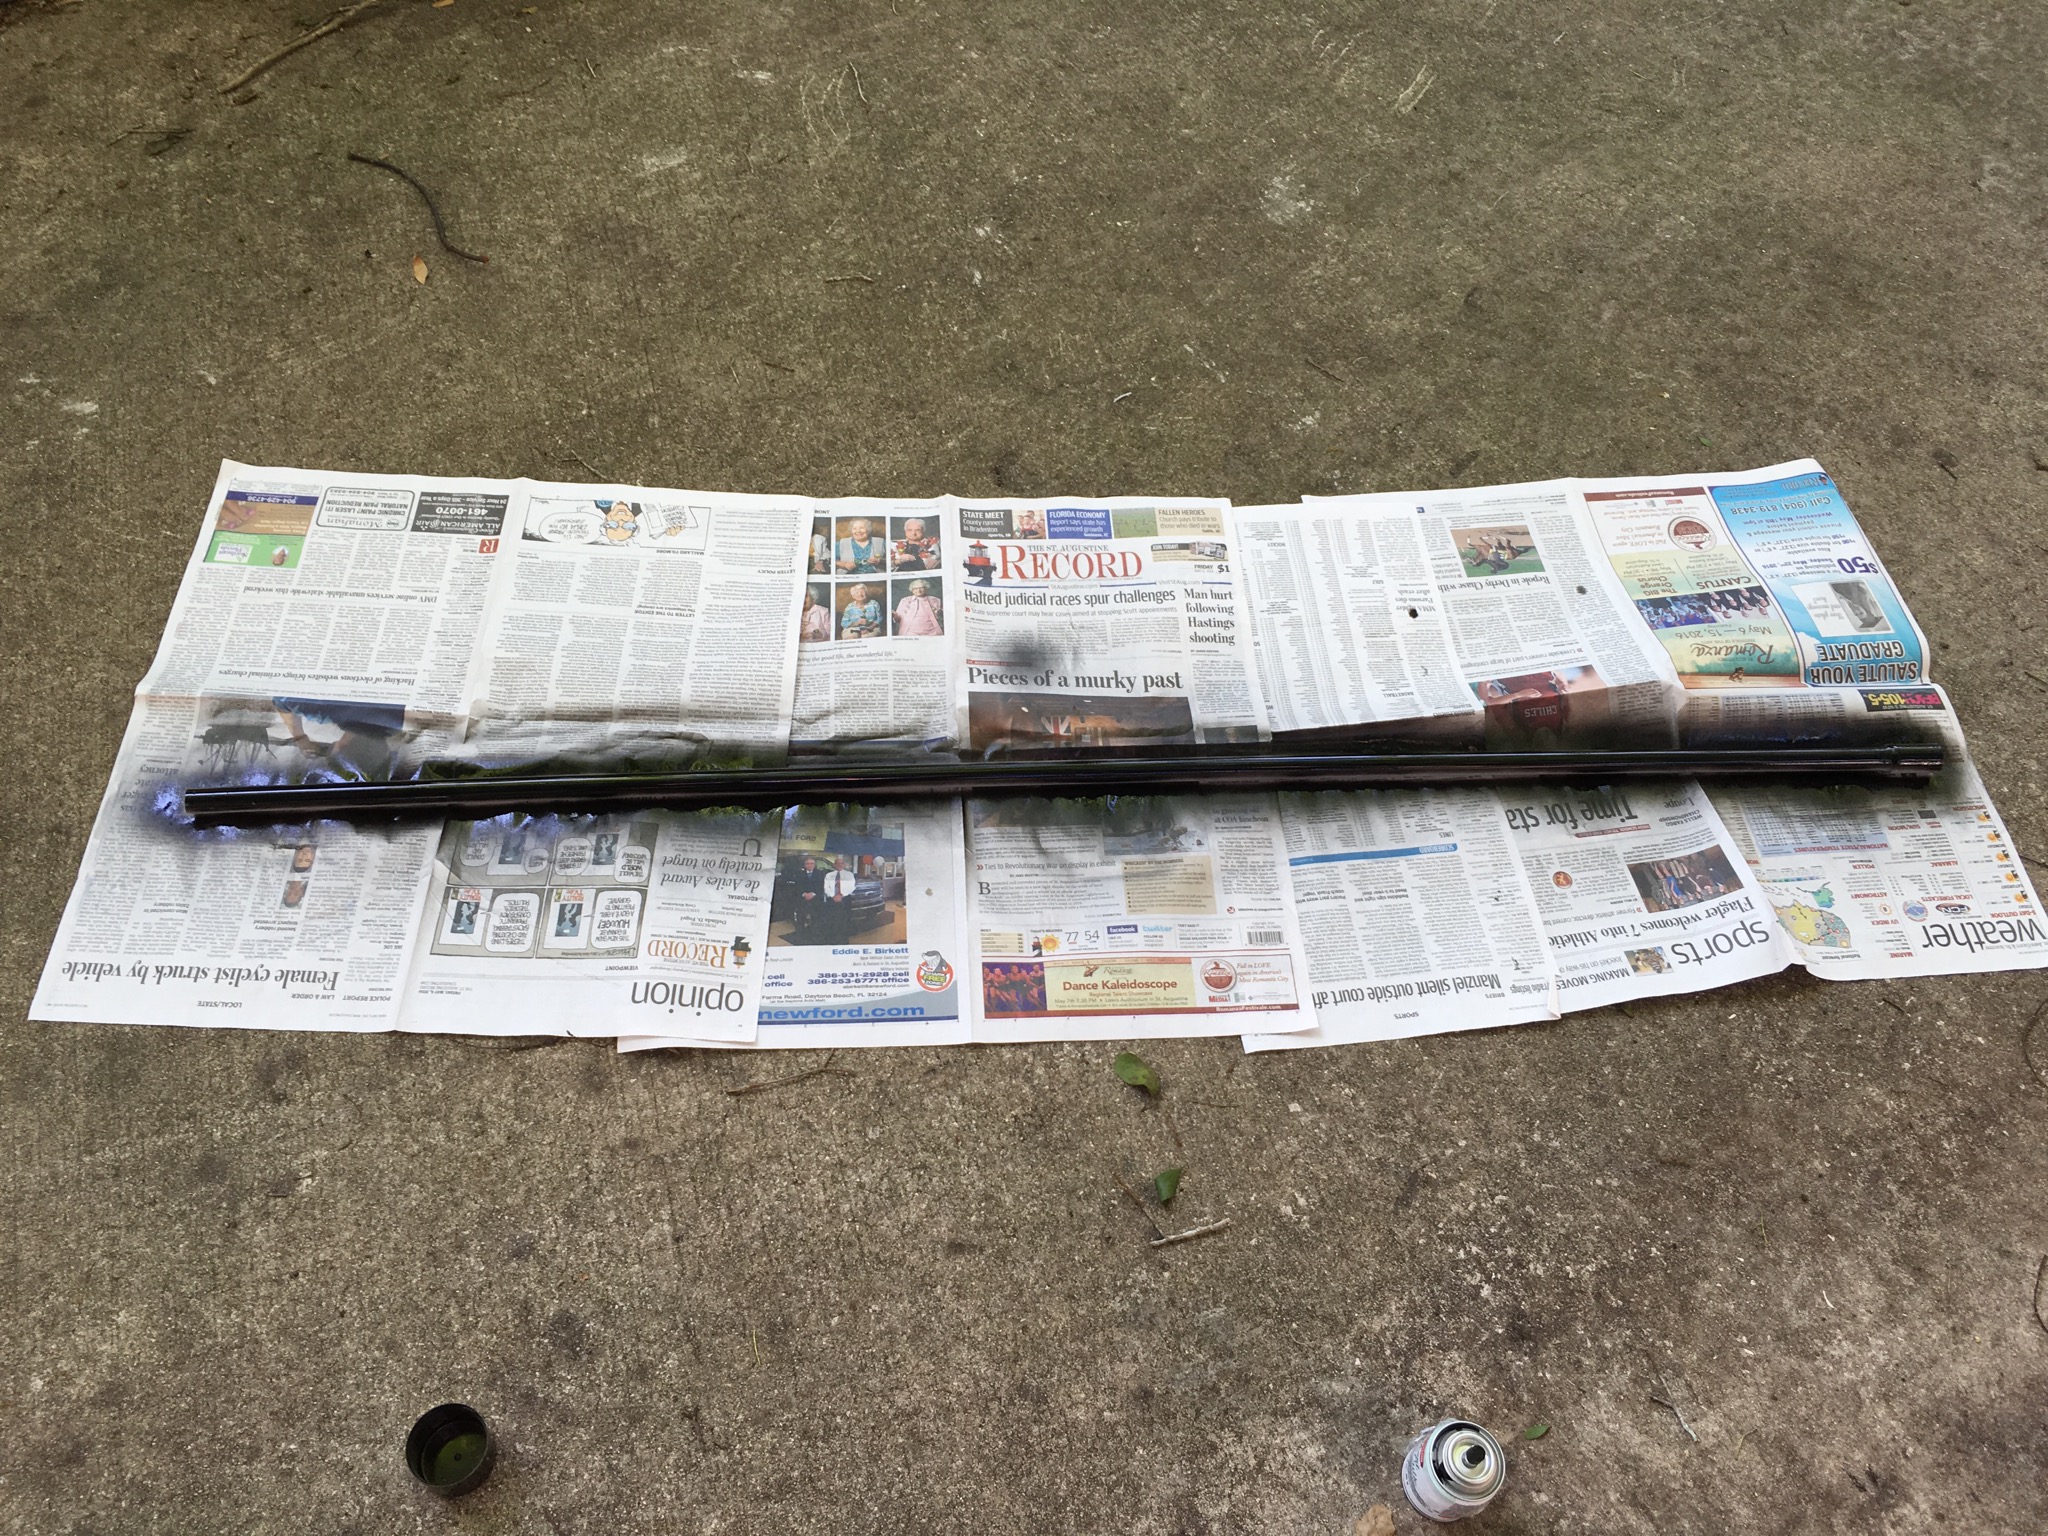
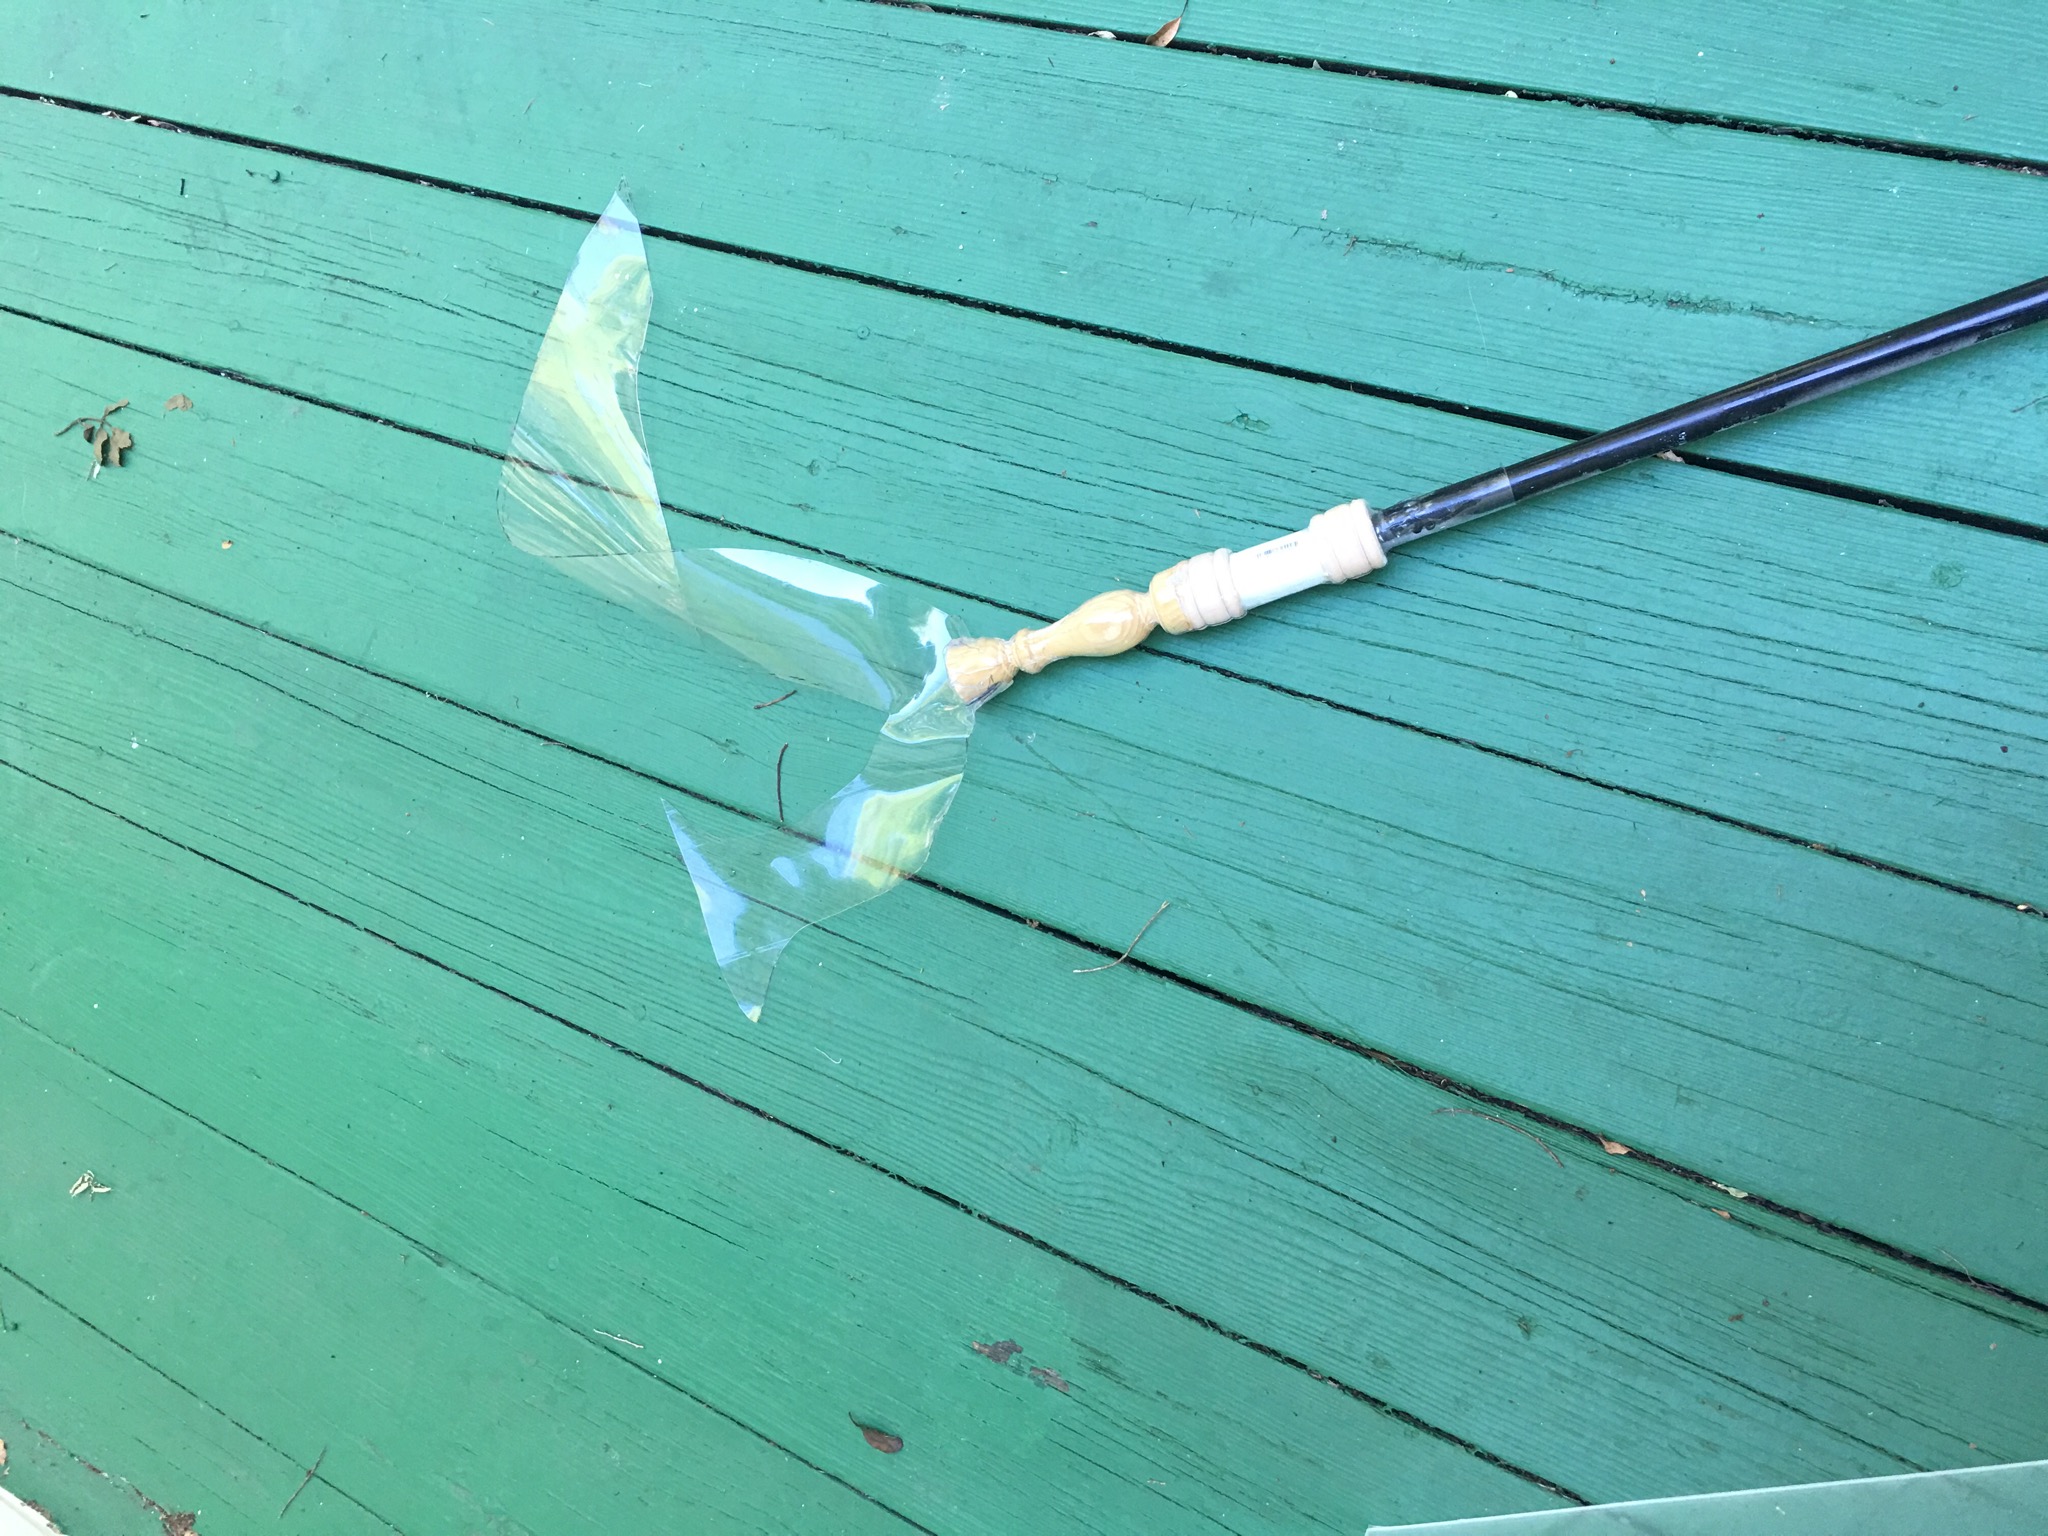
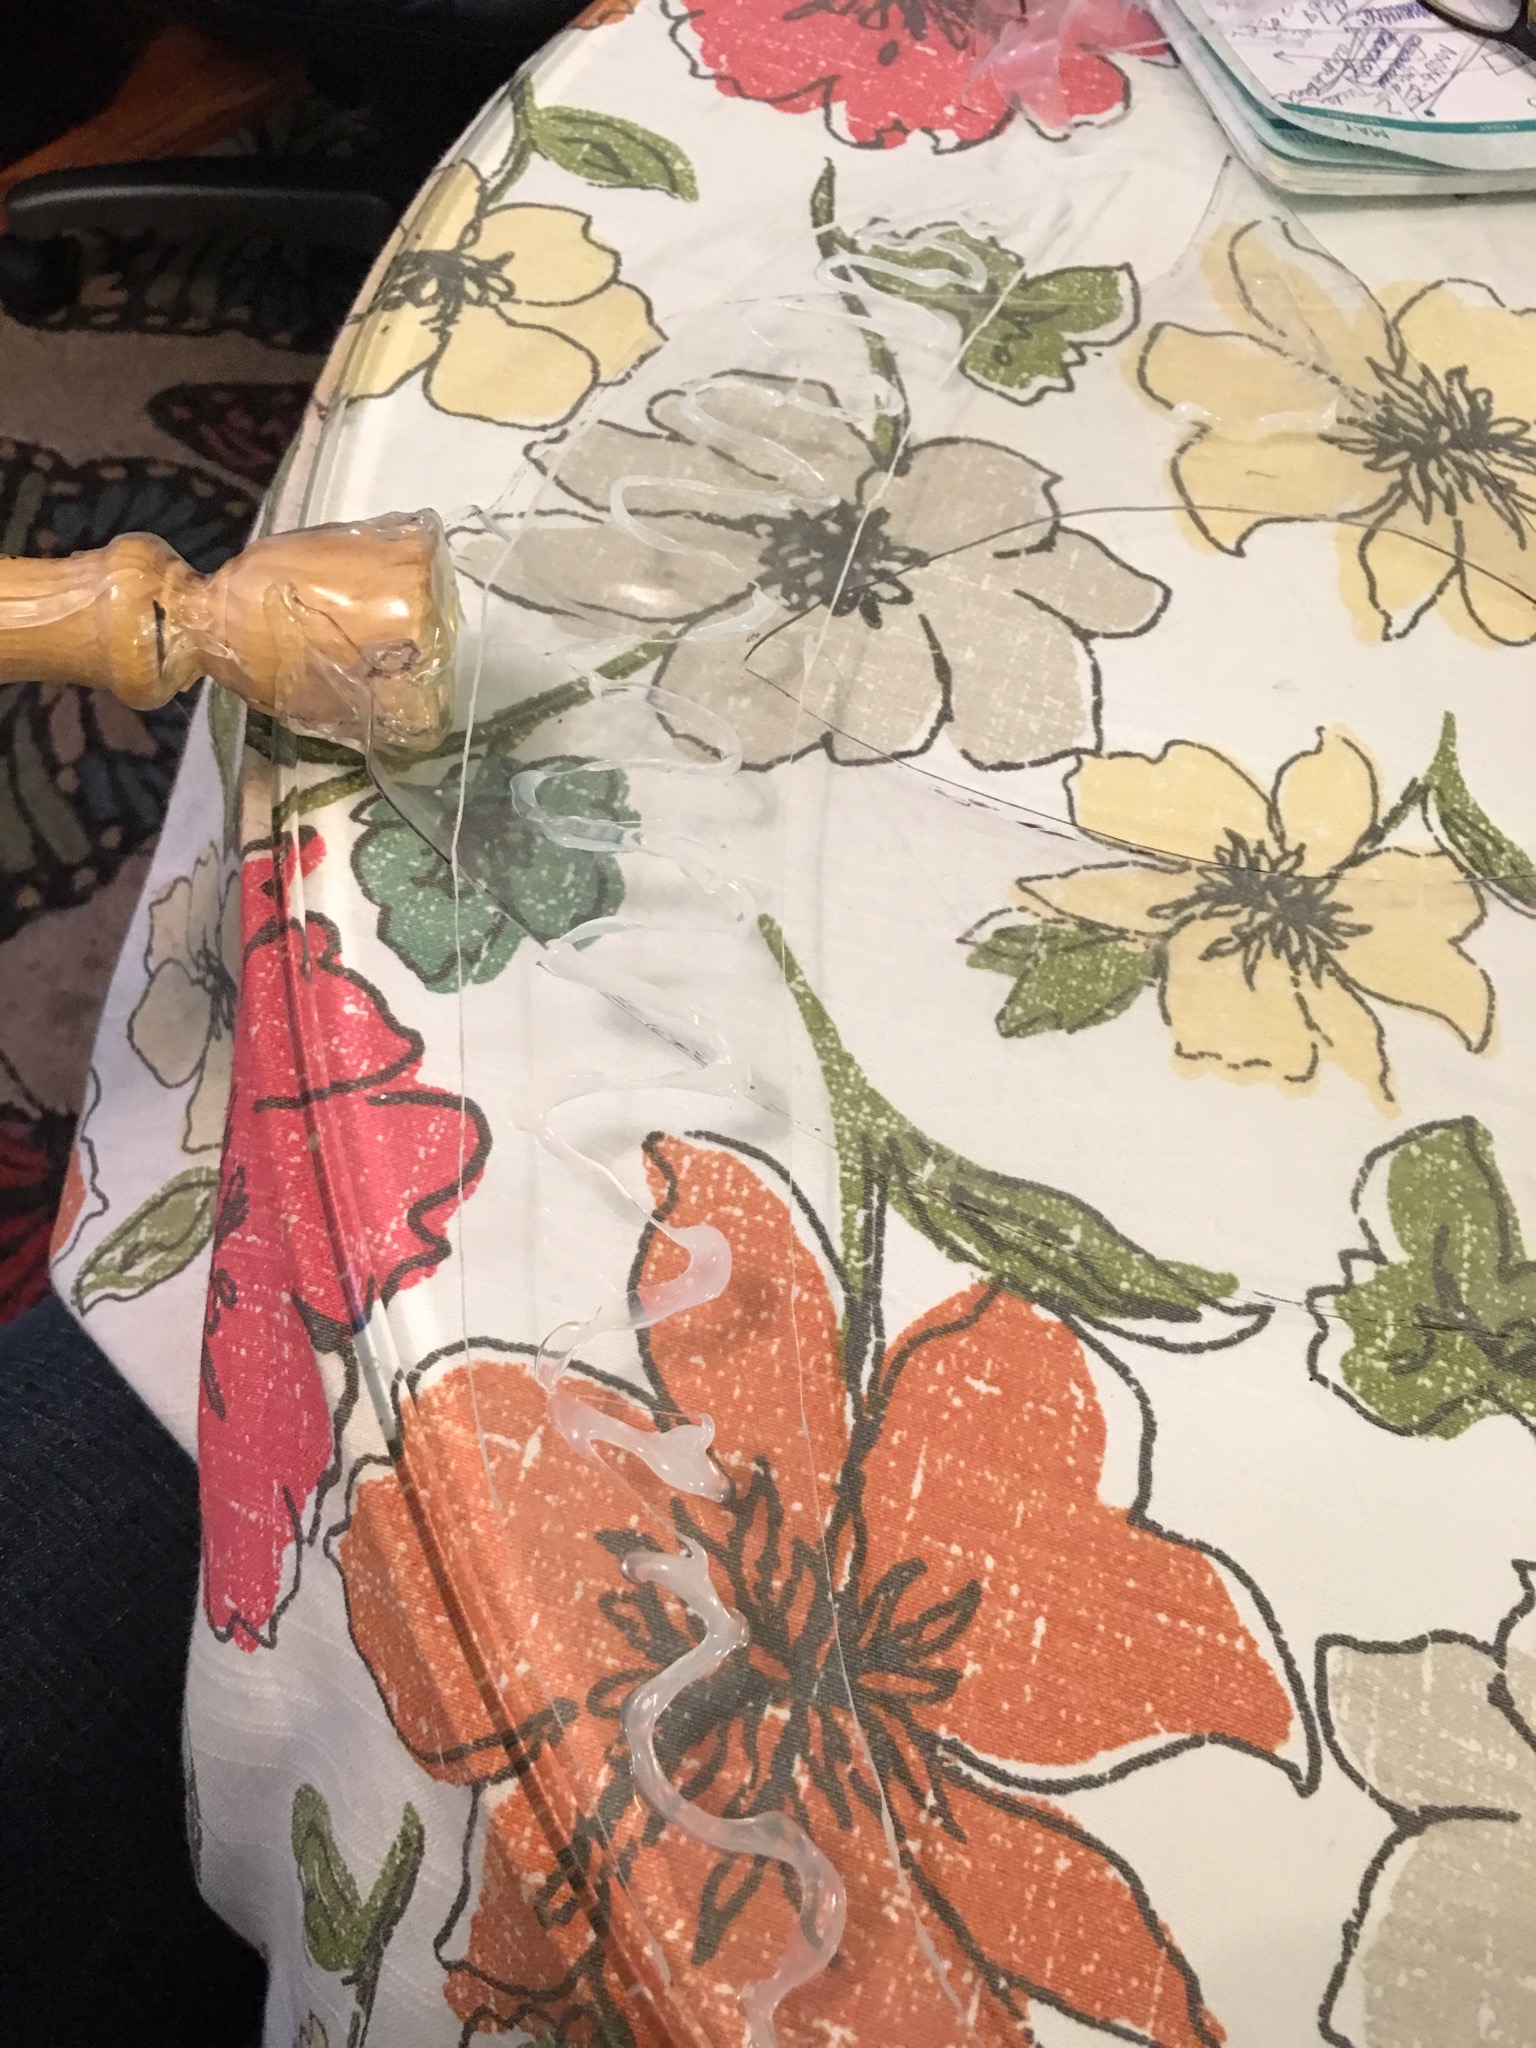
Step 6: Transparent Worbla
Now for the moment many people probably look forward to: creating the actual blade.
Make sure the glue is dry on the candle stick first (so you will be doing this part about 24 hours later)
Lay out your transparent Worbla and grab a marker. You may need some heavy items to hold the Worbla down as you design and cut the Glaive.
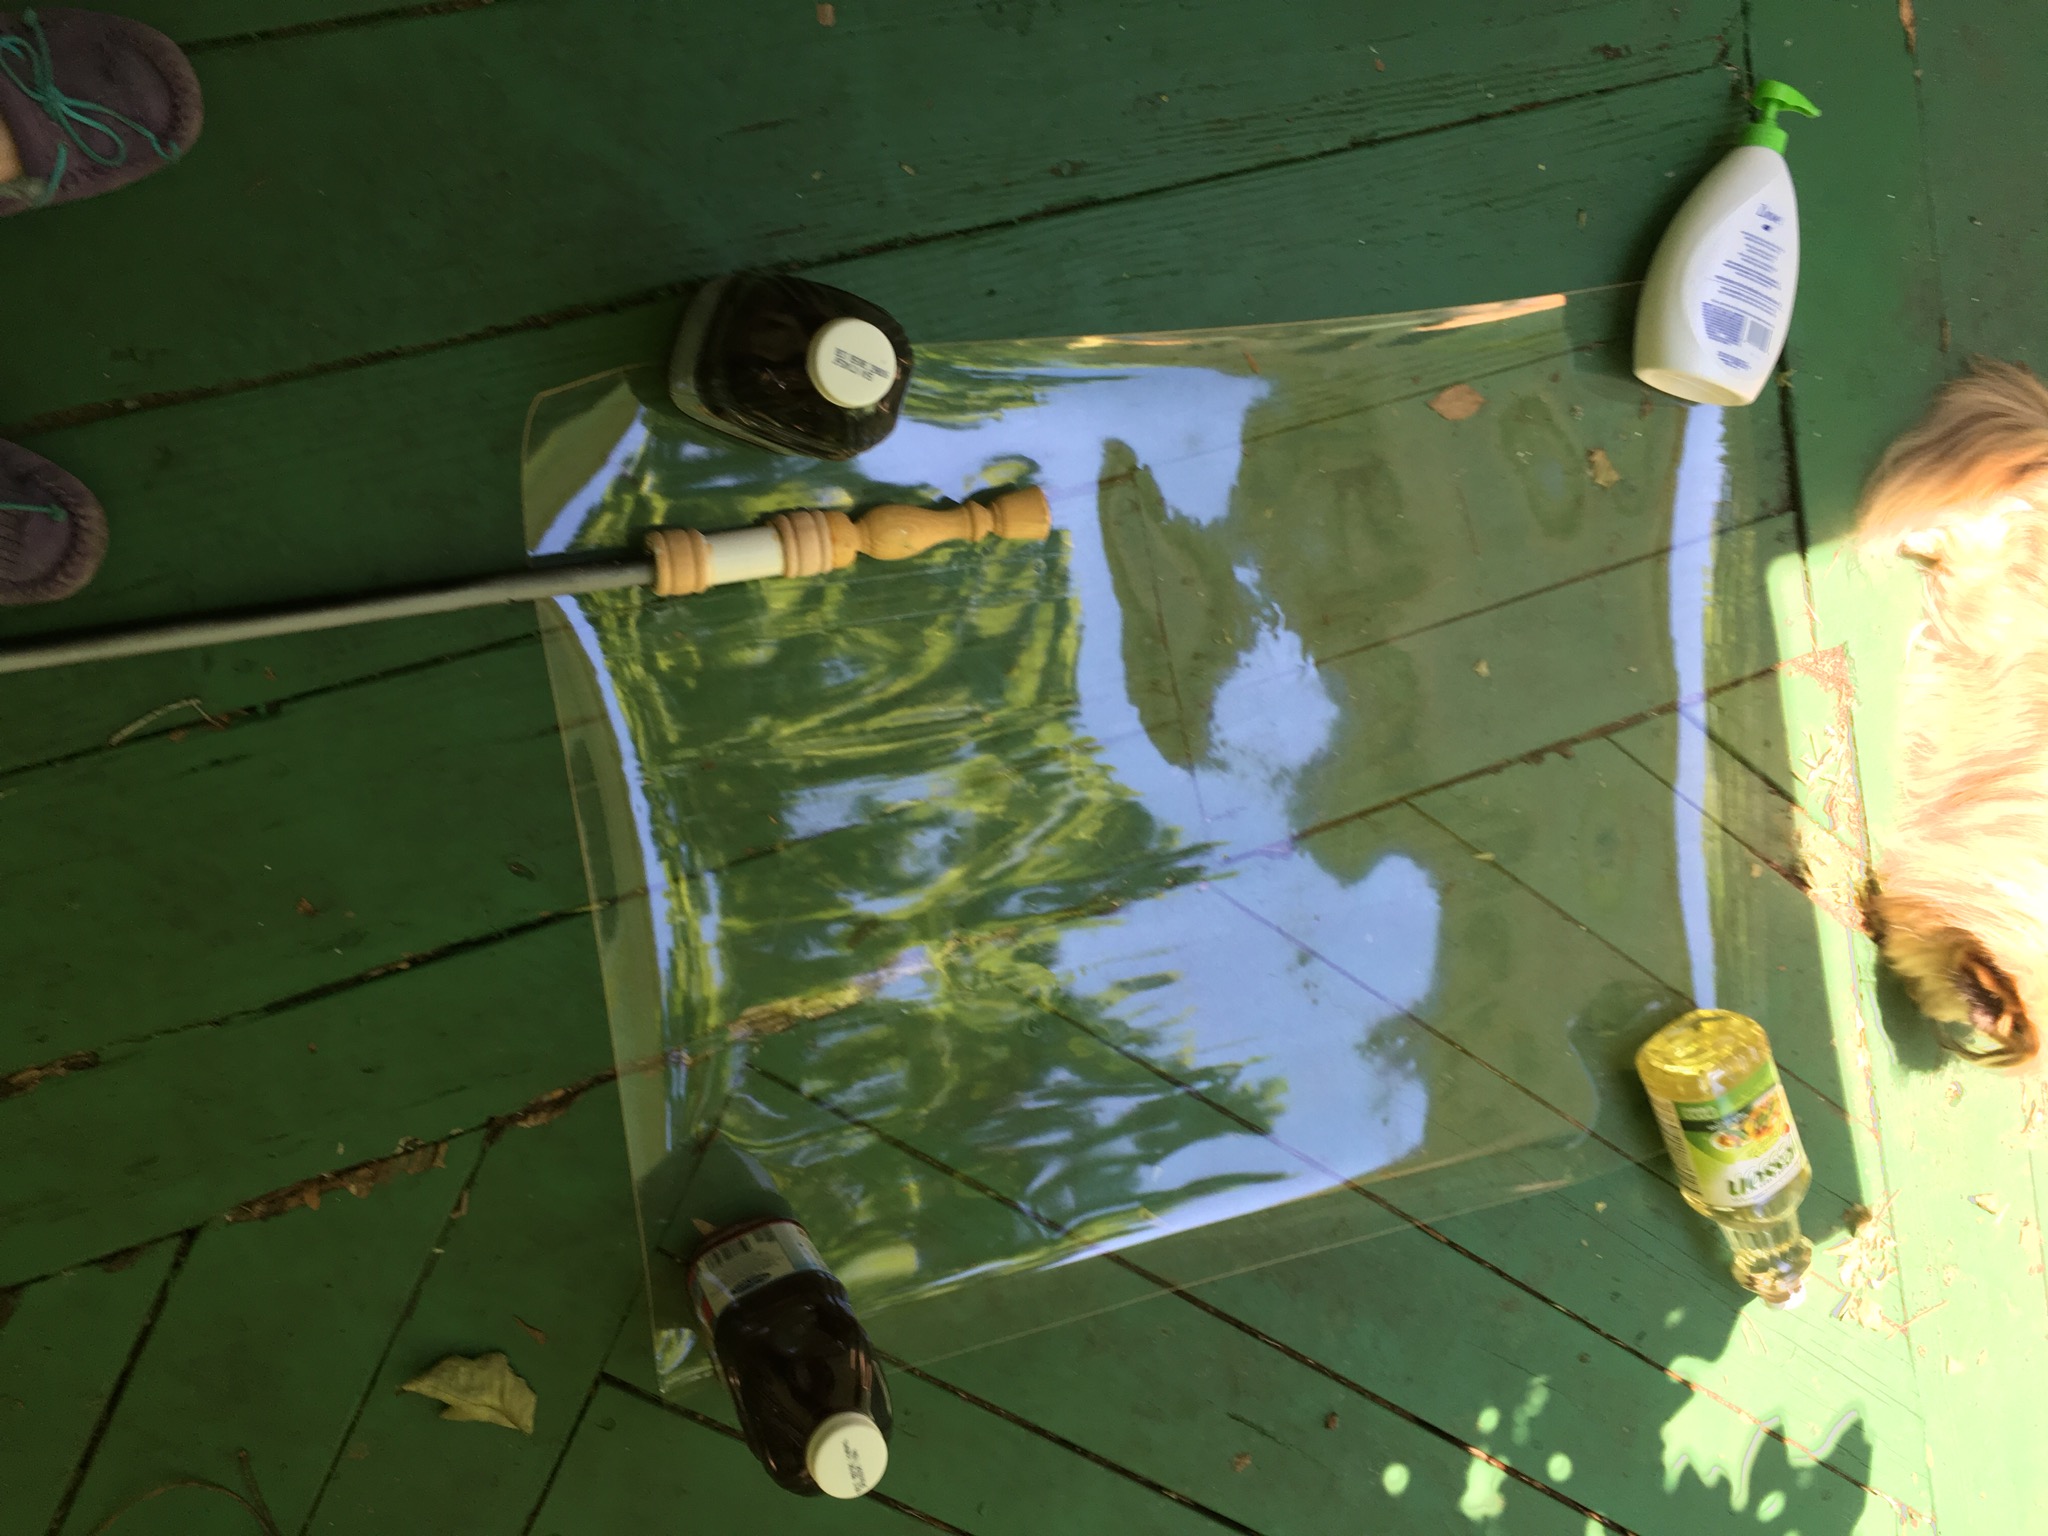
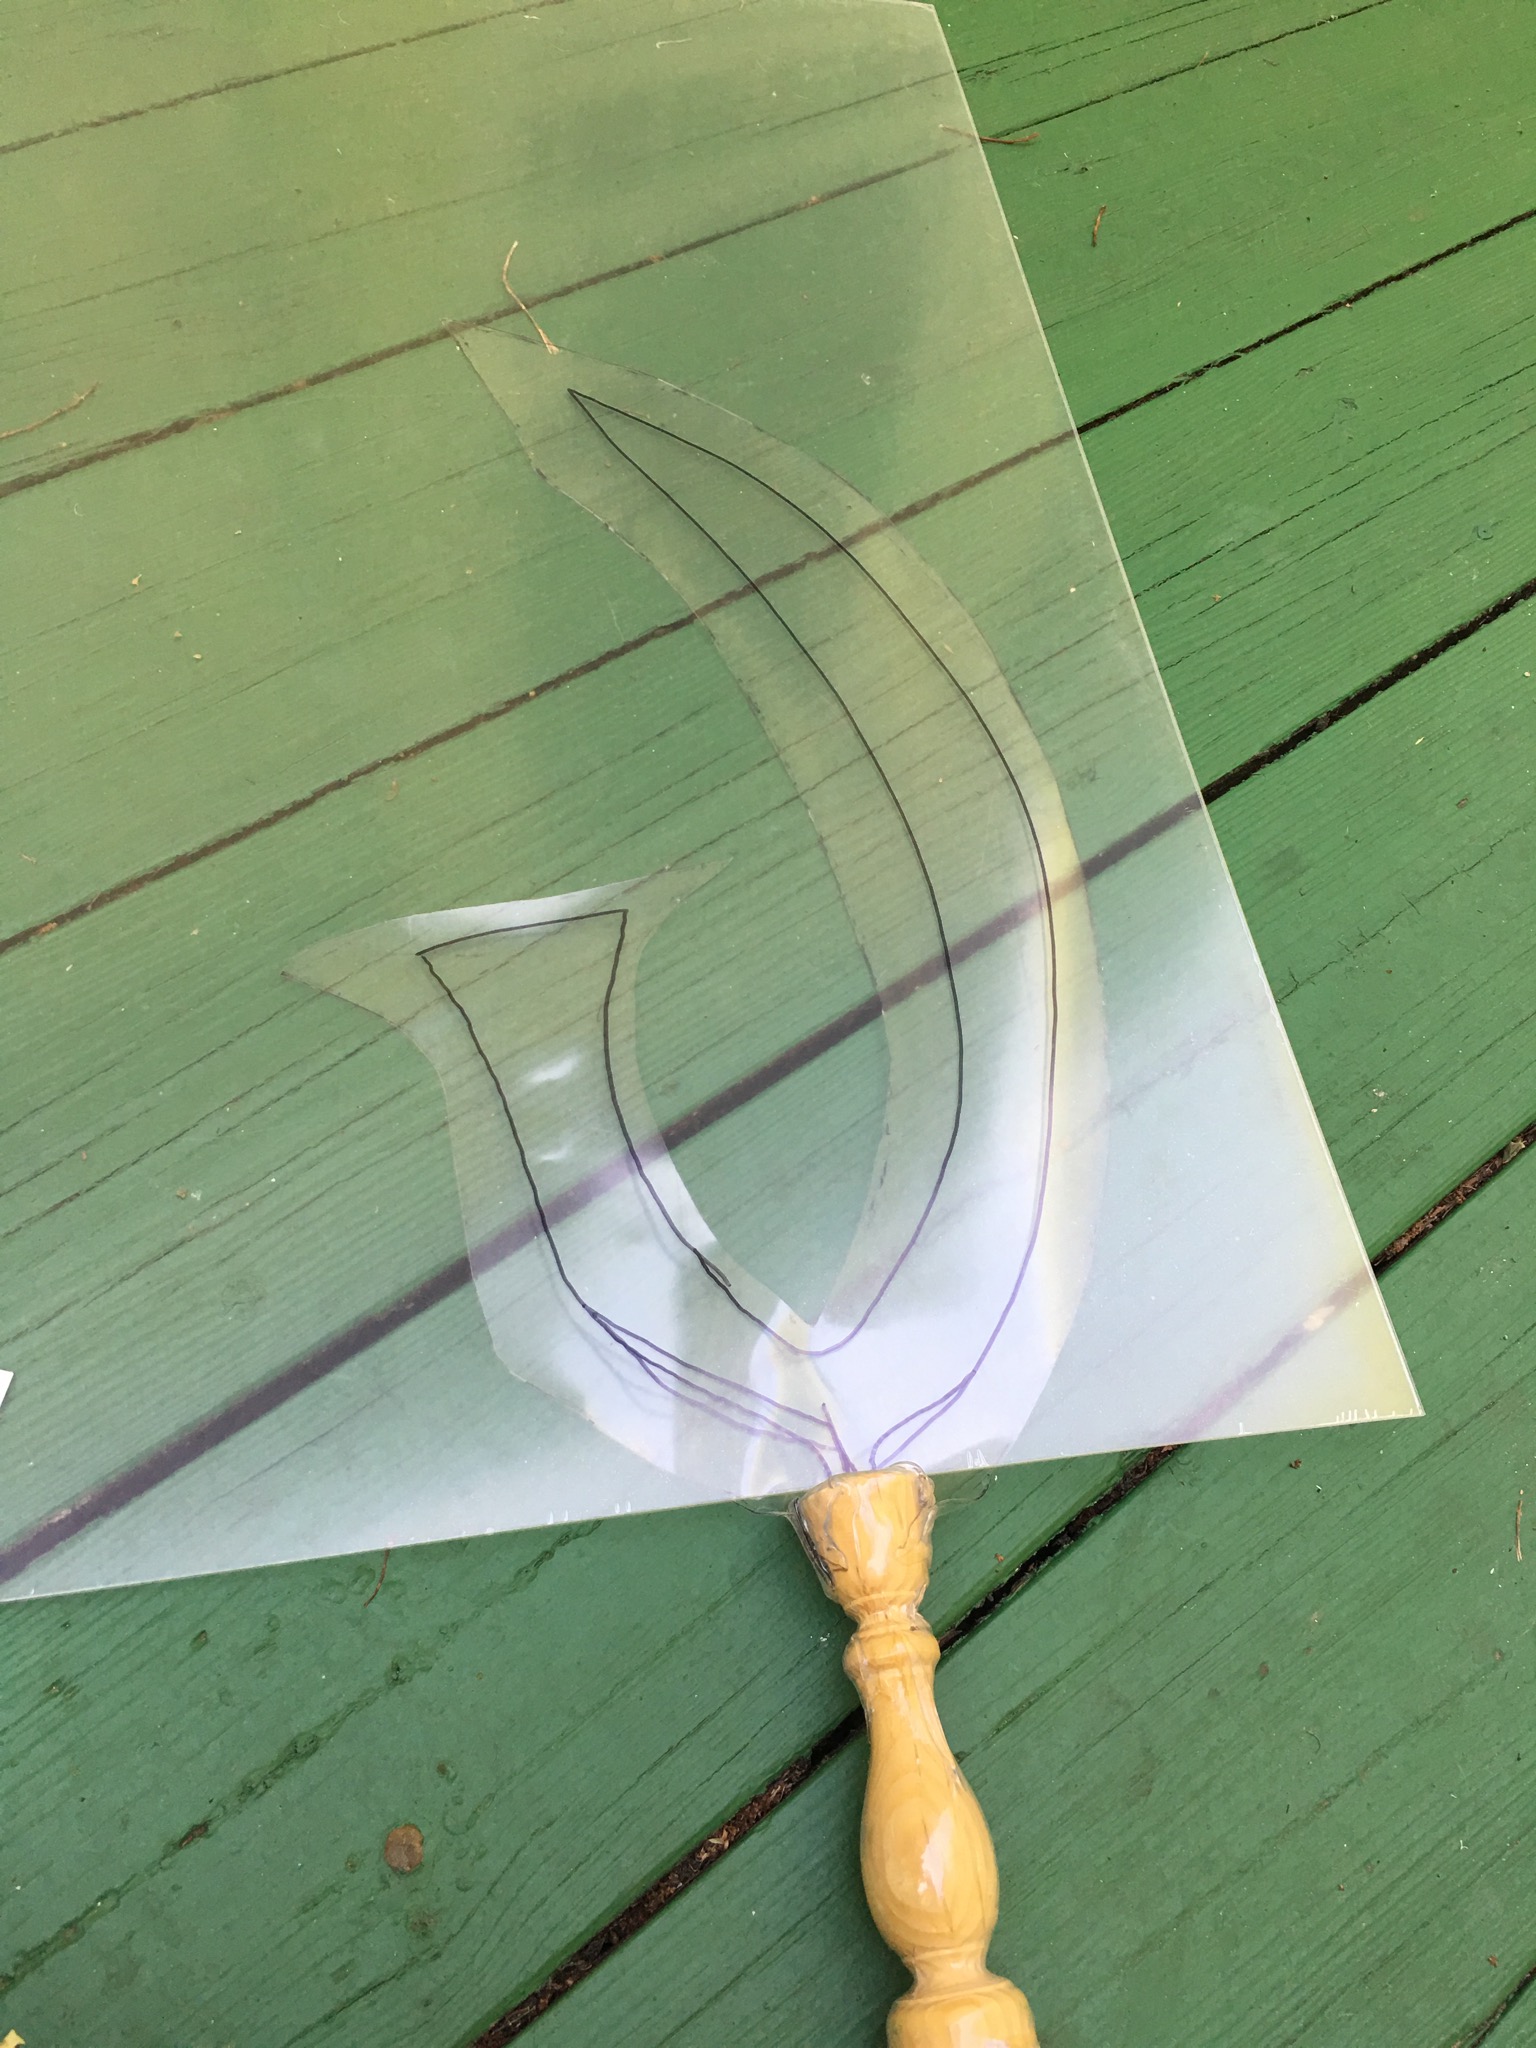
I sadly have no tips for drawing the Glaive…. Sorry… All I can say is use your artistic skills and follow a reference to her Glaive. However before you start drawing look at the image below:
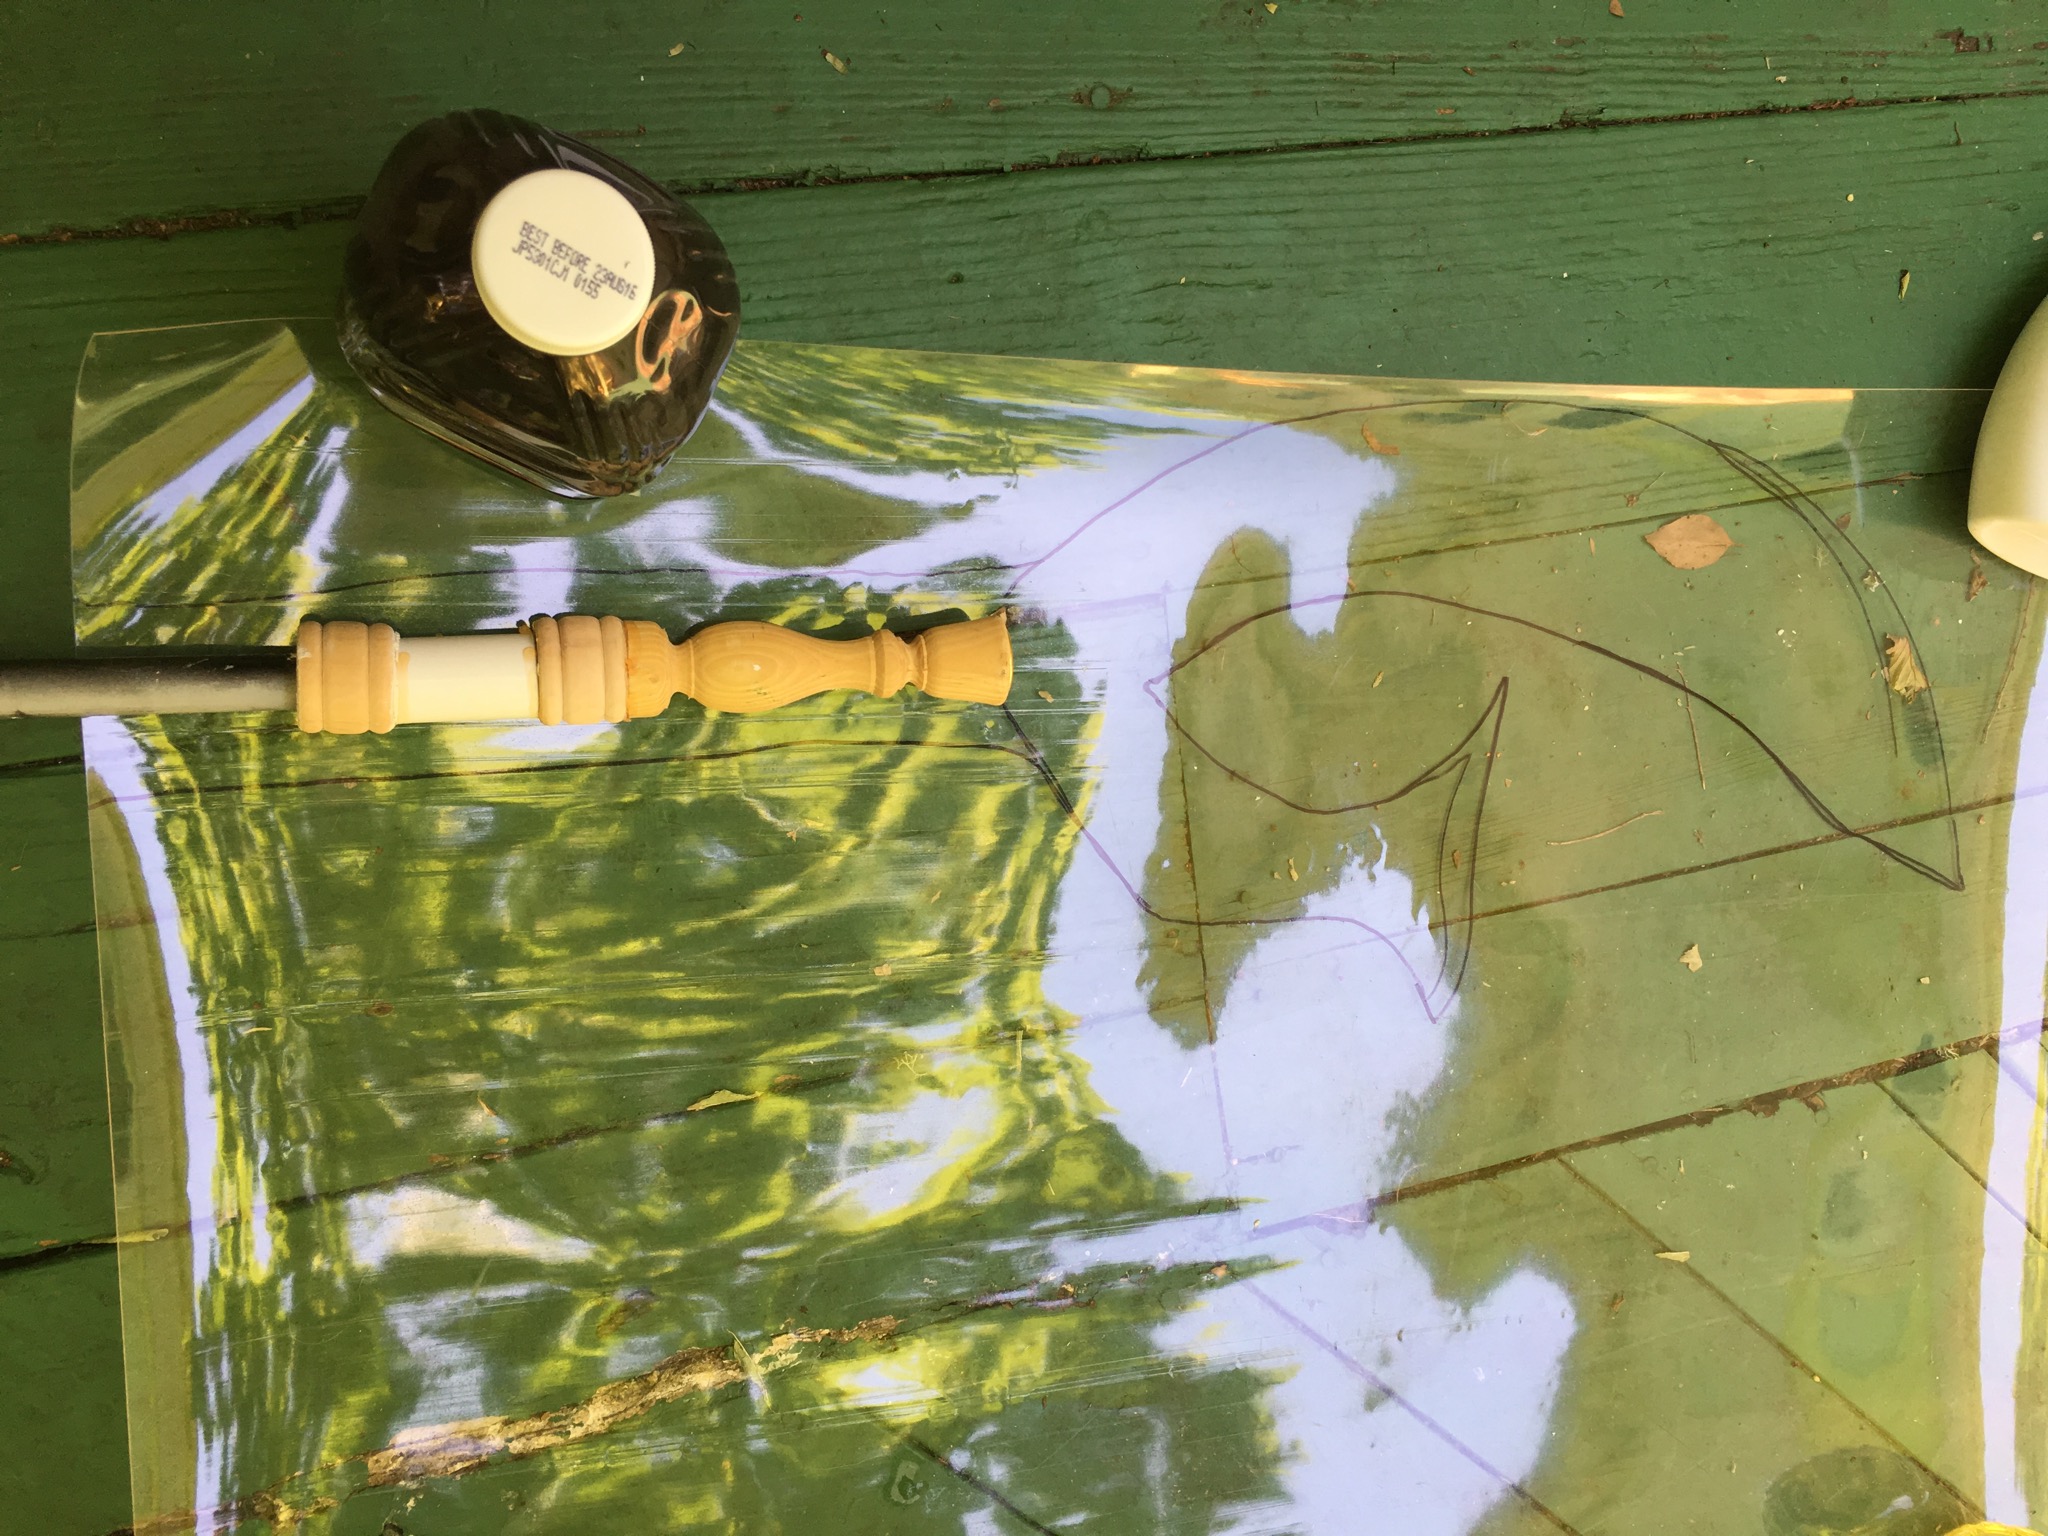

Notice how I places the top of the PVC pipe onto the Worbla and drew a line downward surrounding the wooden details. I mentioned before that I was worried about the stability at the top of the PVC pipe. This is the technique that I mentioned that will help stabilize the top of the Glaive a bit more. So in addition to drawing the actual Glaive be sure you cut out the long piece beneath. This piece will wrap around the PVC and the wooden details. Basically the Worbla will be hugging this area and keep it stable.
Now start cutting you pattern out. You will need to cut two identical pieces
NOTE! If you are using regular Worbla or Wonderflex (which are not transparent) you will have to cut out a mirrored version of your first blade. This is because you heat only one side of Wonderflex. Transparent Worbla it does not matter what side you heat up.
So now you have two identical pieces of the blade… Which are very curly and bendy… Sorry for the bad picture:
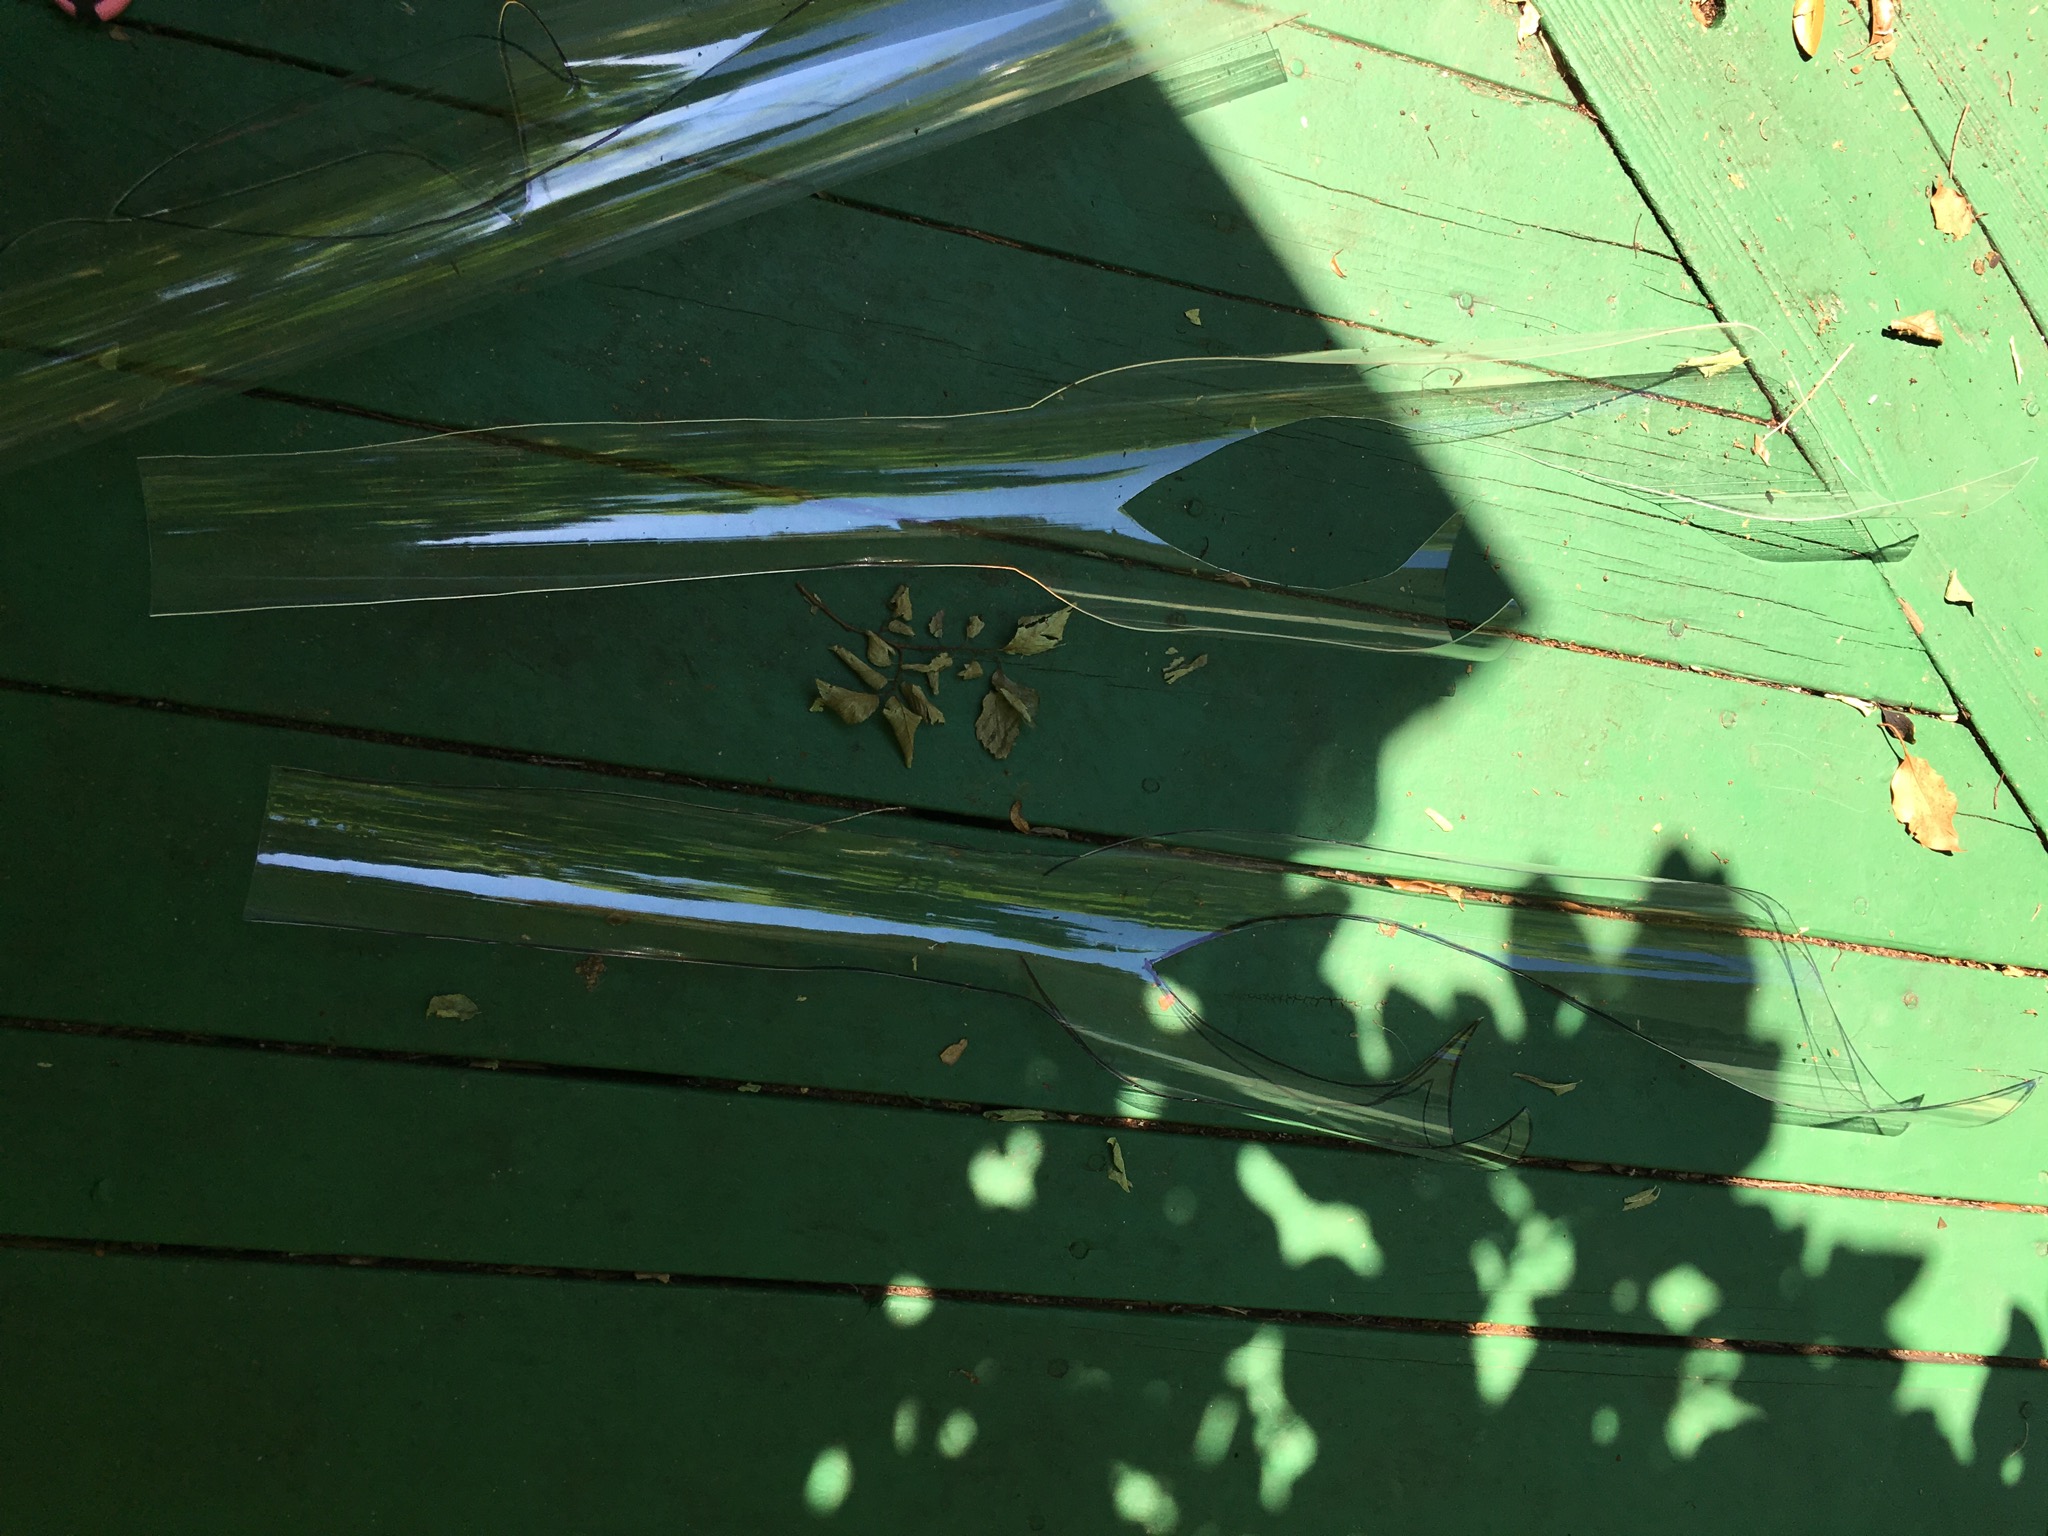
Anyway, you don’t want a dirty piece of Worbla. So if you have been working outside (me), you will have some dirt accumulate on the plastic. So I suggest washing your Worbla before continuing (you don’t want dirt trapped in your Glaive).
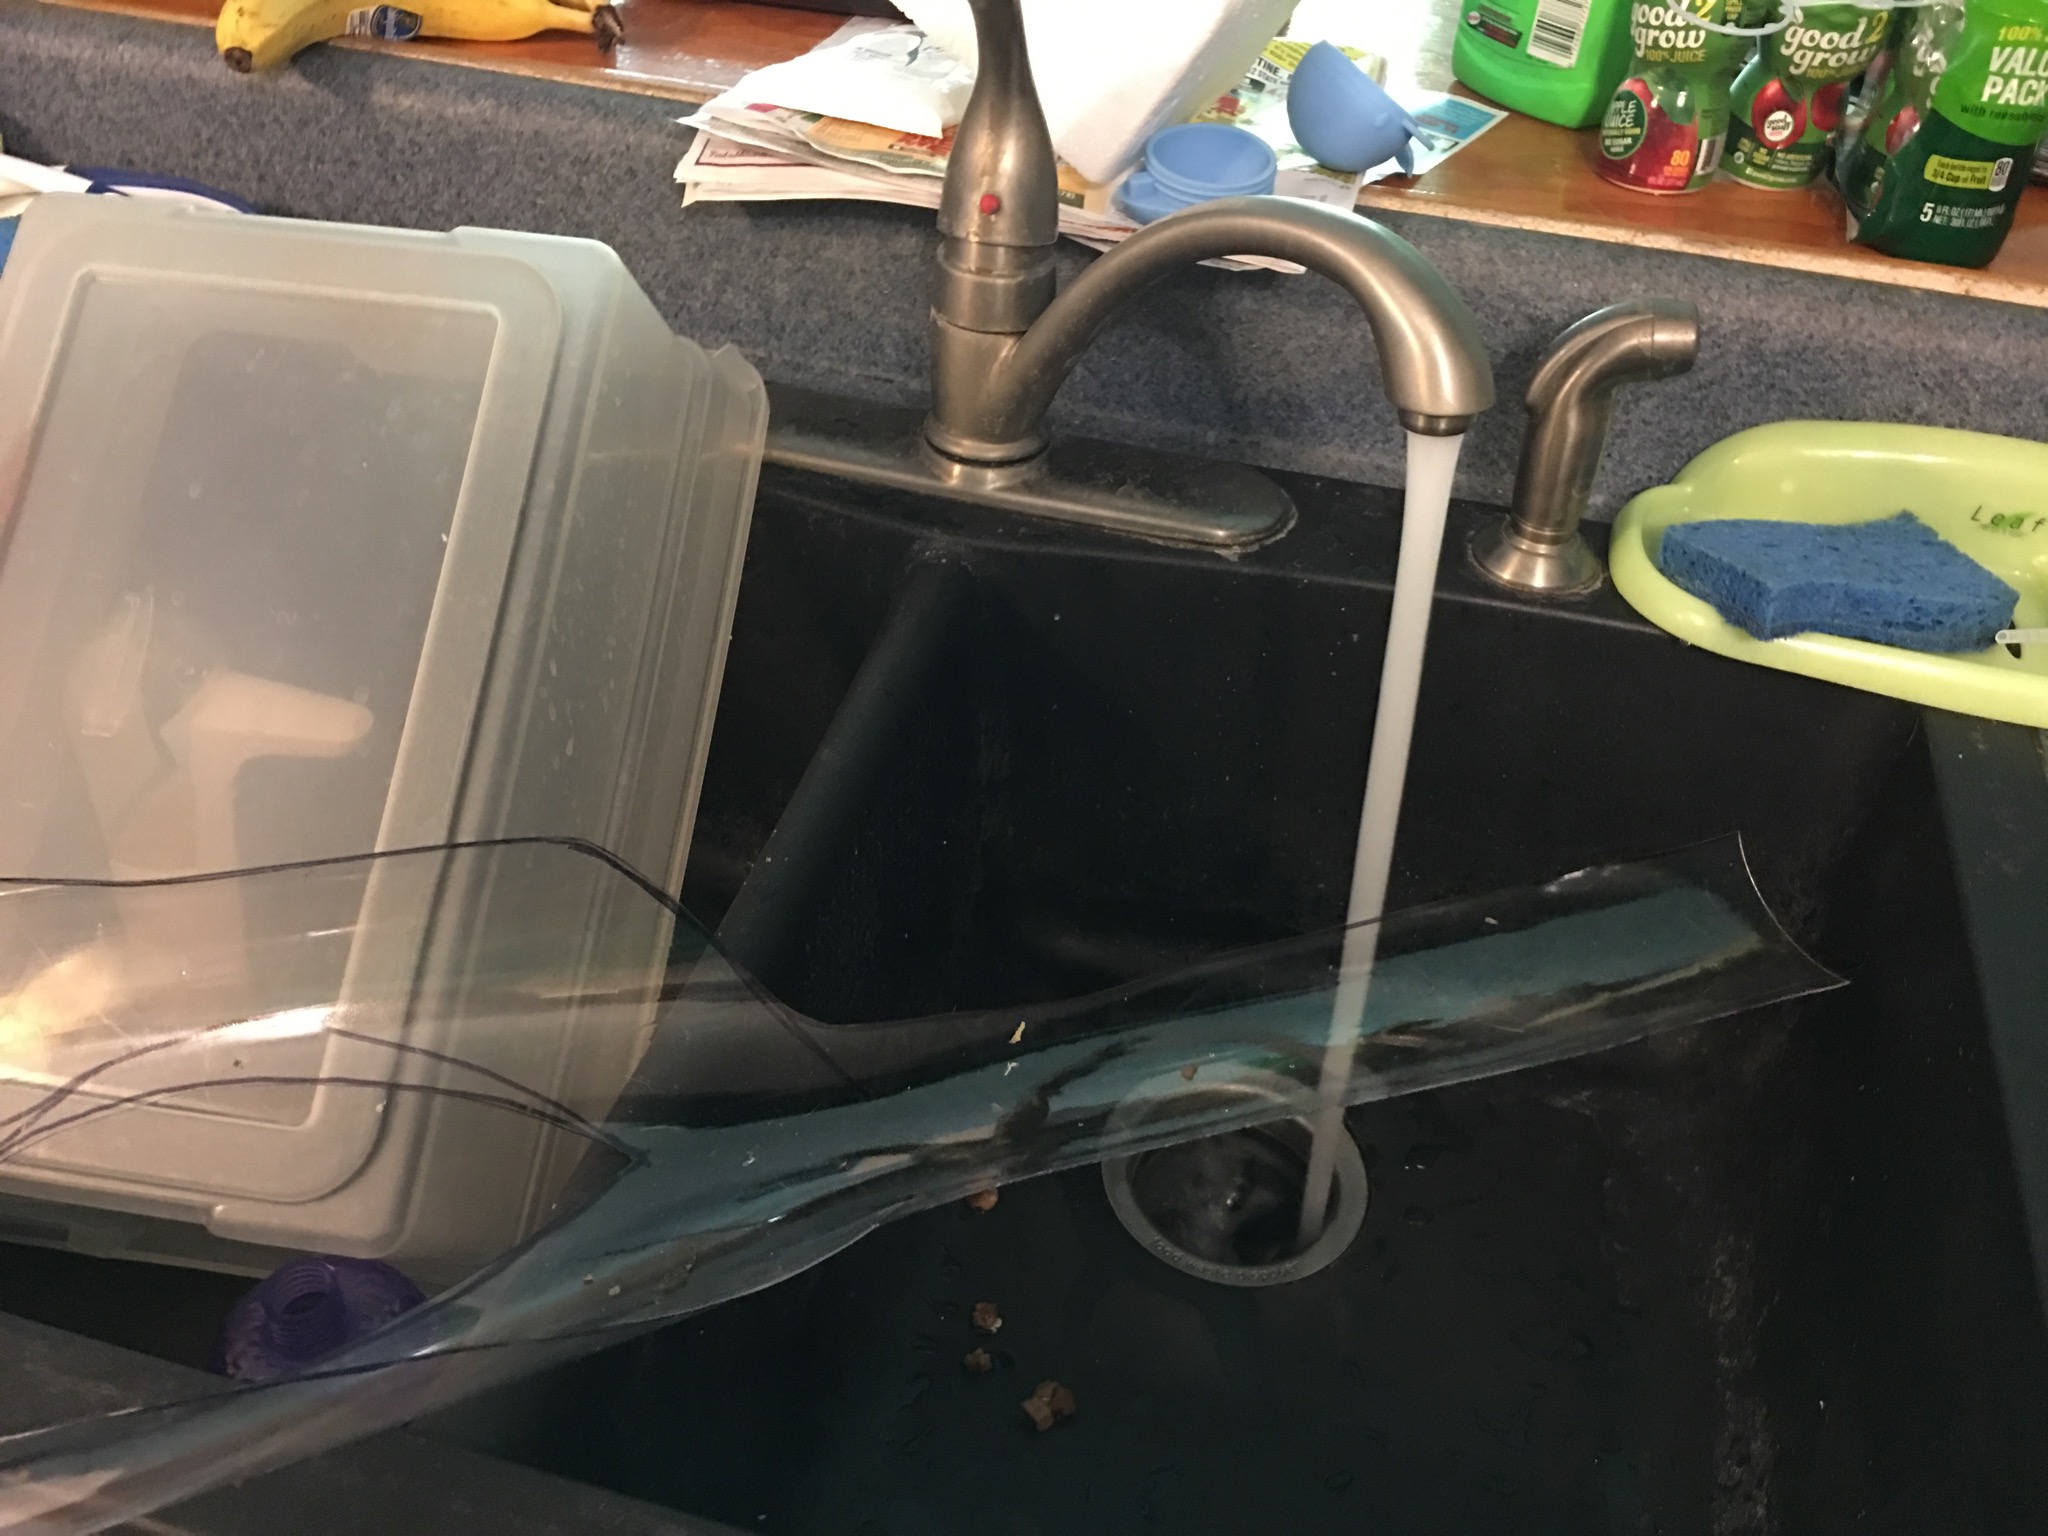
This is also the time to get rid of any ink from the marker you used to draw out the blade. Dry off the blade and this is the time where we get out our heat gun and we prepare for shaping the blade onto the rest of the staff.
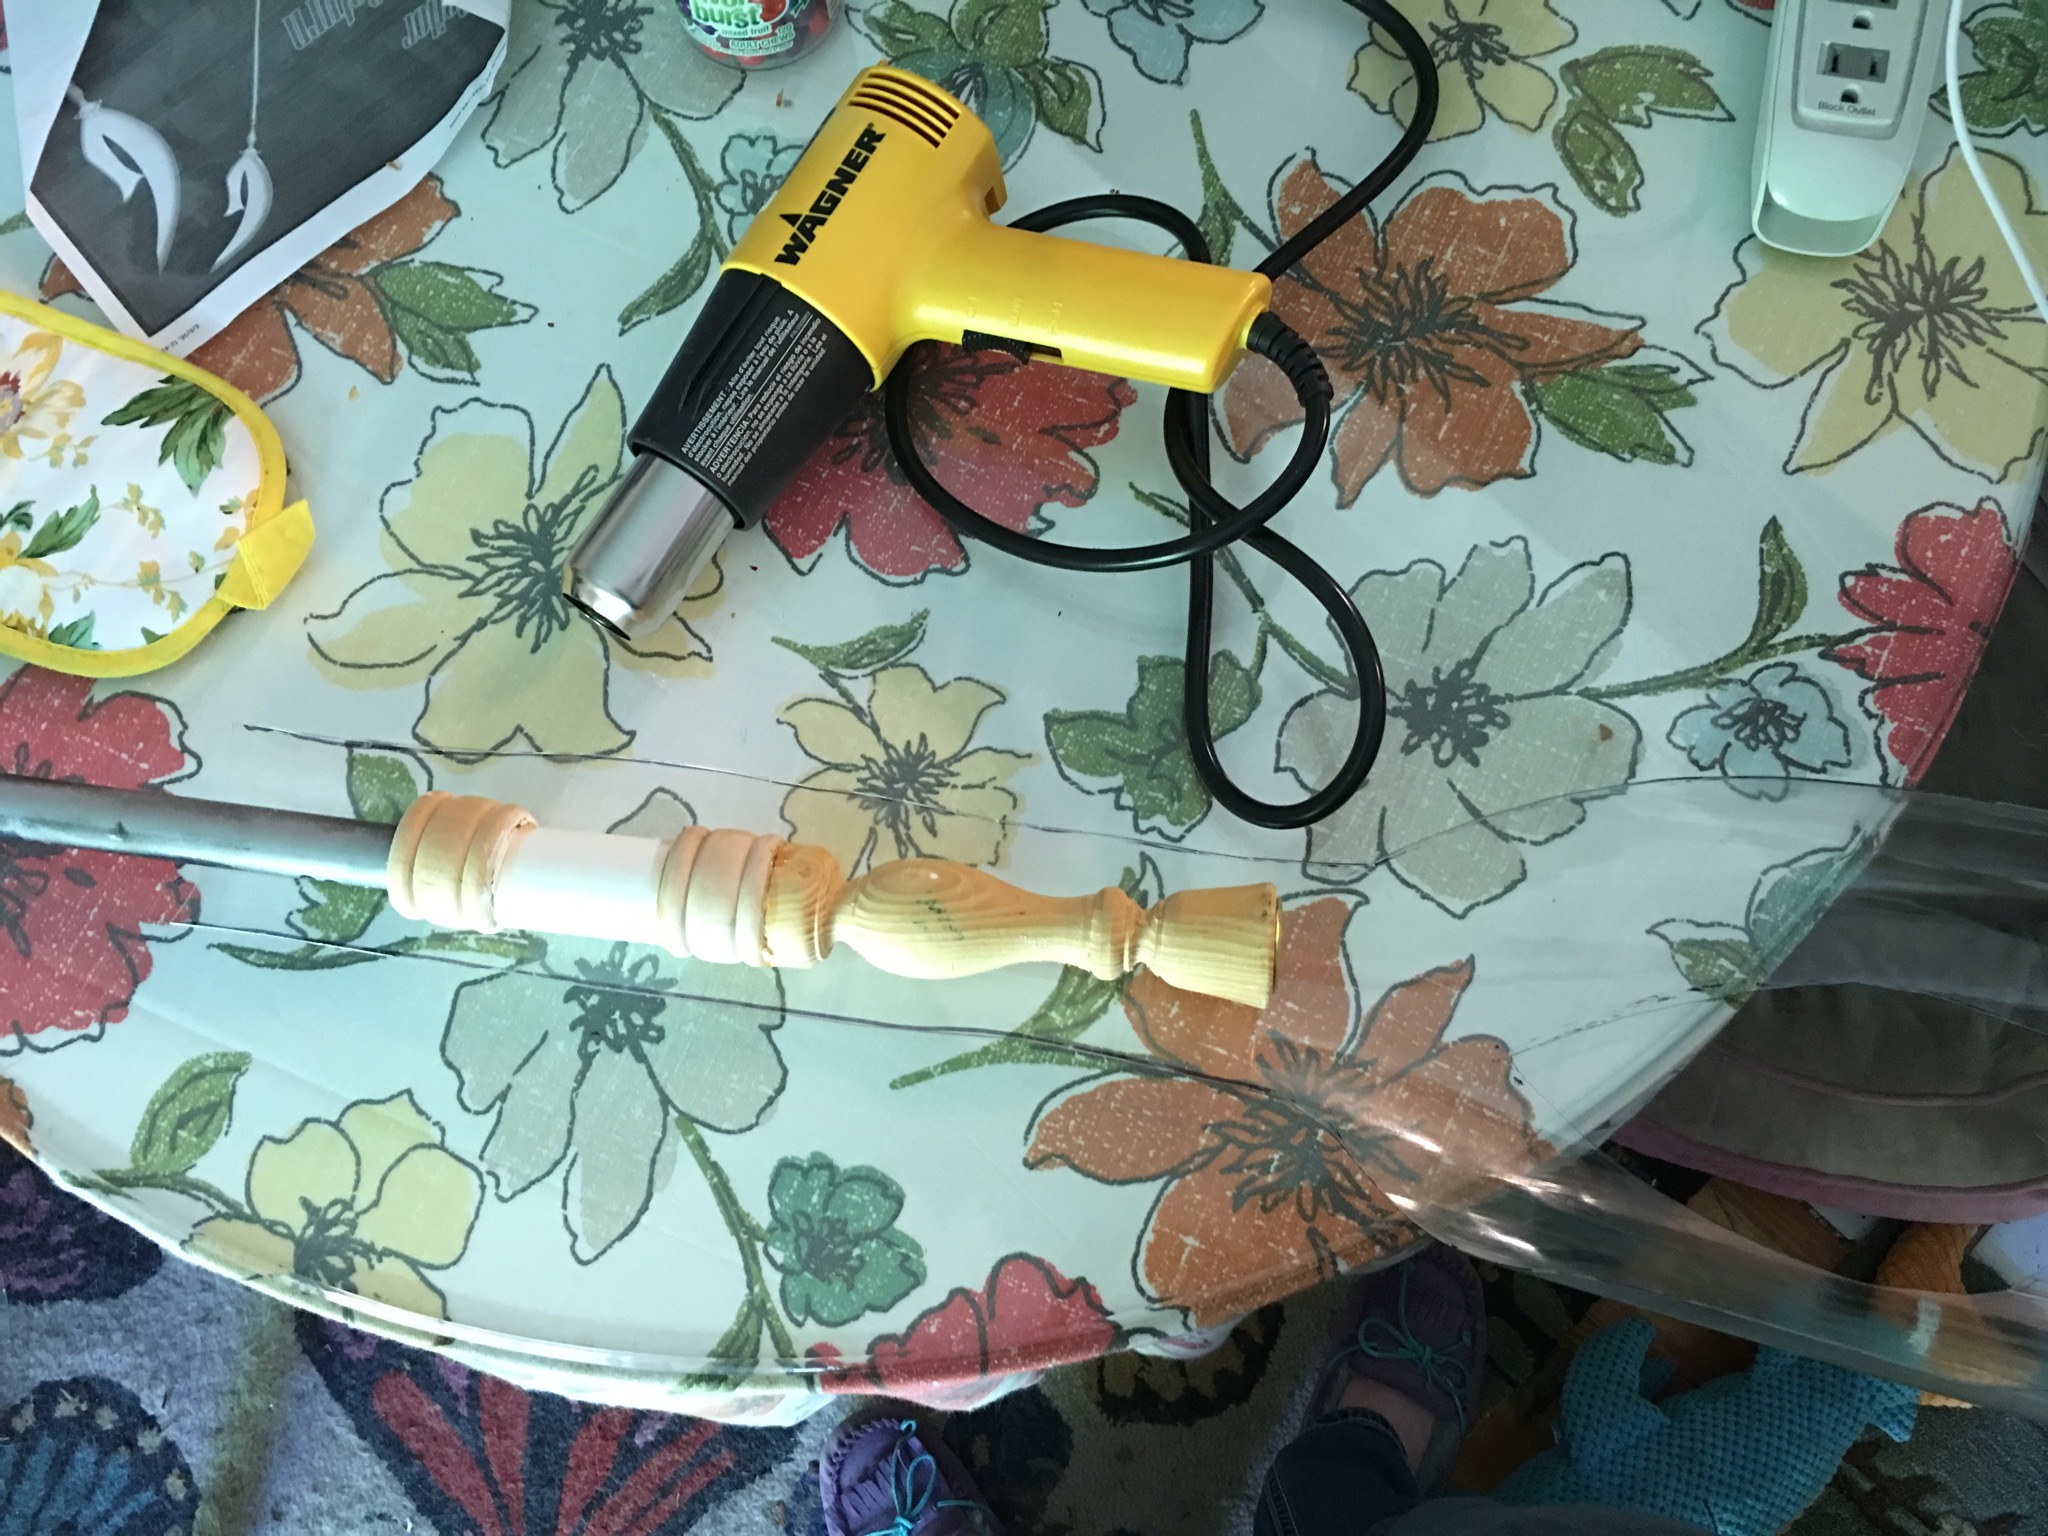
We are going to start from the bottom and work upwards. Place the long area that you cut out a few inches below the detailed areas on the top of the PVC pipe. You now need to heat the Worbla. Unlike non-transparent thermoplastics, transparent Worbla takes a higher heat setting for the plastic to begin to stretch/melt/bend. I usually work bare handed (not recommended) for other thermoplastics, but I am warning you now… Don’t be a hero, use heat resistant gloves! I mean it! It hurts!
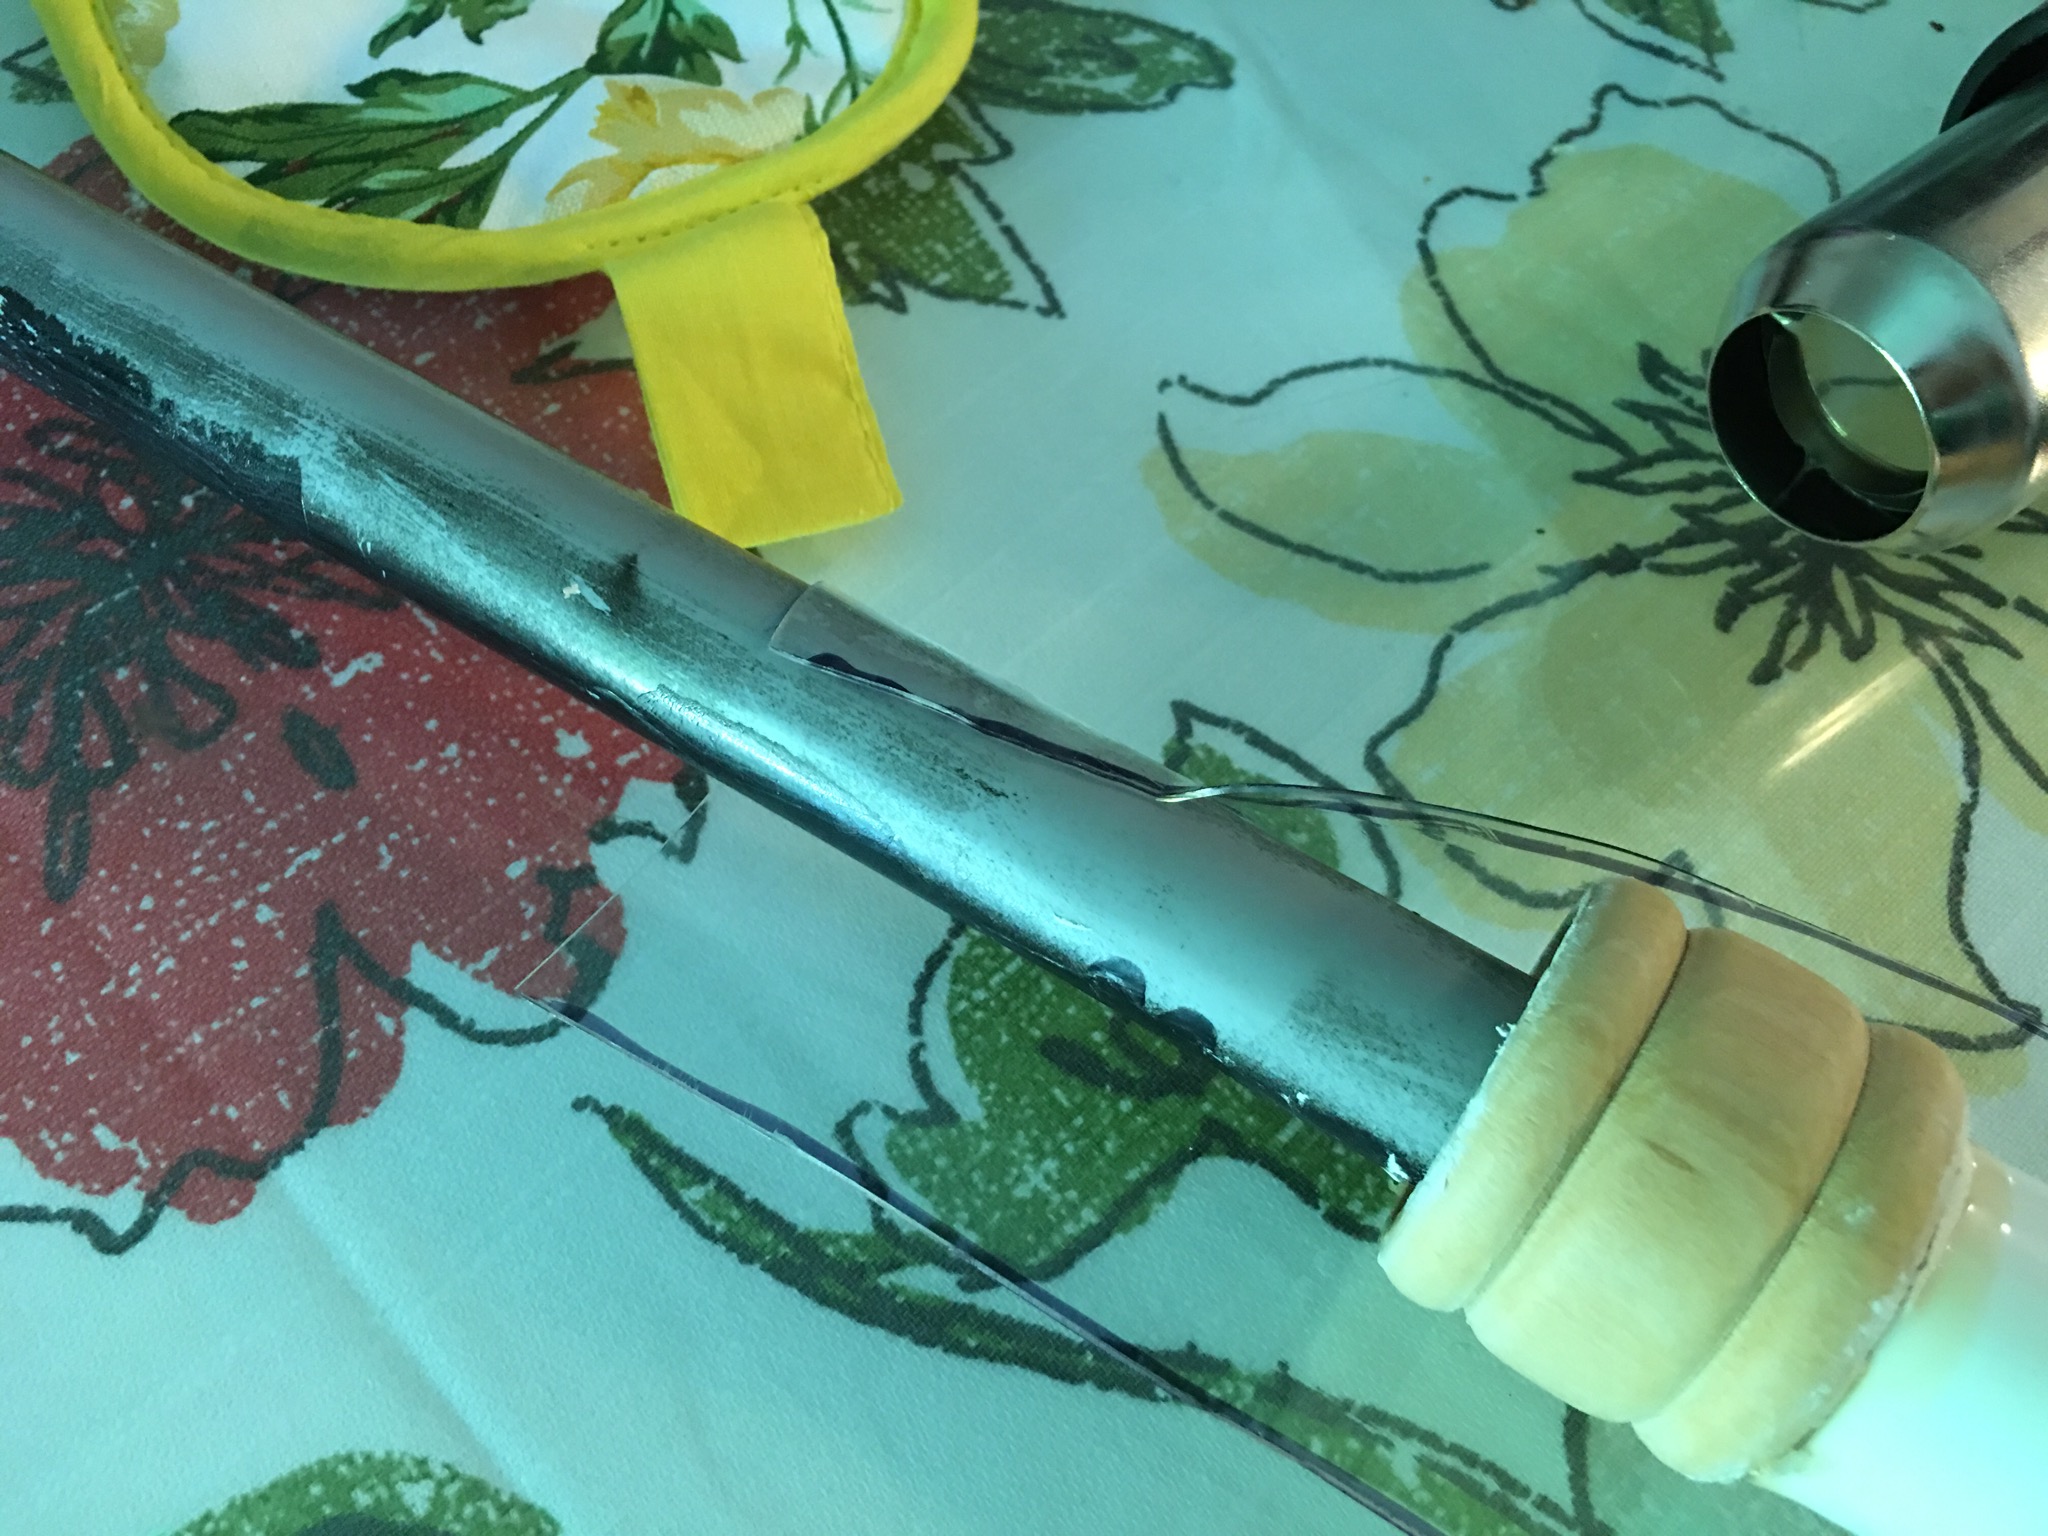
Now begin to heat the Worbla and wrap it around the PVC pipe as you work your way up. Take your time and work in small sections. Squeeze the Worbla firmly until it sticks to the PVC pipe and the wooden details.
To capture the groove details from the wood, get a knife and when the Worbla is hot push some of the plastic into the grooves with the knife.
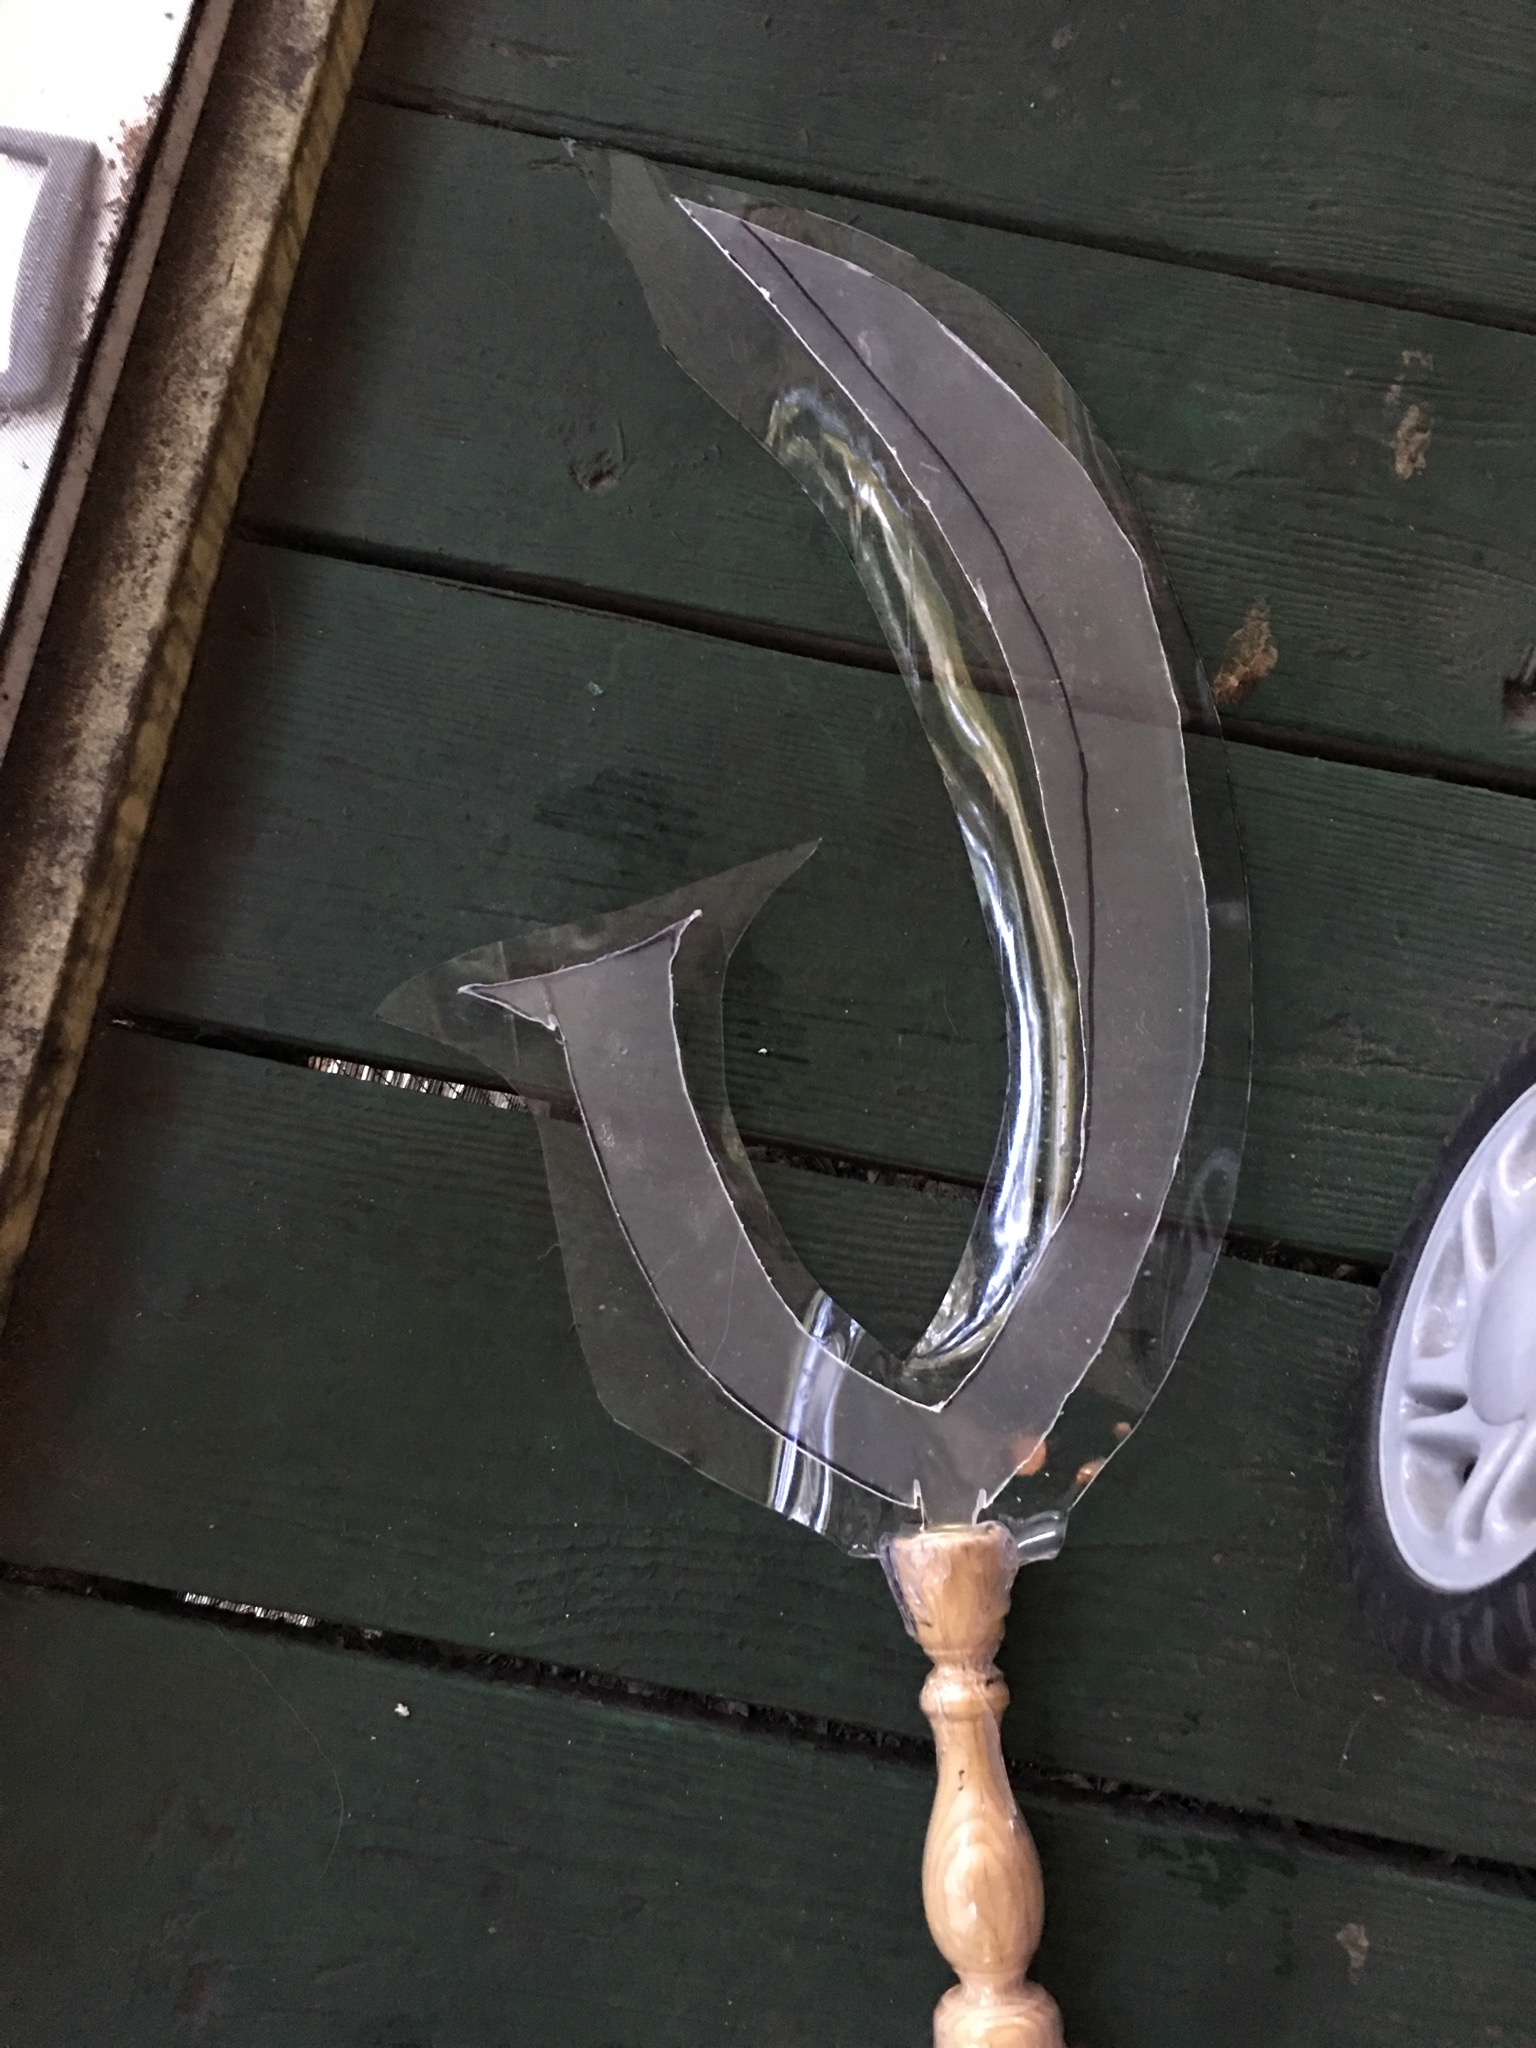
In the end your Glaive should look like this:
The Worbla did not go completely around the top part of the staff but that’s OK, we got another piece of Worbla to cover the rest of the staff. However… We now have a bigger problem. Who can tell me what is wrong with the image below?
Floppy… Sad looking…. Not stiff…
This is mostly my fault. This is my first time using transparent Worbla and I learned the hard way that this material should (ideally) be used for smaller props. Not large bad-ass weapons. Unlike Wonderflex which has supportive meshing within the plastic, Worbla products are flimsy and do not contain the strong meshing.
Don’t panic! This can still work. And, the trick to make this work is plexiglass!
Step 7: Plexiglass
So now you need your sheet of plexiglass. When you get this sheet make sure it is as big as your blade (the top part, not the long part that I made to wrap around the top of the PVC pipe). You also need a plexiglass cutter. Here is where things get tough. You can buy a regular plexiglass cutter knife but I encourage you to not buy it! These knifes are only good when your are doing a straight edge. The blade on Sailor Saturn’s Glaive is curved and complicated. The best way to cut this is by using a Dremel Tool and using a special bit for cutting plexiglass. A Dremel does not cost a lot and it is VERY useful for numerous projects. I encourage every cosplayer to have one. You will not regret it. I use a Dremel 3000 which I got at Home Depot for about $80. This Dremel comes with several bits and a carrying case. So it is a good deal.
 -> My Dremel and the stuff that comes with it
As for the bit that you will need to cut through the plexiglass:
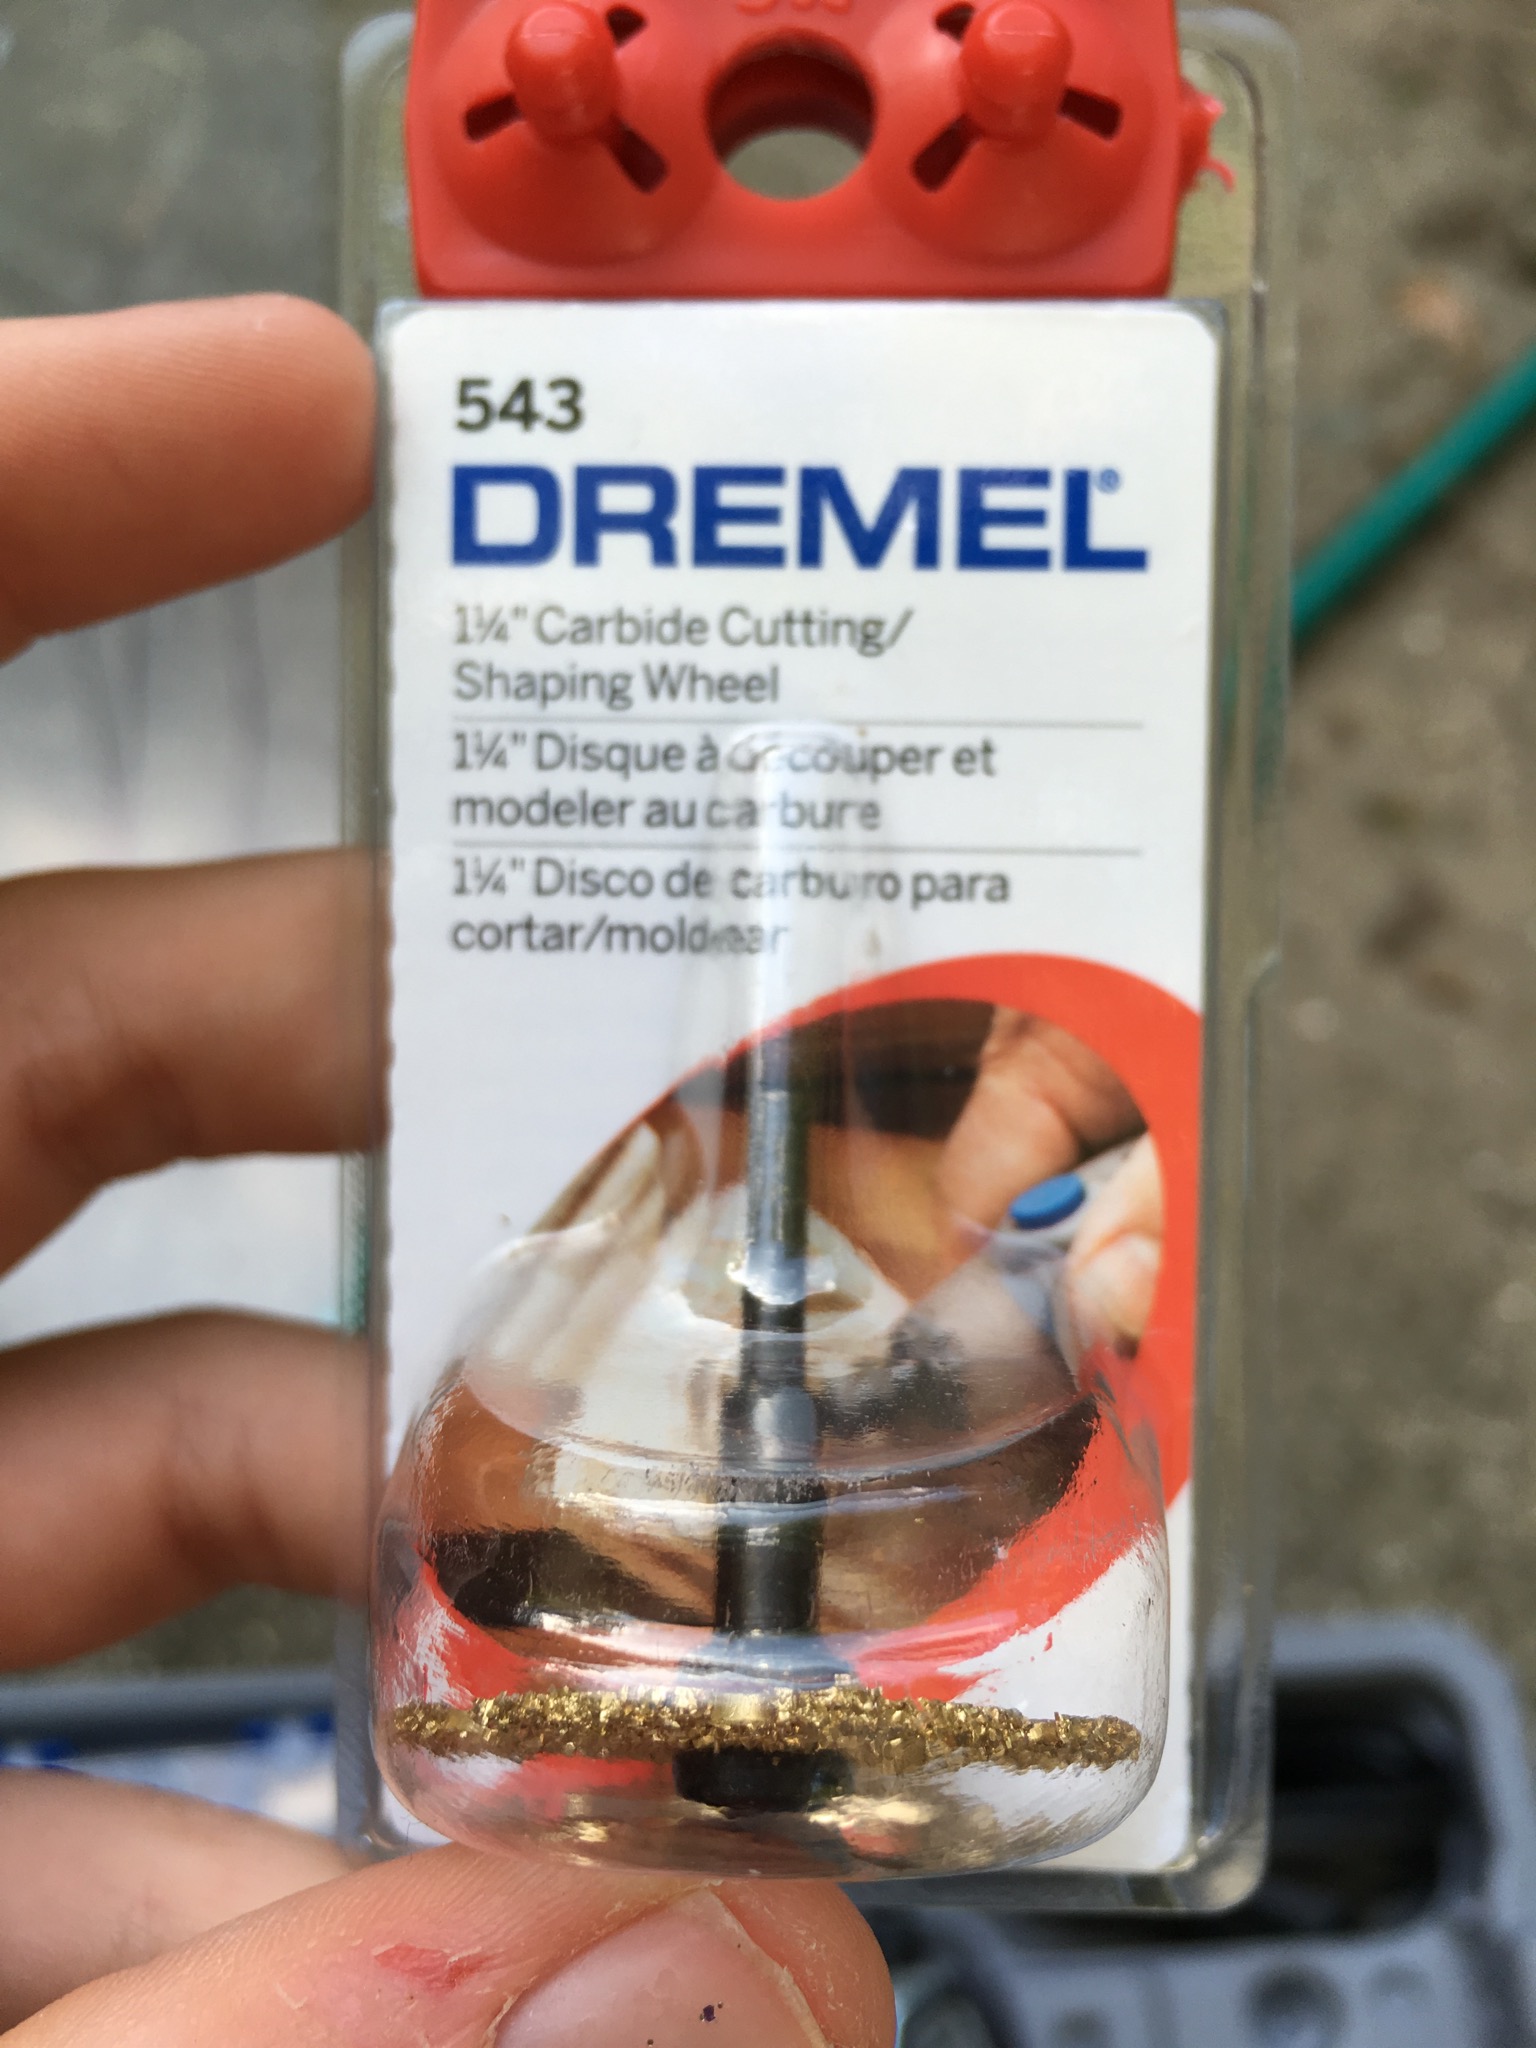
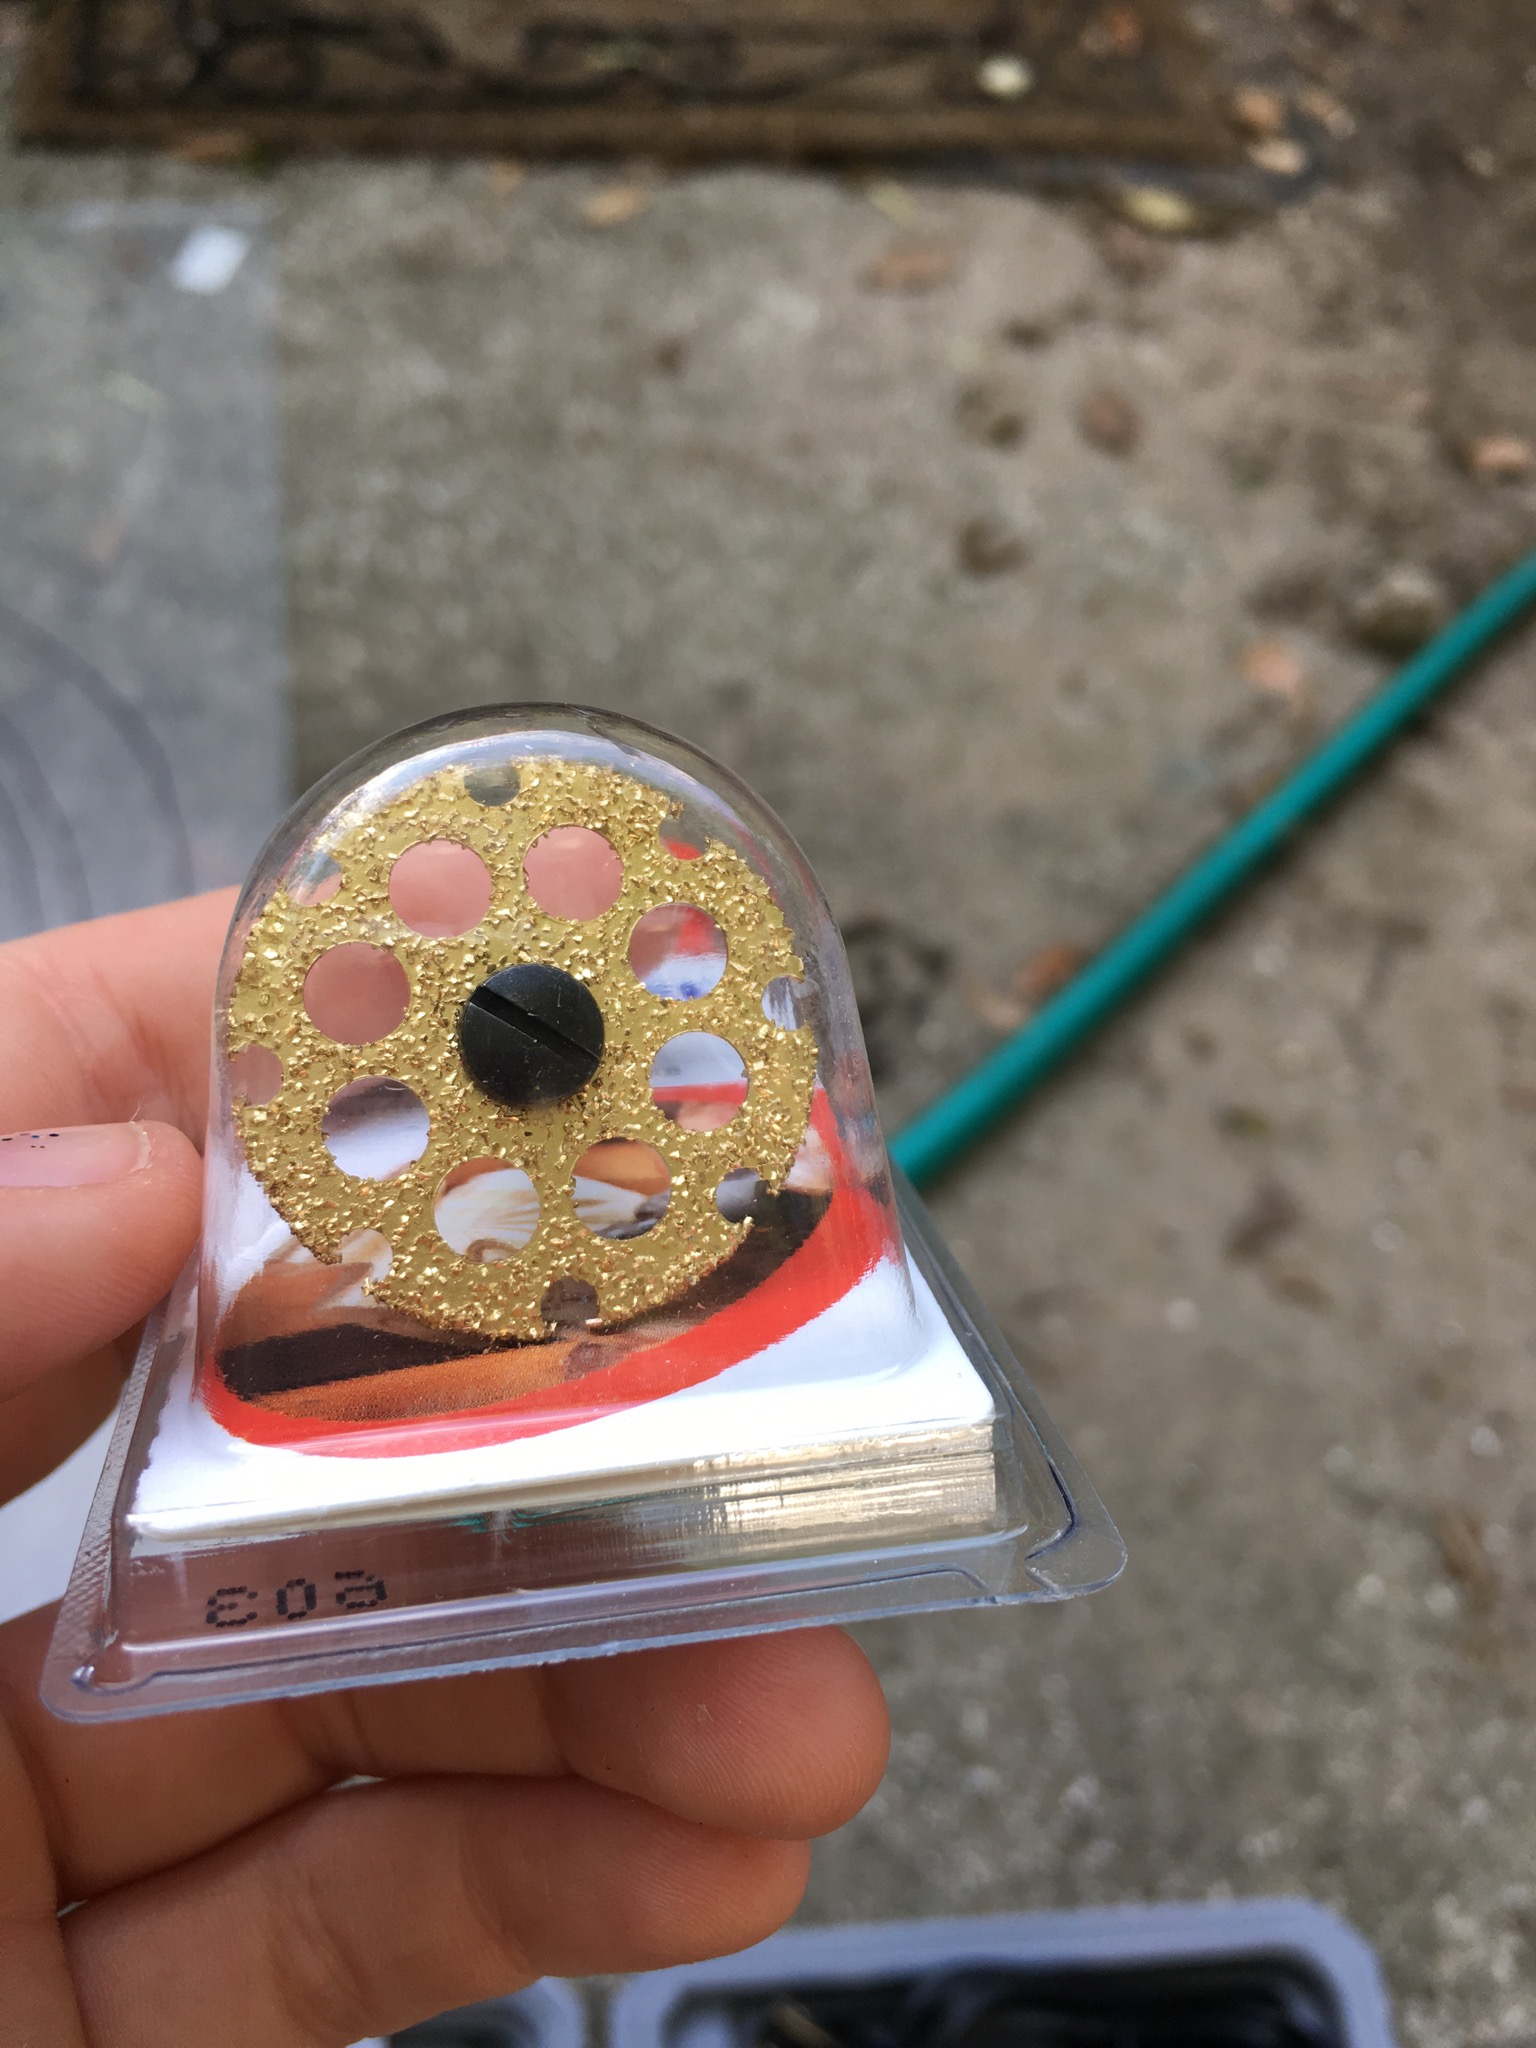
This bit is specifically designed to cut through plexiglass and you can easily find it in your hardware store where they sell Dremel tools. A very pretty gold color 
So let’s continue… When you buy your plexiglass sheet there will be a clear plastic over the glass to protect it from damage and scratches. Leave it on! You can draw on this plastic the shape you will be cutting out.
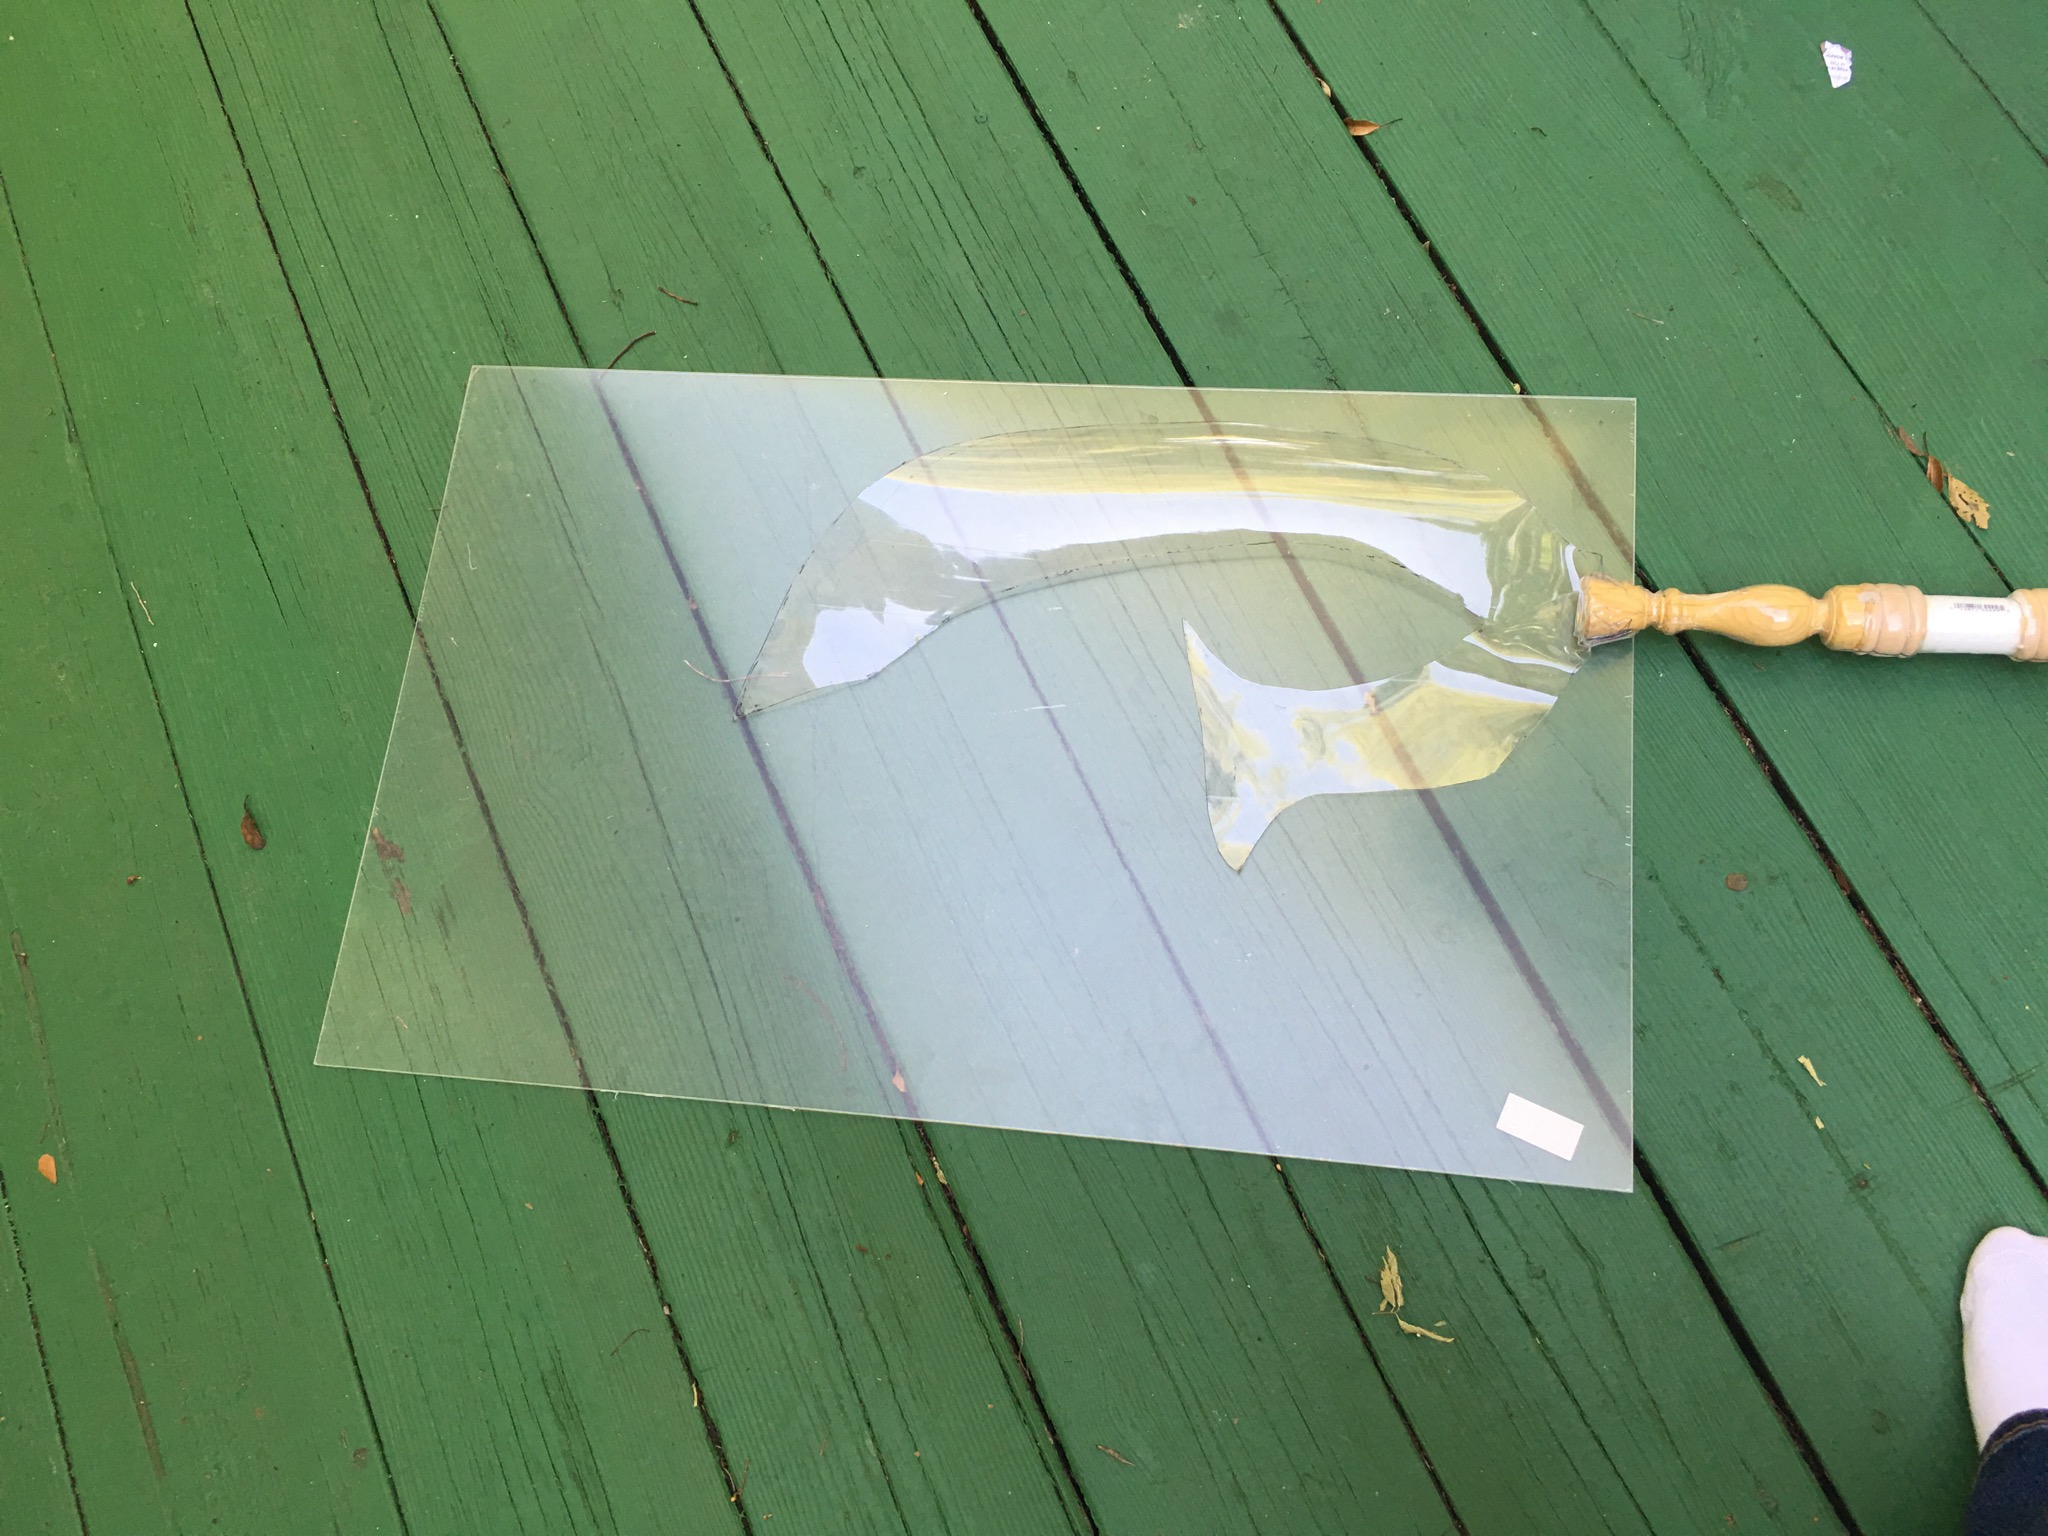
Place your Worbla (which is now attached to your staff) underneath the plexiglass. Using a marker you are going to draw a smaller version of your blade onto the plexiglass. Don’t make the plexiglass as large as your Worbla cut out. The plexiglass is just used for stability and you need enough room for your other piece of Worbla to fuse with the first piece of Worbla. So make your plexiglass blade skinnier.
ALSO NOTE: my candle stick had a hole at the top where you can stick your candle in. I used this to my advantage to help with stability. On the plexiglass glass I made a small extra piece at the bottom of the plexiglass so it could fit perfectly into this candle hole opening. You can see it in the picture below.
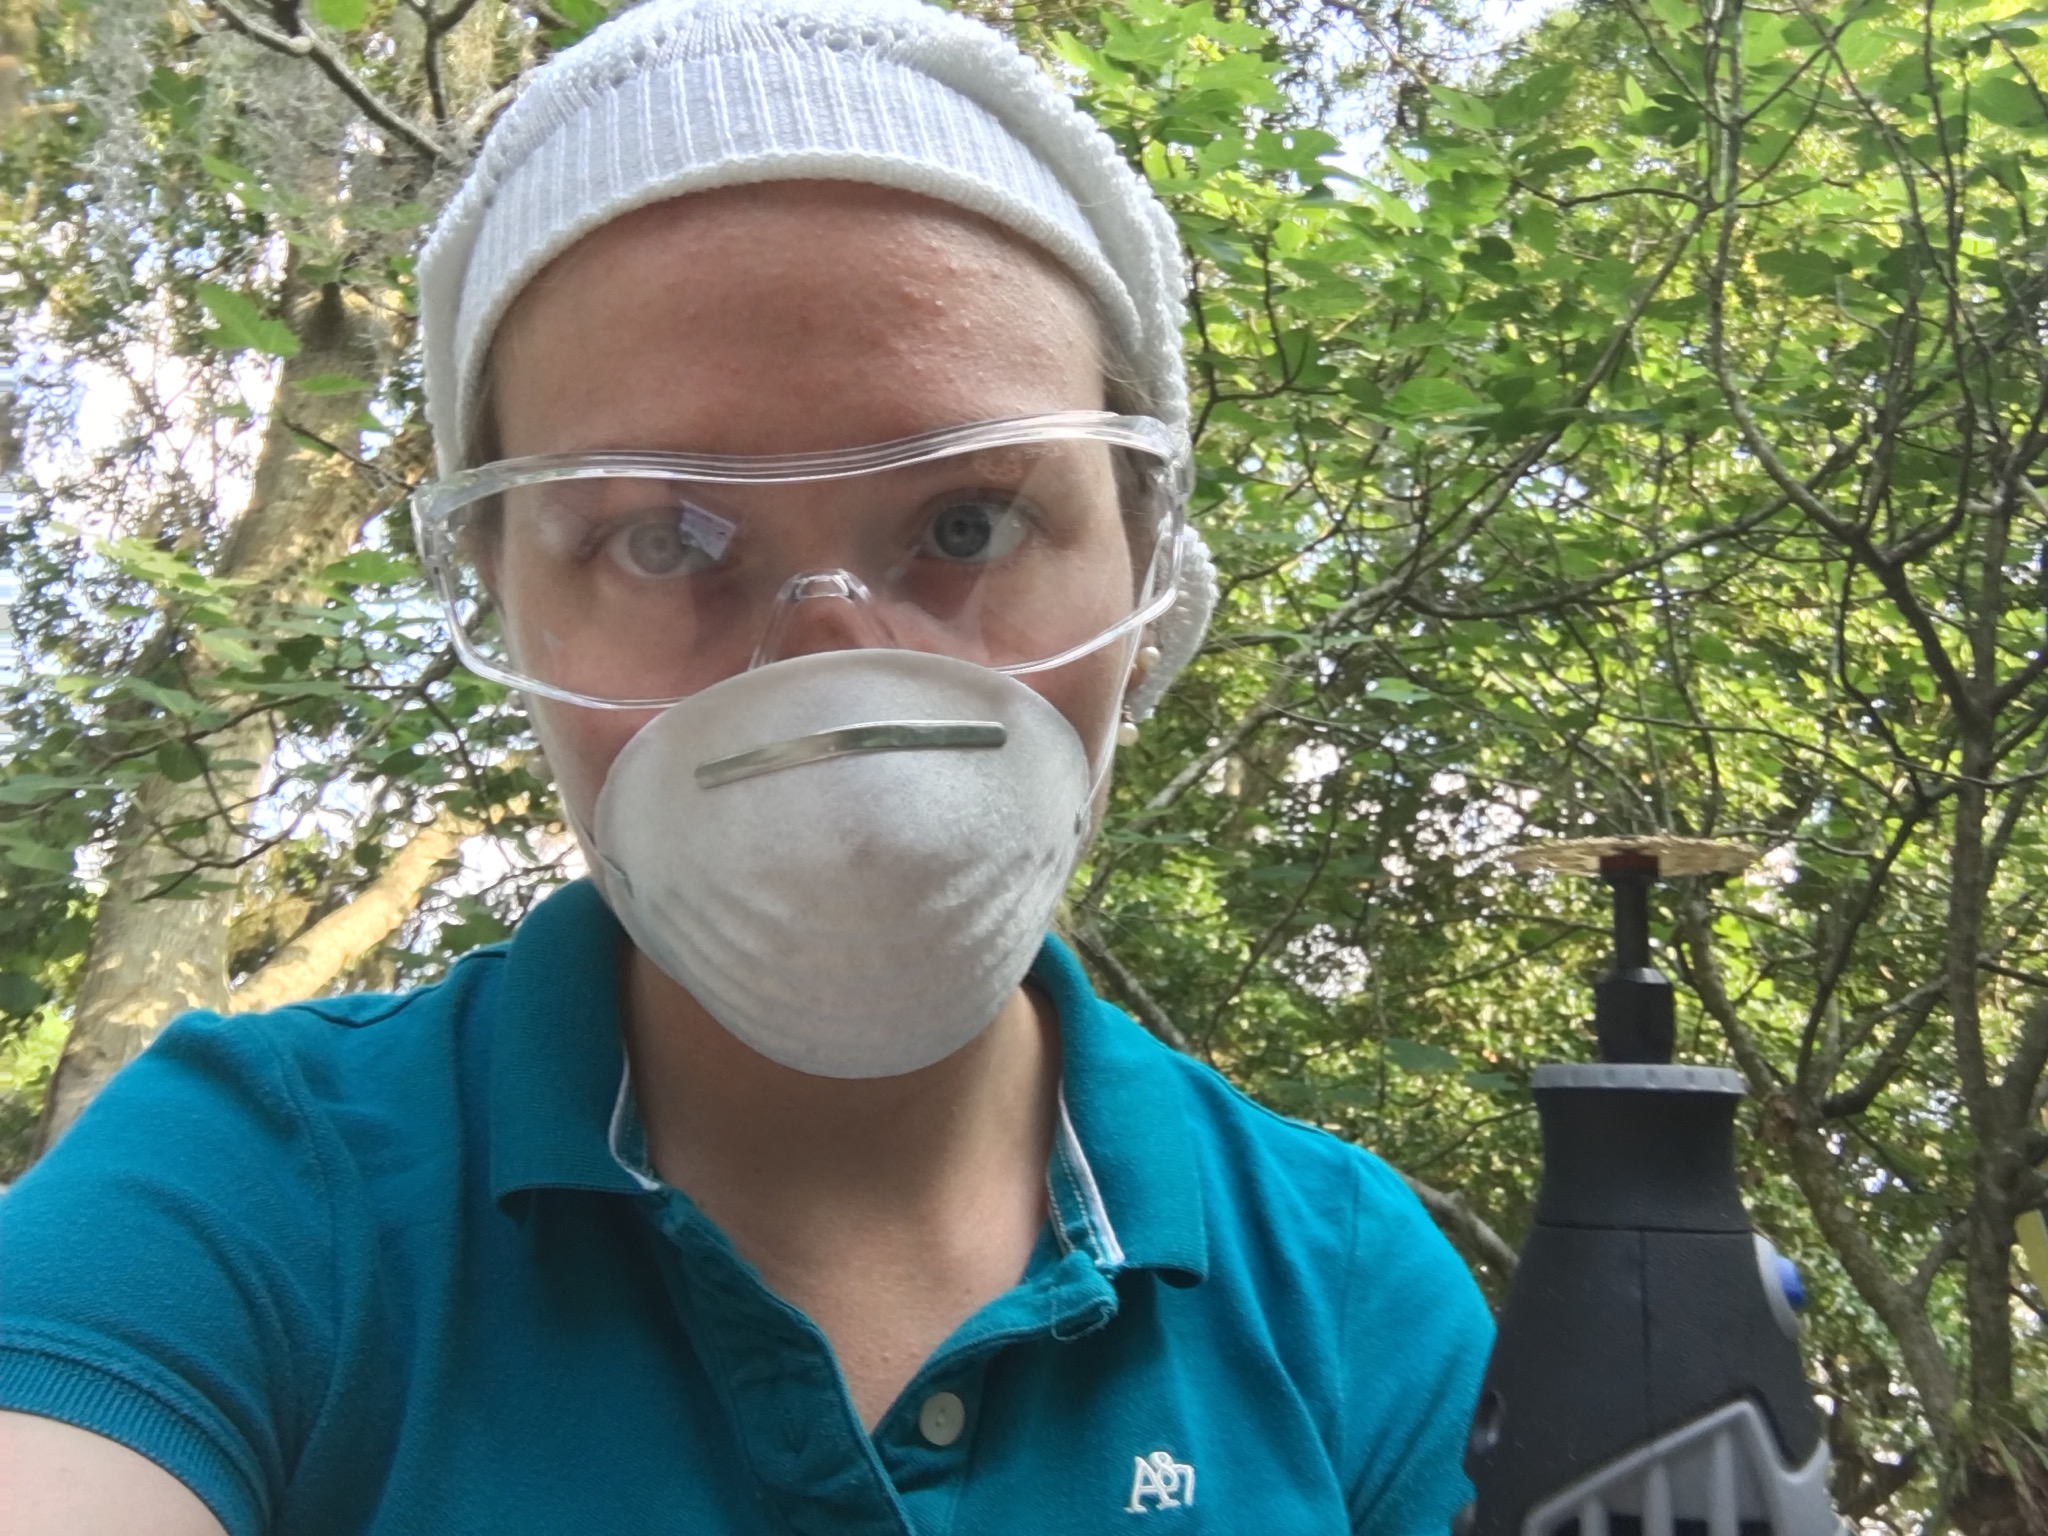
So after you trace what you will be cutting. Get out your Dremel and get your protective equipment!
 -> Look how stylish you can be
You don’t want plexiglass shooting at you while you are cutting. Trust me, it hurts and is very dangerous if it gets in your eyes! Tie your hair back, wear a face mask, safety glasses, and gloves, and wear long sleeves! Be safe! Please!
Once you are done preparing, start cutting. I suggest cutting on a work bench, but if you don’t have one (like me) place a piece of wood underneath you plexiglass. You won’t have to worry about destroying your Dremel bit, it will just cut a little bit of the wood underneath. Do not work over something hard, like concrete. This will break your Dremel bit!
In the end this is what your cut out will look like:

Fell free to take off the protective plastic covering after you are finished cutting. You may also find some stray fiberglass strands on your cut out. You can easily sand these off for a smooth finish.
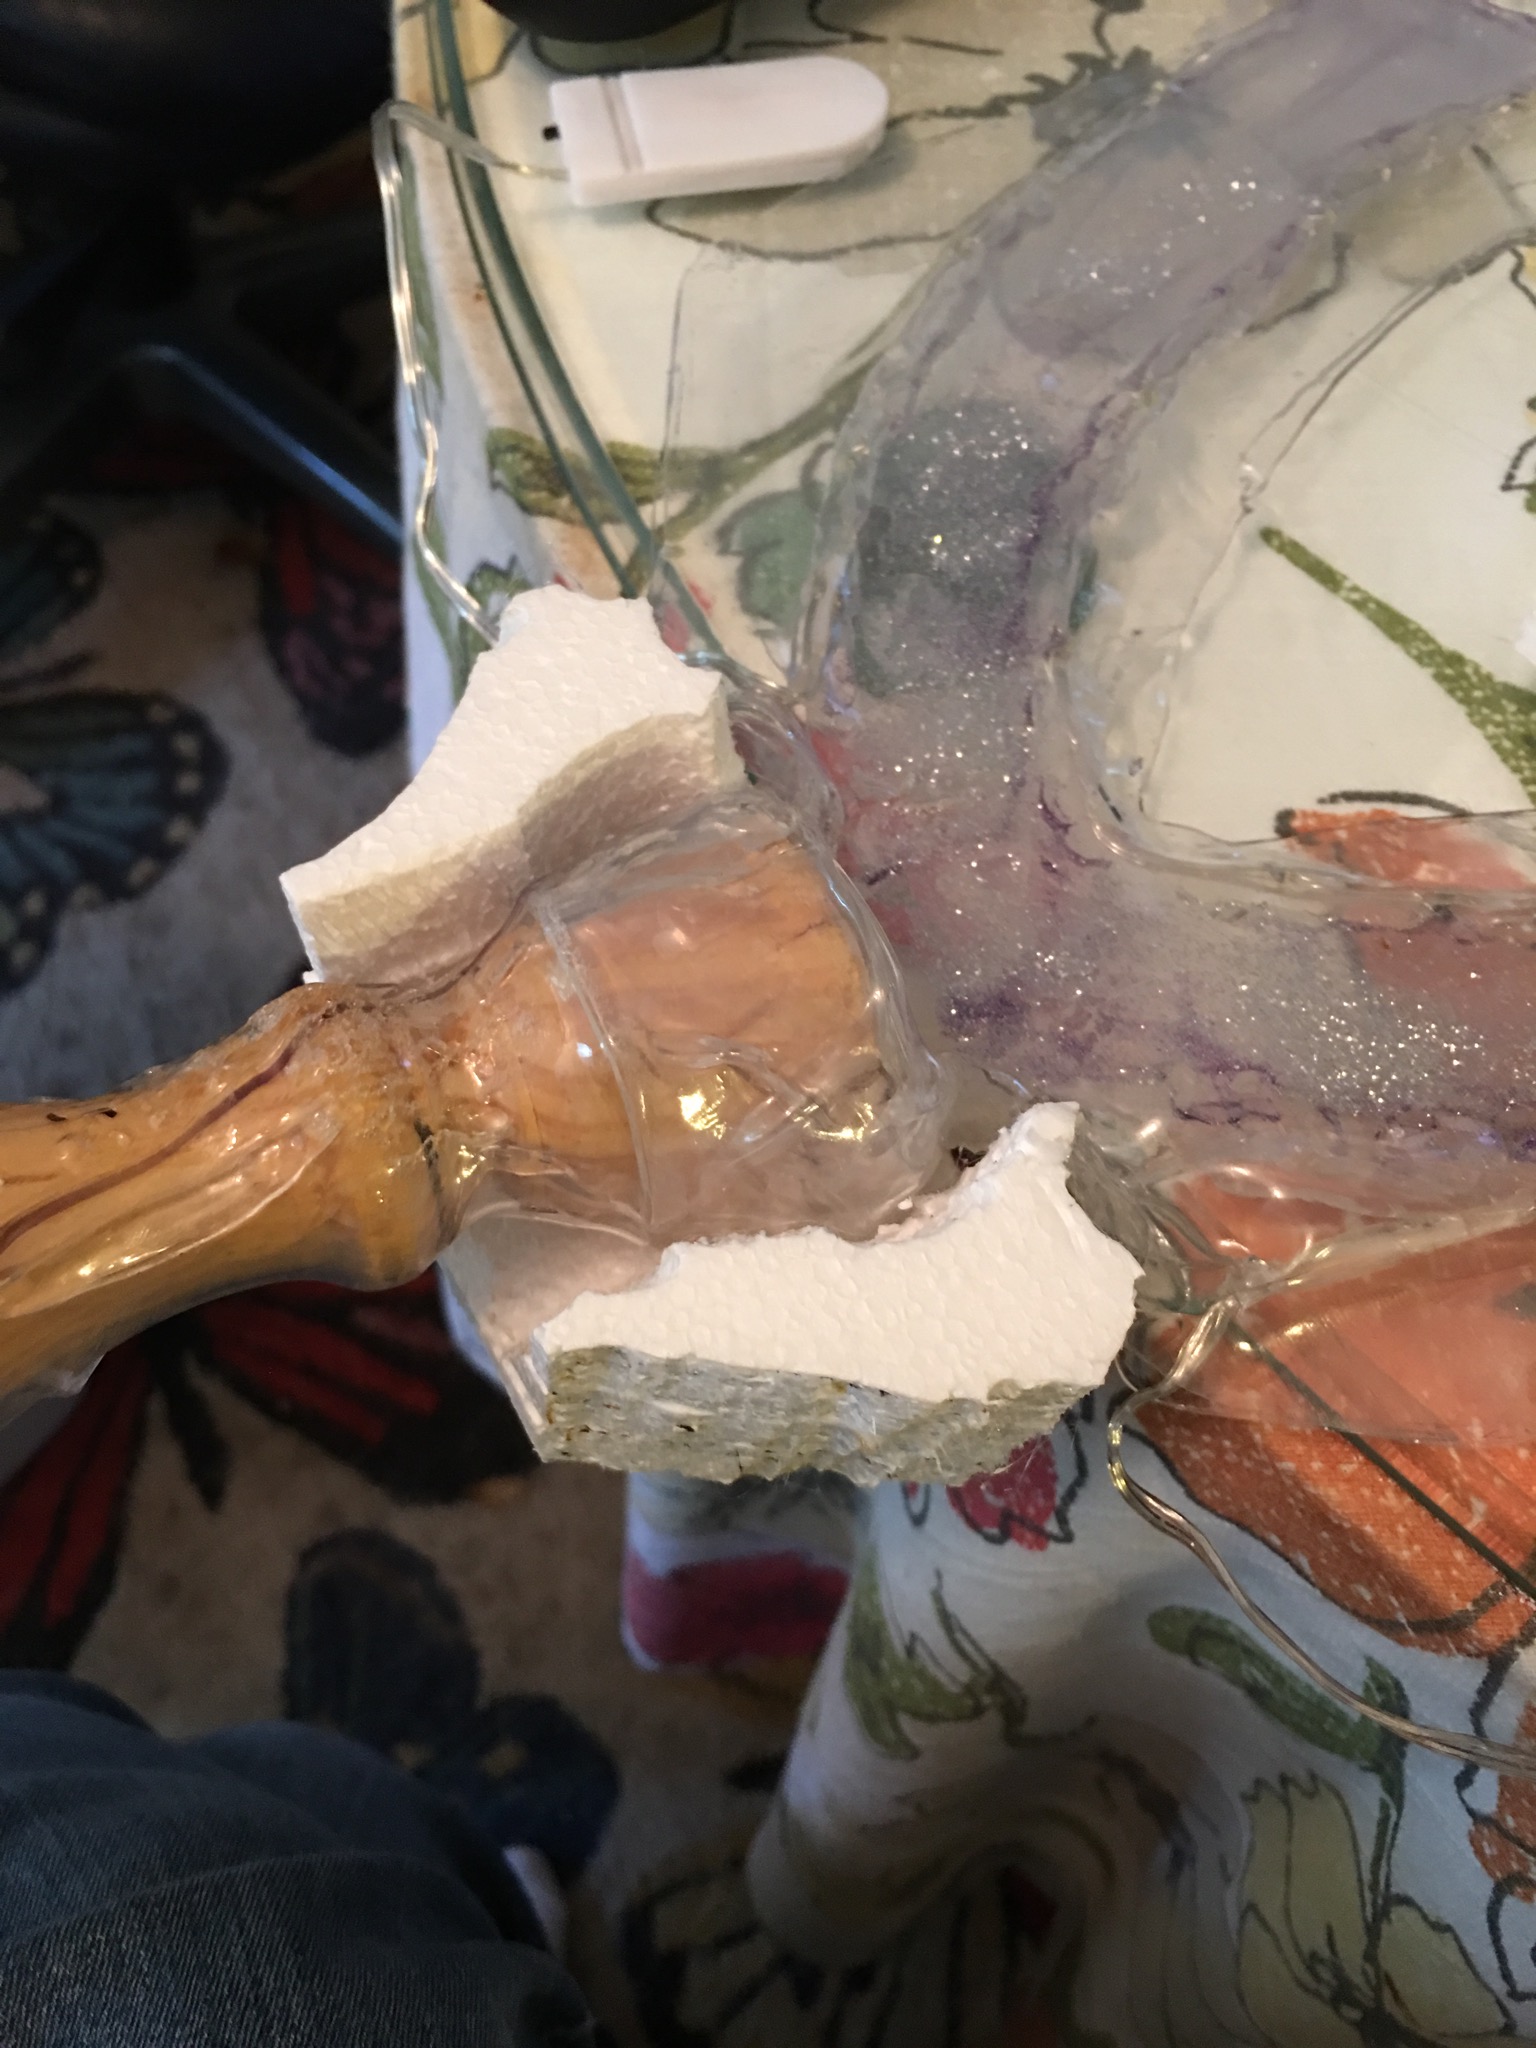
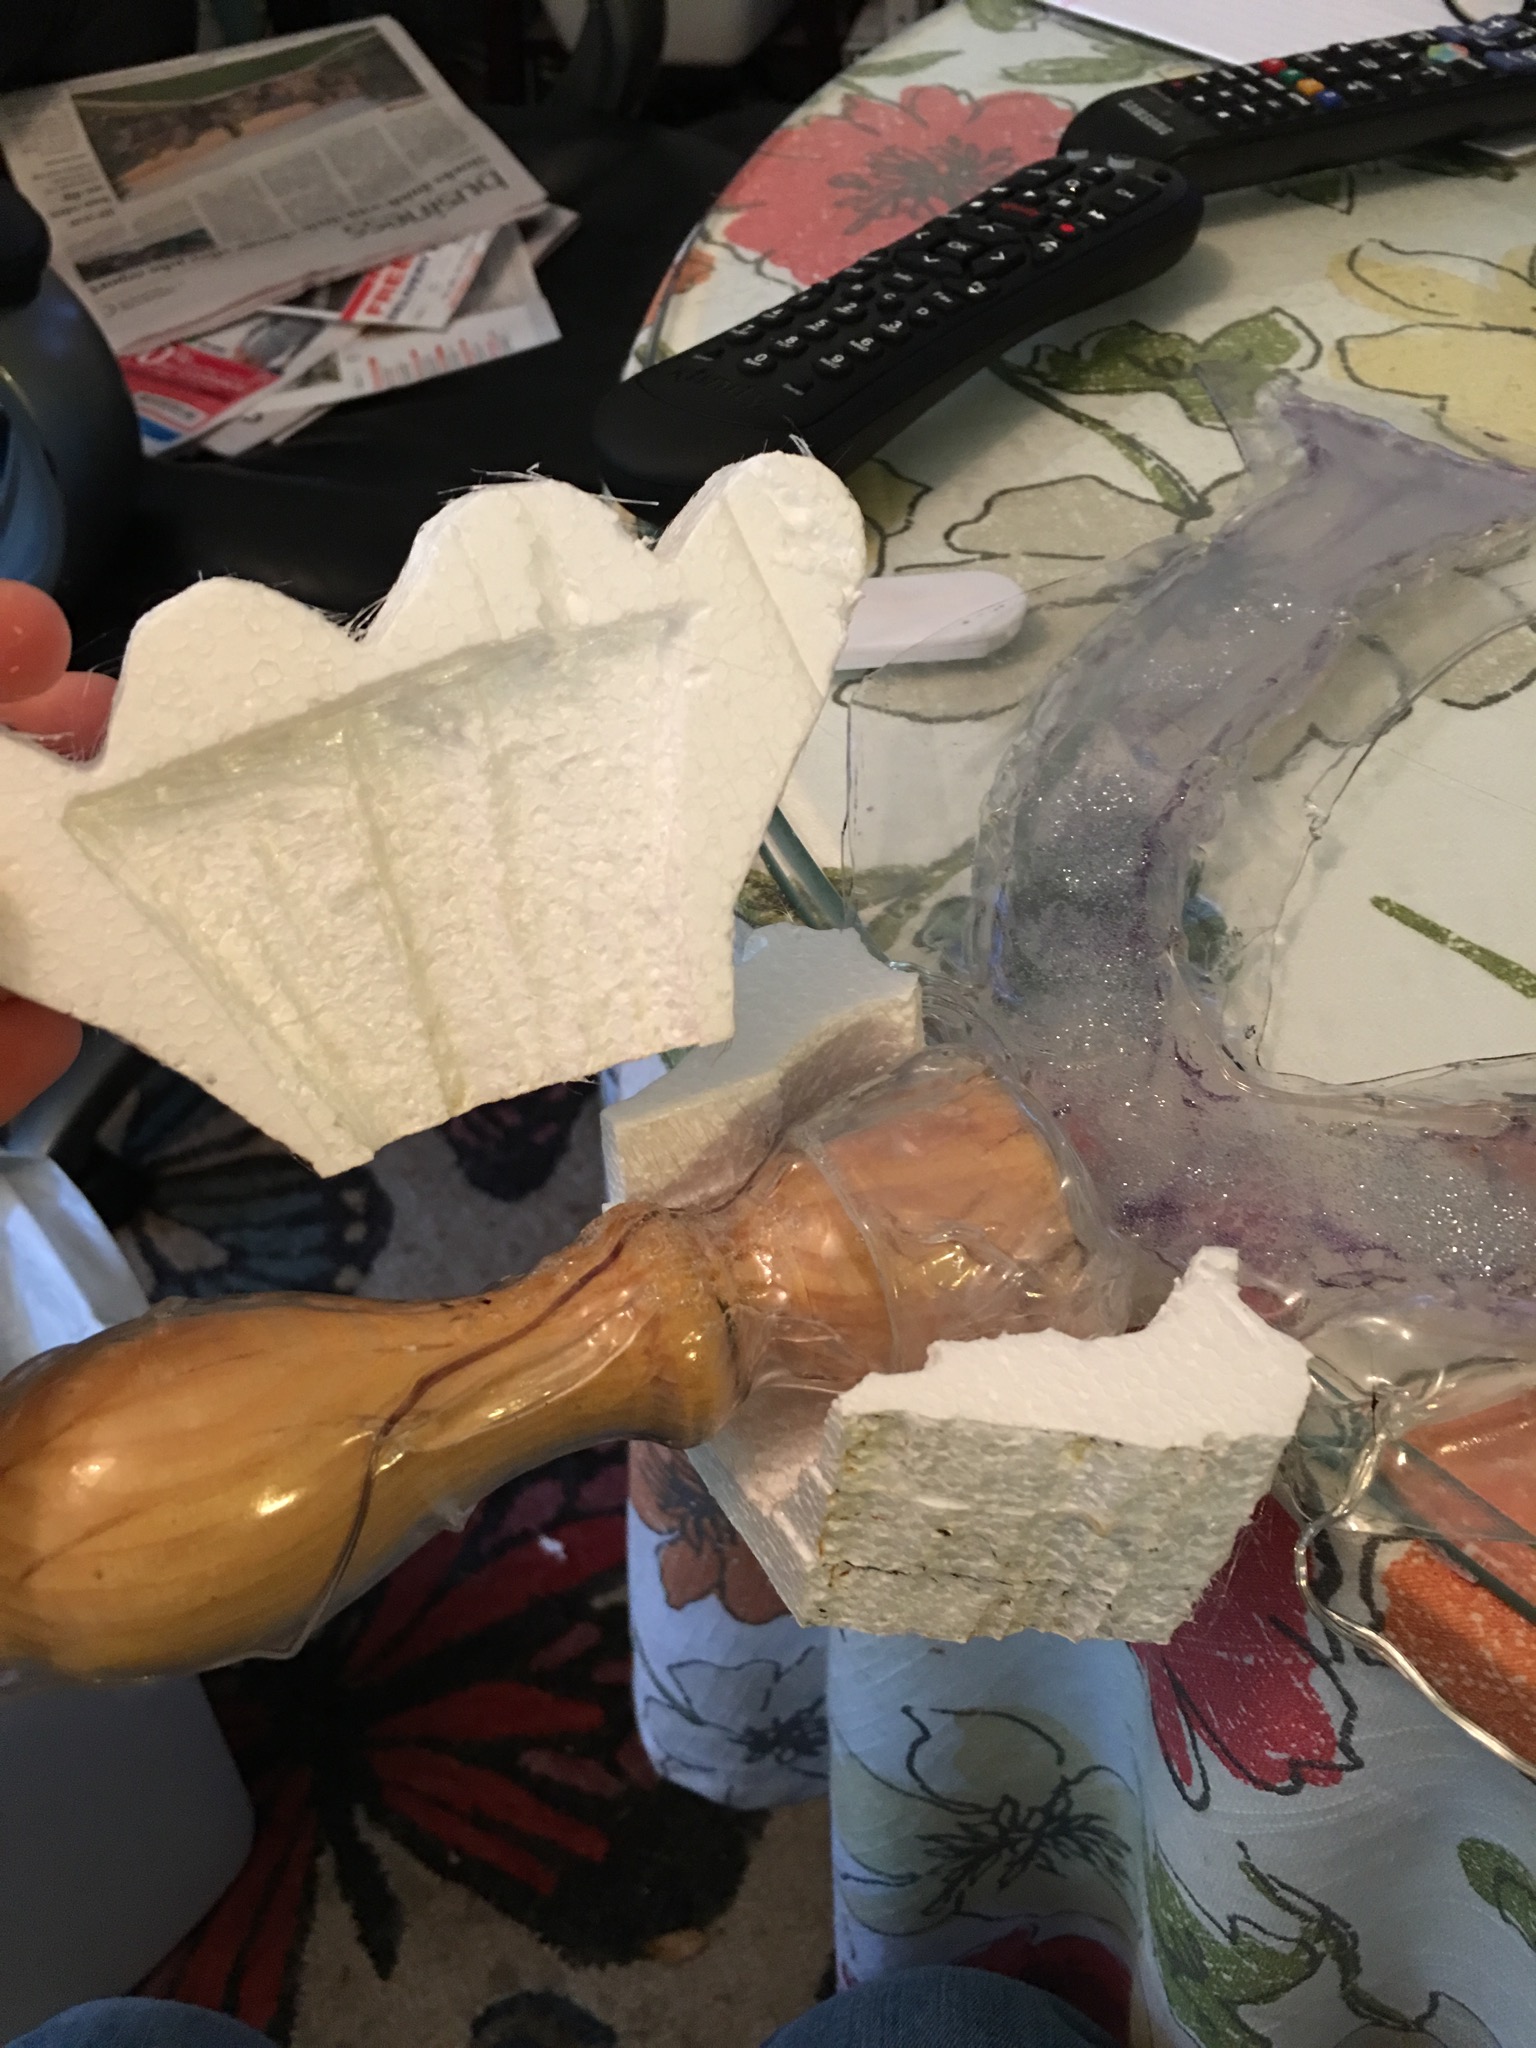
Next you need to glue this piece to the inside of the Worbla piece that is already attached to your PVC staff.
Insert the bottom piece into the opening of the candle holder and make sure it looks similar to the image above. You want your Worbla piece to be showing all around the plexiglass and that the bottom fits perfectly into the hole of the candle holder. I would suggest that you add a hero us amount of Gorilla glue into the candle opening and let it fill up around the plexiglass that is stuck into the hole. Let it dry overnight (extra stability).
Next you need a special type of plexiglass glue that dries transparent (you don’t want a glue that will ruin the look of your transparent staff).
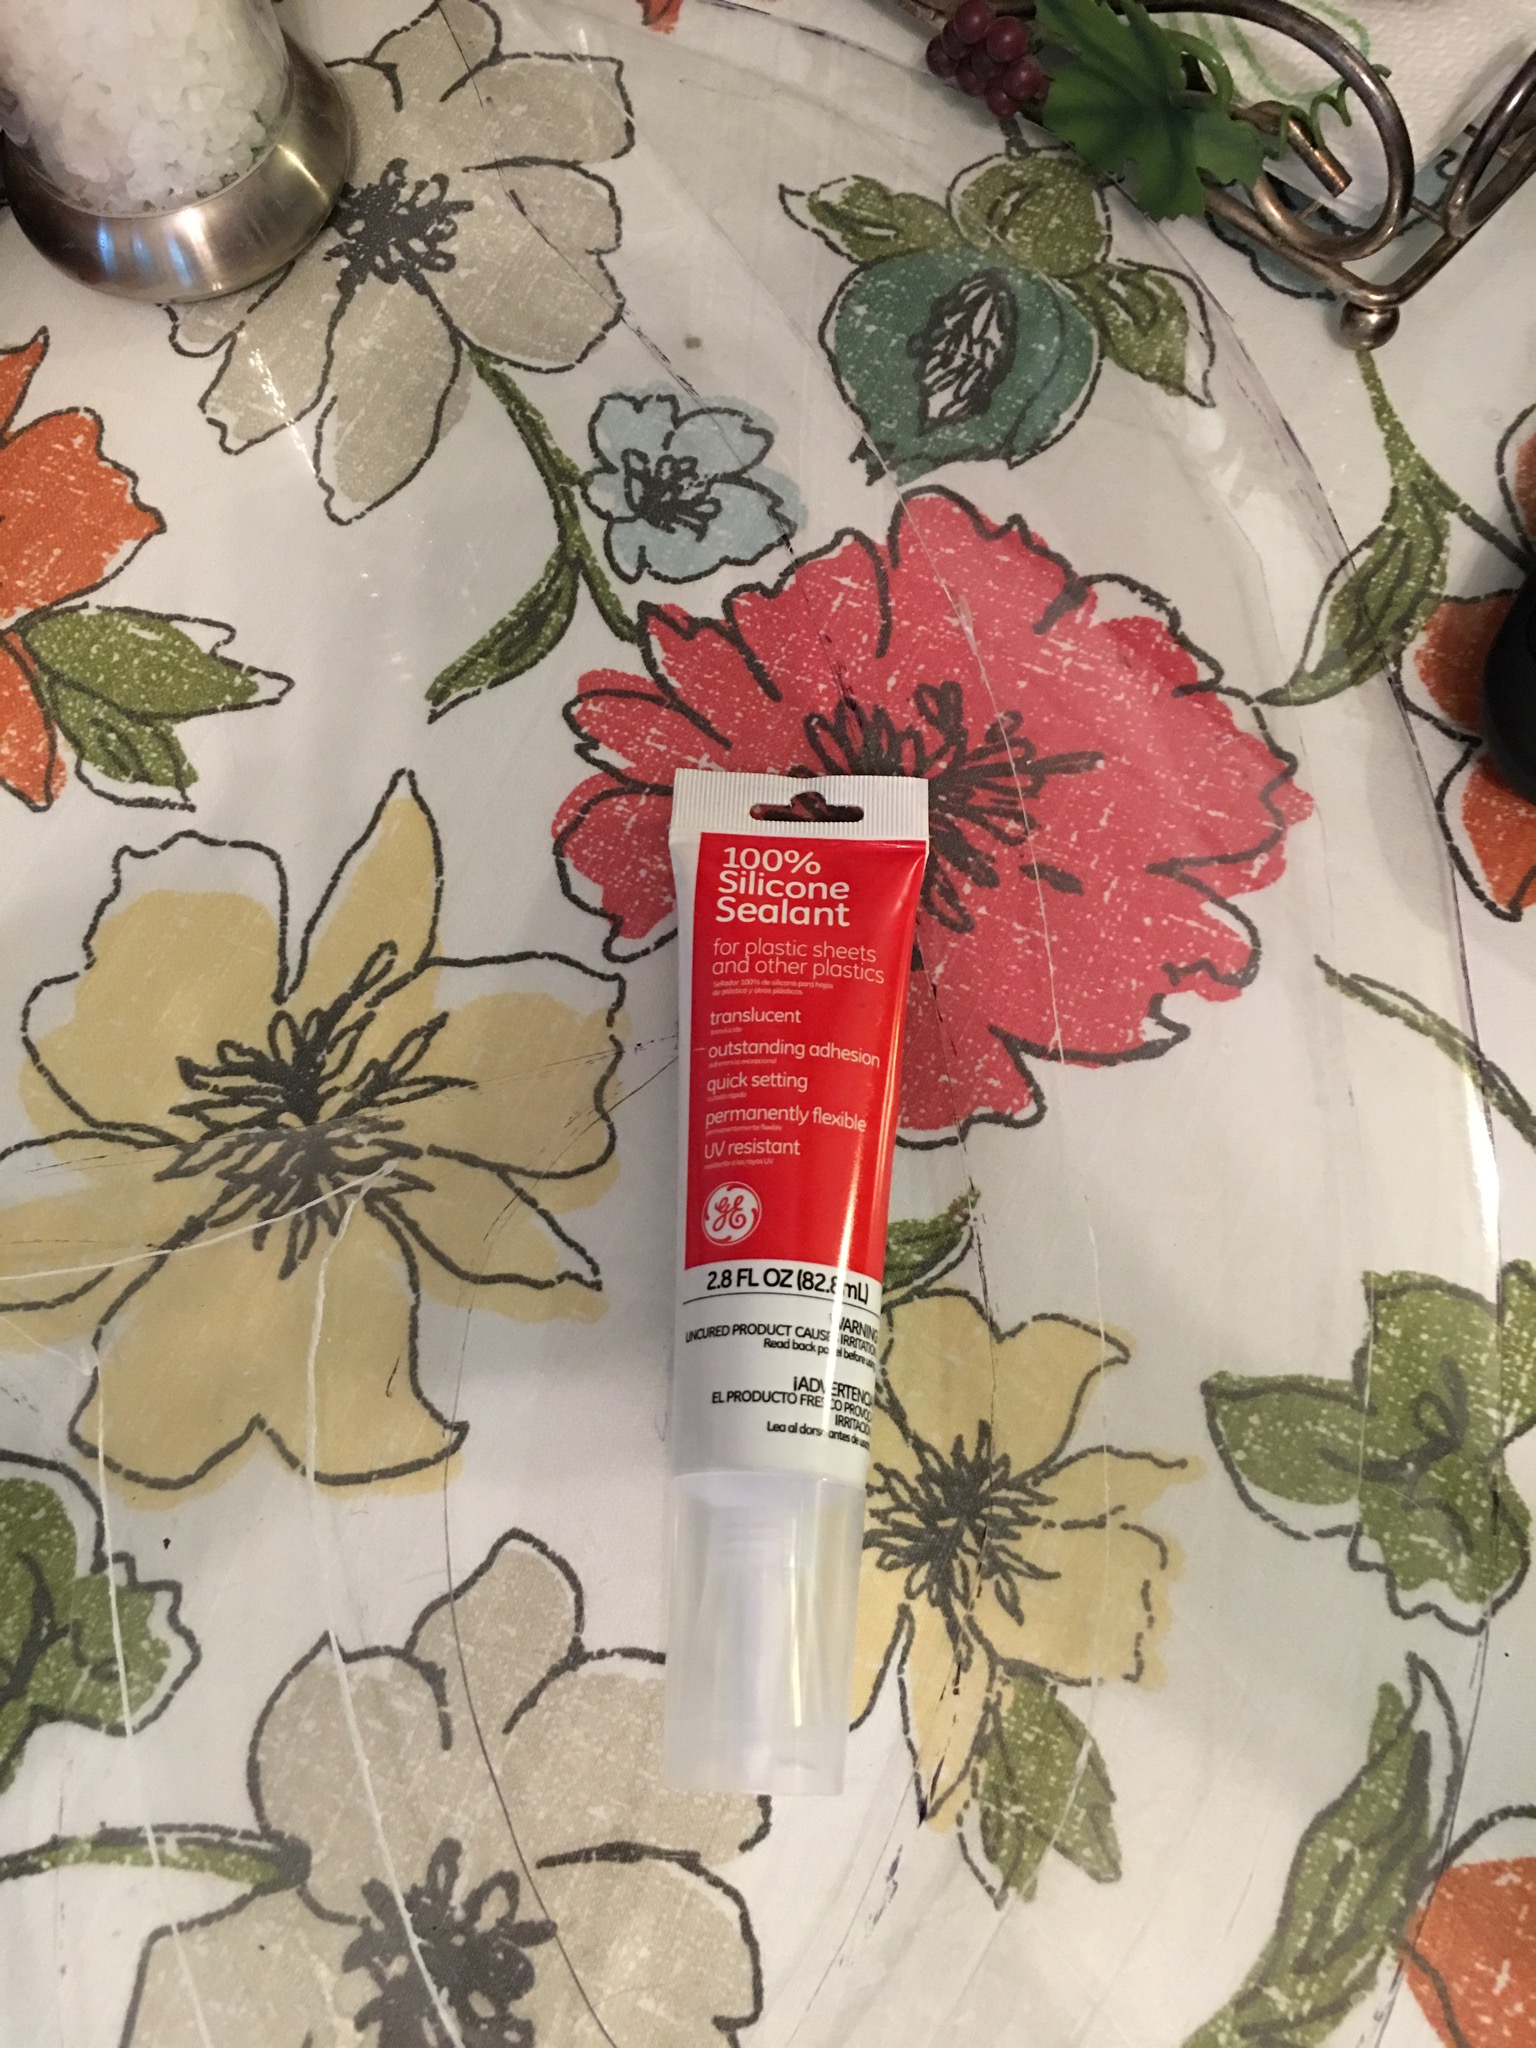 -> here is the glue I used
Apply a generous amount on your plexiglass and stick it to the Worbla beneath it:
You will need to find some heavy objects to press down on the bond and leave it lie this for about 24 hours. You want a secure bond!
 -> funny heavy objects
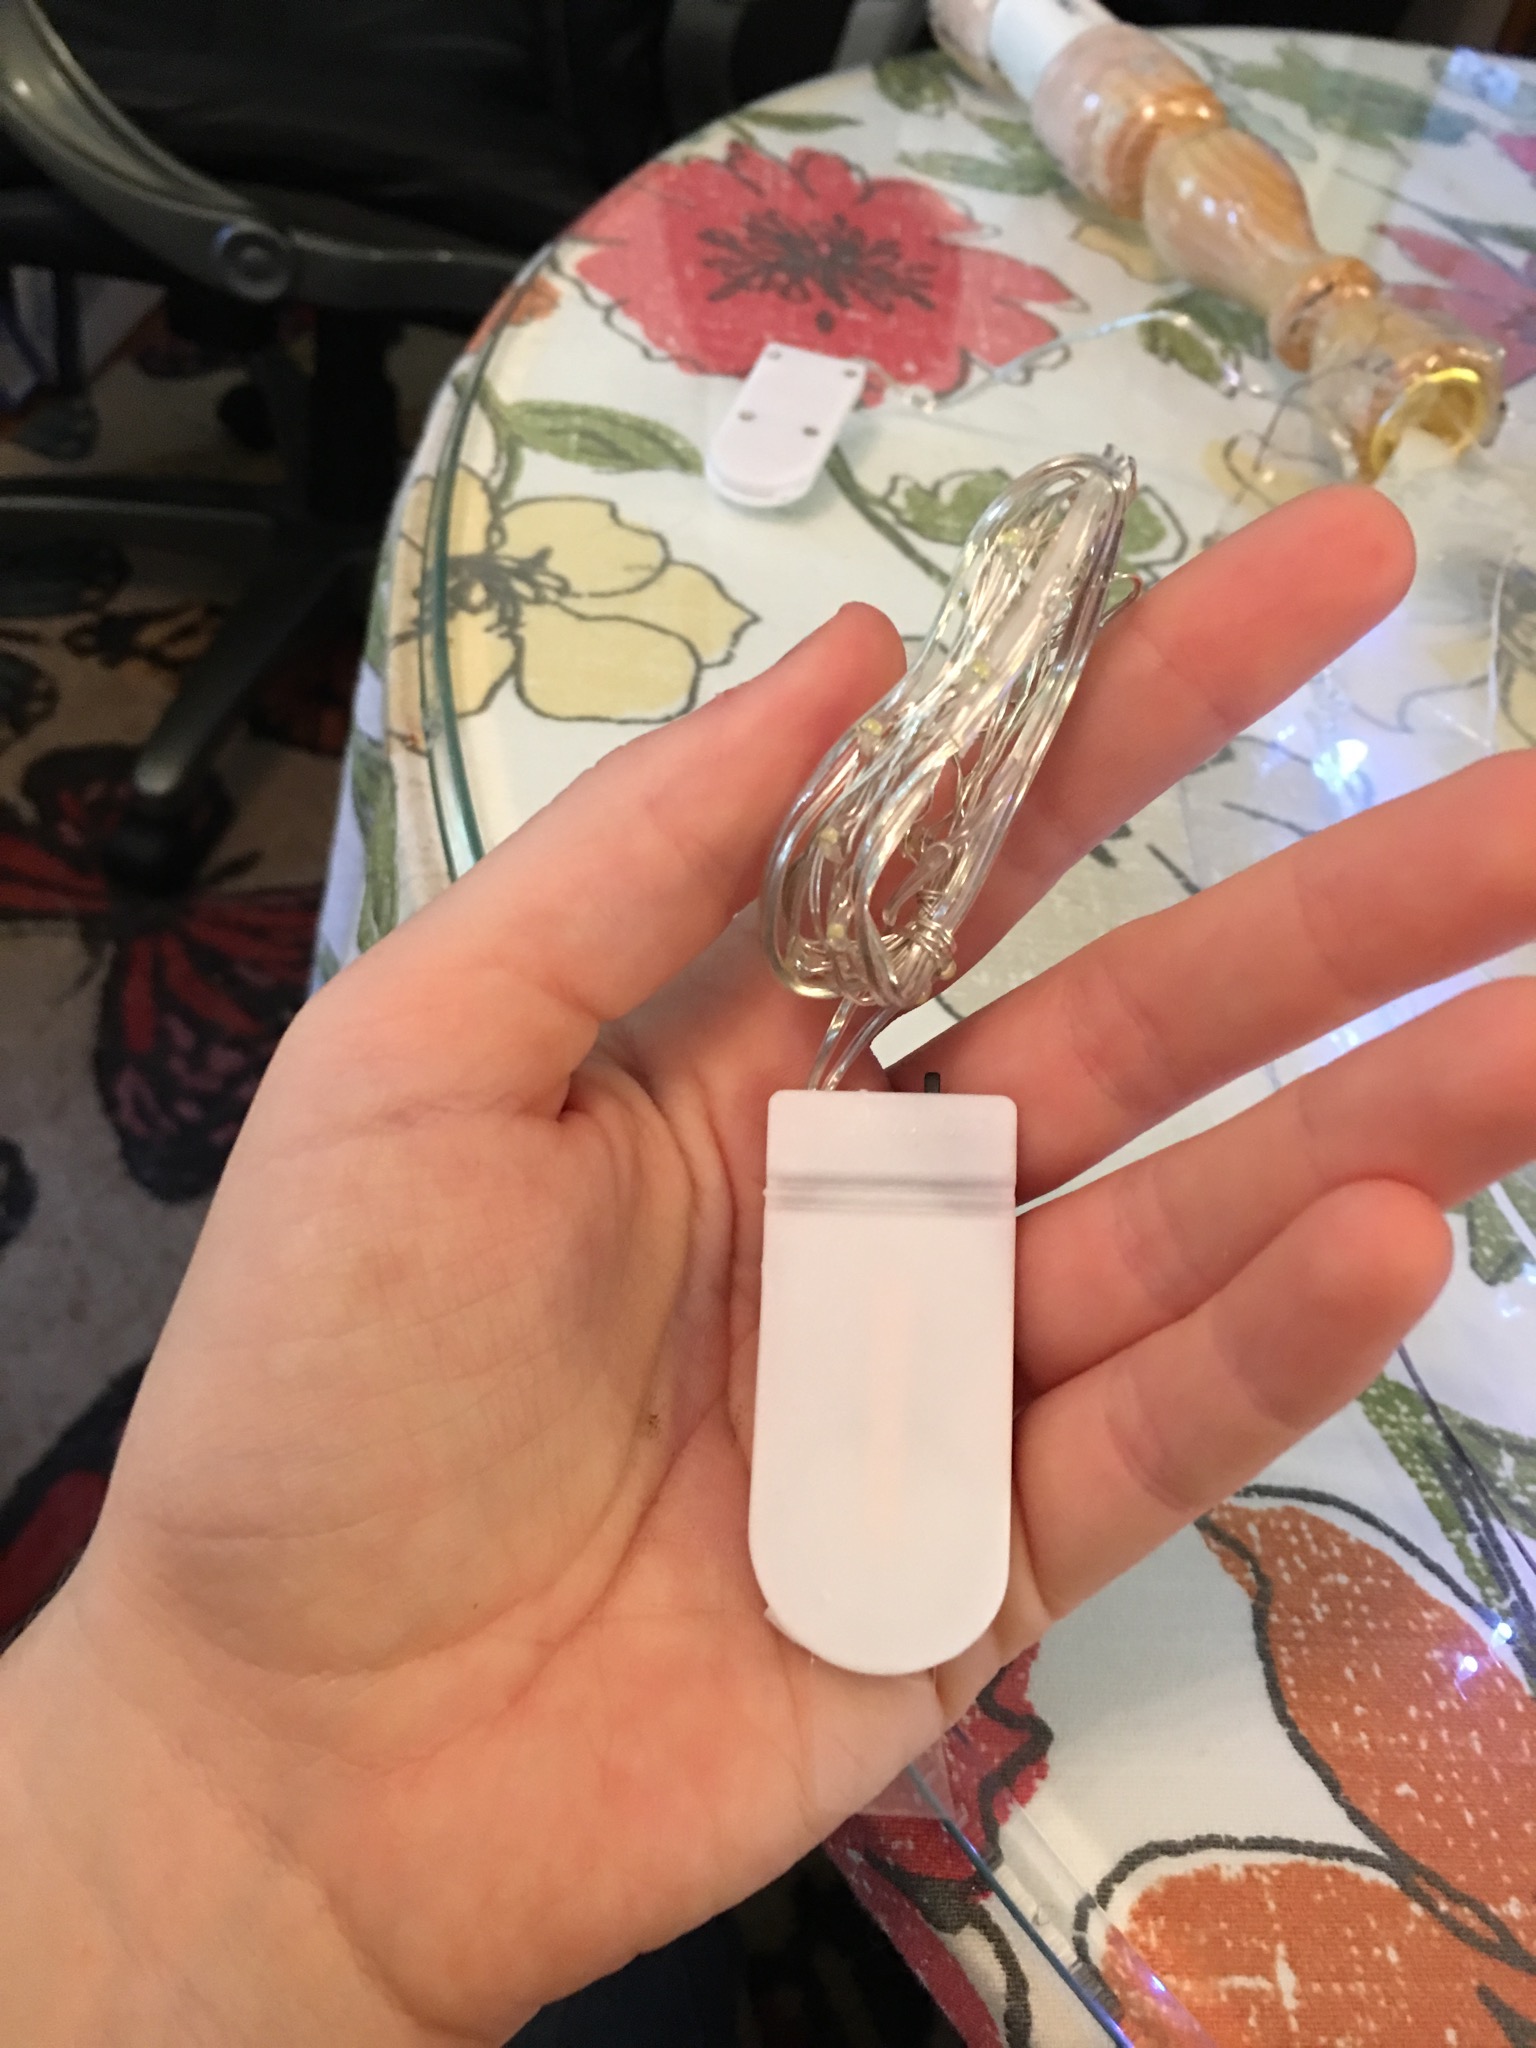
Step 8: LED Lights and Final Worbla Piece
So after 24 hours the plexiglass should be sealed to the Worbla underneath. This is now the time to add some LED lights. There are a variety of lights with different battery sized backs that can be found on Amazon or eBay for as little as $5. They come in a variety of colors. For the Glaive I used a bright white color. In order to go around the whole Glaive and a little bit up the center of the Glaive I needed two LED strands. This is what they look like.
These are fairly easy to install. I used them for my Milla Maxwell Sword in 2015. You can attach these lights using a simple hot glue gun. Making sure that the battery back and about 4-5 inches of strand is left to the side, start at the bottom of the blade (towards the candle stick) and start adding hot glue to the edge of the plexiglass and pressing the LED strand into the glue, holding it still until the glue hardens. Try not to press the actual light bulbs into the glue, just the metal wiring. Continue around the plexiglass until you run out of length.
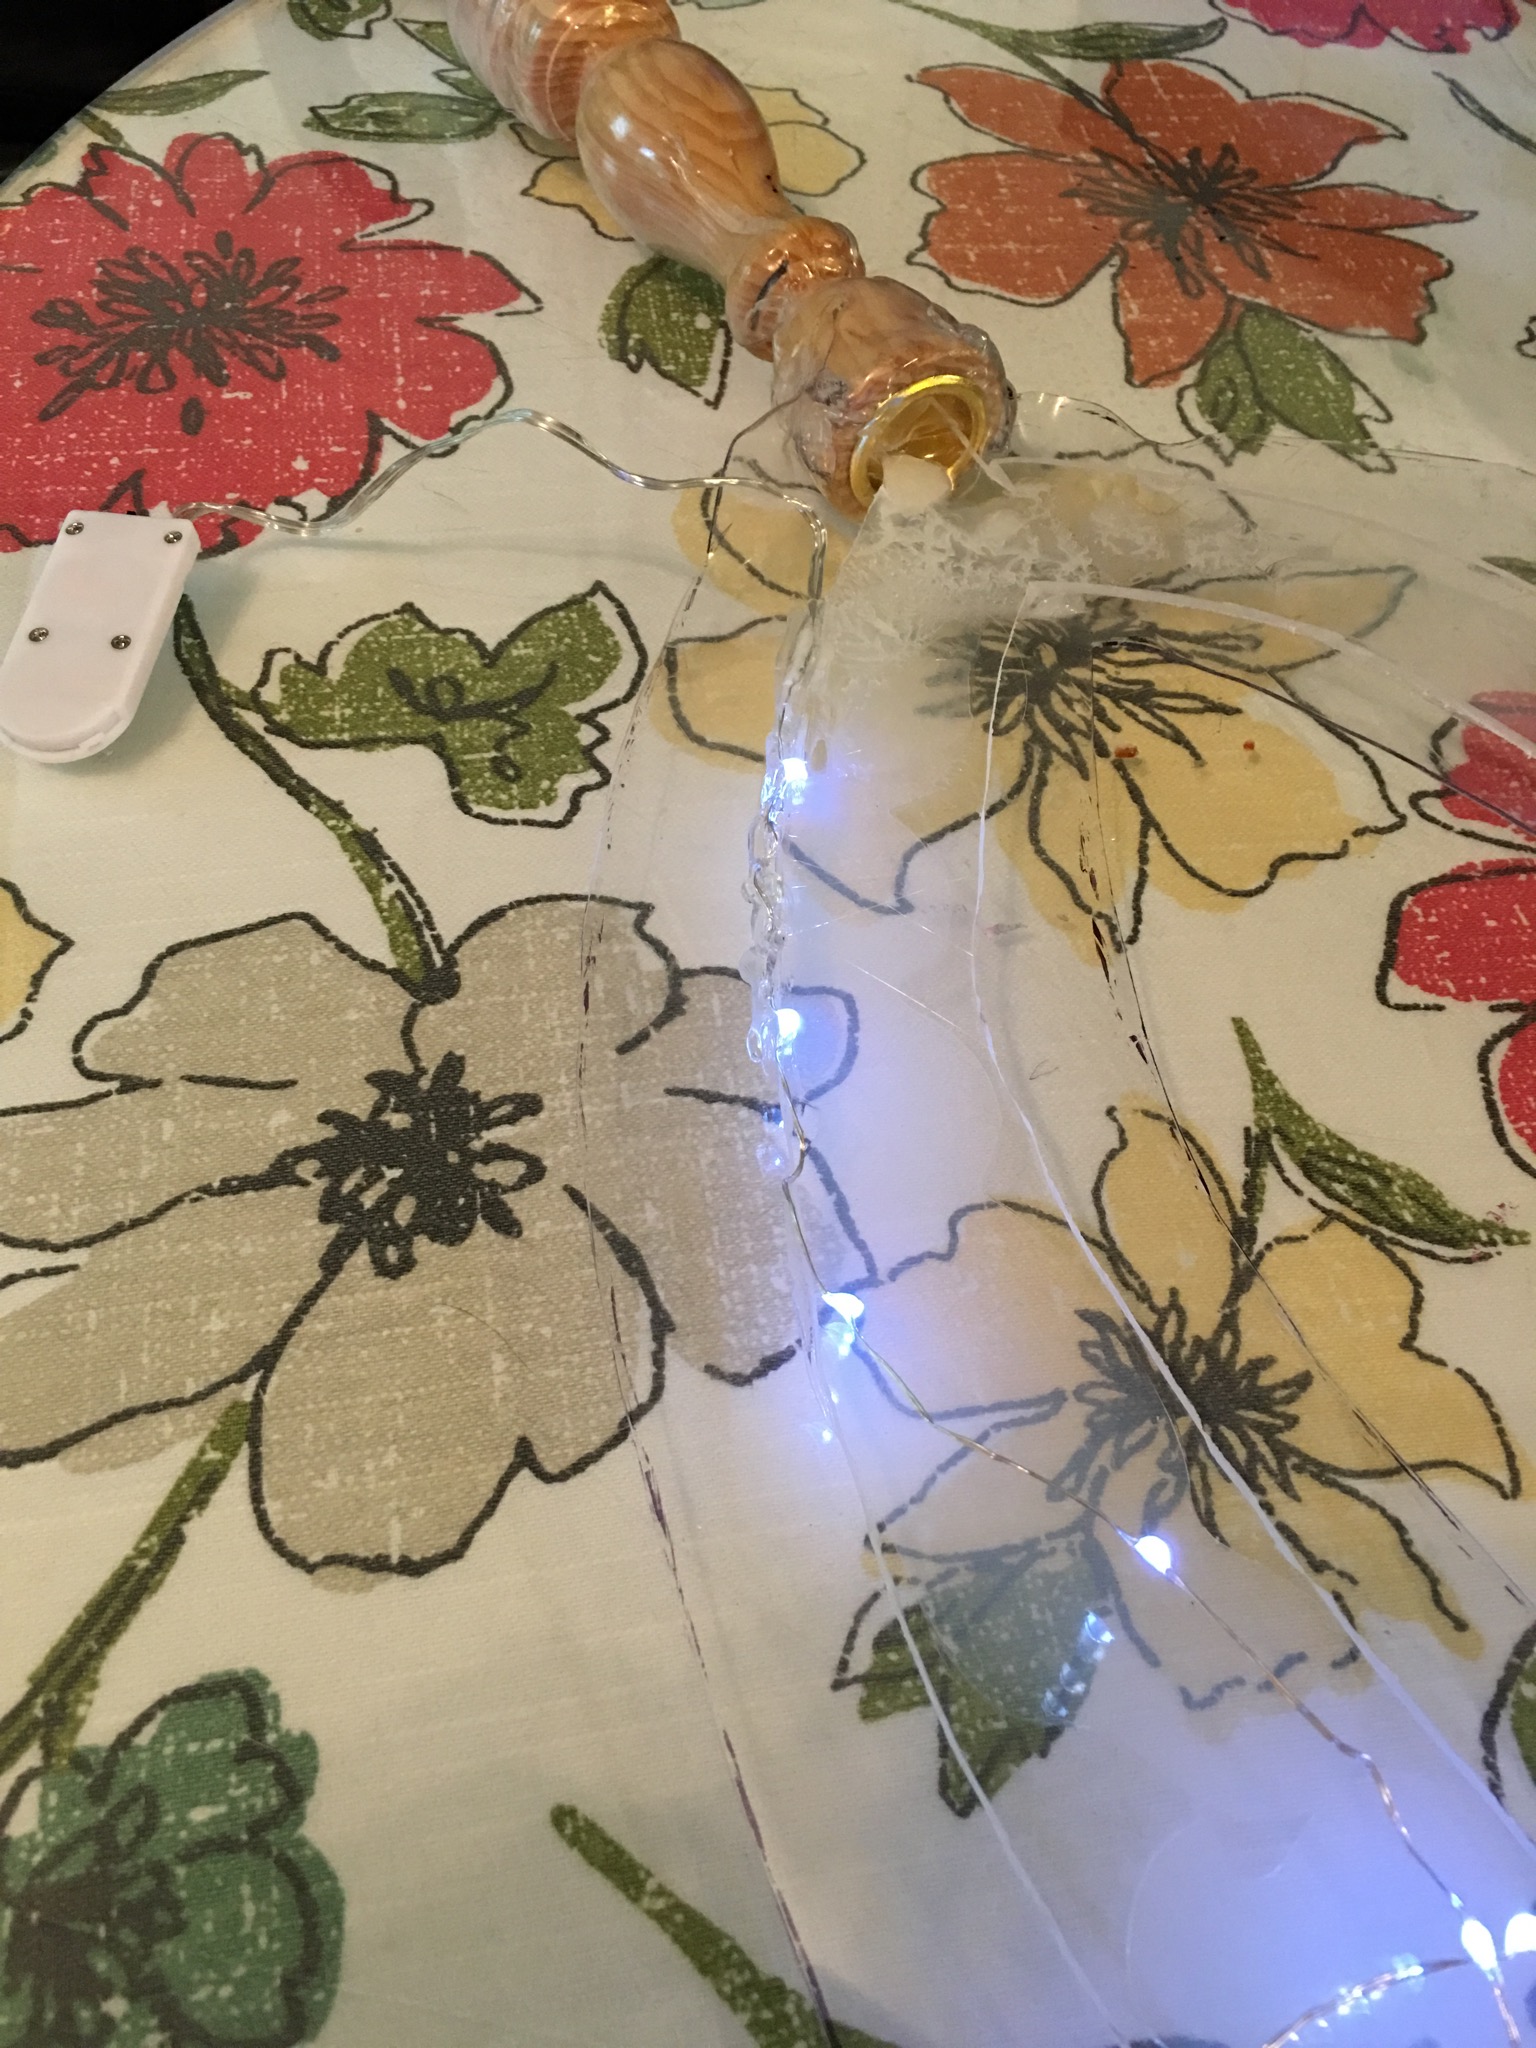
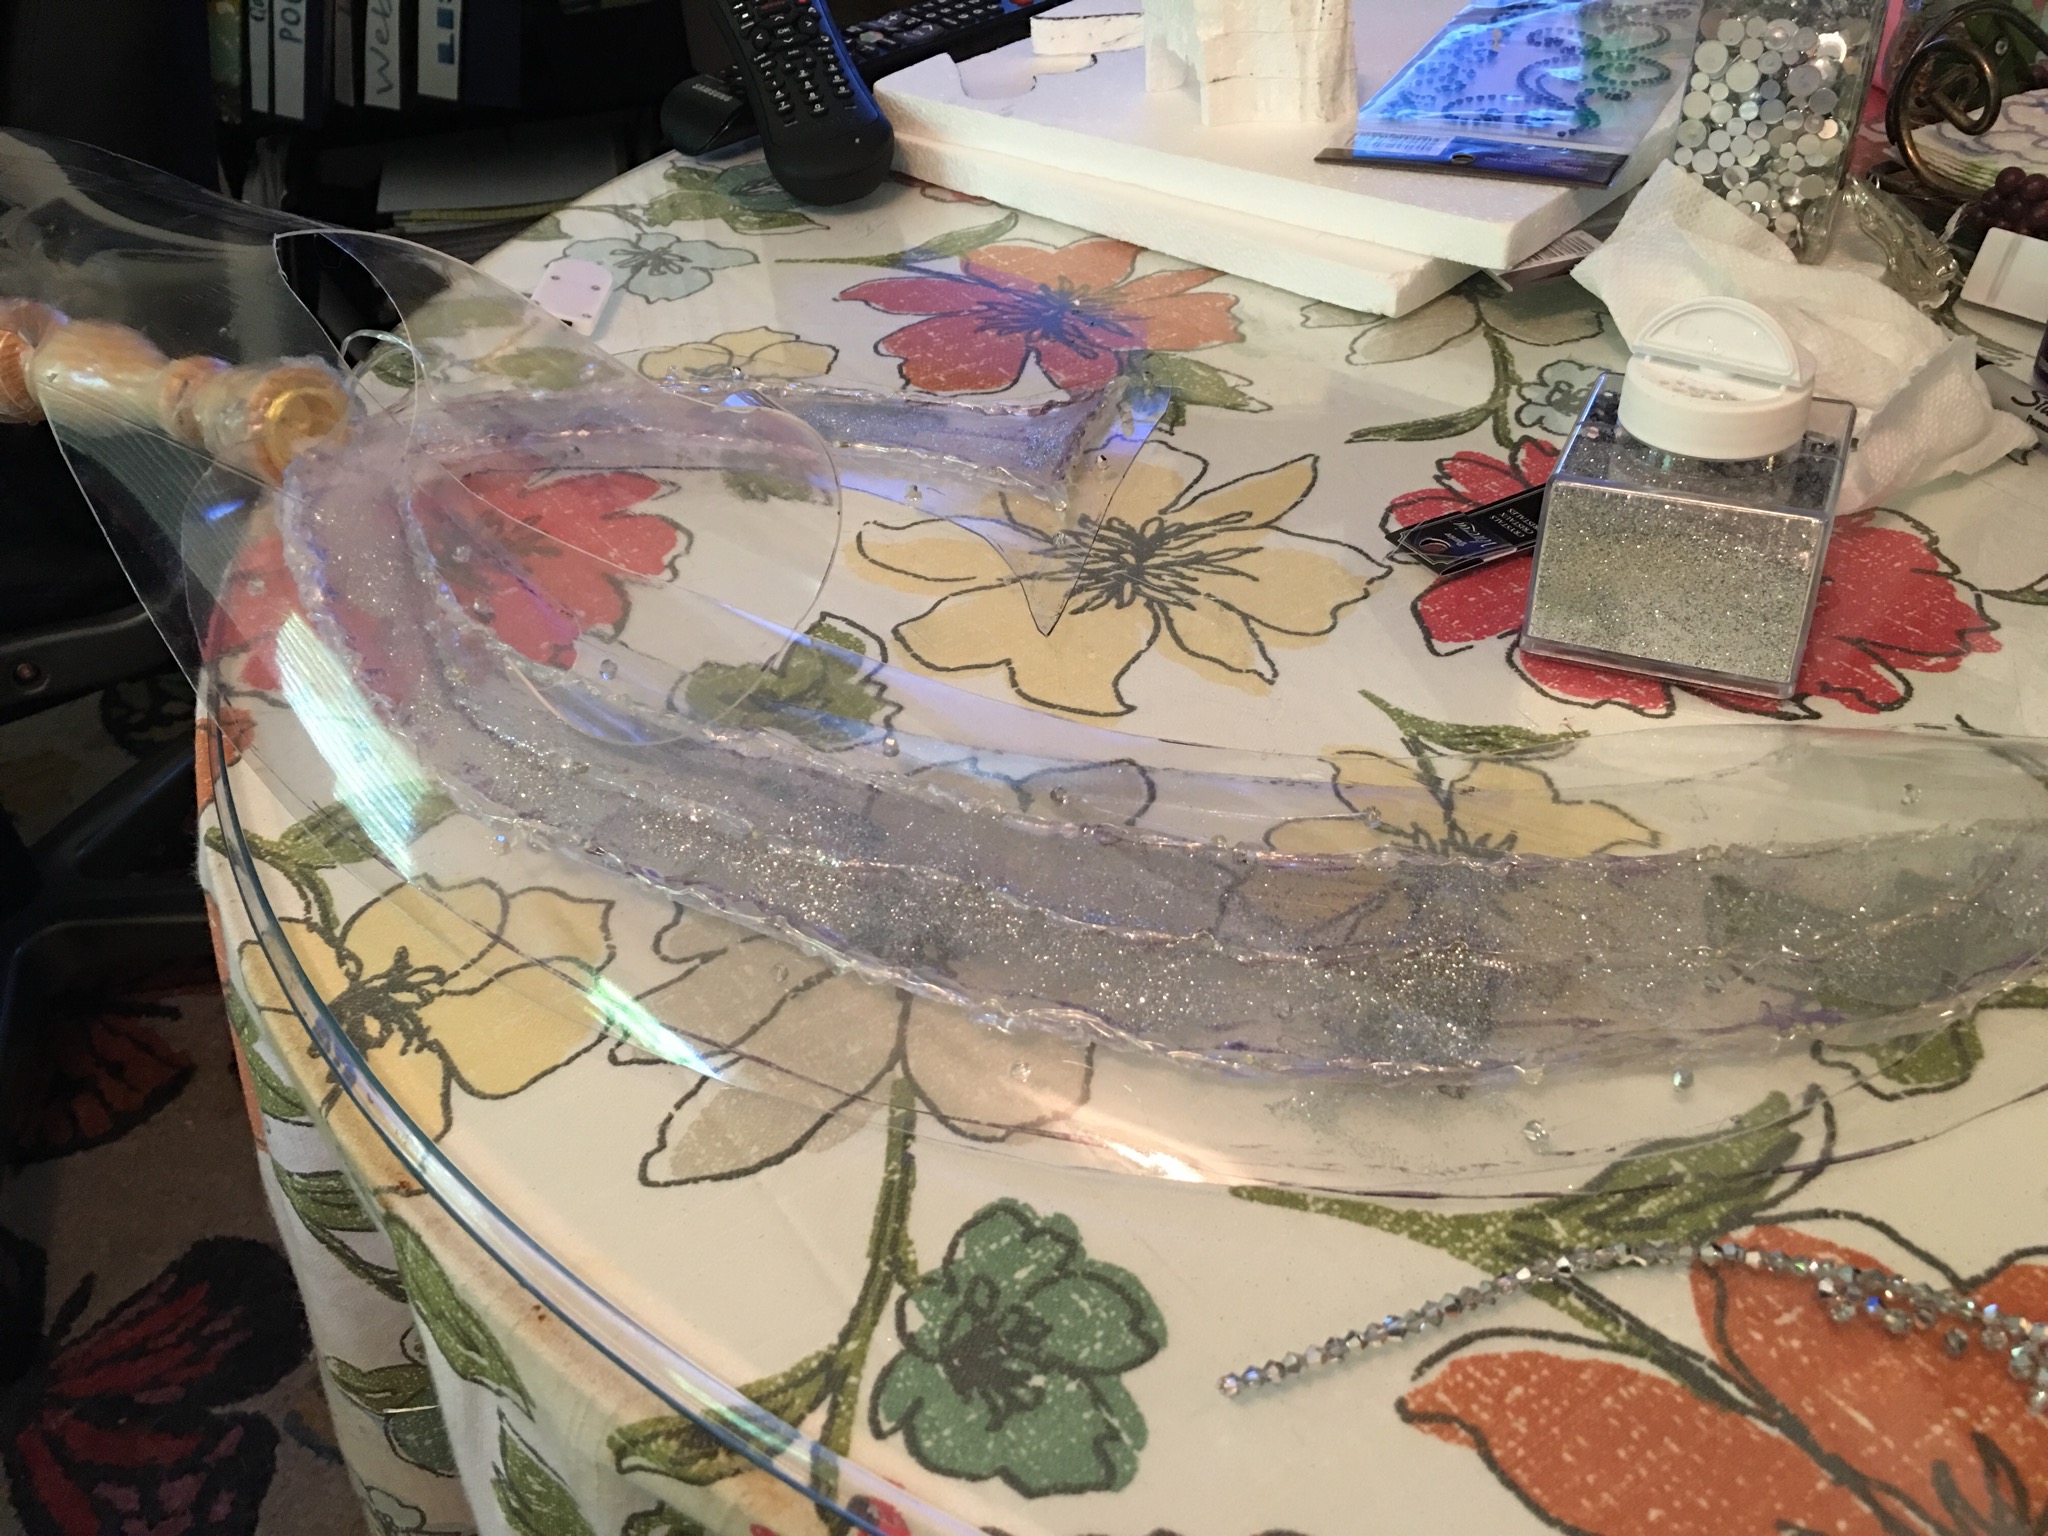
Once you run out of length get your other LED light strand and STARTING AT THE BOTTOM of the blade again (opposite side of your first LED starting point), repeat the process. You will probably have some length left over in your send strand. You can either cut it or you can go up the middle of the larger blade like I did. In the end this is what it should look like:

Both battery pack should be hanging down at the bottom.
This next part is optional but I wanted to hide some of the hot glue areas. So I used some glitter to paint on the plexiglass between the lights.
I used the three items in the middle of the above picture, but you can use other glitter products if you want. I added more white/silver glitter compared to purple and then sealed it with some glitter transparent glue.
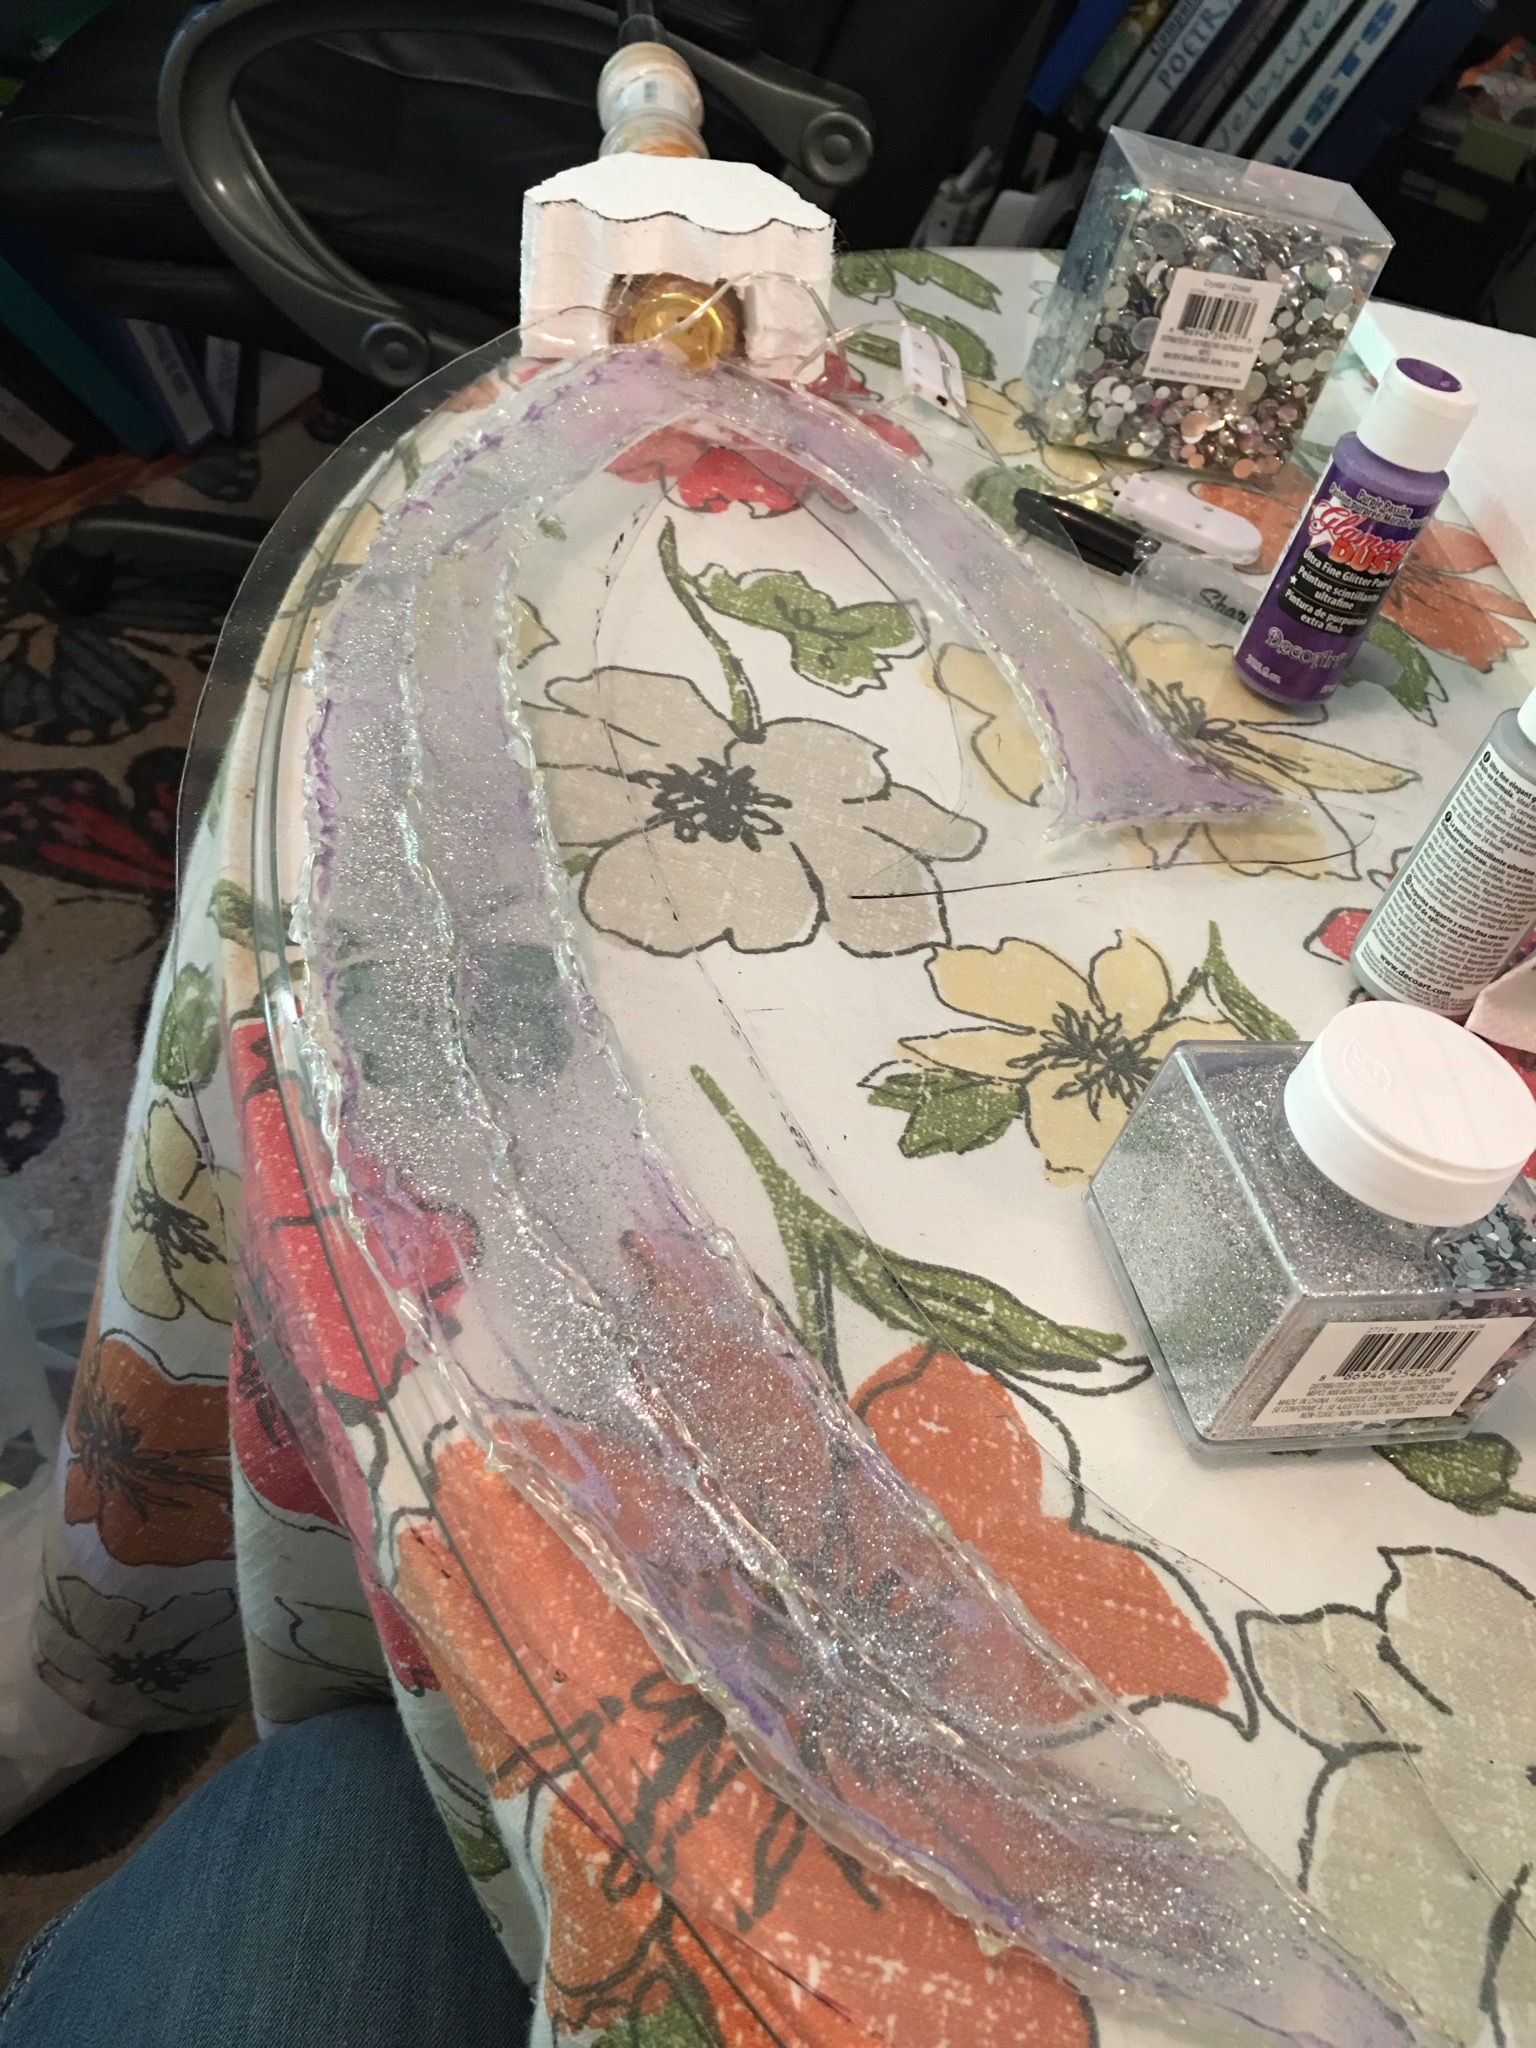
It may look a bit messy but trust me, once the lights are on the lights bounces off some of the sparkles and makes the Glaive a little brighter.
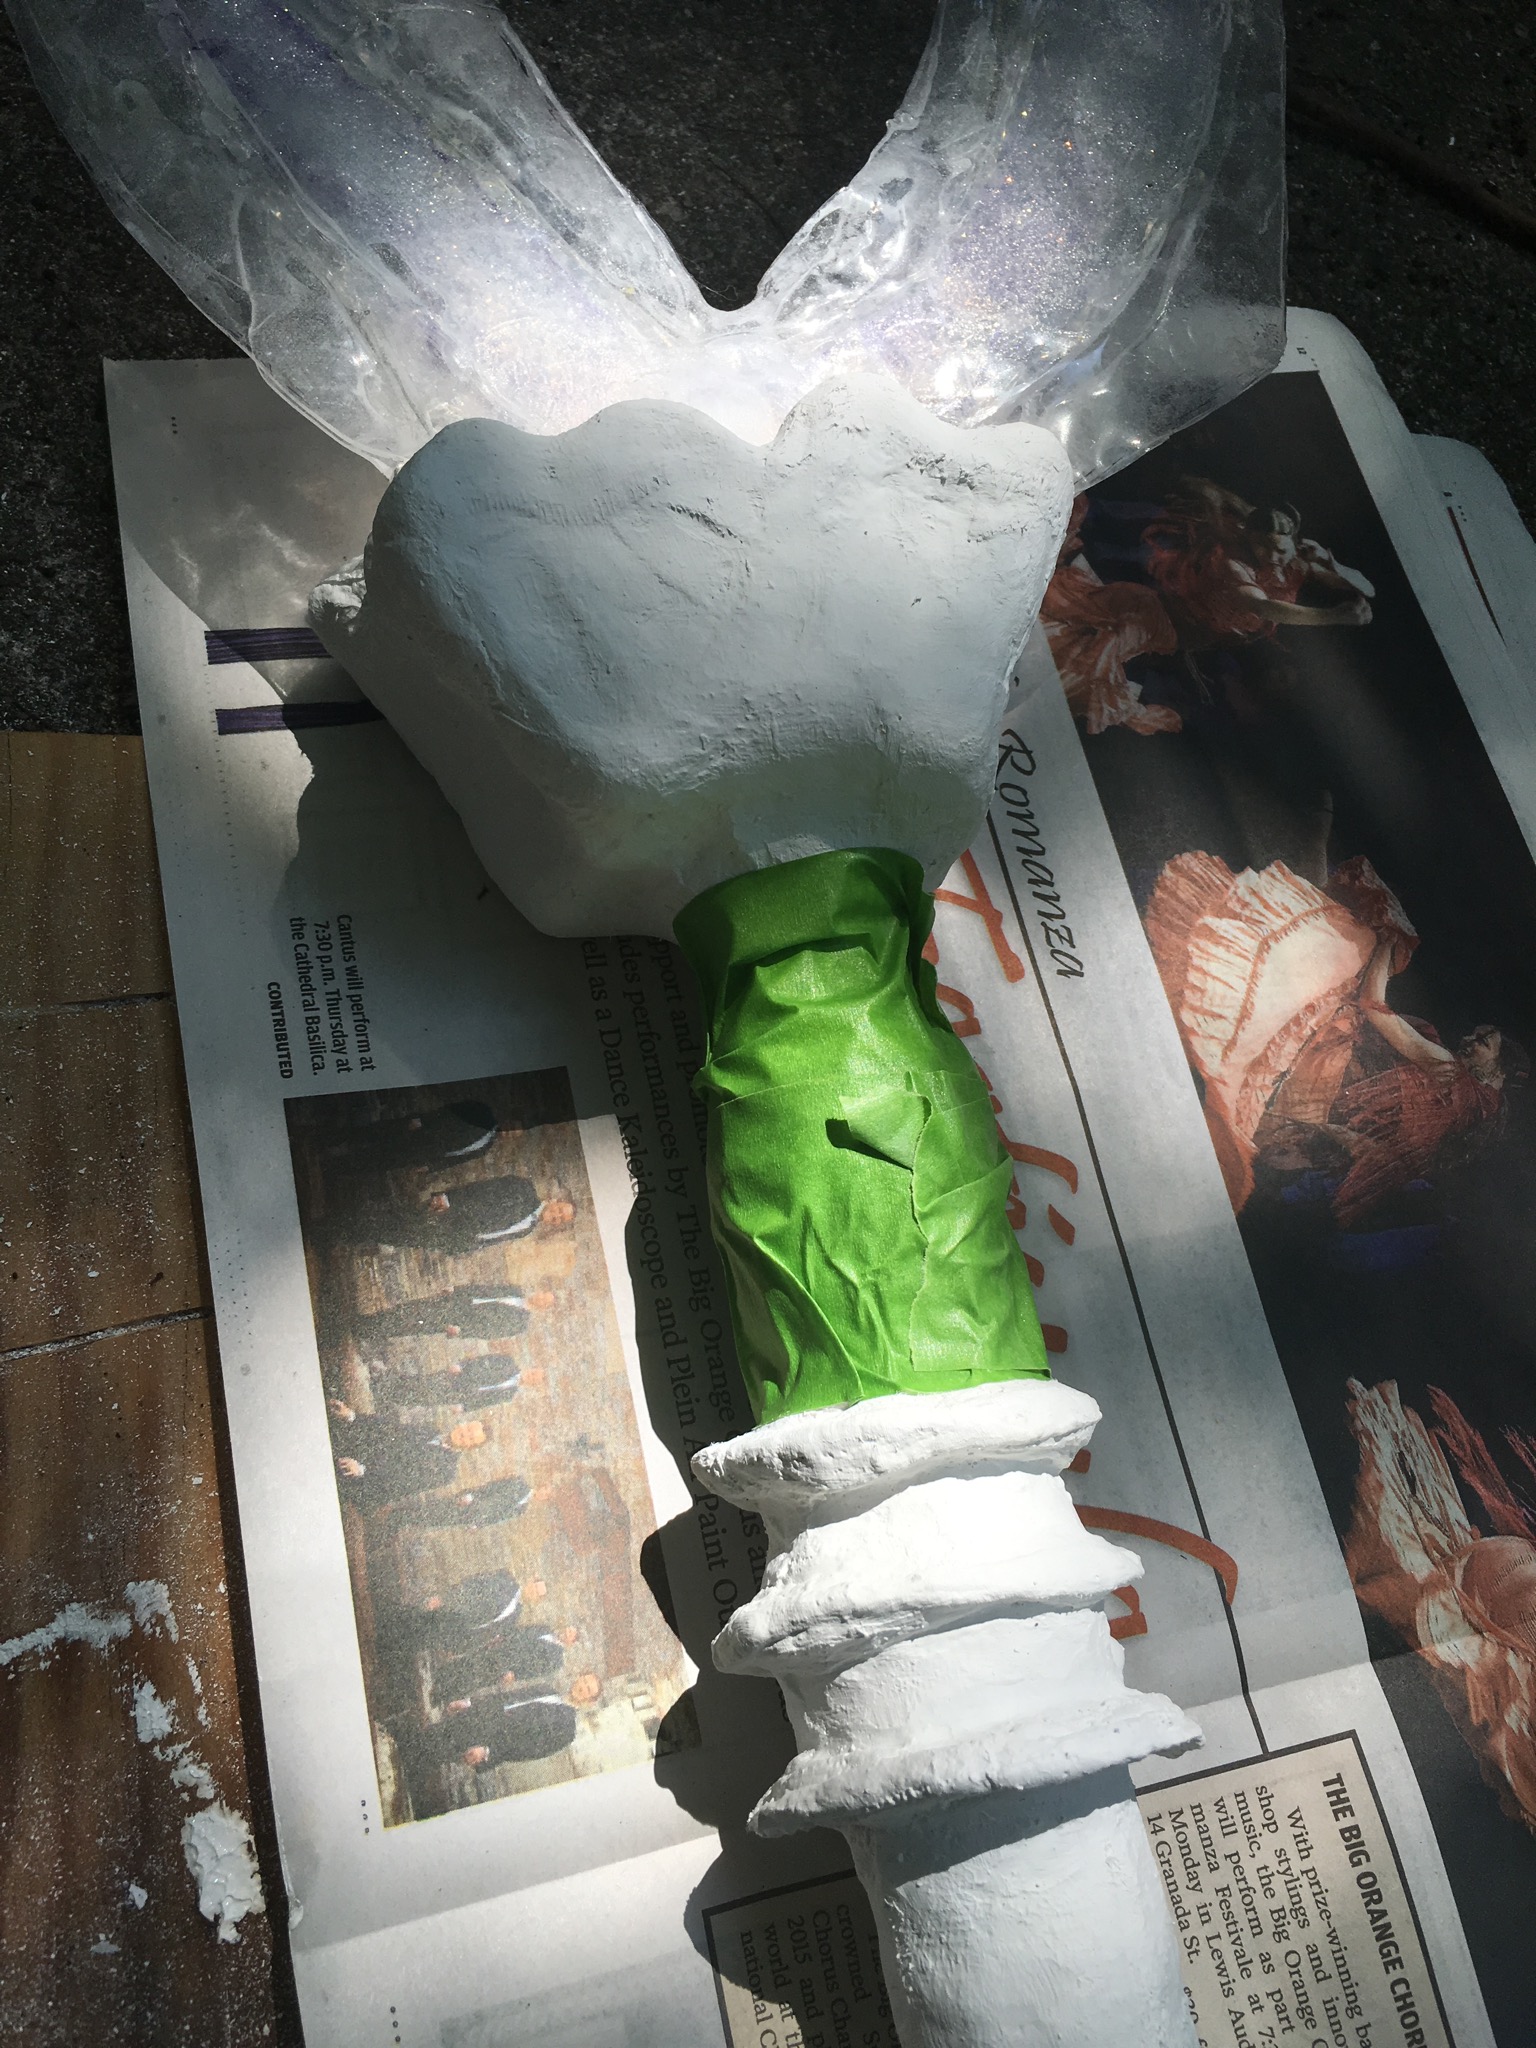
Finally, you need your other sheet of transparent Worbla. I don’t have a picture for this but just refer back to step 5. It is the exact same process. Start at the bottom and begin to wrap the extra Worbla around the top of the PVC pipe and the wooden napkin rings and candle holder. Once you get to the actual blade you are going to heat the Worbla on the edges and pinch it to the otheir Wrobla piece beneath the plexiglass. Make sure that both pieces of Worbla fuse to each other. The plexiglass and the LED lights should be sealed completely between the two pieces of Worbla. If some of the edges on the blade don’t watch up, you can either trim them or heat the Worbla and stretch it until they are equal.
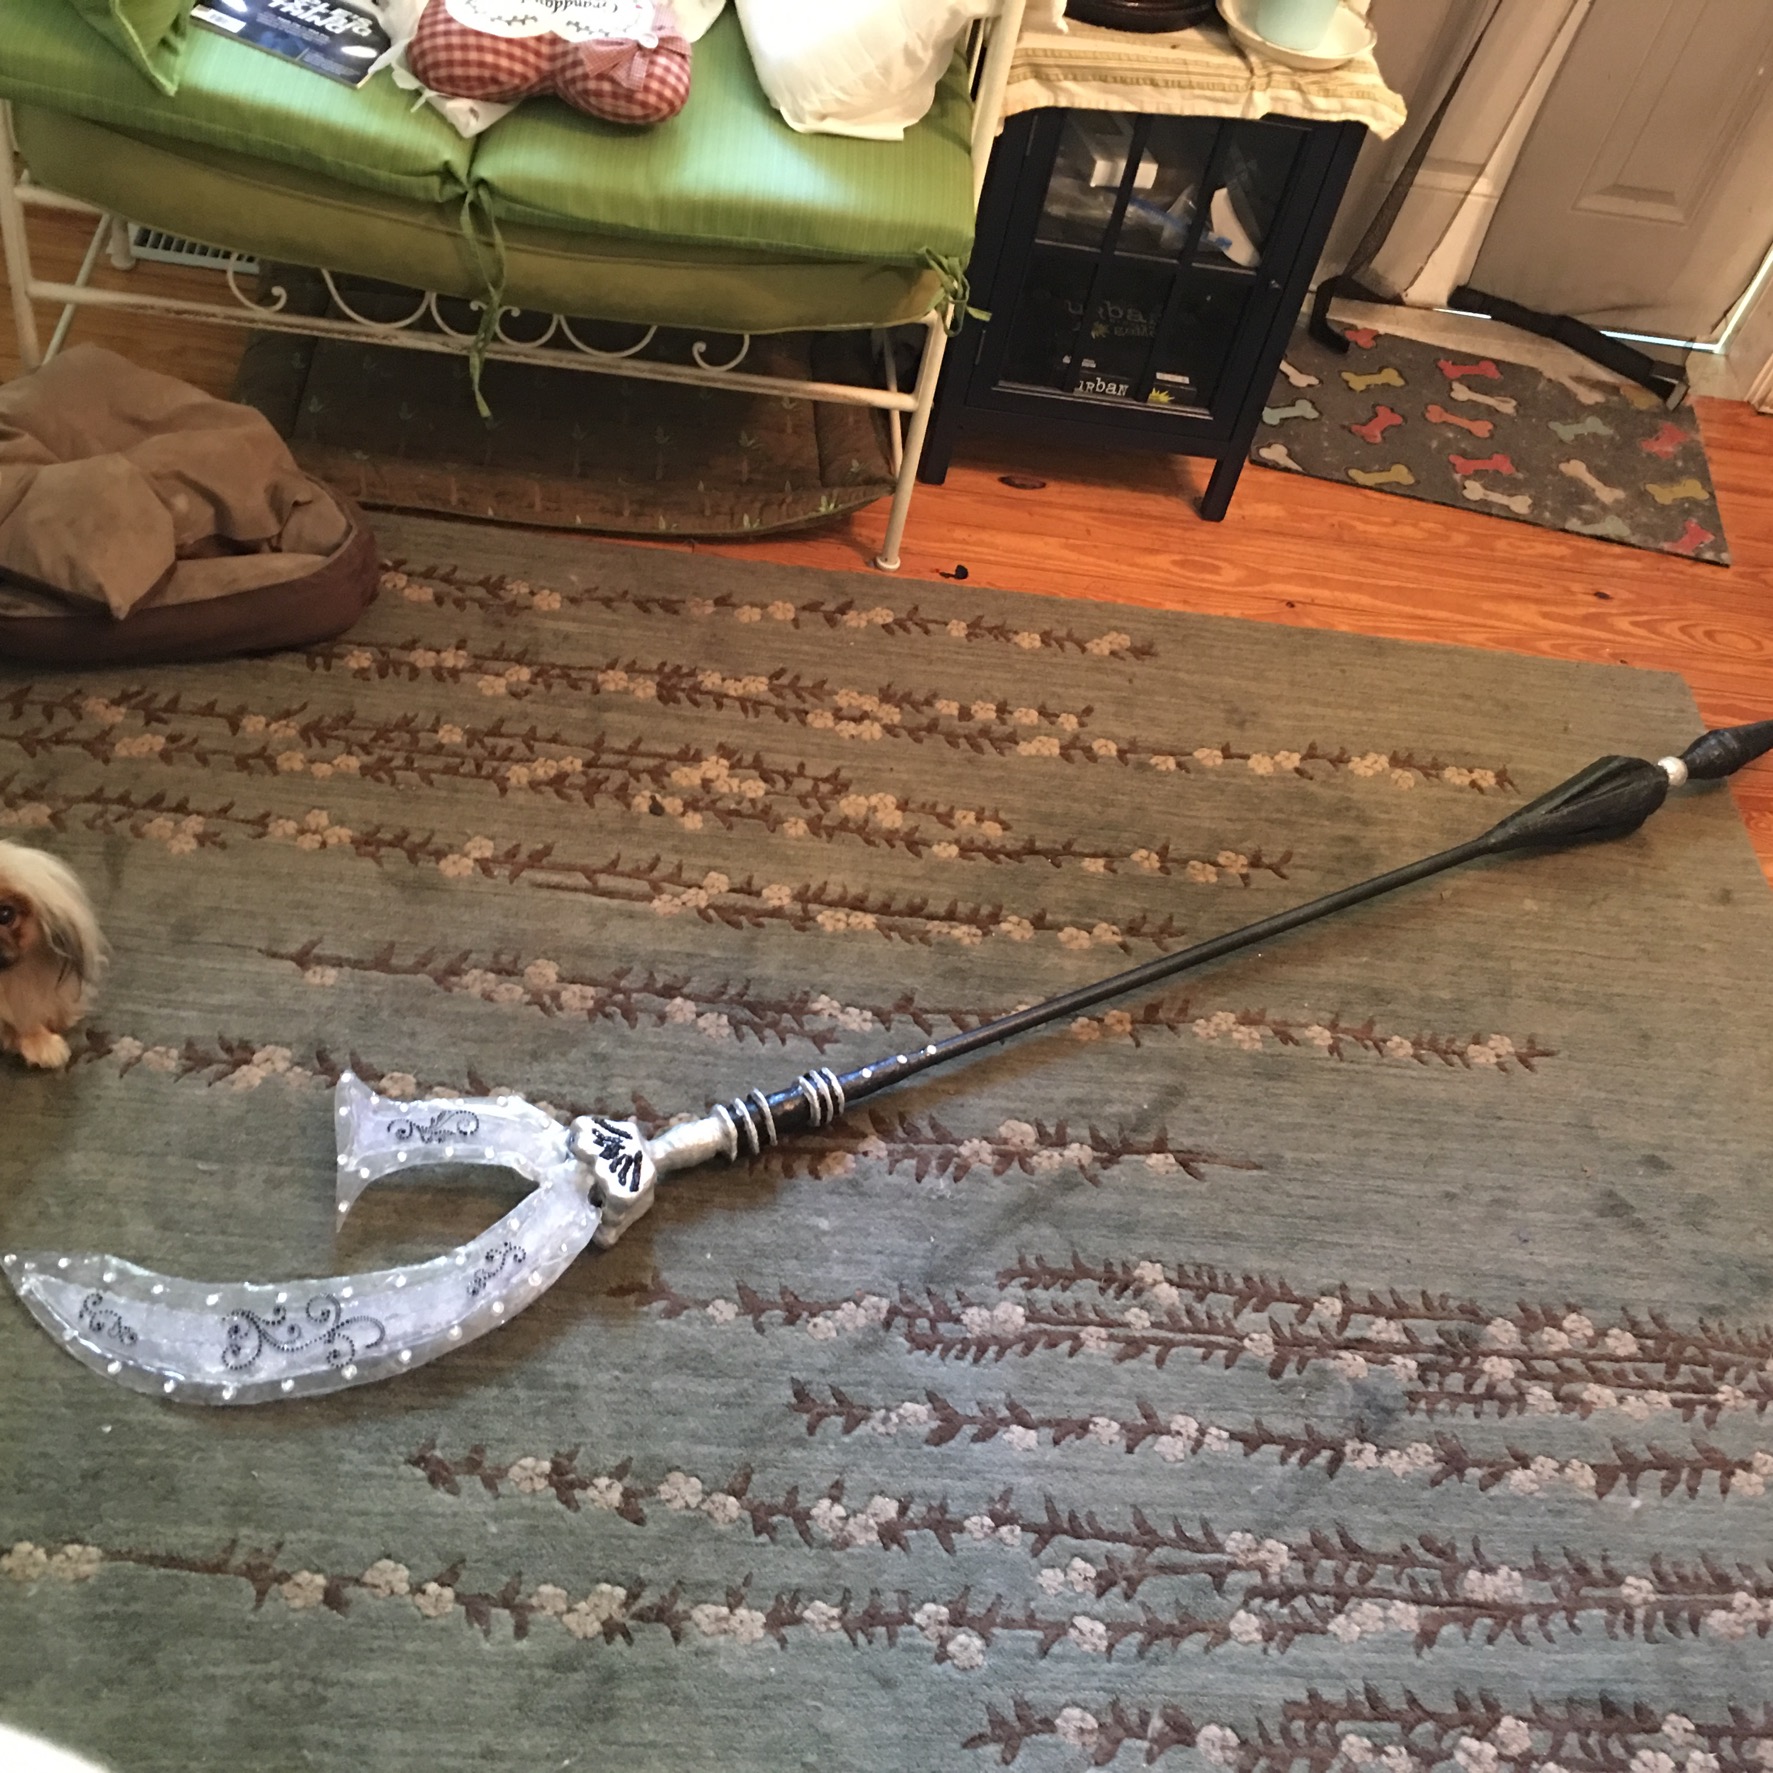
So far this is what the top of the Glaive looks like and the hard part is basically done:
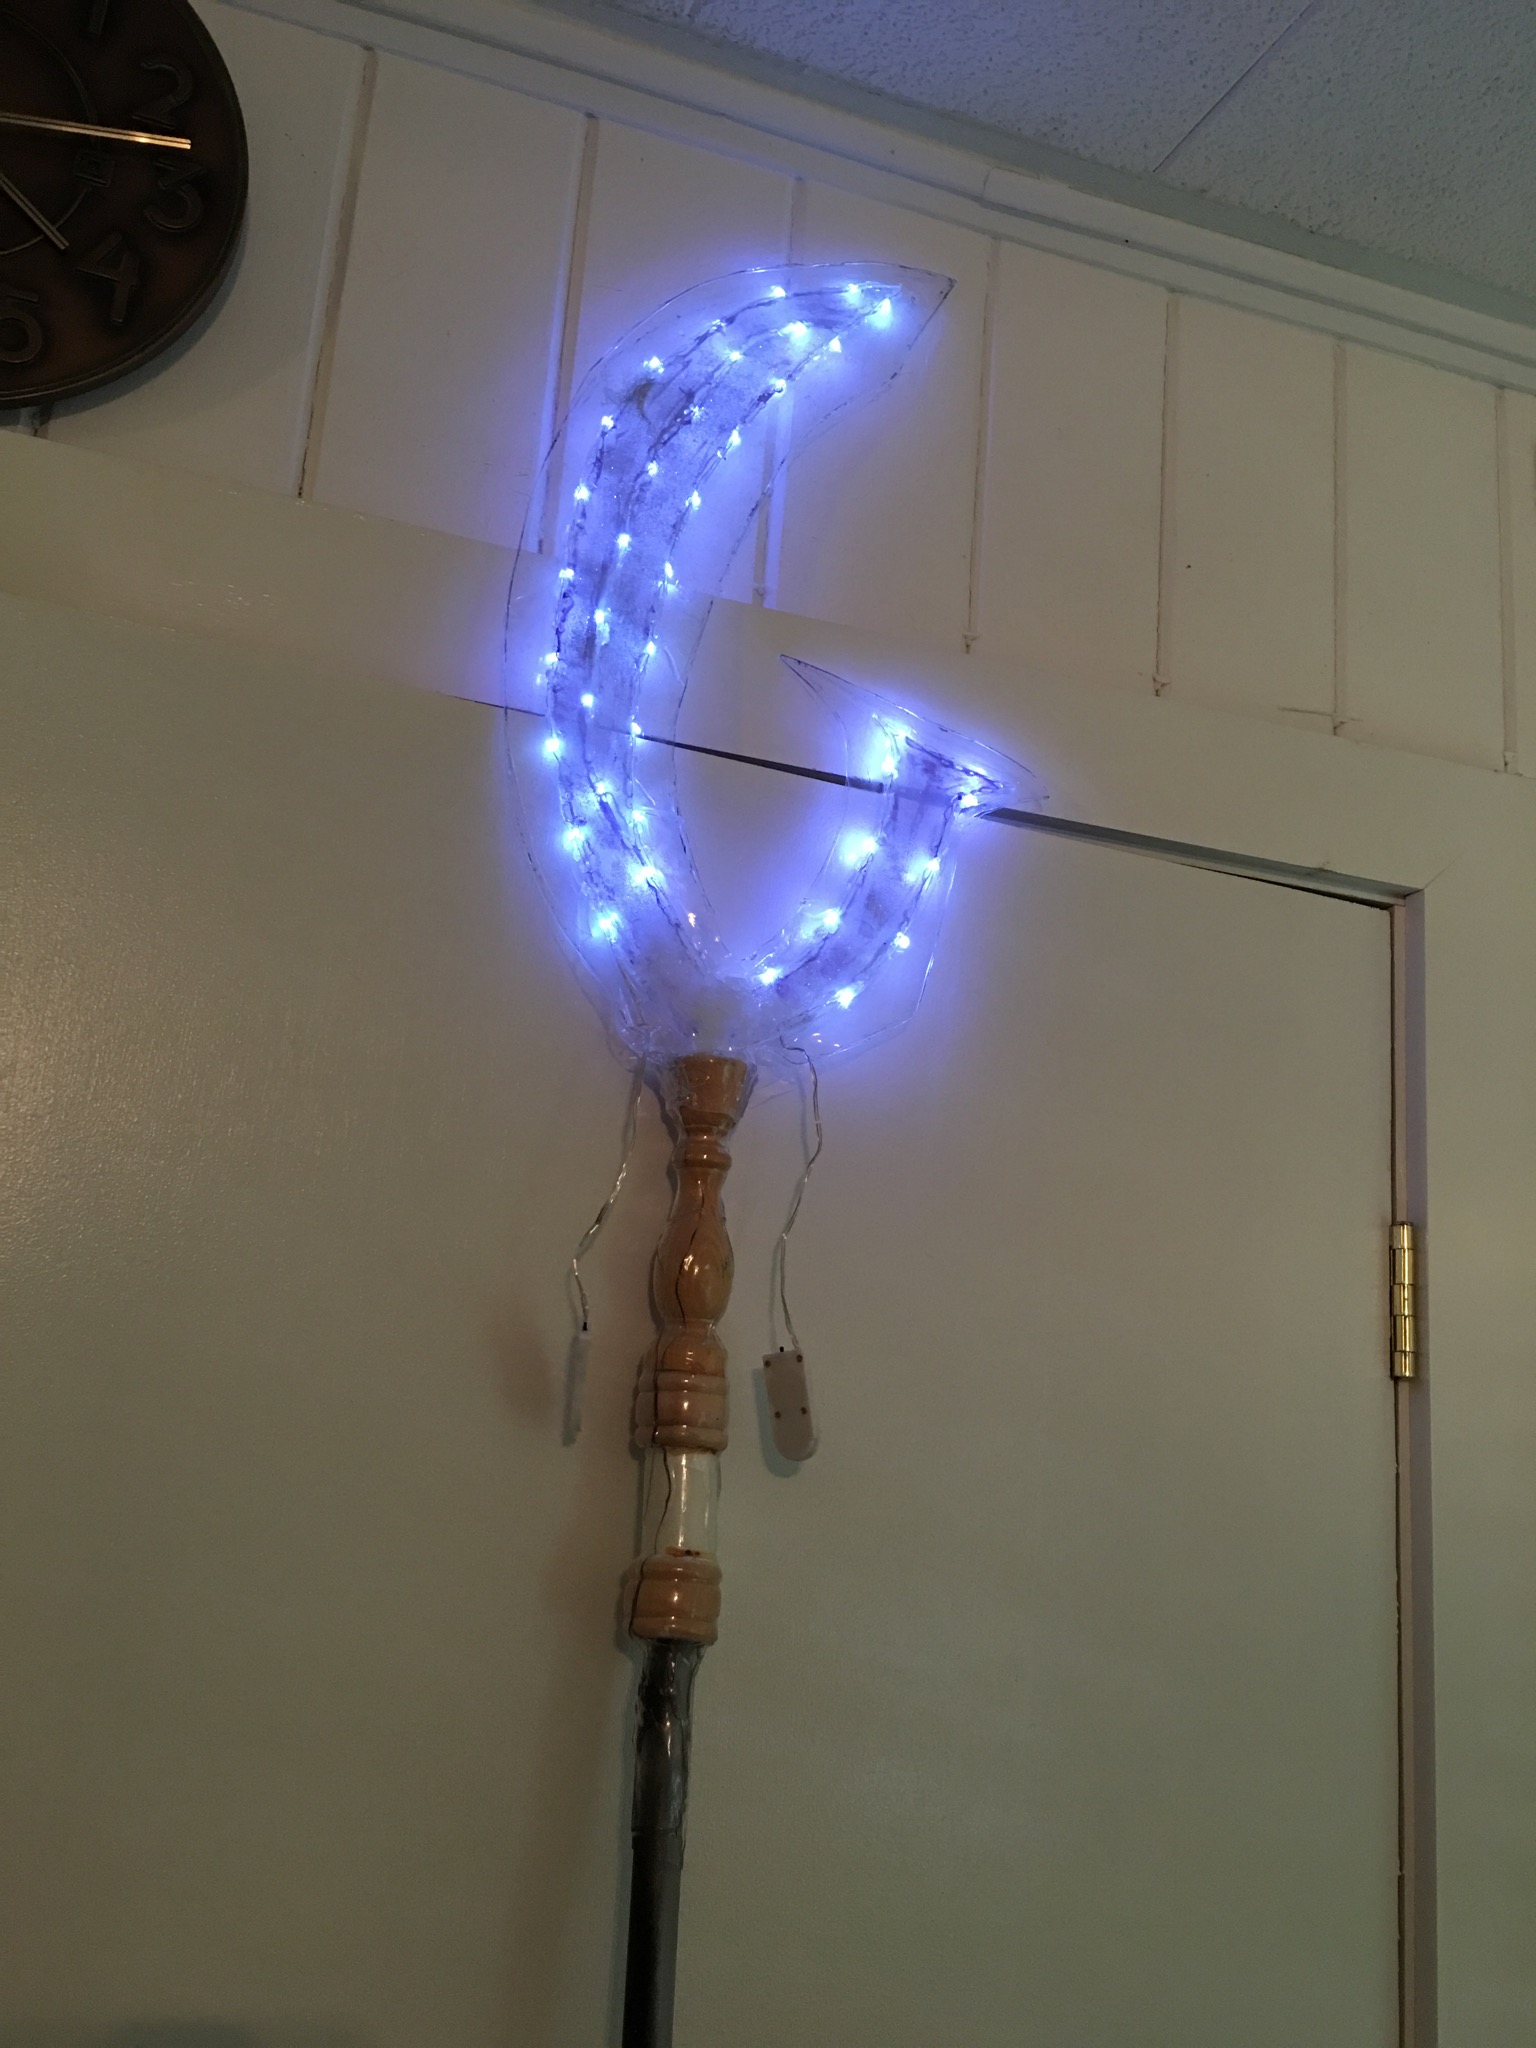
Notice how the battery packs hang down. We don’t want this. We know need to focus on hiding these battery packs but also create a place that we could easily access them in case we need to change the batteries or turn the device on/off.
So far this is how the whole staff looks like:
 -> I’m getting shorter by the minute…
I never realized how tall the Glaive was going to be and I started to notice that walking through doorways was a bit of a struggle. However, I am happy I made this thing so tall. Not only is it noticeable, it also makes for a great night light at the raves that happen at Cons. Also, it usually keeps creepy pervs away… Very intimidating
Step 9: Hide the batteries
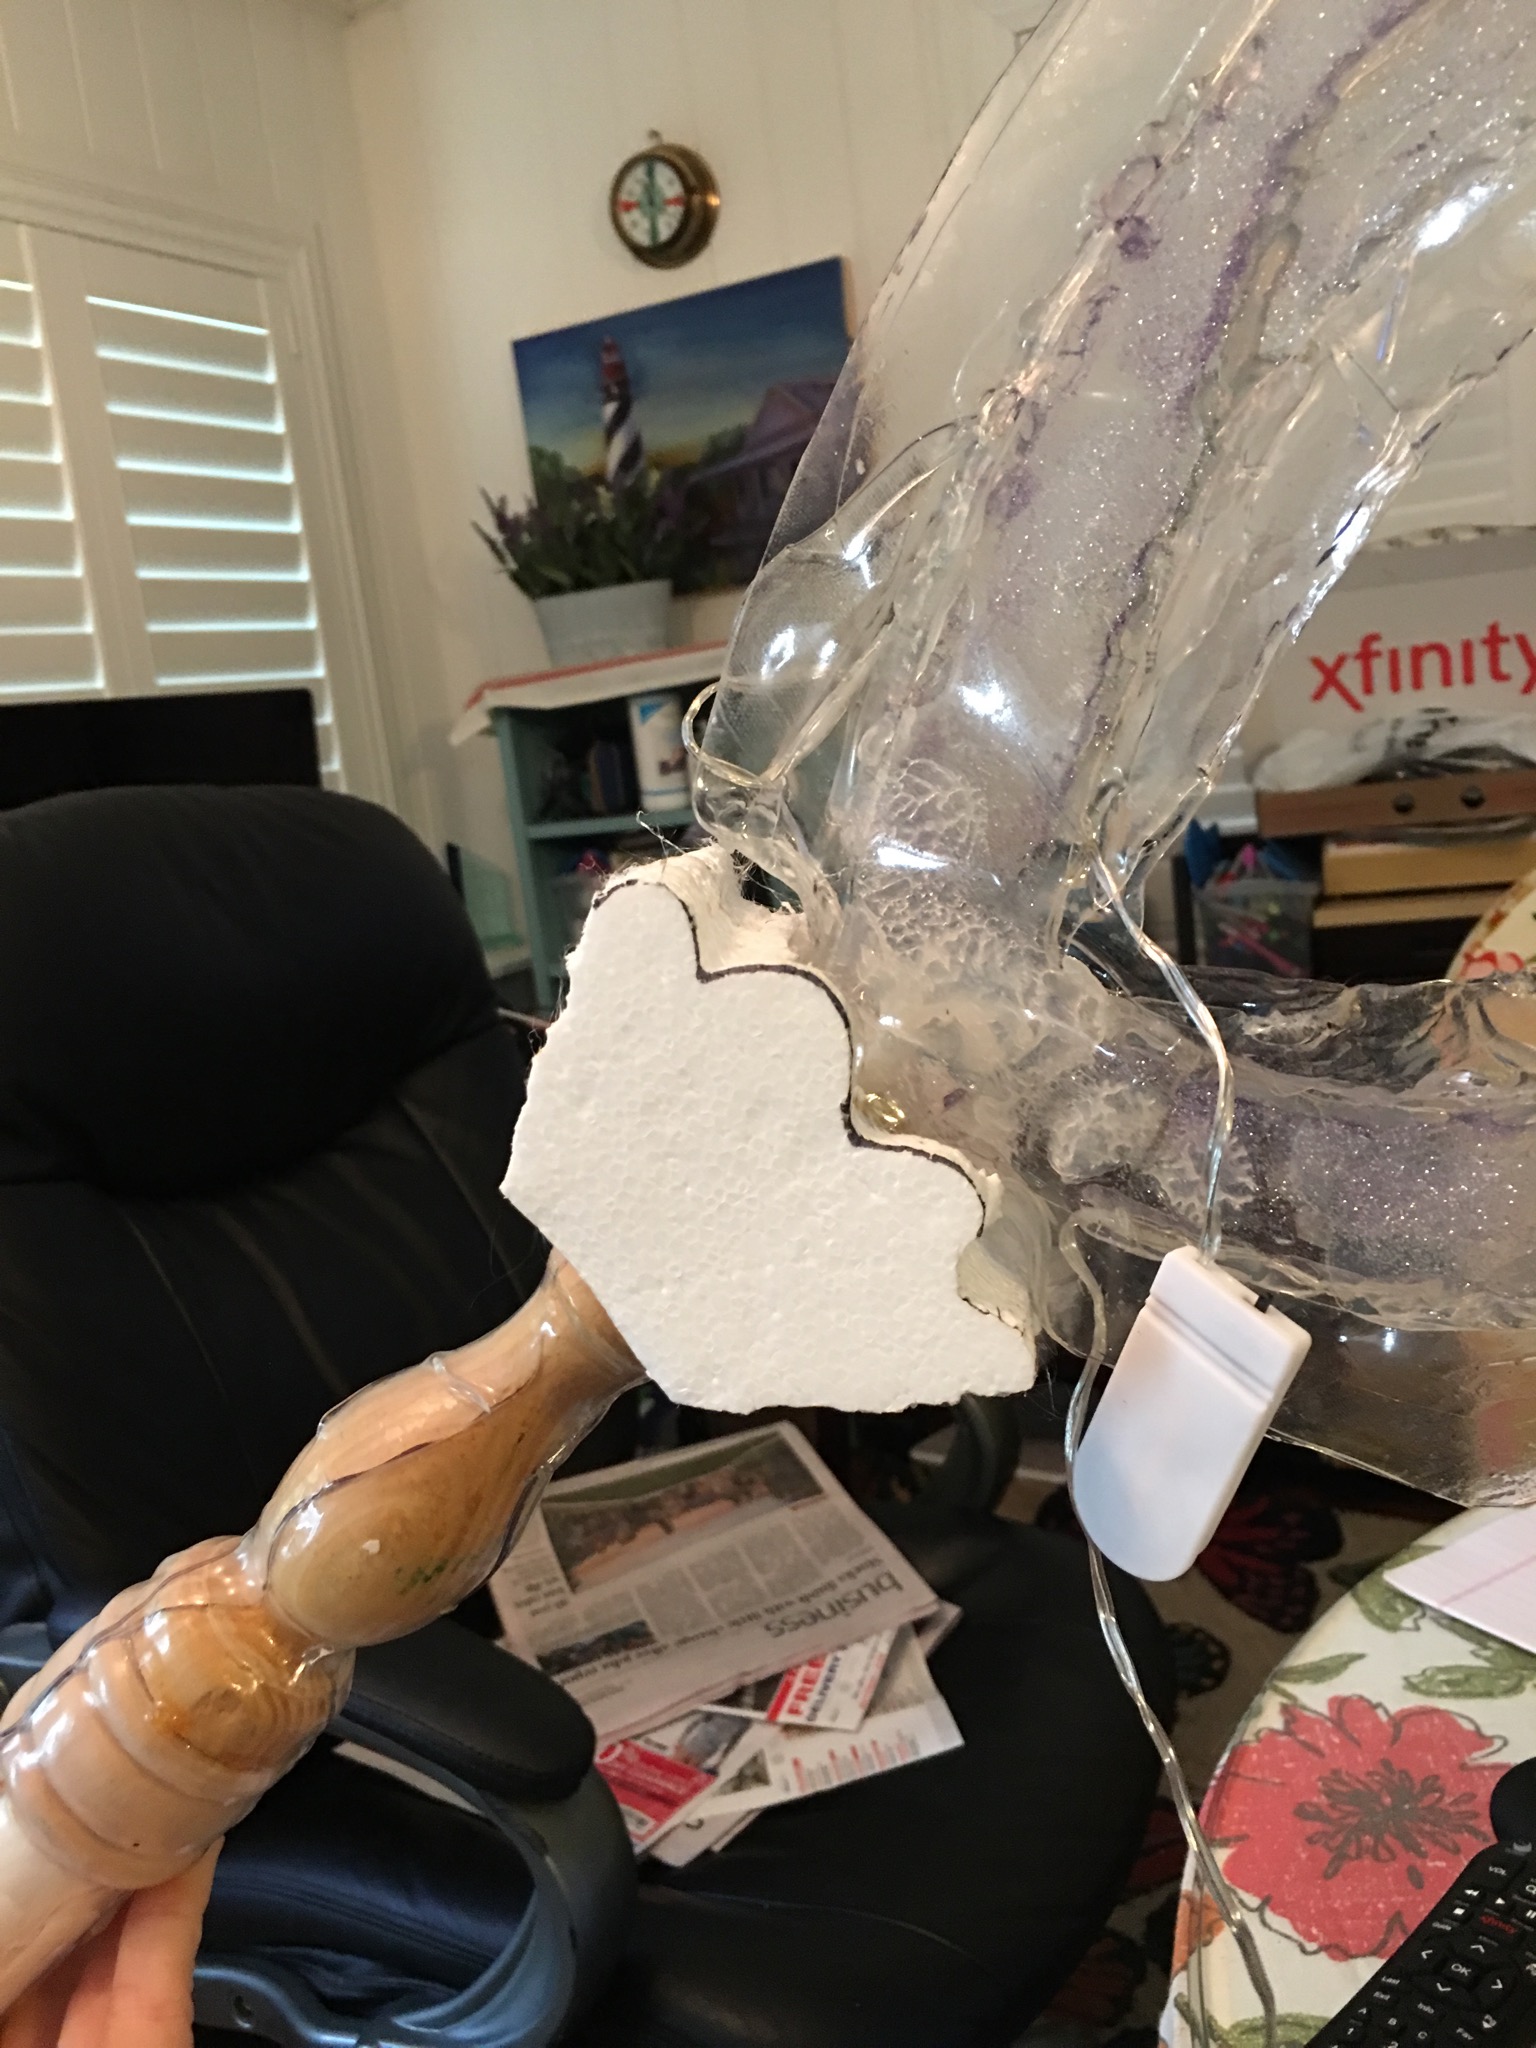
Now you may be panicking that there is nowhere to hide the battery packs… There is. I did not add this specific part until this point because of this. Take a look at the reference below:
See where the red arrow is pointing? There is a detailed object that looks sort of like a fan. This is where we will hide the battery packs.
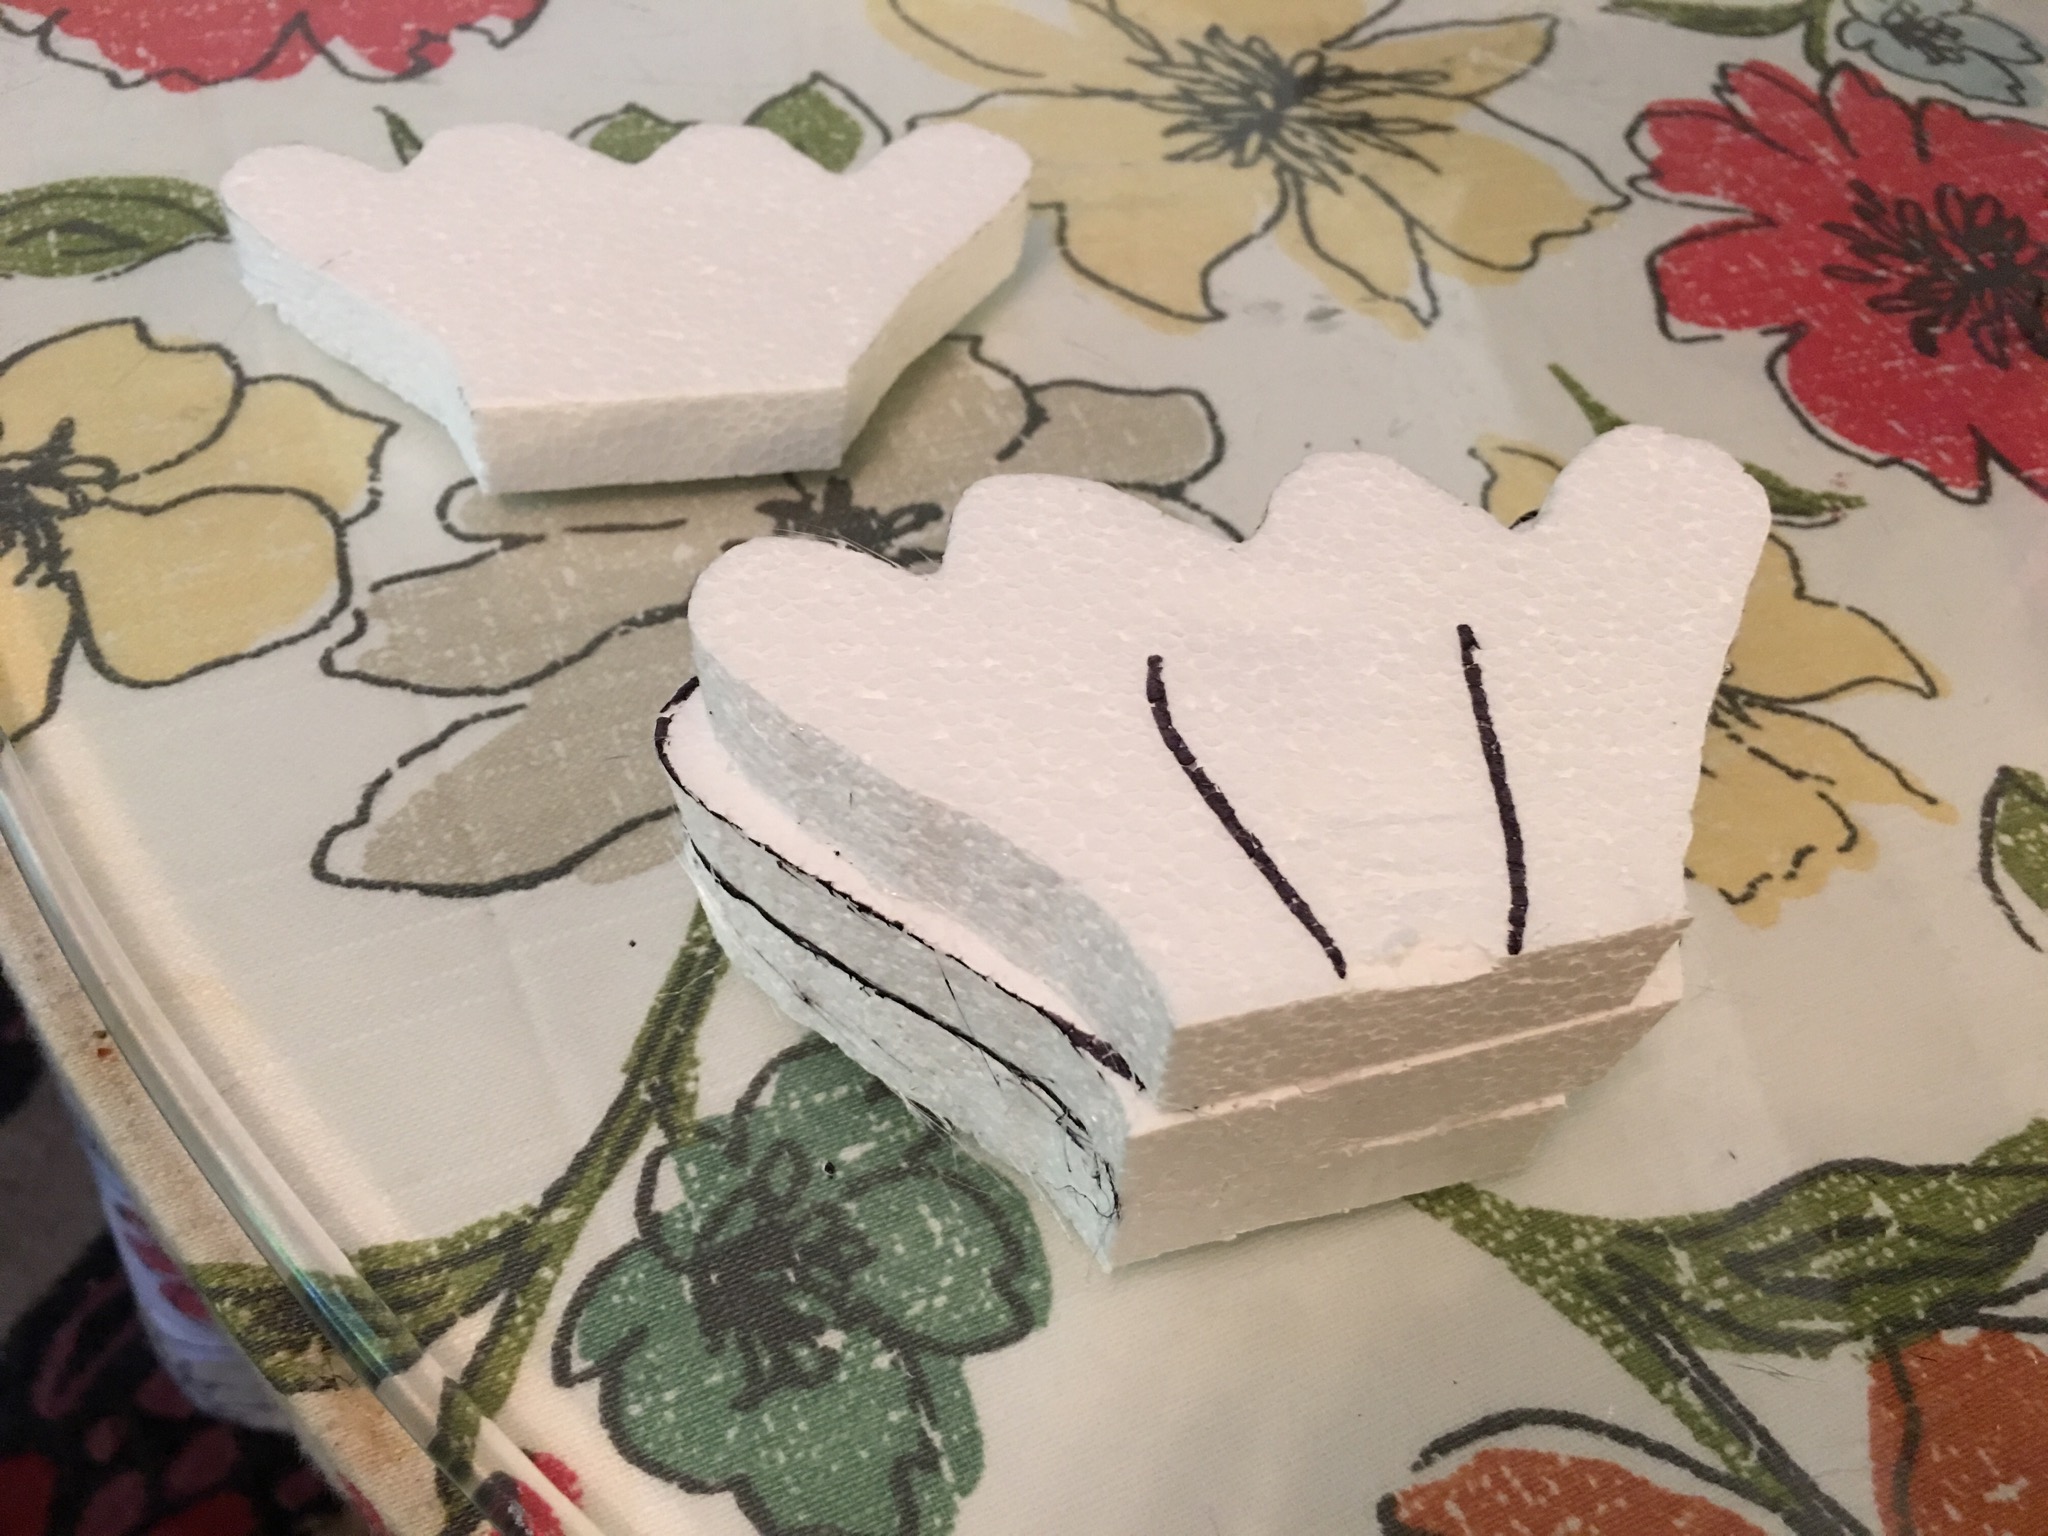
Grab your sheet of styrofoam and we will start to design this area.
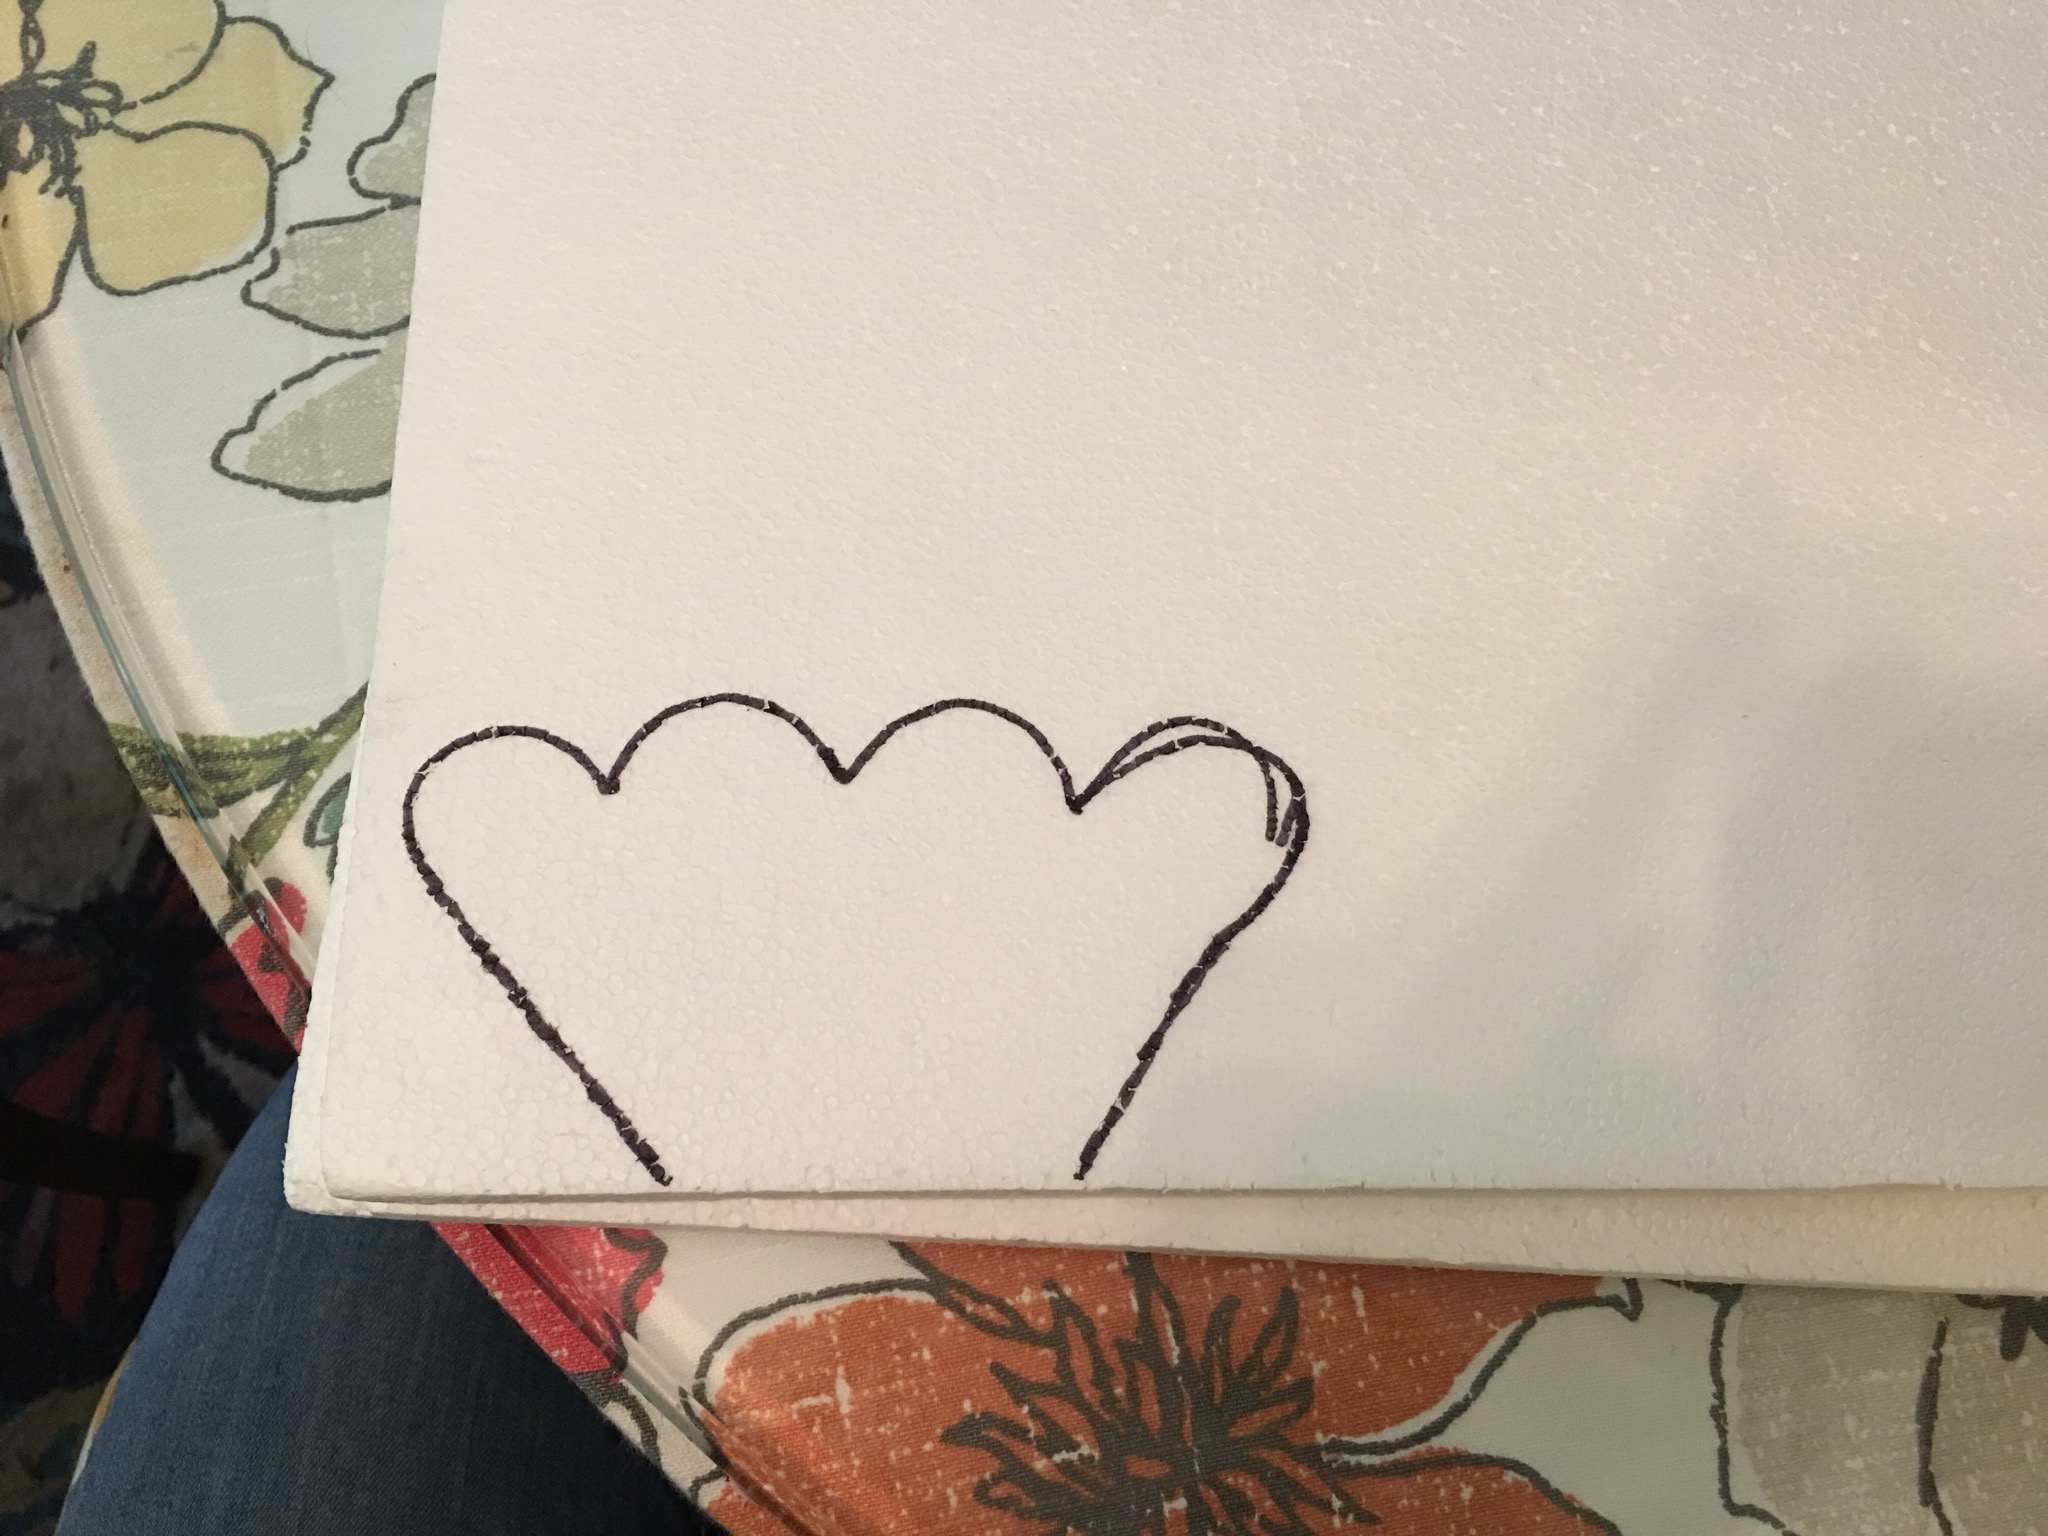
You want to draw and cut out 4 of these in total. Don’t worry about it being perfect we are going to reshape it a bit with clay.
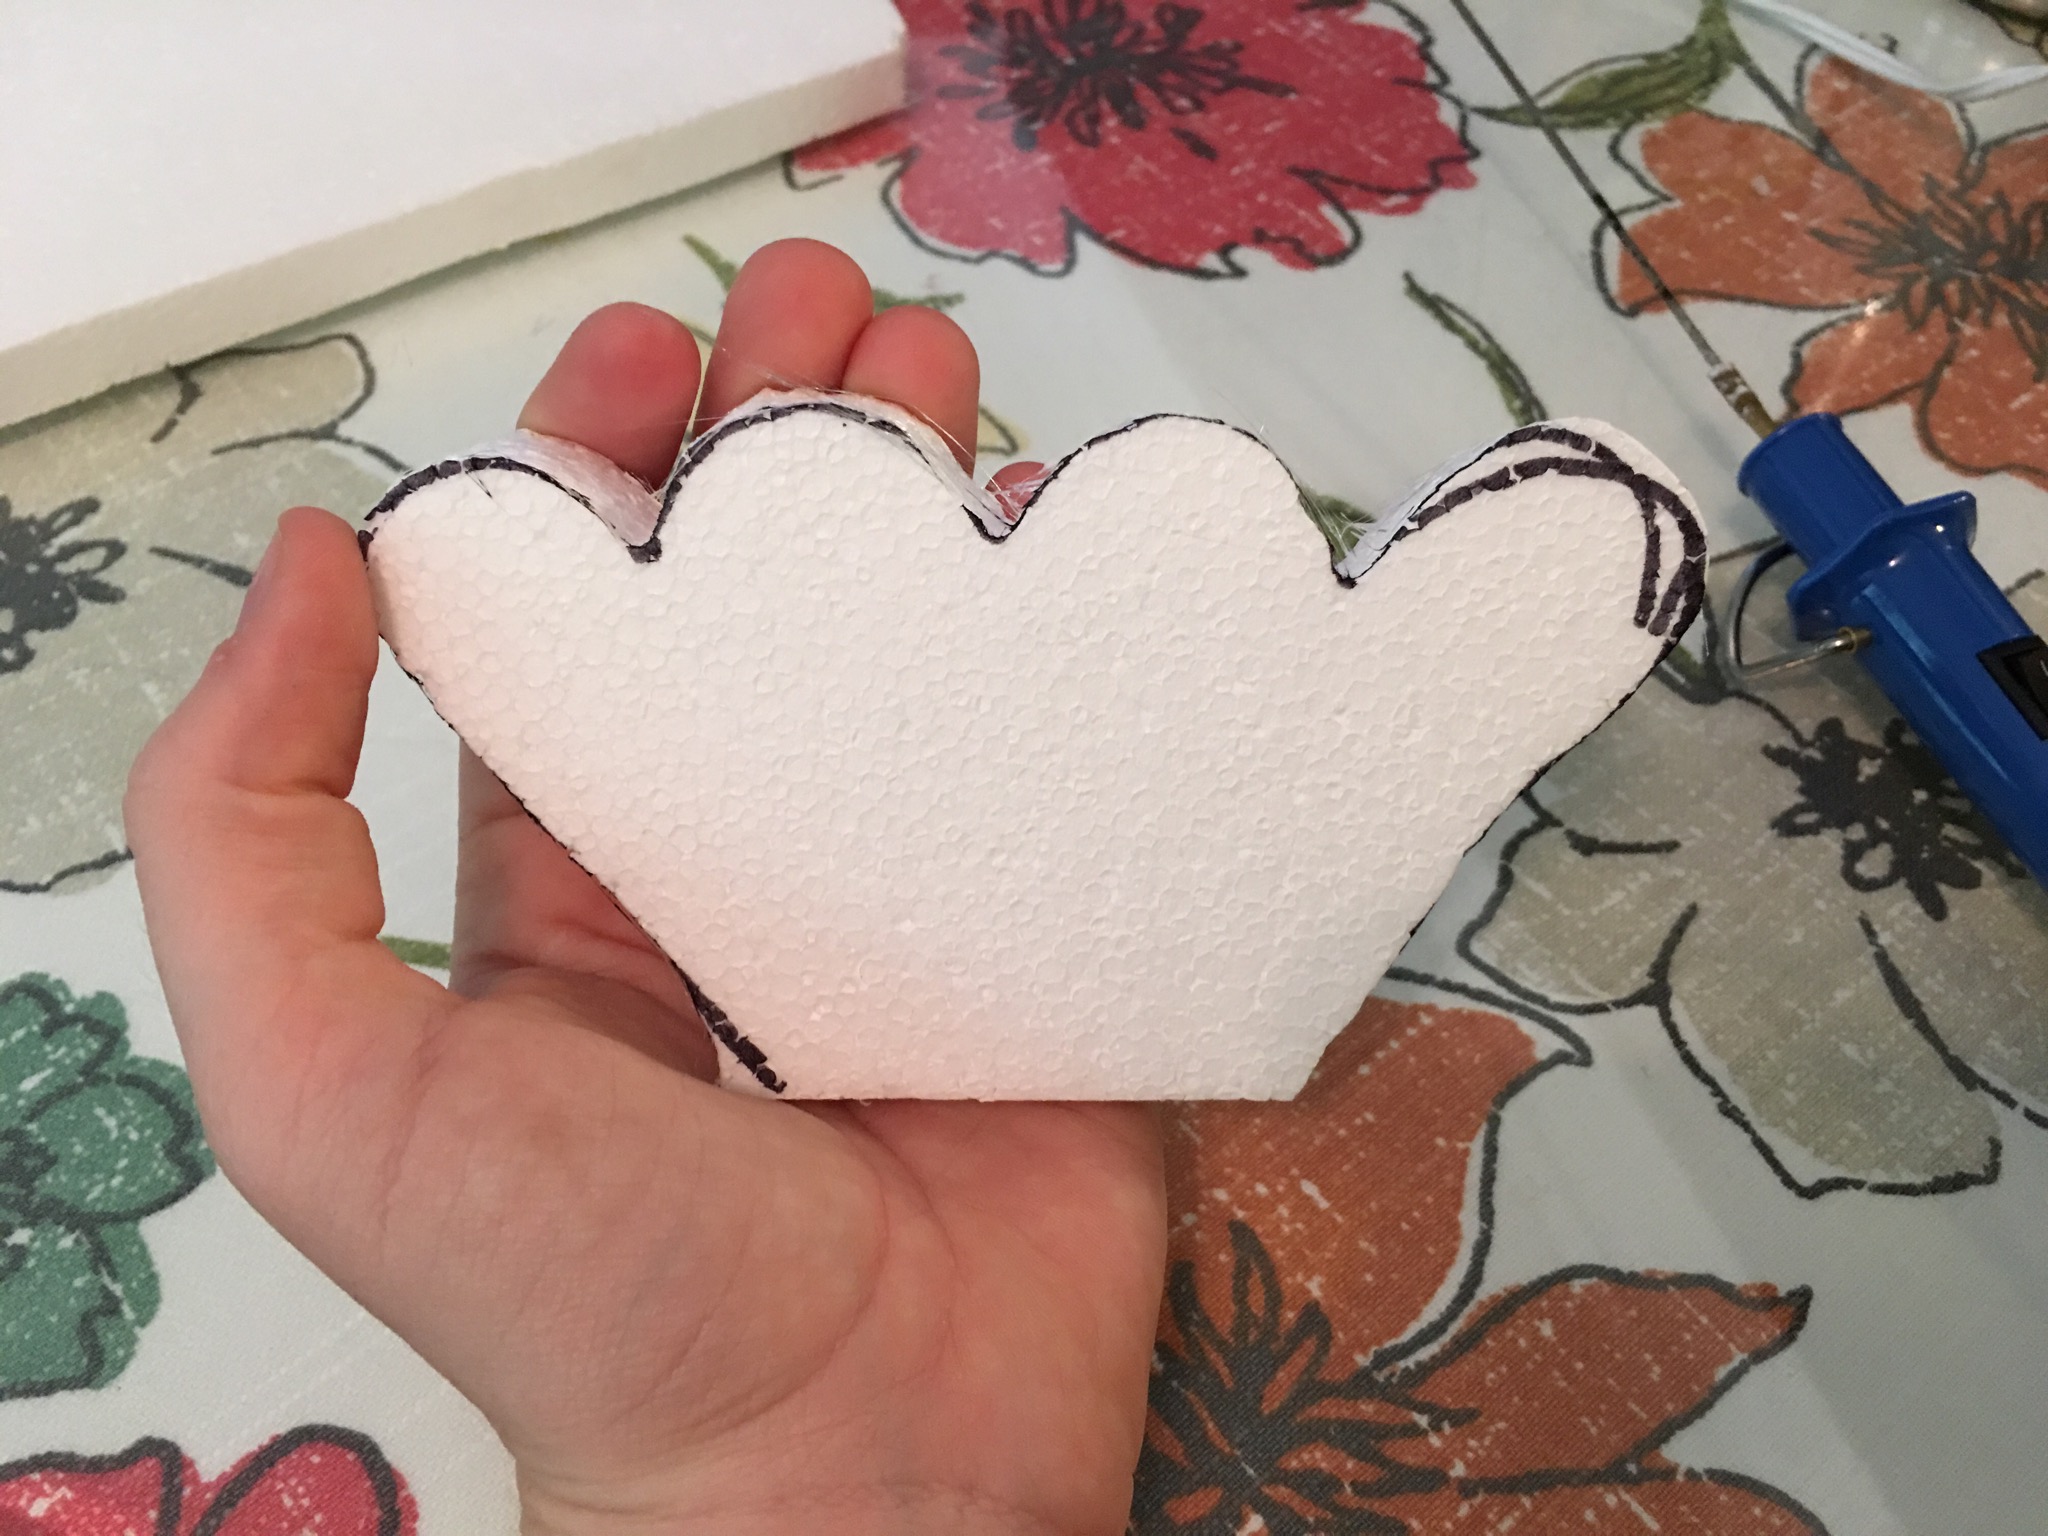
 -> 4 sheets cut out. Try and make them as close to the same as possible.
Take 3 of these sheets and glue them together. I used hot glue since I was going to be cutting through them again using the styrofoam heat cutter.
Place the top of the candle stick onto the styrofoam stack of three and trace around the top of the candle.
You are now going to cut through 2 layers of foam in order to make room for the candle stick. Try not to cut into the outermost layer! (The layer that will be showing on the outside). This should be what it looks like after you carve away the styrofoam:

The top of the candle holder should fit perfectly into the slot you carved out. All that remains is the final sheet (sheet 4). This will be placed on top. You may have to get into sheet 4 a little bit to make sure it touches the stack of 3 beneath:
In the end glue the final sheet to the other three sheets beneath and you should have something like this:
Now is the time to hide the battery packs. You should see that there is some empty space between the 4 stacks of styrofoam that you just put on. You may have to carve into the space a bit more with your heated styrofoam carver but the battery packs should fit in comfortably.

Pretty nice right?
However, let’s take a look at the bottom:
Not so pretty… We need to cover the bottom up and to do this we need our clay. Clay will also help with some details that we may have accidentally broken off or burned off while we were shaving the styrofoam.
I covered up the majority of the styrofoam and made the pumps at the top more detailed with the clay. The bottom is still not sealed up at this point. I decided that plaster was going to be the better way to go. Let the clay dry for 24 hours.
Step 10: Plaster
So now that everything is sealed and the Glaive looks like a Glaive we need to make it more smooth and prep it for painting. This is where plaster comes in. Plaster is very similar to the stuff doctors use to wrap broken bones in. This stuff is very hard once it dries and it is easy to sand and paint.
You can find this stuff in several different sizes at Michaels (it’s called “Plaster Wrap”) and it comes in rolls that look like this:

What I do is cut the roll into many long strips. This makes it easy to work with. To activate the plaster you need a bucket of water. Dip a strip into the water and it will immediately become pasty. Spread the paste around the strip (trying to fill up the holes as much as possible) and lay it across you project. This stuff fills in holes very well and can be formed to any shape. In addition it dries pretty fast. You are going to cover all the detailed areas of the Glaive using this stuff. Starting from the bottom:
 -> bottom
And working your way to the top. Covering some of the Worbla in the process that you wrapped around the wooden detailed parts. You do not have to cover the PVC pipe in plaster, it is not worth it.
To seal up the bottom part of where the batteries were stored add a few layers of plaster beneath the area and wait until it is fully dry before inserting the battery packs (Note: keep the battery packs far from the plaster. Remove them from the enclosure and keep them away from the plaster as it dries, you can re-insert them after painting). Now remember those wooden napkin rings that we inserted? Well the plaster covered up most of the grooving details. Instead I took a couple sheets of plaster and rolled them into a coil and placed it over the detailed areas. Plaster is amazing and you can create anything with it. So if some details are missing you can recreate them using plaster!
Here is the finished product after all of the plaster is put on. If some plaster gets on the blade or the PVC pipe, do not worry. You can wipe it off using a wet paper towel.
Some areas you may not find smooth enough to your liking. Plaster is easy to sand and if you have a Dremel your sanding can be very fast. Feel free to sand down areas to make them smooth. You may find that some of the plaster webbing may start showing and create “fuzzy” areas. This will be fixed when we add some paint and Gesso. So do not worry about it for now. If you sand so much that it goes through to the styrofoam layer you can easily add more plaster to cover up the styrofoam again.
Once you are happy with your plaster and your sanding we can get to the final few steps: painting!
Step 11: Spray Paint
Now here is the important part. Plaster helps protect the styrofoam but you may have missed a spot while covering the Glaive. Only certain spray paints will work on styrofoam. Many spray paints will eat right through your styrofoam and melt it! You don’t want that! So when you go and get your paints you have to ready the label and make sure it says “for use on styrofoam”.
Here are the paints I Used:
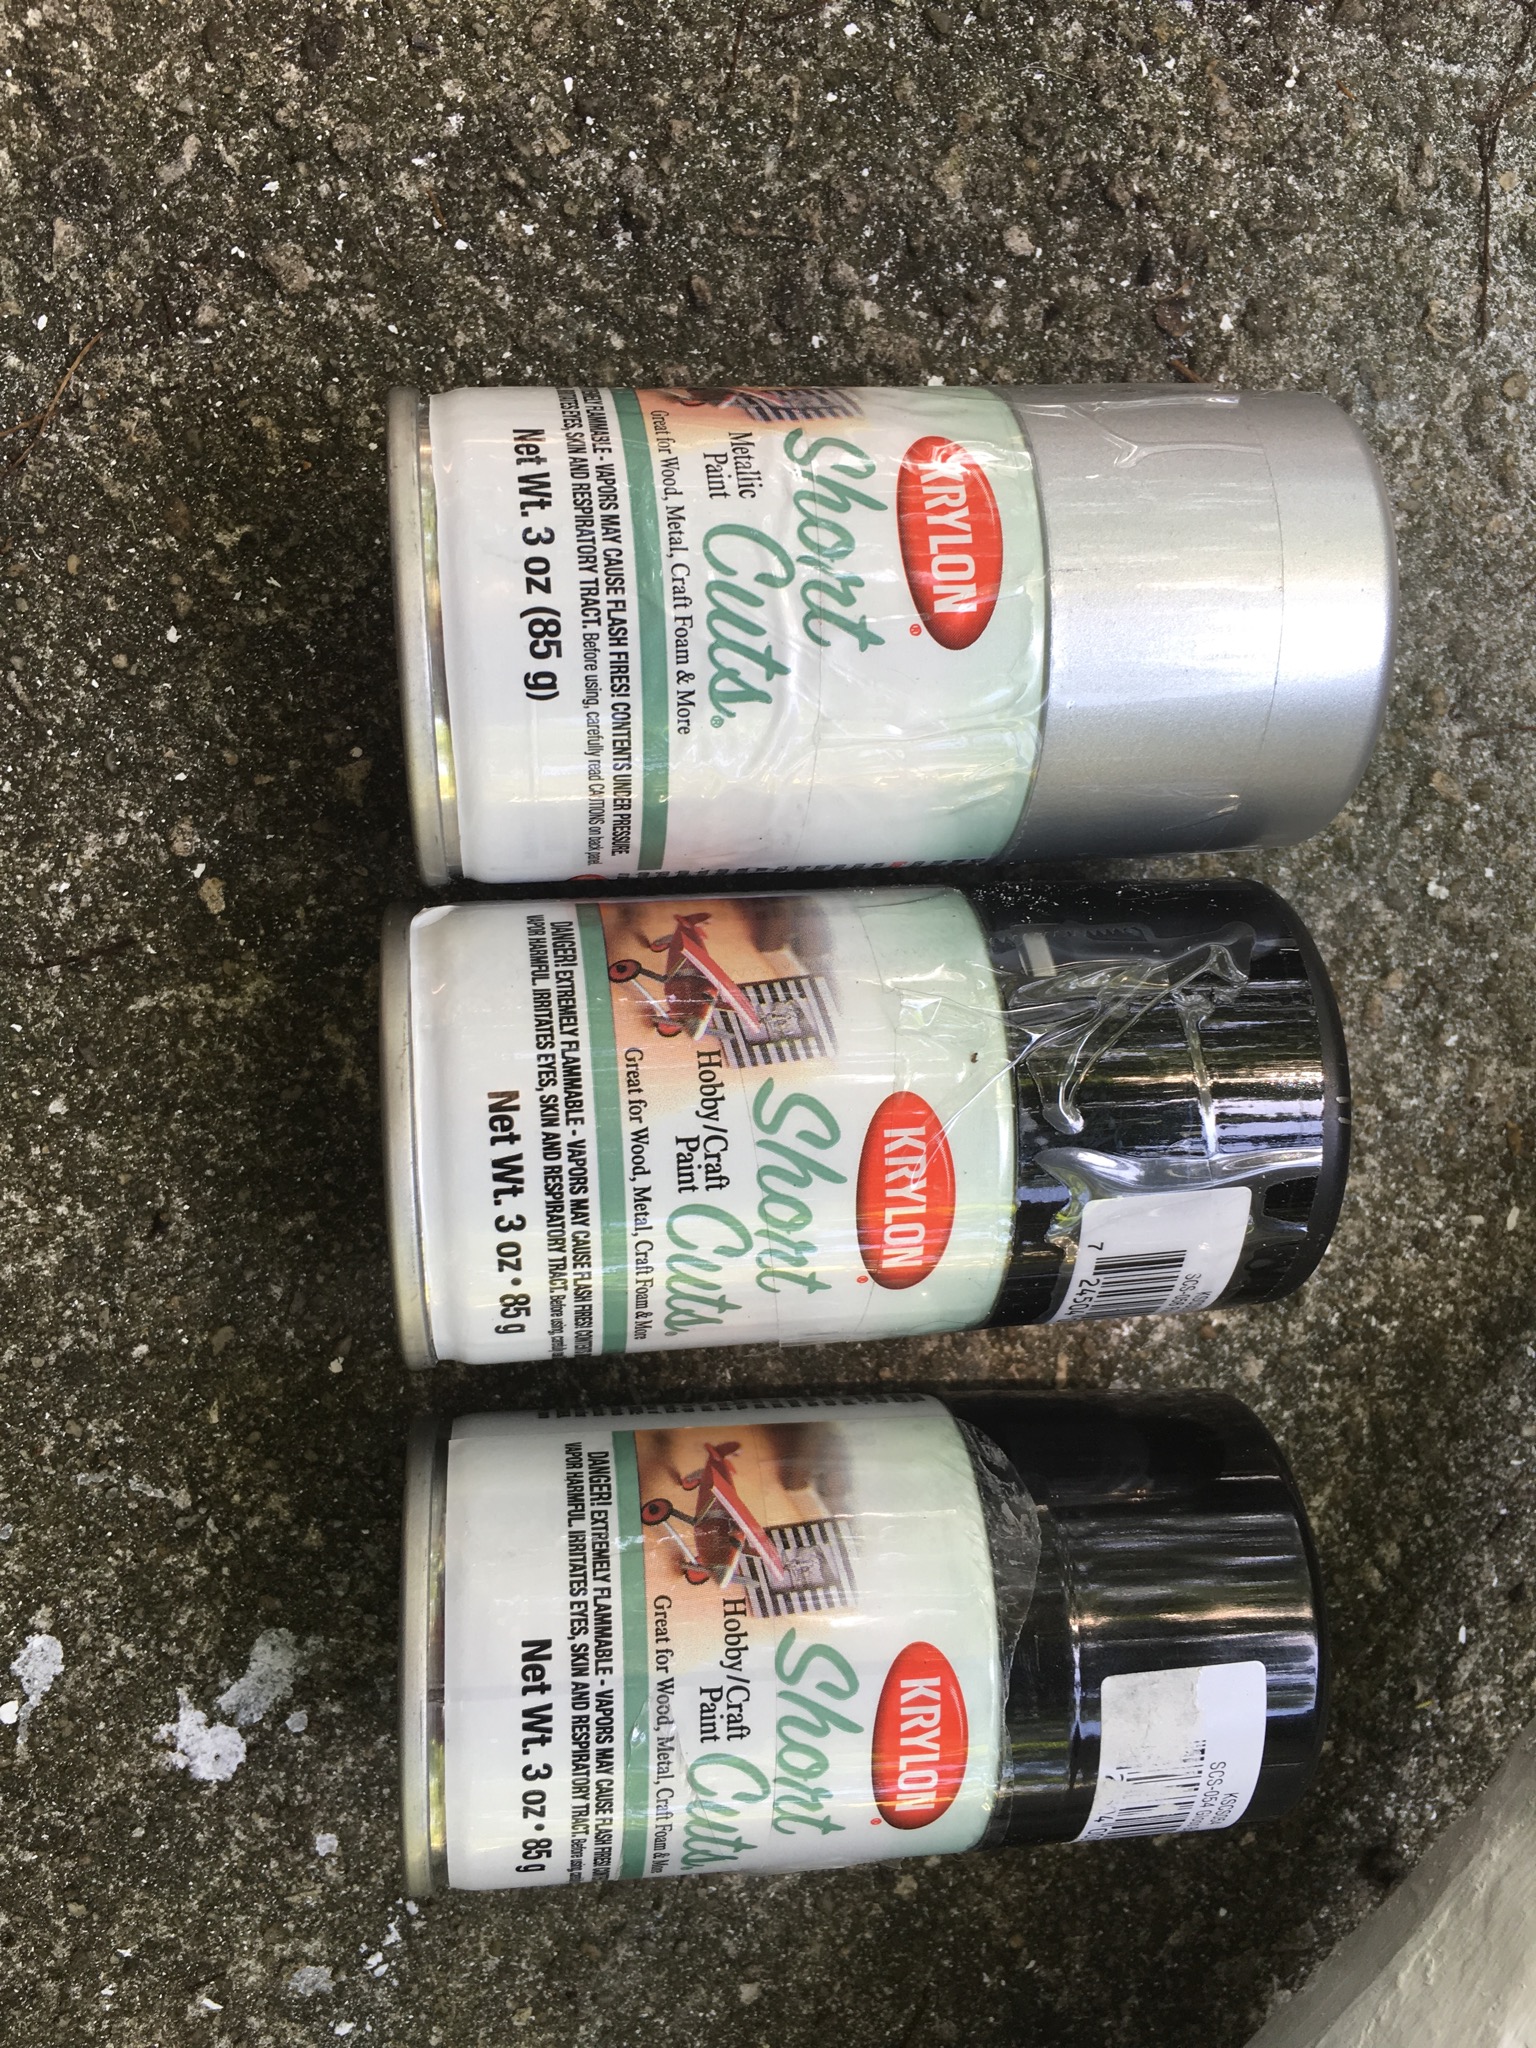
 – Black, glitter black and silver.
You will also need some painter tape to protect areas from other colors. Sailor Saturn only has one silver area (which is located at the top of her Glaive). So If you are following her Glaive exactly the paint job is fairly easy. I added a few extra silver area, but that was my own choice.
 -> Use your painters tape
Now I don’t have pictures of the painting process but here is the process I used:
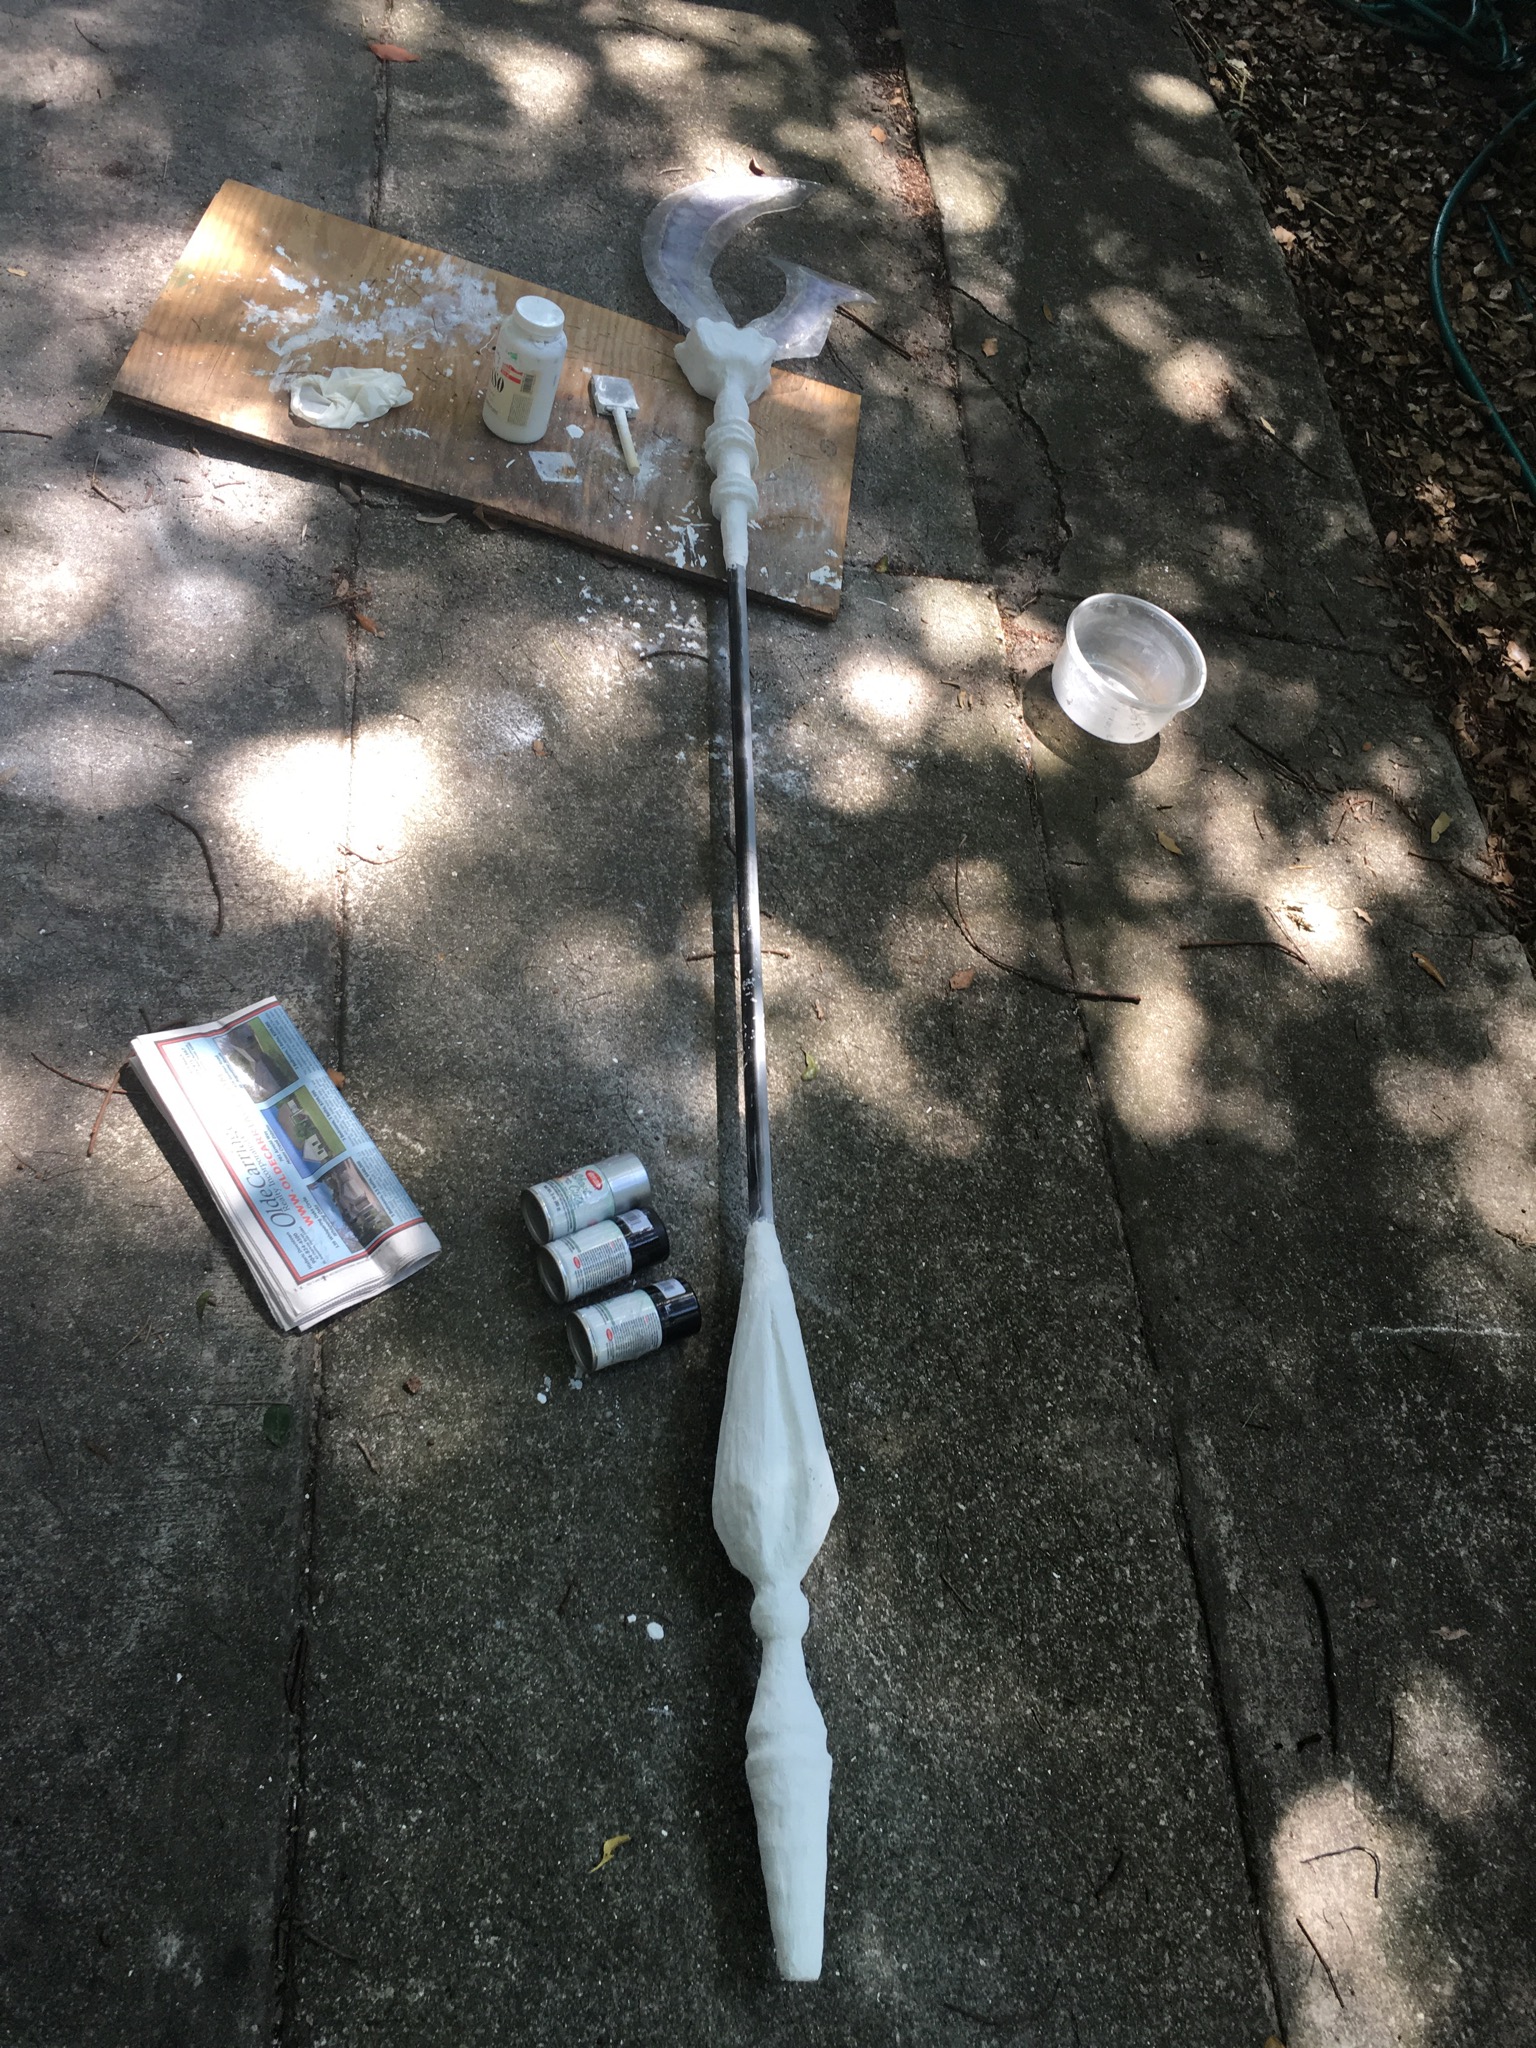
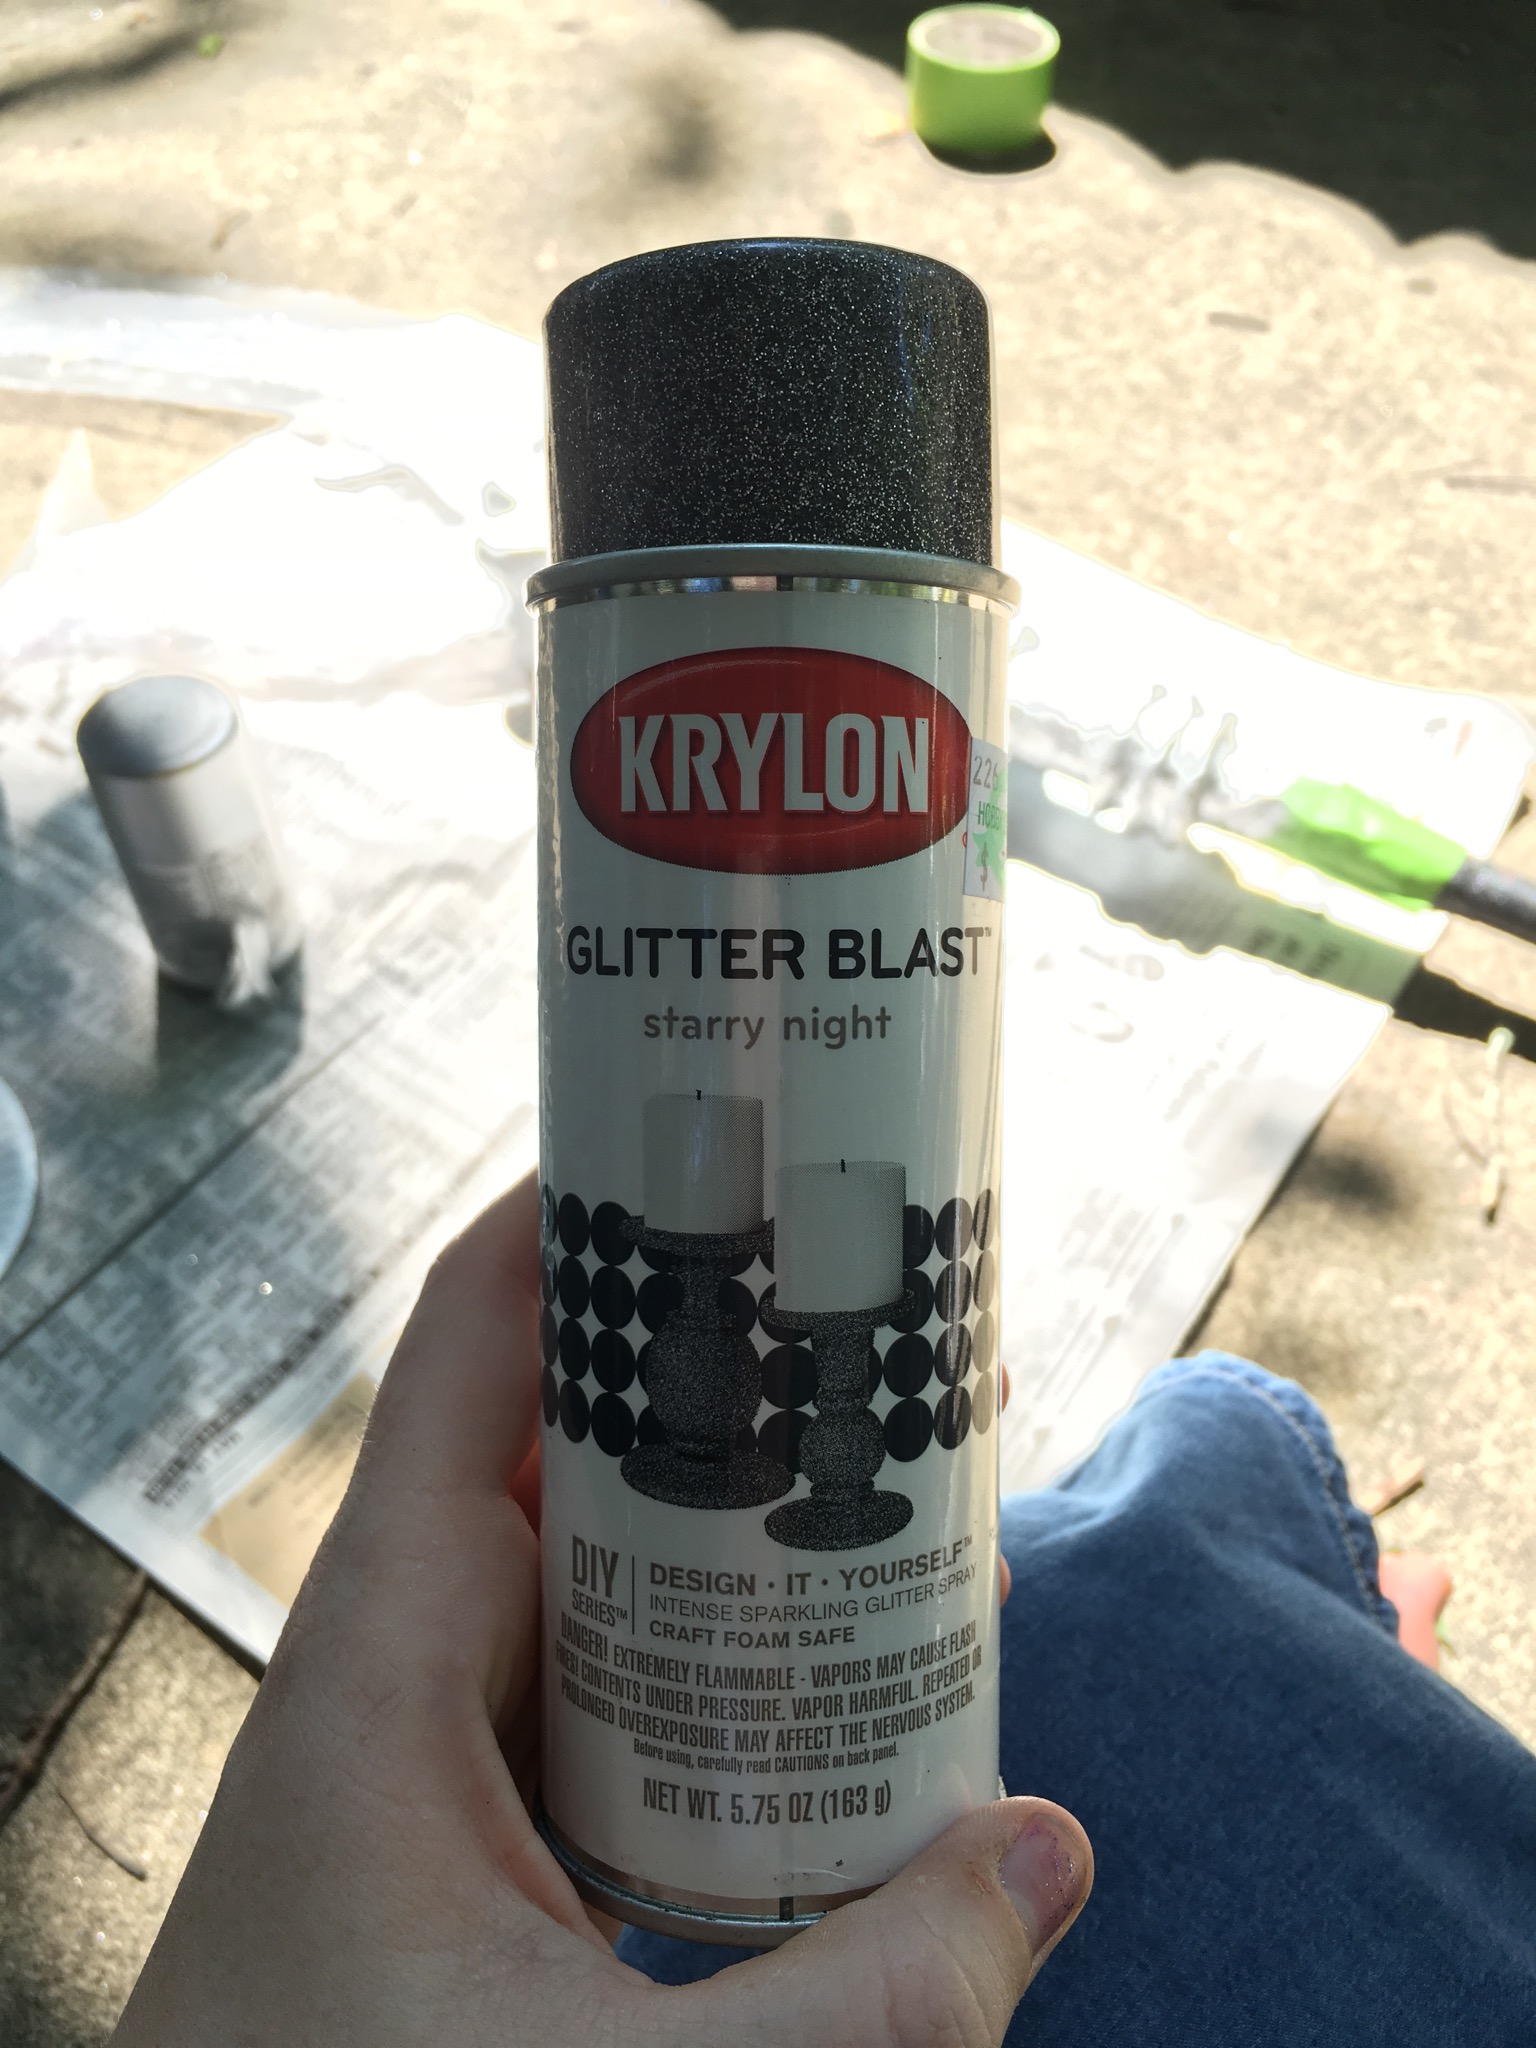
I started by painting everything except the very top (where the batteries are held) solid black and let it dry. I added a second coat afterwards. Let this dry for about 3-4 hours before you move onto your silver paint. However, if you want you can add a layer of “glitter blast” spray paint. This type of paint adds a bit of sparkle to your Glaive but not so much that it detracts from the black. It also helps to show off the grooves in your Glaive, especially at the bottom where you carved some of your styrofoam. Your choice though on if you want to use this paint though. Finally, move onto your silver spray paint and make sure to cover some of the black areas with painters tape that lie close to the silver area. So if you are following Sailor Saturn’s Glaive exactly the only part that is silver is the very top of the Glaive. So you would paint silver the place where the candle stick is and the “fan-like” area where the batteries are stored. However, for mine I added a few more silver areas. The groves that are around the napkin ring areas I painted silver as well as the tiny ball at the bottom of the staff. Because these areas were so small I decided to paint the silver on using a paintbrush instead of torturing myself with placing painting tape in particular areas. The colors and their location were my own personal choice, so don’t feel like you have to follow it. Here are some images of the top part of the Glaive and the bottom part. The Glaive got to be so tall that it was hard to fit it all in one picture. Haha!
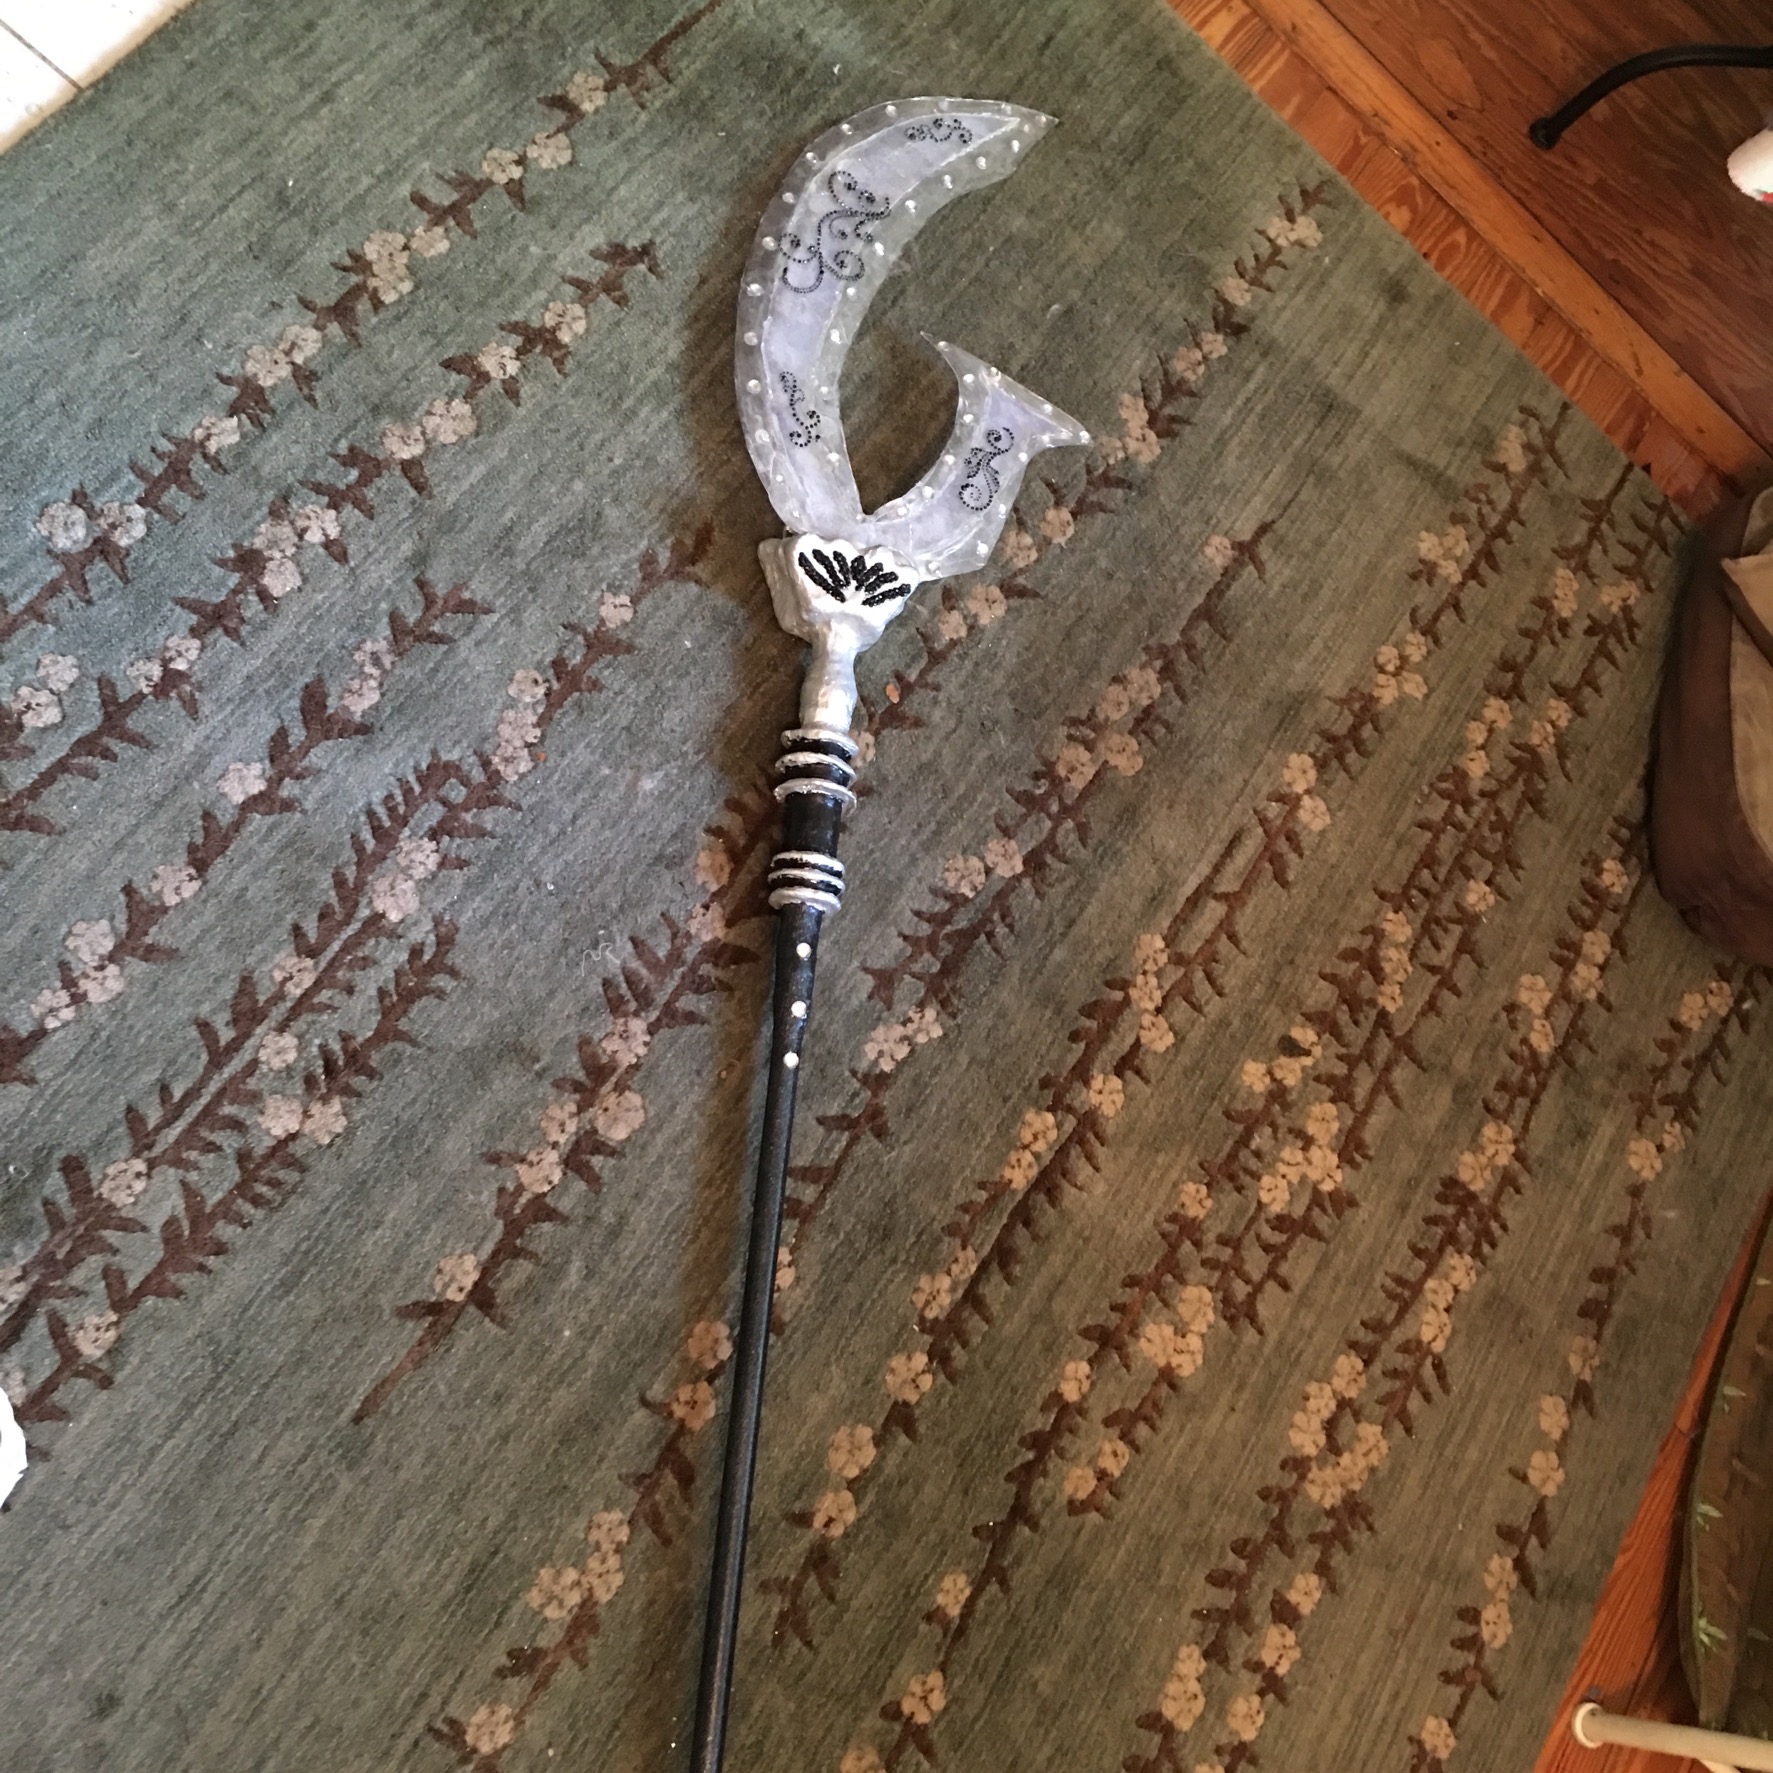
Look at some of the final cosplay pictures to see the colors of the staff. See cosplay page here.
Step 12: Final Details
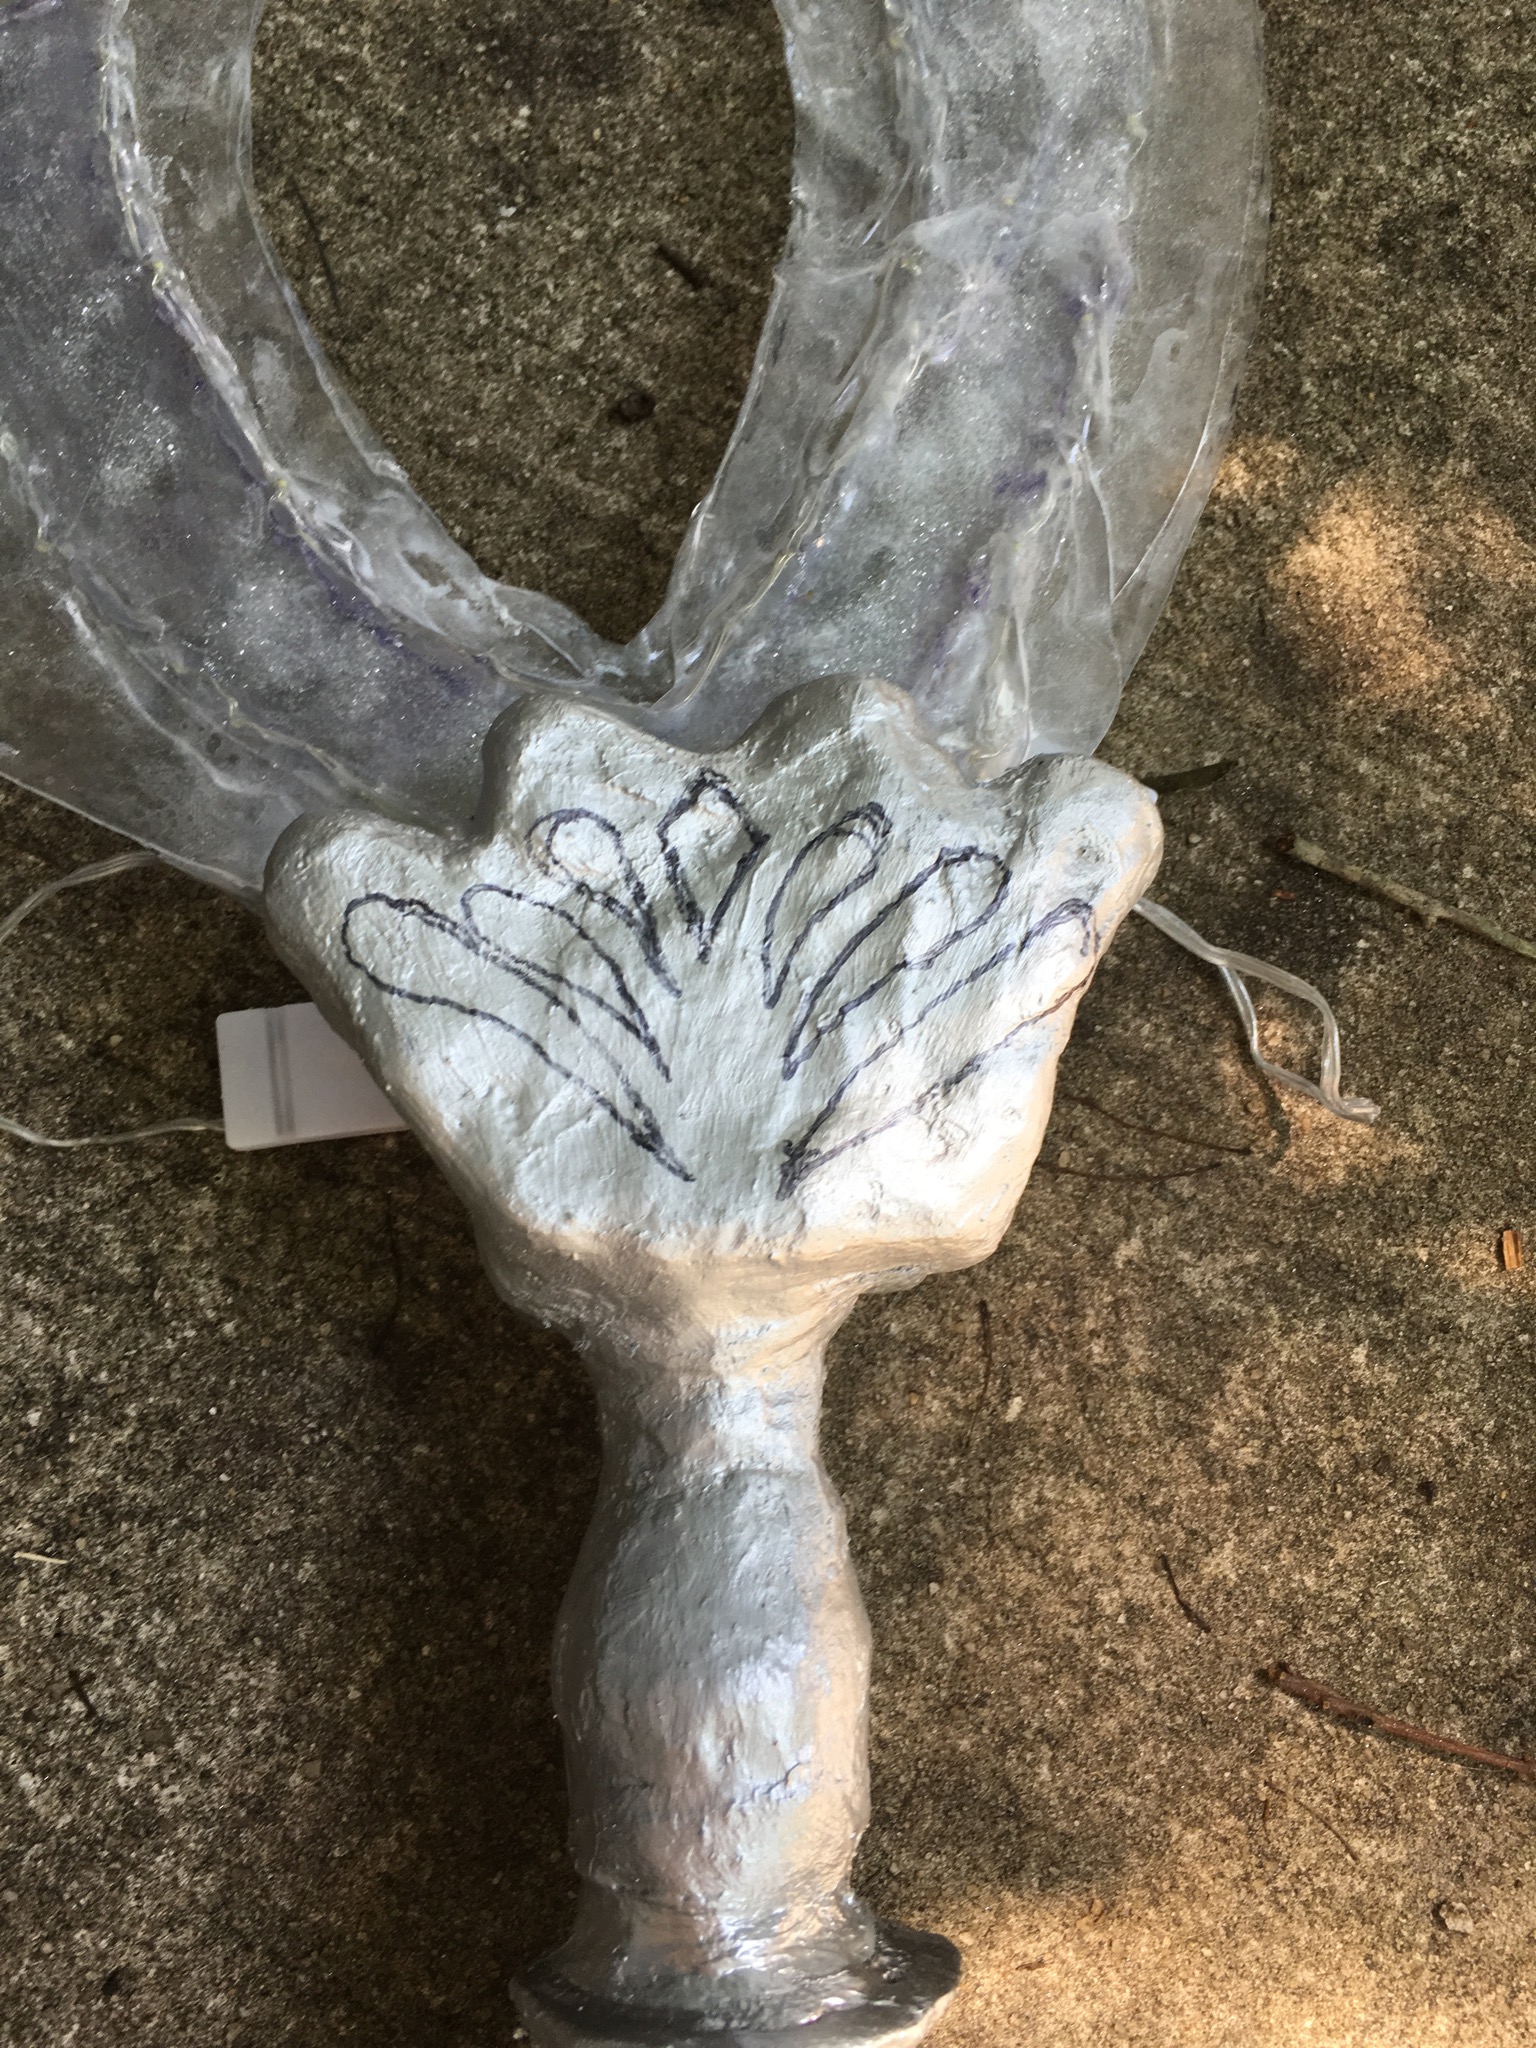
So if you look at you references of Sailor Saturn’s Glaive you will notice on the “fan-like” area at the top of the staff there is a design pattern. This area is filled in black or silver depending on what reference you look at. I decided to fill this area in as black to give more detail to the Glaive. First I drew the design straight on the silver painted fan (after it was dry obviously).
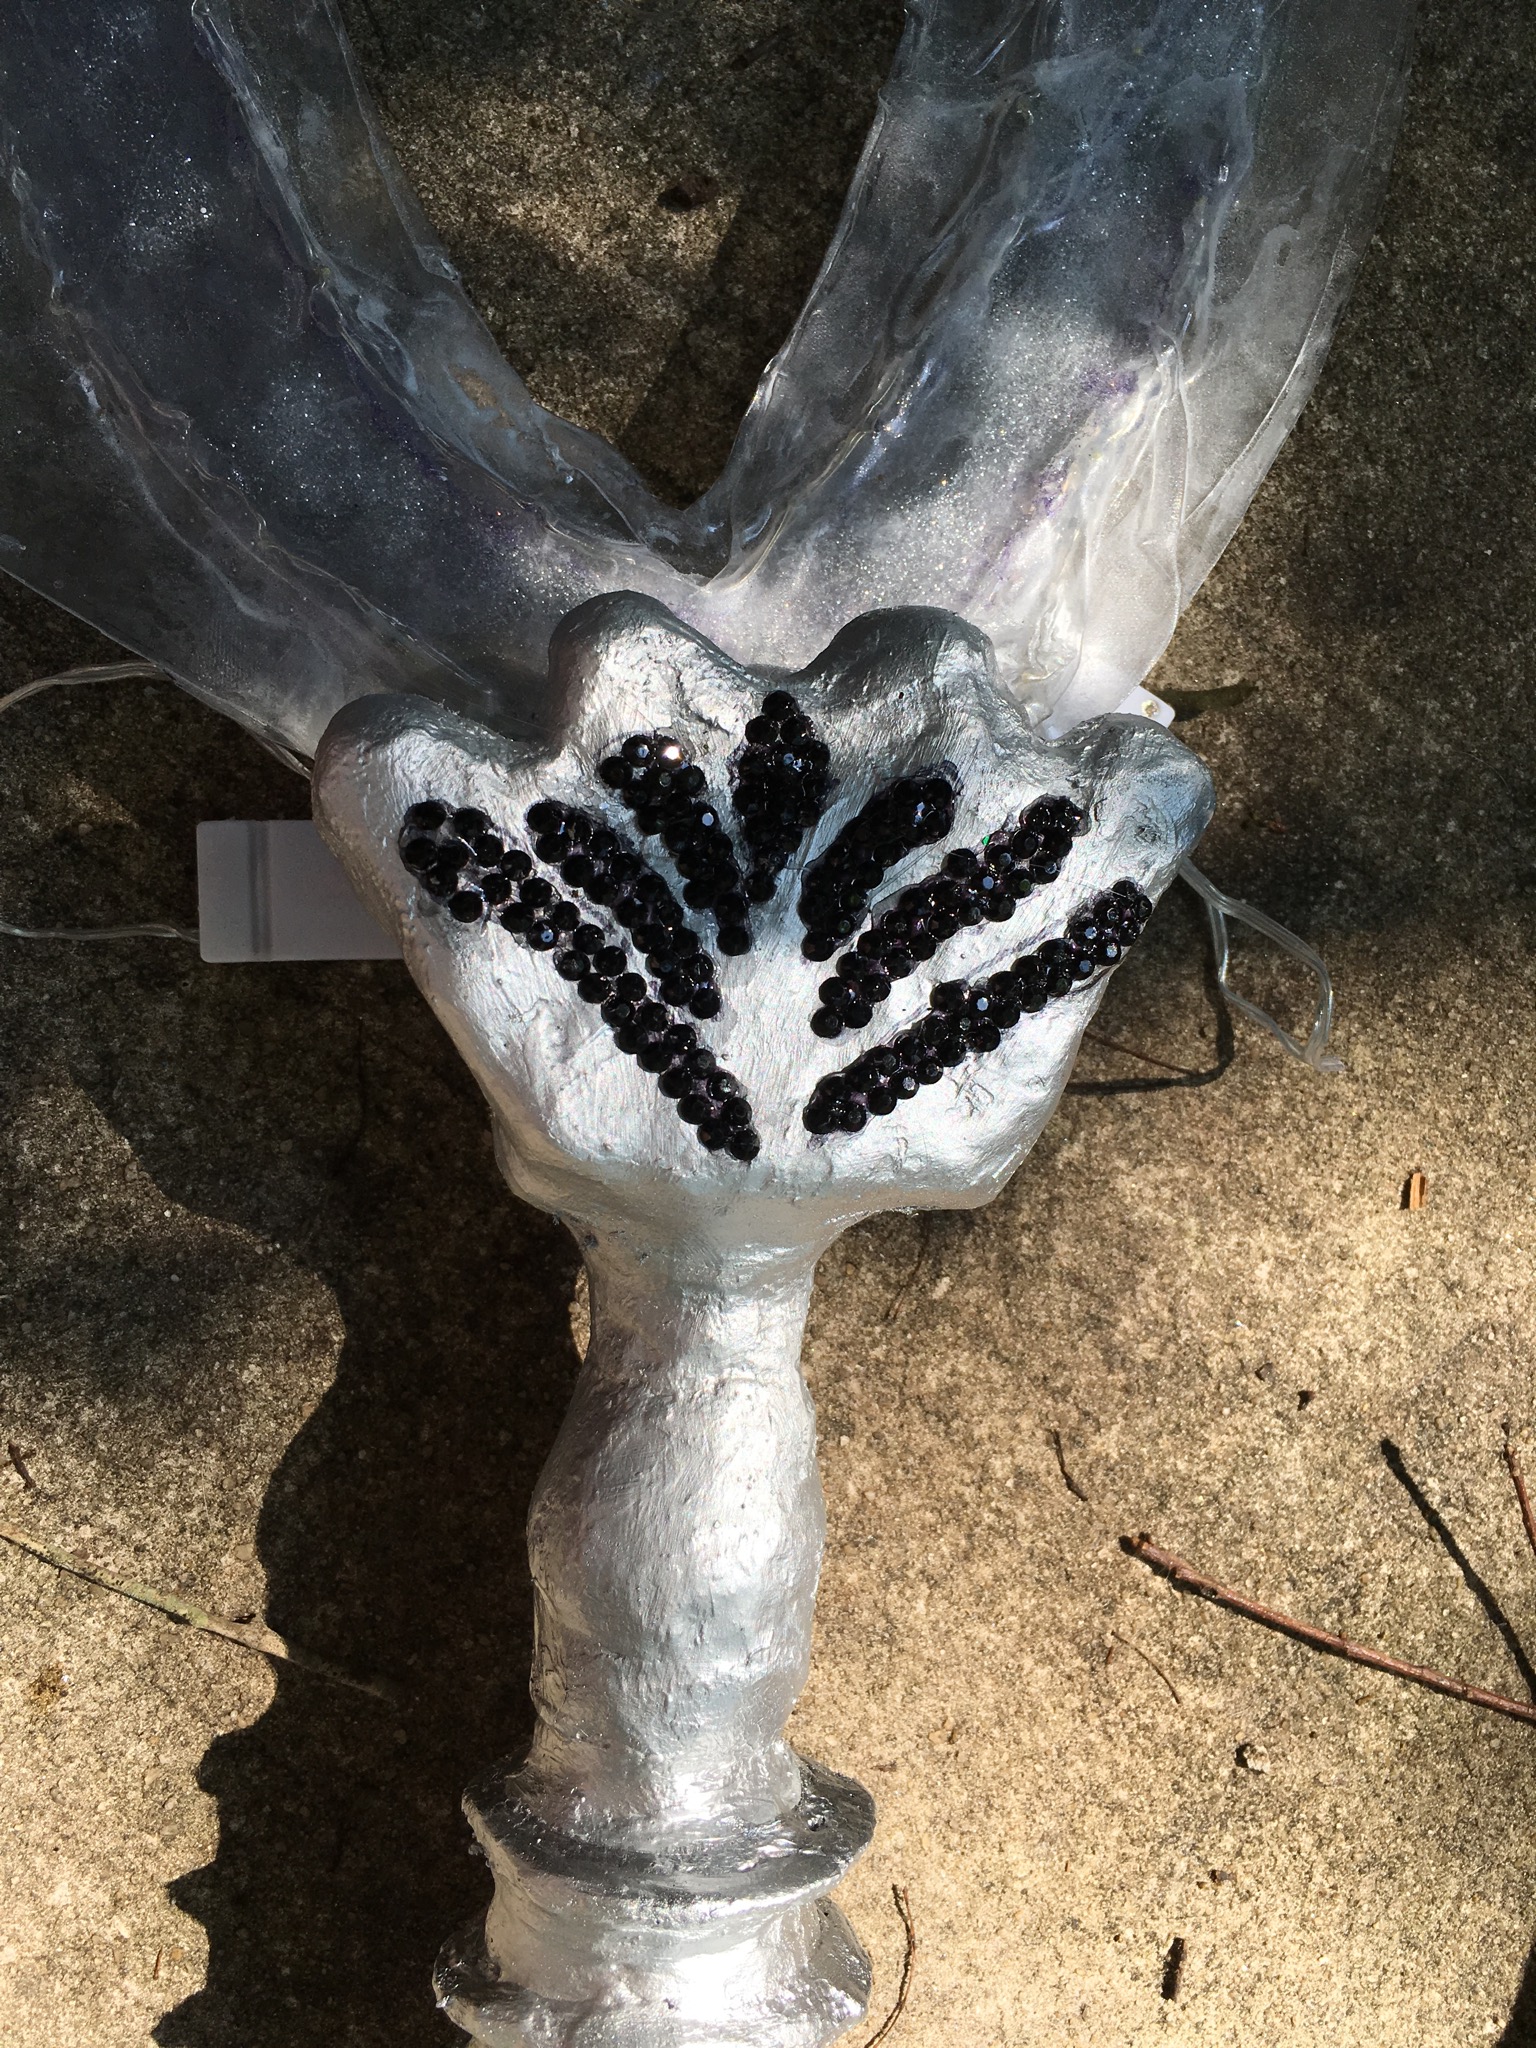
Instead of using paint to fill in the design I decided on adding some tiny black crystals and securing them with E6000 glue. You can also use hot glue but I find that E6000 has a stronger bond. It will take a few hours to dry completely though before you can switch sides and do the back. Here is how this part came out:
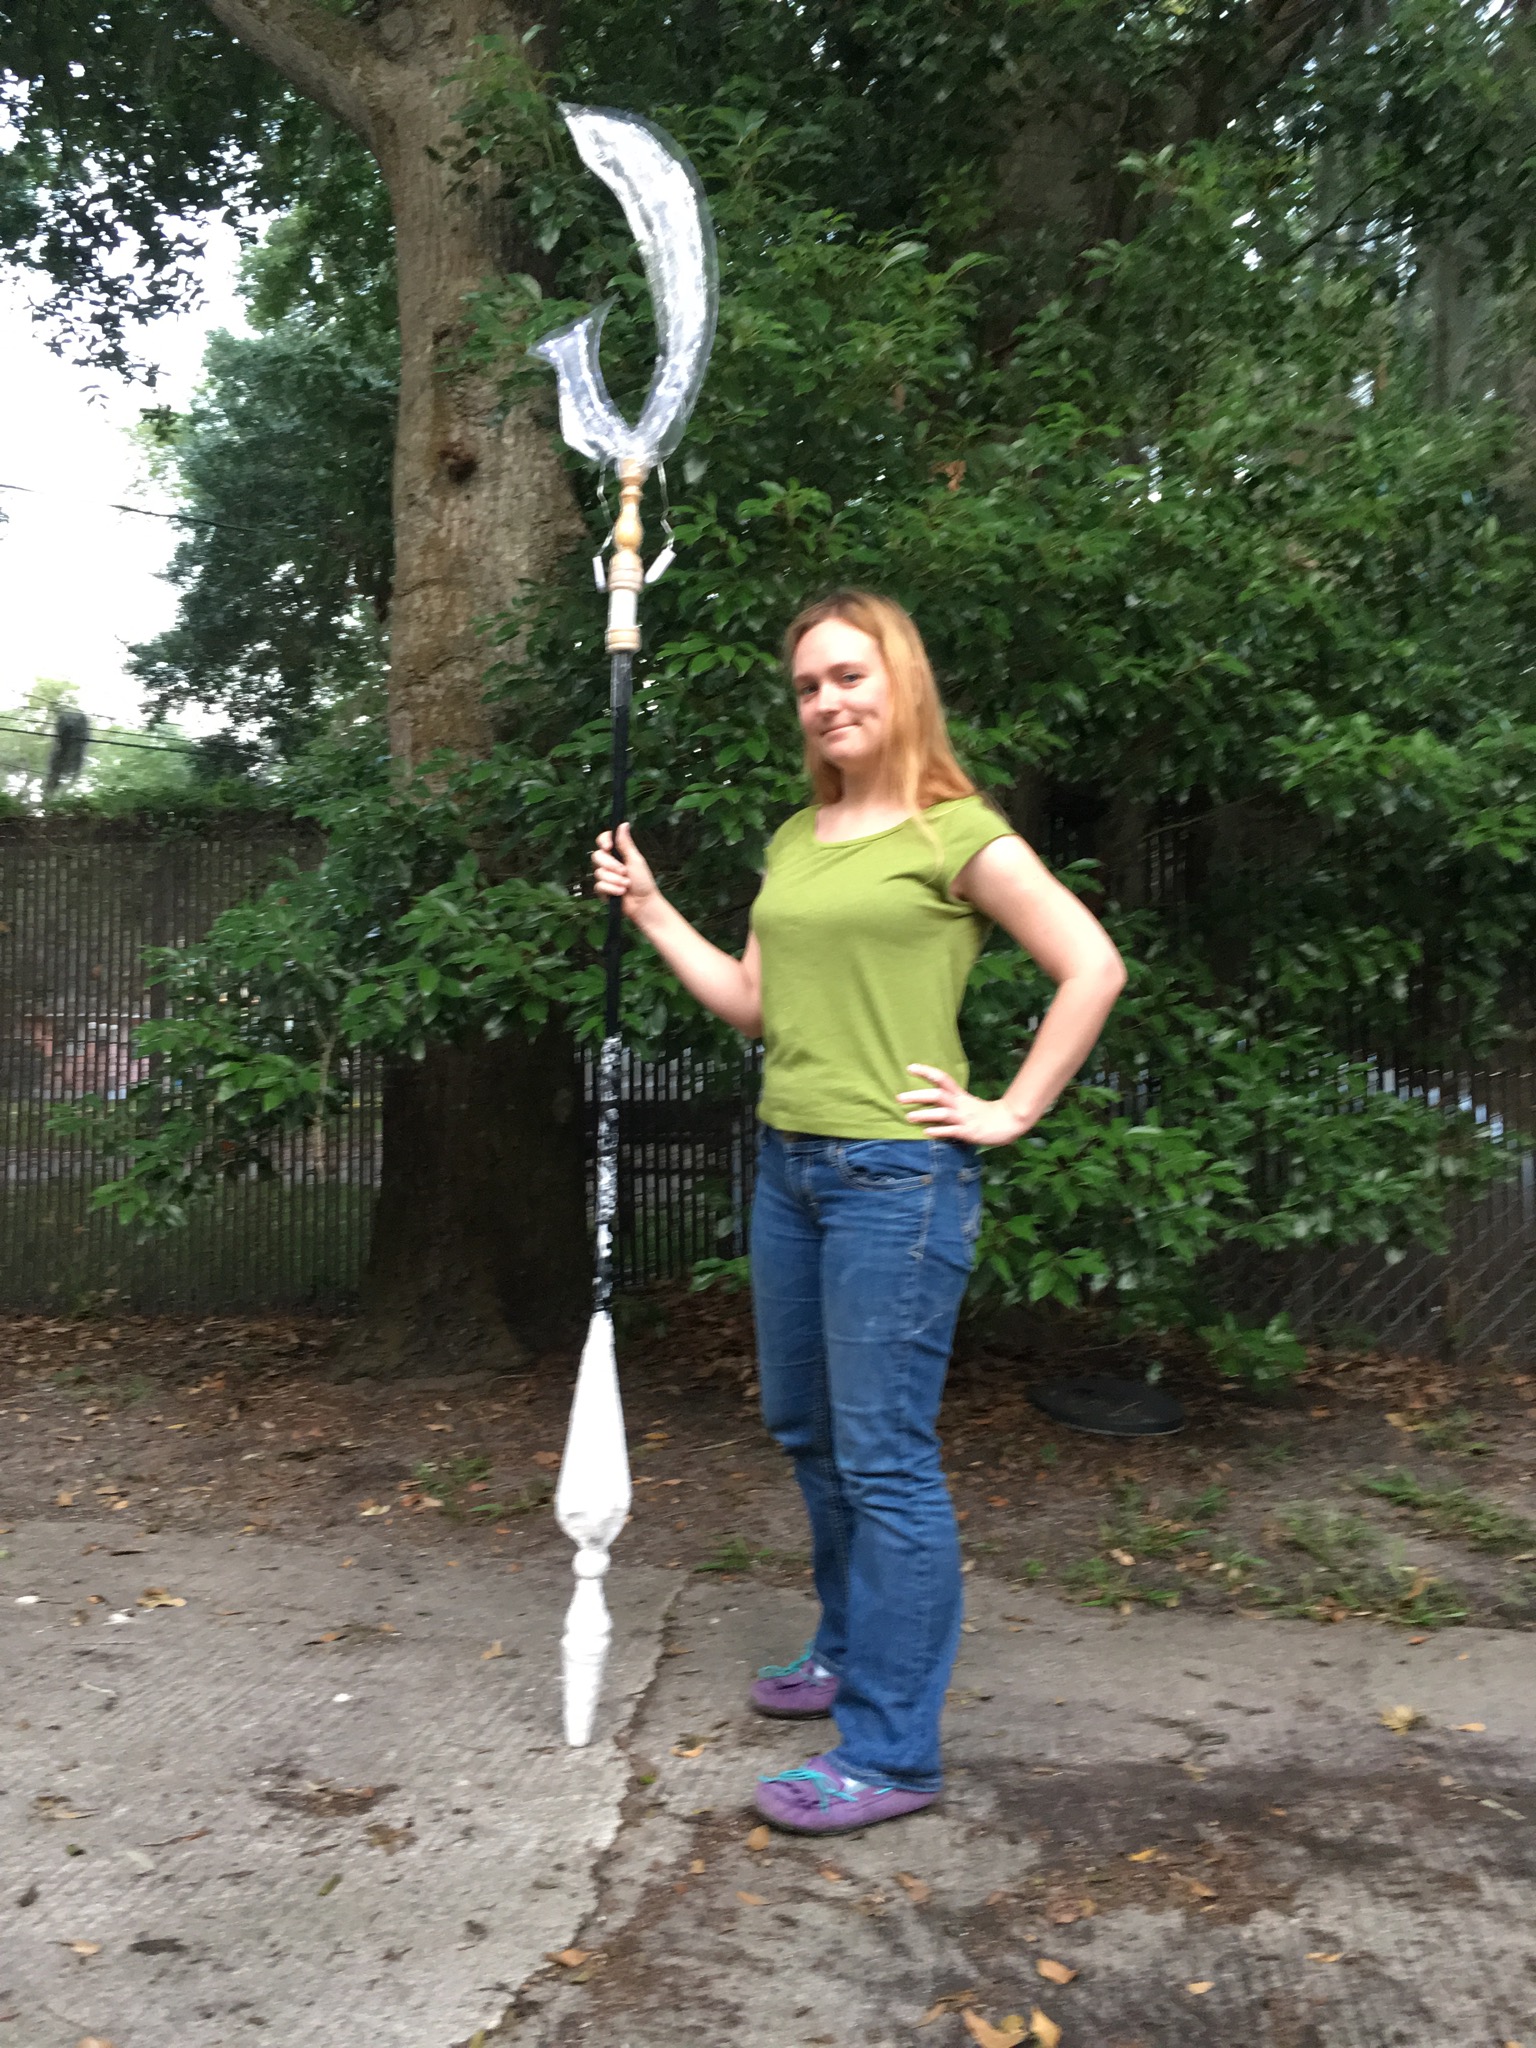
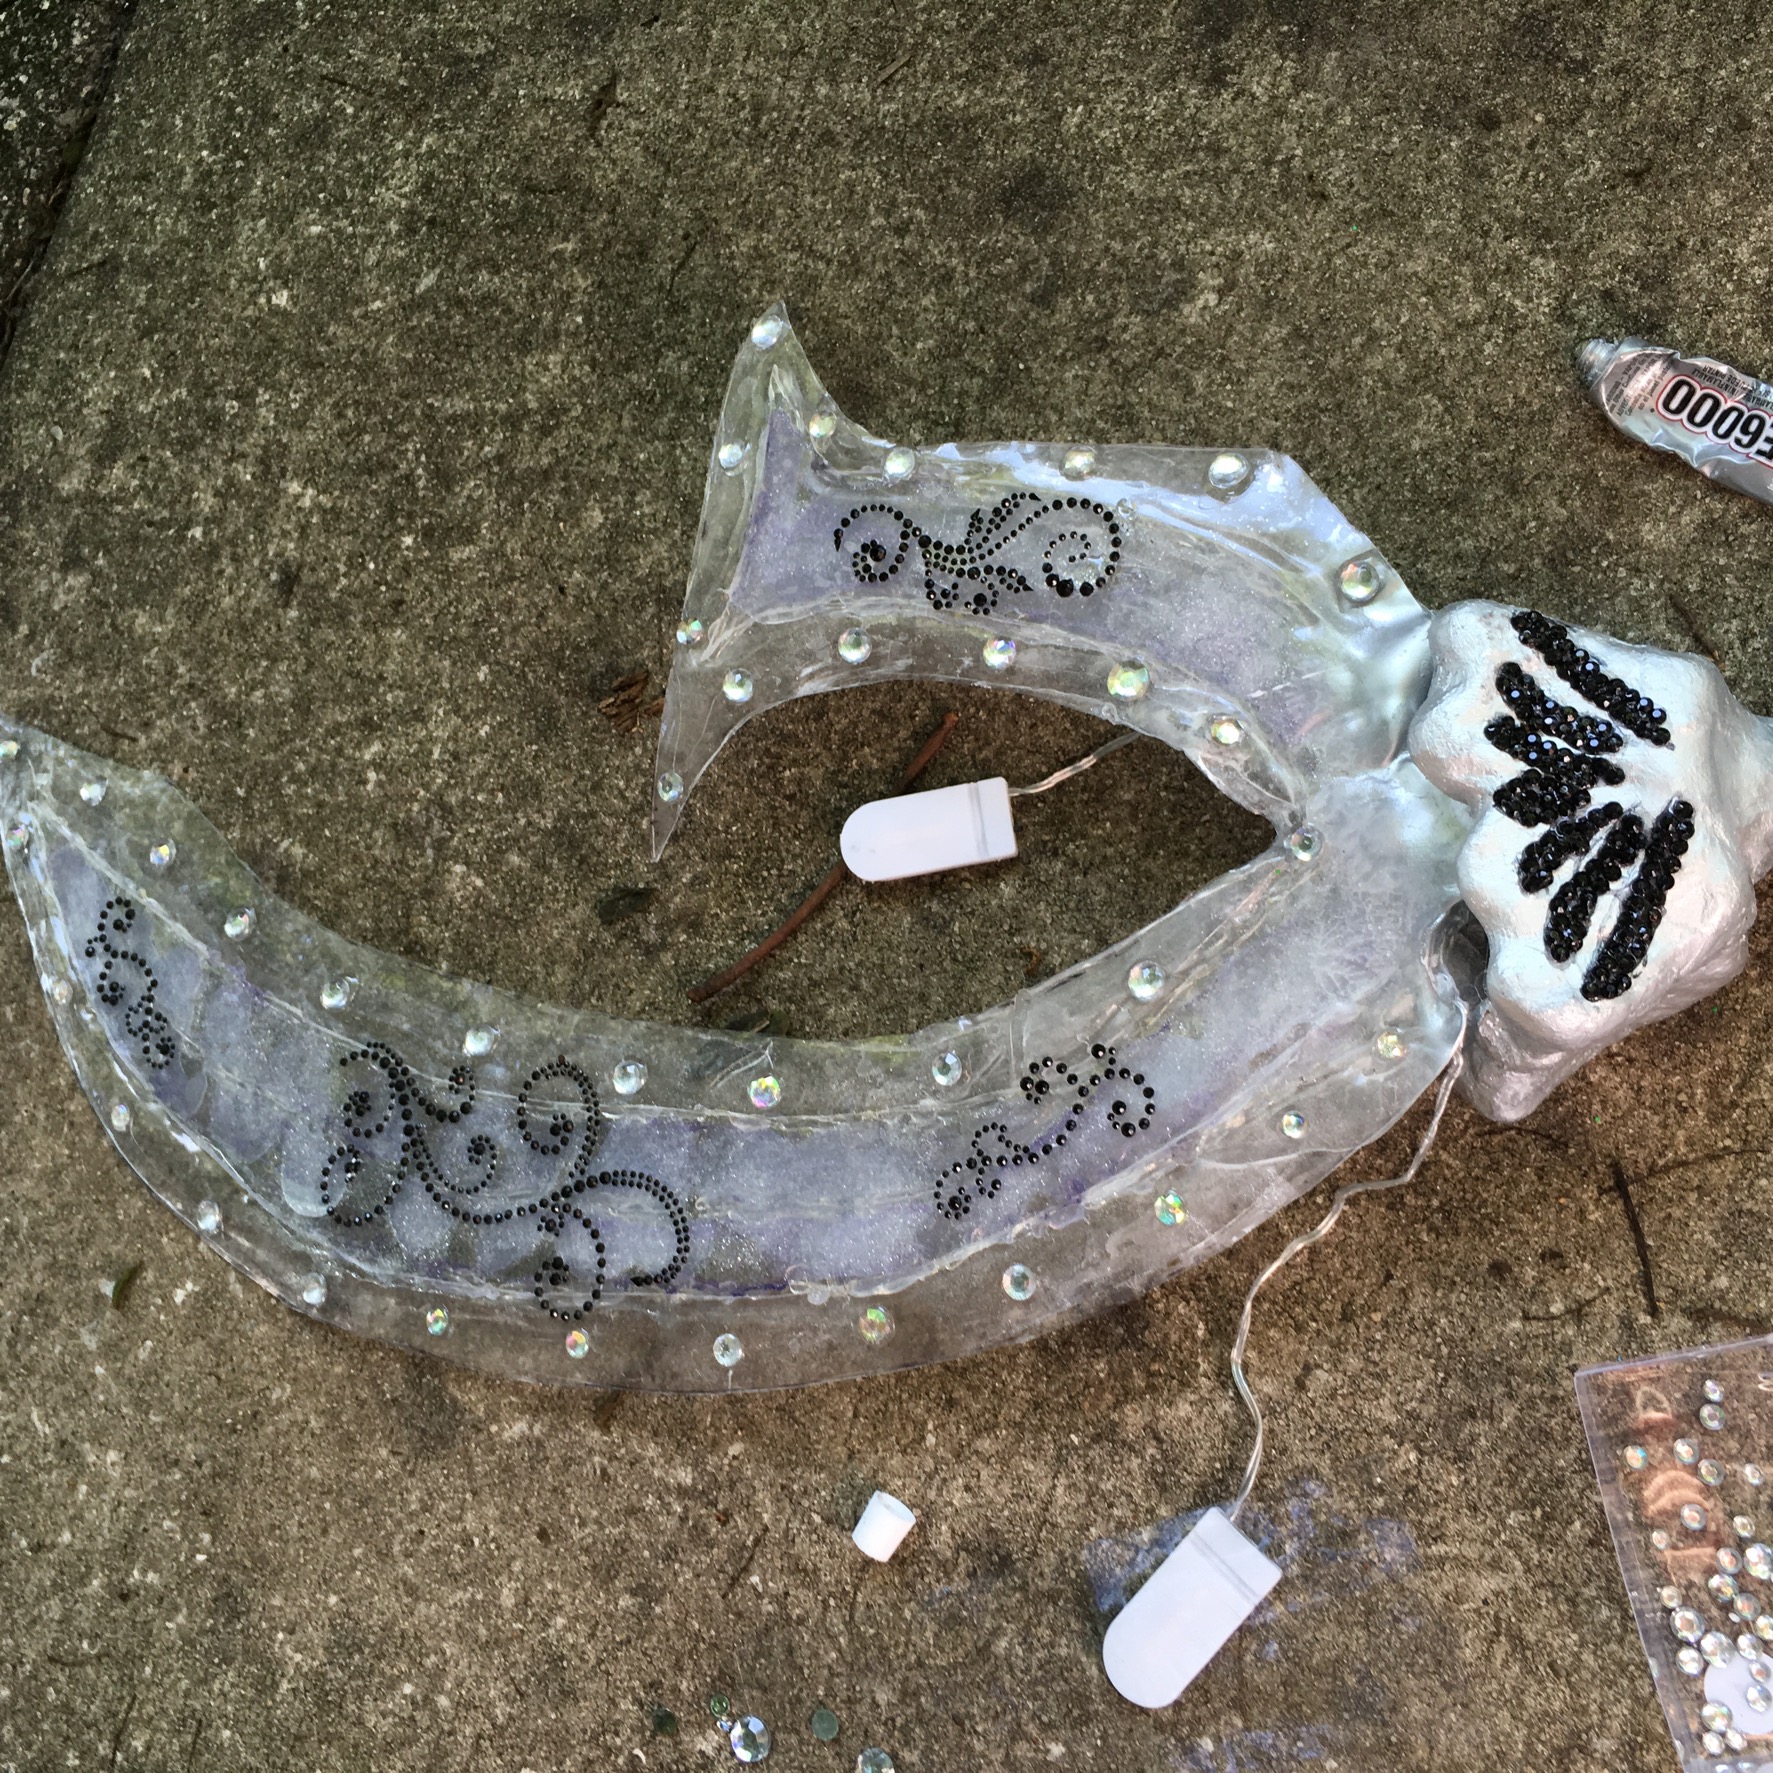
Finally I added one last detail to the blade. I felt that the blade needed a bit more “sparkle” to it and I decided to use some of the extra black crystals to create a few simple pattern across the blade. I am glad I did since so many people thought it went well with Sailor Saturn. I secured the crystals in place using E6000 glue and then repeated the process on the opposite side. I also added a few transparent gems around the edge of blade. Completely optional you don’t have to add all of this sparkle. I just have a gem problem The final look was this:
Once everything is dry you can re-insert your battery packs and your Glaive is done! (Big Cheer!)
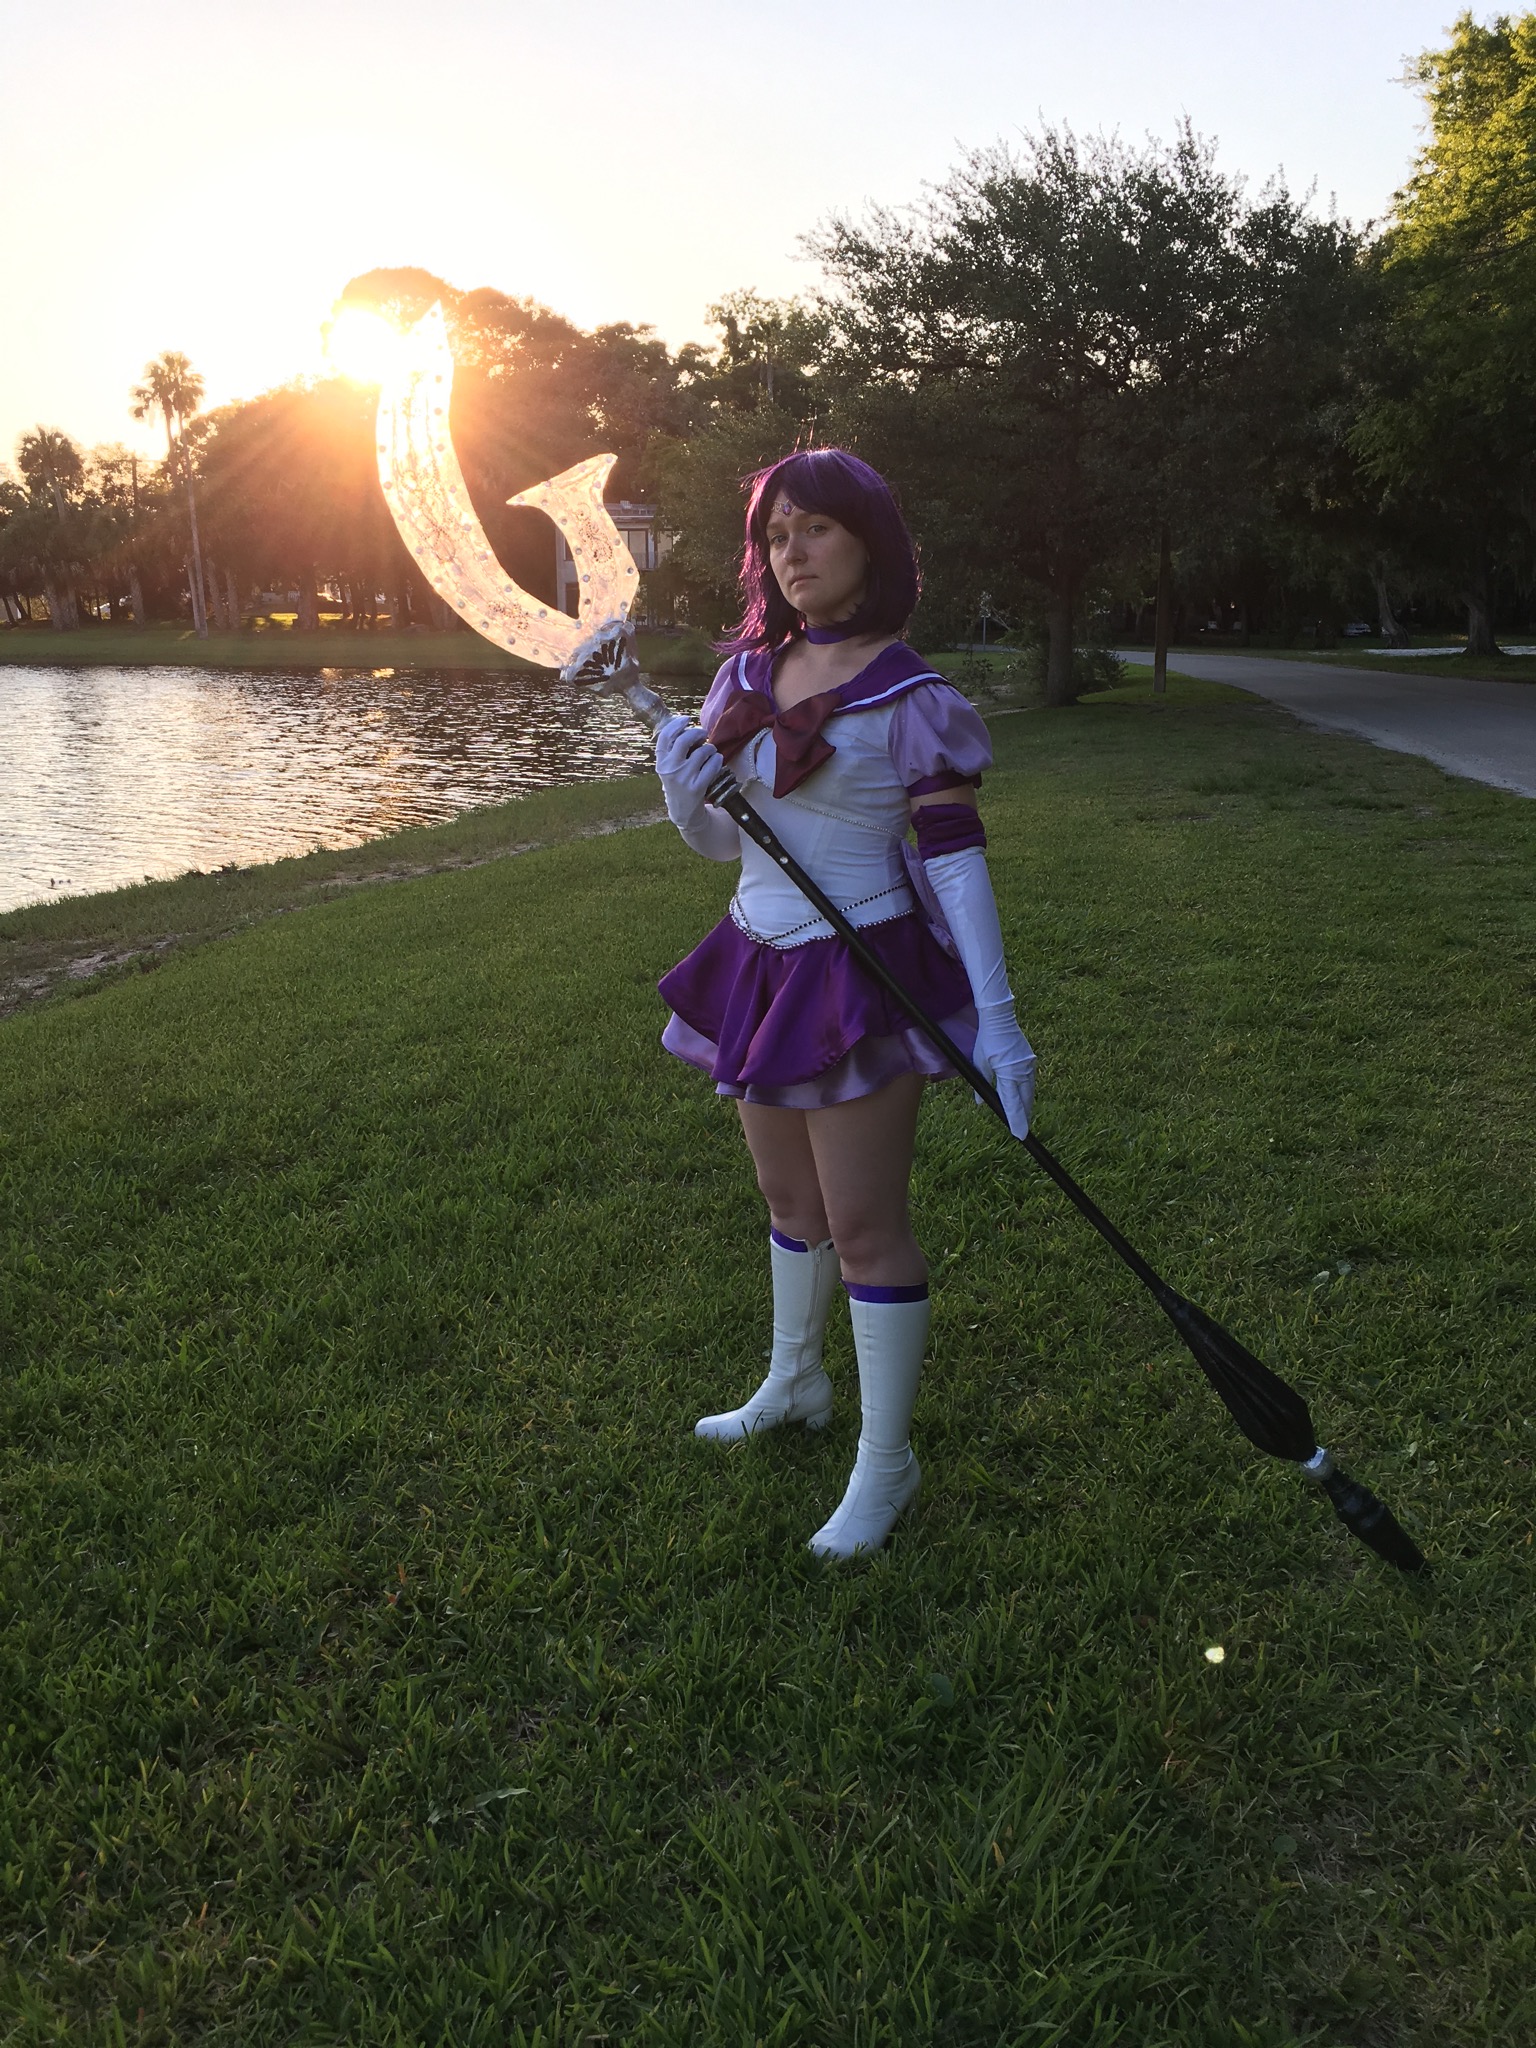
For more pictures please check out my cosplay page: here.
Hope you were able to stay with me throughout the tutorial. It’s very long, I know. Good luck on your project and make sure to have fun:)